

The best background for a car photo depends on its purpose. Choose a plain white or grey studio backdrop for a consistent look. Use a virtual showroom floor for a branded dealership feel. Opt for a clean outdoor scene for hero and lifestyle shots.
The right choice is the one that stays consistent across an inventory and matches the light on the car. This guide covers the three background categories. How to match lighting so the composite looks real, and a free starter pack you can download.
Background consistency gives a listing gallery a polished look. This makes it feel designed, not thrown together. That impression leads to conversions. Dealer.com, part of Cox Automotive, reports that used and certified listings with real photos receive leads 40% more often (Corcoran & Pierce, Dealer.com, updated March 2026).
The same research finds that 90% of shoppers prefer real, high-quality photos over stock images. The takeaway shapes this whole guide: a background should make a real car photo look clean, not replace it with a generic stock scene.
Cutting the car out cleanly comes first — that is covered in our guide to removing the background from a car photo. This page is about what you put behind it.
Key takeaways
- The best car-photo background depends on the listing’s job: studio, virtual showroom, or outdoor.
- Studio white or grey is the safest default for inventory galleries because it is neutral and reproducible.
- Virtual showroom backgrounds fit franchise dealers. They only work if the perspective and lighting match the shot.
- Outdoor backgrounds suit hero images but are the hardest to keep consistent across many cars.
- Whatever category you pick, every car in the same gallery should use the same background.
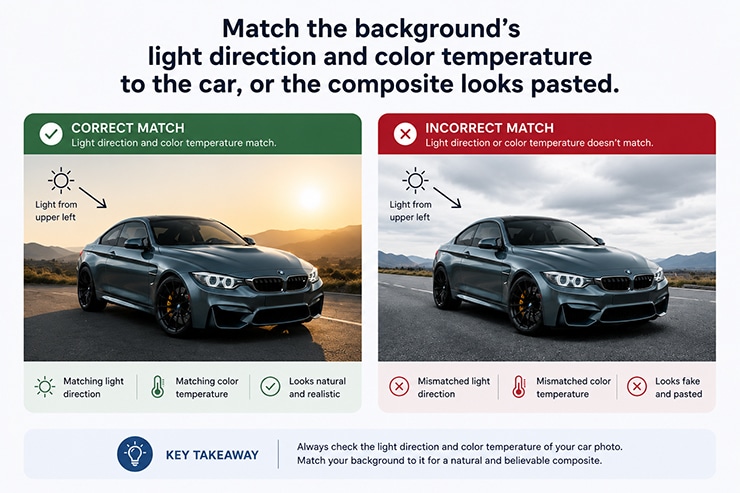
- Match the background’s light direction and color temperature to the car, or the composite looks pasted.
The three background categories
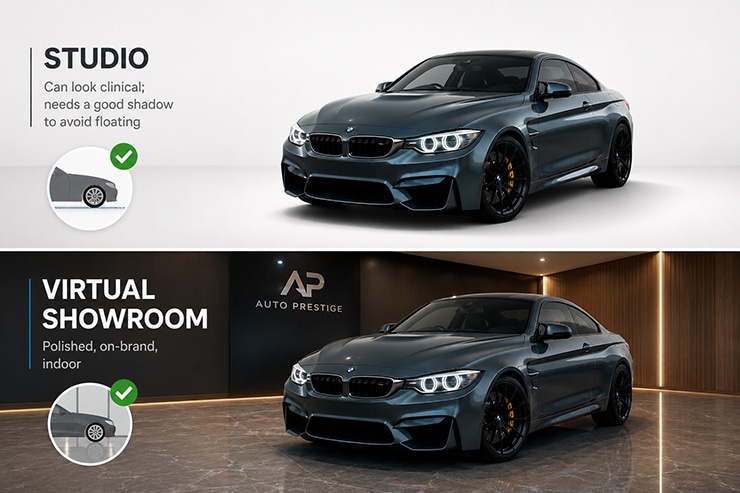
Car-photo backgrounds fall into three types, each suited to a different listing purpose.
| Category | Best for | Look | Trade-off |
| Studio (white / grey / gradient) | Marketplace listings, inventory galleries | Clean, uniform, neutral | Can look clinical; needs a good shadow to avoid floating |
| Virtual showroom | Franchise / branded dealership sites | Polished, on-brand, indoor | Must match brand; harder to light convincingly |
| Outdoor / lifestyle | Hero images, social, premium listings | Aspirational, contextual | Hardest to keep consistent across many cars |
The decision rule is consistency first. Whatever category you pick, every vehicle in the same gallery should use the same treatment, because buyers compare listings side by side and a mismatched set reads as careless.
Studio Backgrounds (white, grey, gradient)
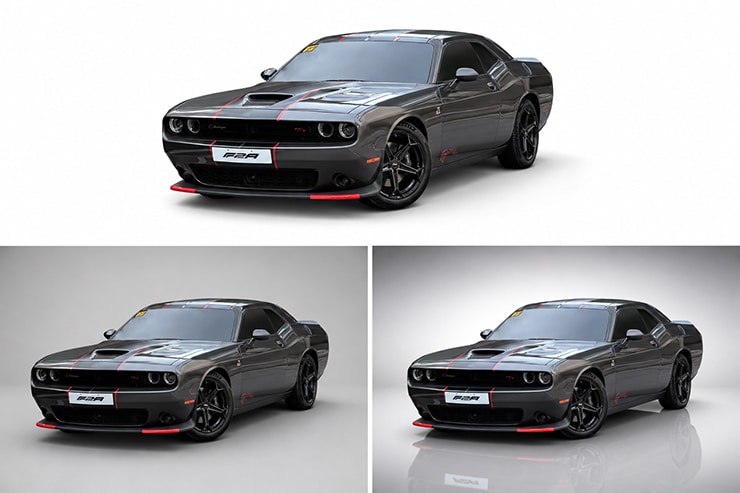
A plain studio background is the best choice for inventory listings. It’s neutral, uniform, and easy to use for many vehicles. White suits most third-party marketplaces. A light grey or a subtle radial gradient adds depth without distraction and hides the seam where a pure-white floor meets a pure-white wall. A studio background needs a solid contact shadow under the tires. Without it, the car looks like it’s floating, ruining the clean look and making it seem fake.
Virtual Showroom Backgrounds
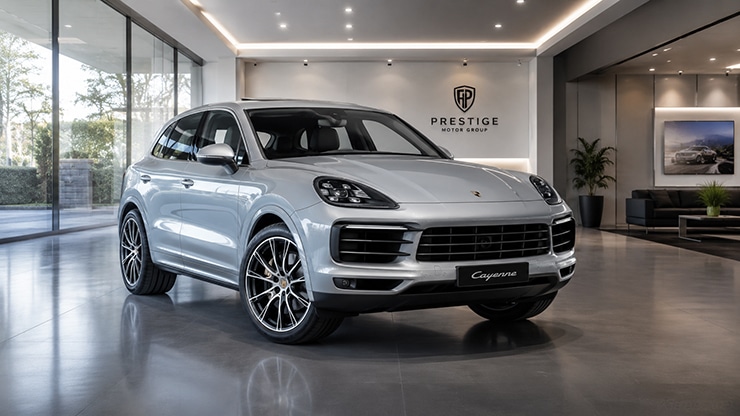
A virtual showroom background showcases the car on a shiny indoor floor using image manipulation. This gives franchise dealers a branded look without needing a physical photo studio. It works when the lighting and perspective match the car’s original capture. It fails when a top-down lot shot gets dropped onto an eye-level showroom floor — the perspective mismatch is glaring. Choose a showroom plate whose camera height and angle match how the vehicle was shot.
Outdoor and Lifestyle Backgrounds
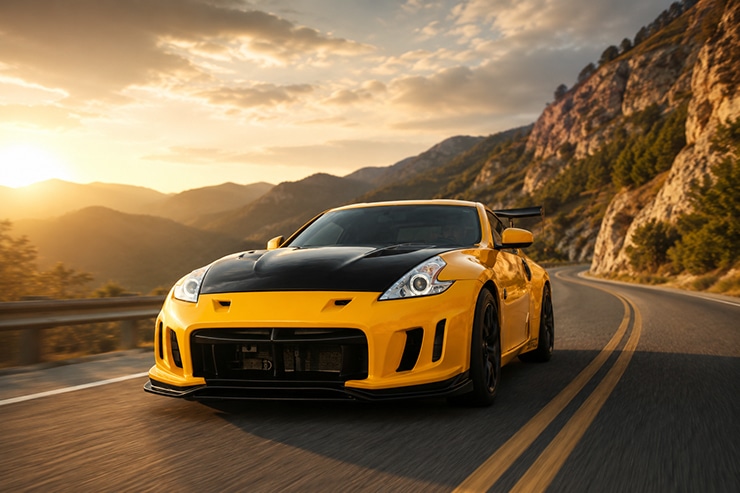
An outdoor background—like an open road, a scenic view, or an urban front—fits hero images and premium listings. Here, aspiration is key, not uniformity. It’s tough to keep this category consistent. Real outdoor light changes with each shot. So, it’s better to use it for one or two key images of each vehicle, not the entire gallery. Match the time of day and light direction of the scene to the car, or the composite separates.
How to match lighting so the composite looks real
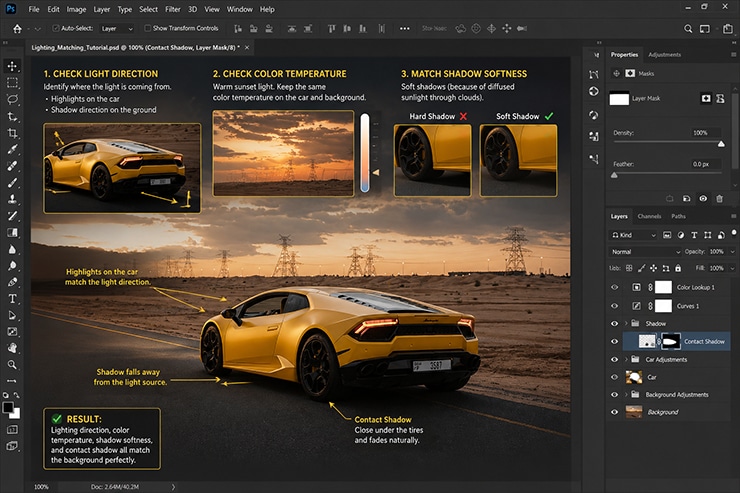
A background works only if its light matches the car’s. So, check the light direction and color temperature before compositing. This one step makes a real composite stand out from a simple cut-and-paste, no matter the background category you picked.
Check three things on the original car image. Identify the light direction from where the highlights fall on the body and where the original shadow points. Note the color temperature — warm late-afternoon light versus cool overcast — because a warm car on a cool background looks wrong.
Match shadow softness:
- Hard-edged shadows mean direct sun.
- Soft shadows mean overcast.
- The background should match too.
Then build the contact shadow to match. A car added to a new background needs a shadow. This shadow should match the light direction of the background. It should be close under the tires and fade away opposite the light. When the shadow direction doesn’t match the background light, the brain quickly realizes it’s fake, even if it can’t explain why.
Free car background starter pack
A starter set of backgrounds lets you test each category before committing to a workflow.
Here’s a free pack for you! It includes:
- Several white and grey studio backdrops
- Two virtual showroom floors
- A set of neutral outdoor plates
All items are at listing resolution.
Download the free car background pack — no studio required to start.
Use studio backdrops for your main inventory gallery. Use showroom plates for branded feature shots. Moreover, use outdoor plates sparingly for hero images. Each is sized for direct use behind a cut-out car at standard listing dimensions.
When to composite in-house vs. outsource
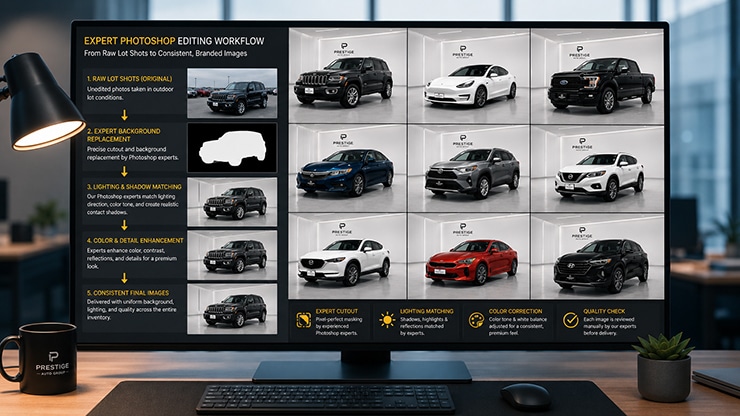
Compositing a hero image is quick. But applying the same backgrounds to an entire inventory is a big task. The tasks for each image are the same for all vehicles: clean cutout, matched shadow, and lighting check. This makes them repetitive but easy to standardize or delegate. A dealer photographing 30 new arrivals a week spends more time compositing than shooting.
This is where a dedicated service earns its place. A background replacement service uses raw lot shots. It returns them with a consistent, branded background for the entire batch. Each vehicle features the same studio, showroom, or scene. Shadows are matched for each image.
Frequently asked questions
White is the safest default for marketplace listings because it is neutral and uniform across an inventory. Light grey or a subtle gradient is a close second and hides floor-to-wall seams. The color matters less than consistency — every car in the same gallery should use the same background.
A free starter pack of studio, showroom, and outdoor backgrounds is available above, sized for listing resolution. When sourcing backgrounds, pick high-resolution images with neutral lighting. This makes them easier to match with your car shots. Also, steer clear of generic stock scenes; shoppers like authentic-looking photos.
The usual causes are a missing or mismatched contact shadow and a lighting direction that disagrees with the background. Read the light direction on the car, match the background’s implied light, and build a shadow that follows it. A composite fails the moment the shadow contradicts the scene’s light.
Yes for the main gallery — uniform backgrounds make the listing set look professional and let buyers compare cleanly. Reserve outdoor or lifestyle backgrounds for one or two hero images per vehicle. Real outdoor light is tough to keep consistent across multiple cars.
A virtual showroom gives a consistent, branded look that a varied real lot cannot, which suits franchise dealers. But it only works when lighting and perspective match the original shot. A clear photo with a nice shadow often does better than a fake showroom image. Shoppers like pictures that look real.
Want consistent backgrounds across your whole lot? See the car image editing service or start a free trial.

Salim Ahmed is the CEO of Graphic Experts India, with over 25 years of expertise in photo editing, clipping path, image retouching, and eCommerce image editing services.