Have you ever looked at a photo and thought, “This would be amazing with a different background”? Well, sigh, no more!
This step-by-step guide will show you the power of Adobe Photoshop in removing white backgrounds and replace with stunning ones. Whether you’re a skilled designer or a beginner, this guide will empower your knowledge and techniques to:
- Remove white backgrounds easily using Photoshop’s powerful tools.
- Replace the white background with an attractive BG and captivate a new image.
- Unlock the potential of your photographs by creating eye-catching image compositions.
So, delete the white, embrace creativity, and enrich your photo editing skills to the next level! Besides, I will give you tips on “when and how you can use those tools to get a perfect result.” so let’s dig in.
Remove White Background In Photoshop
With Photoshop, you can remove any background of an image quickly. But you need to know the exact way to do it. So here, I will discuss “how to remove white background in Photoshop” differently. And later, you will also know when we need to remove or not remove the white background.
The rules of thumb when you are going to remove background-
- You need to select the object using Photoshop tools (Pen tool, Lasso tool, Magic Wand Tool) and then inverse the selection to select the rest of the image and delete it.
- Some tools allow you to automatically select an object (Object Selection Tools, Quick Selection Tools) by clicking the mouse.
- The last group of tools ( Eraser Tool ) directly erases the BG.
Here is the process of removing the background
- Clipping Path Technique: Pen Tool for Pixel Perfect Selection
- Image Masking Technique: Background Eraser Tools – A non-destructive way of selecting Objects
- Lasso Tools – The straightforward method requires patience
- Magic Wand Tool – The fastest process to select anything, but not perfect.
- Online tools- Not excellent, but it does not need Photoshop.
Remove Background Using Different Tools In Photoshop
Removing the background of an image in Photoshop is relatively easy. When the BG is white, it’s effortless to remove. You can do it easily with fun and joy. But, of course, you need a little practice and patience.
There are many tools in Photoshop. But the best tool is the pen tool. Sometimes, you need to do some retouching and color correction to get the perfect backdrop. Most of the time, we use the Magic wand tool or pen tool to do this kind of work.
Thus, here are some differences and exciting techniques to remove the white background in Photoshop. Like Lasso, Object selection, quick selection, and many more, here I will describe all the methods so that you can remove background from an image.
So follow my Techniques and start practicing. Let’s start-
Remove White Background Using Photoshop Pen Tool

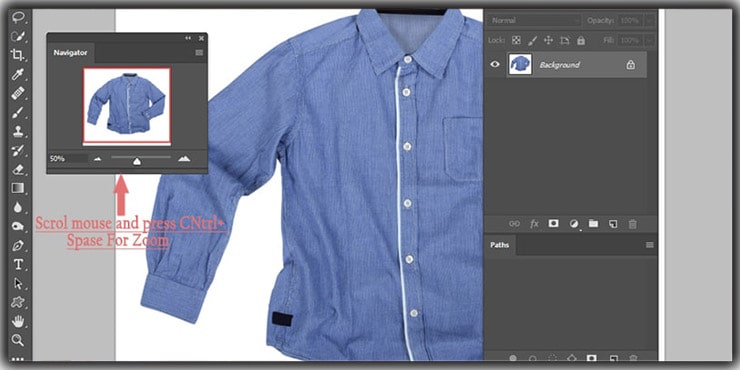
You need to open an image in Photoshop. From the layer palette, you have to pick the Pen tool. A new layer will open when you click on the object’s outline. It’s called a path layer.
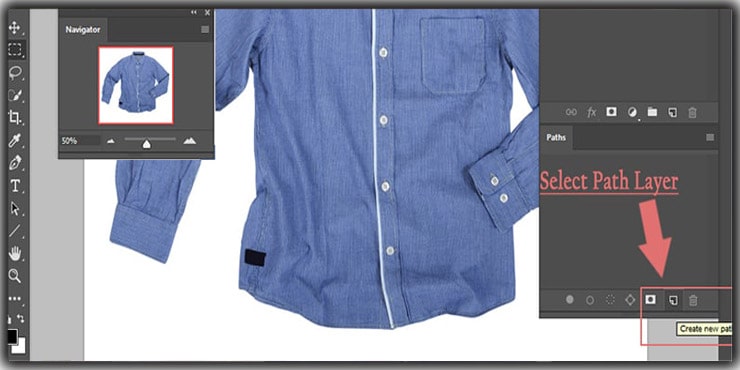
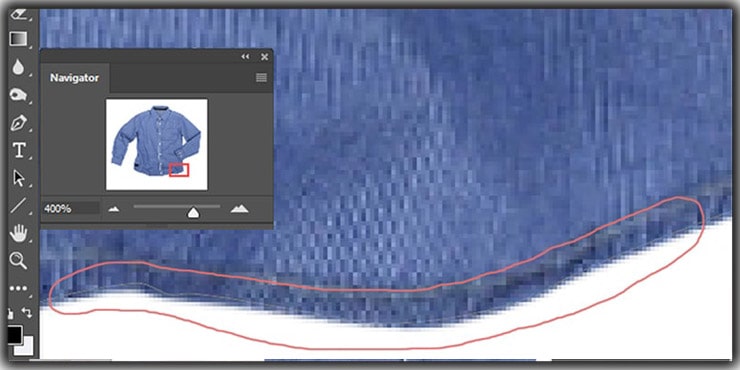
For proper selection, zooming in on the photo at 300% is essential as it would give you a perfect view of the object’s outlines. After that,t you can make an ideal path for the object.
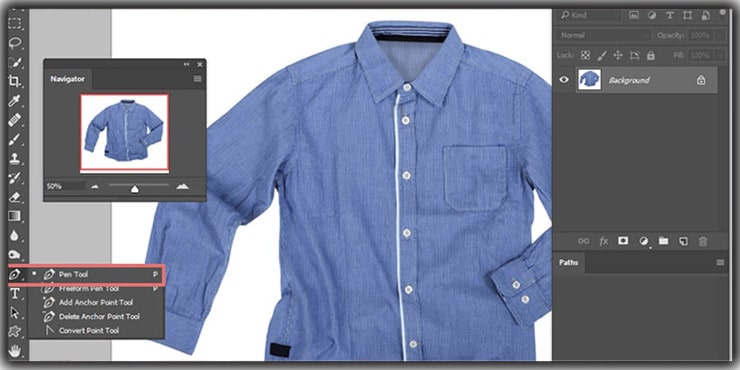
How To Use The Pen Tool In Photoshop
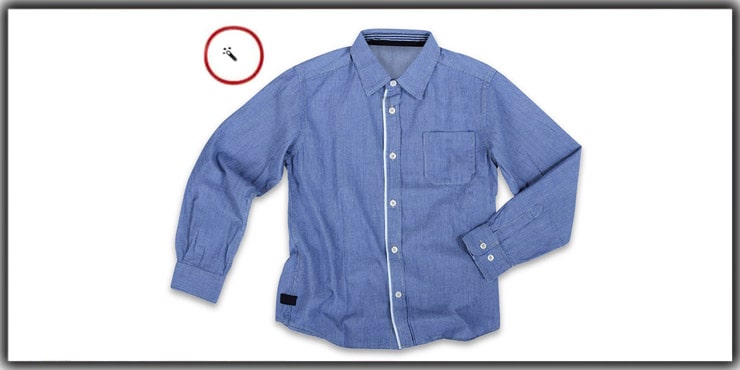
The pen tool is the best tool to remove a backdrop. Because when you outline by using a pen tool, your selection will be perfect. Using a pen tool, I’m using a simple image to show you how to make a proper outline. So, when you practice it, try to choose an easy picture.
So let’s start to outline the object. After completing the outline again, go to the starting point. When you reach the starting point, press Ctrl and the Path line.
How to Remove Image Background After Selecting The Object
Now is the time to give a glossy look effortlessly for a quick and fresh BG transformation. Then press and hold Shift+F6 to apply the feather 0.3px.
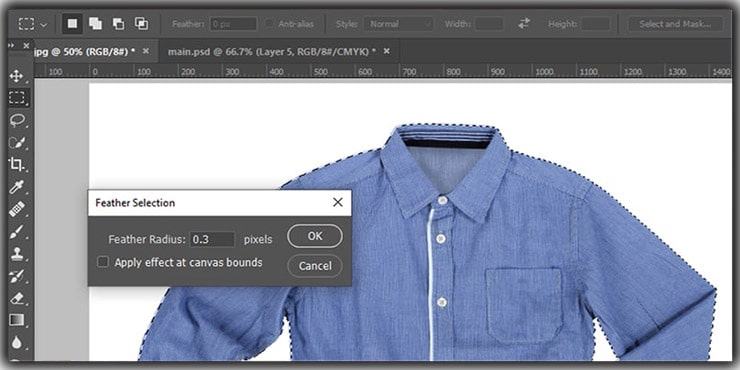
After that, you must add the layer mask to remove the background from photographs.
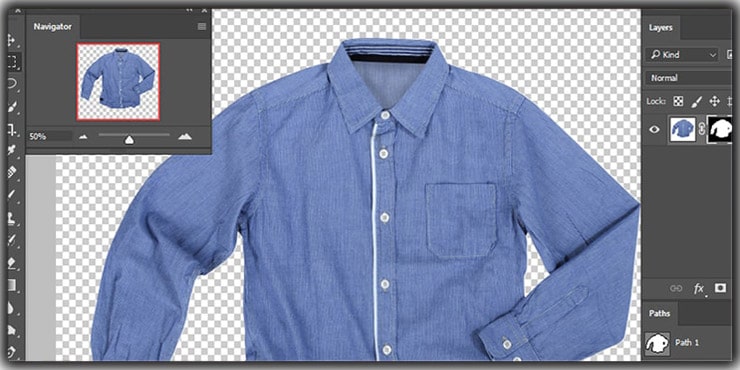
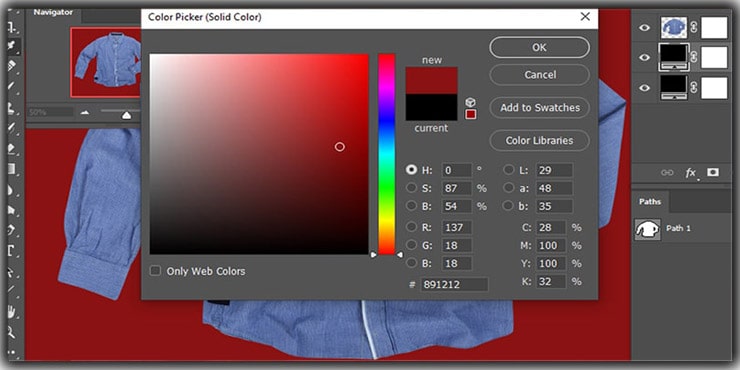
Furthermore, you must go to the adjustment layer to add a solid color behind the objects. And you can choose any transparent color.
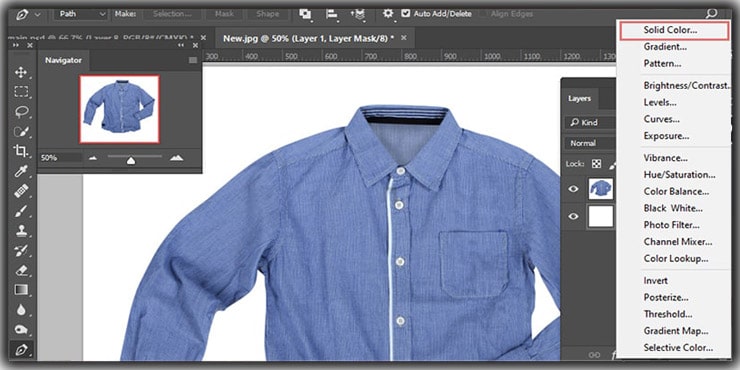
You can now use any background color you like.
After finishing the whole work, you need to check everything you have done. If you do the job properly, then the picture will look beautiful.
Background Eraser Tool for White Background Removing
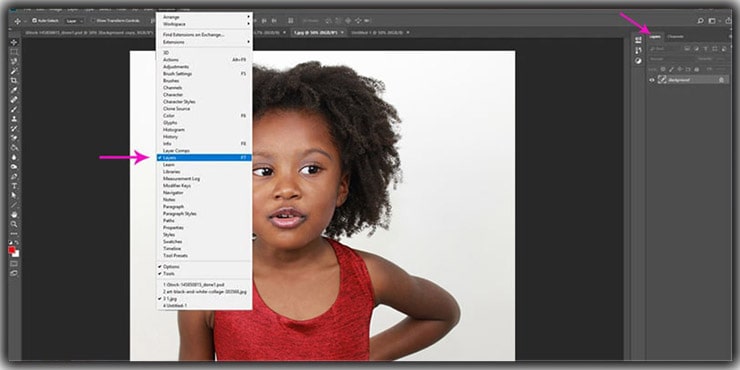
The background eraser is one of the most used tools for removing complex backgrounds like hair, fur, glass, etc. Ensure that the layer panel is open if you don’t set the layer panel on the right side of your screen. Then go to the top menu bar and Press on the window option. From the window option, you need to set the layer panel.
Protect The Main Image File
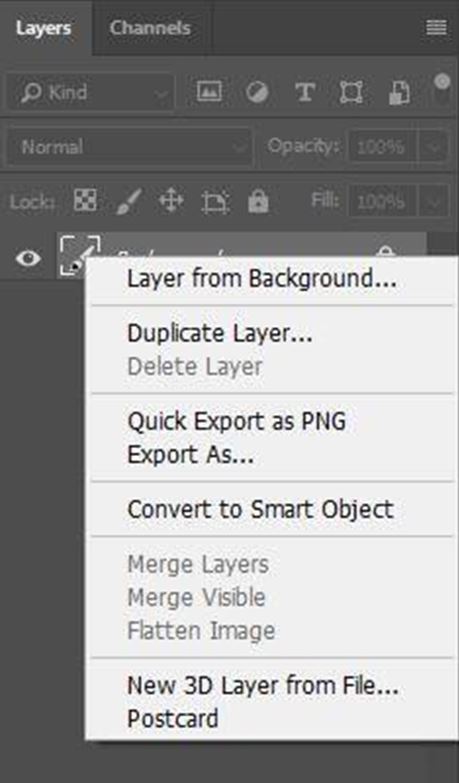
Go to the Layers panel and right-click on the background layer. Then press on the duplicate layer. For making a duplicate layer, you can start again quickly if you make any mistakes.
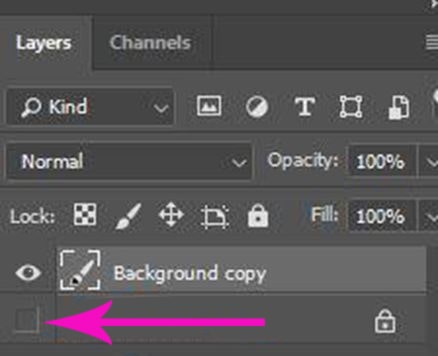
After that, press the eye icon to close the original layer.
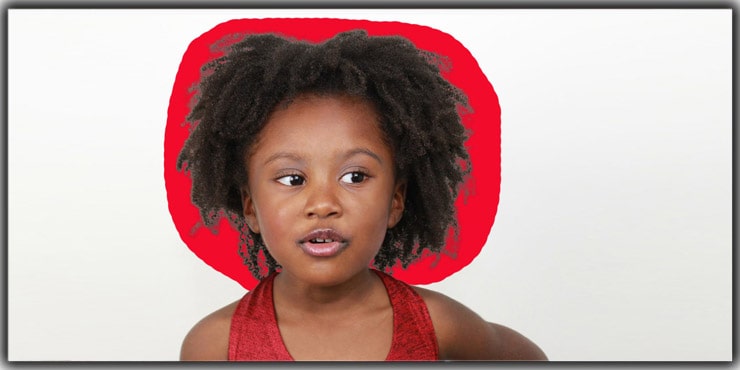
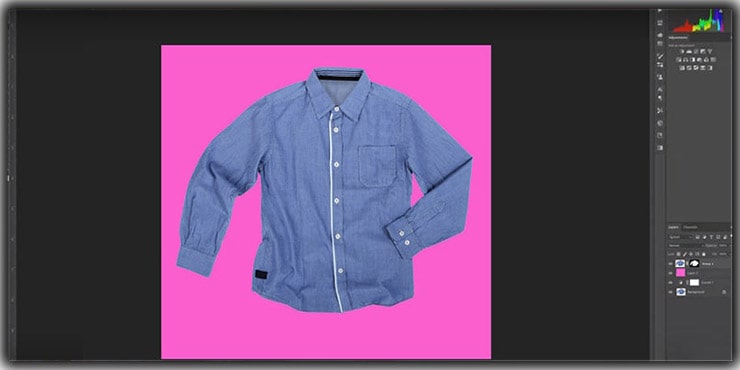
Make a High-Contrast Background
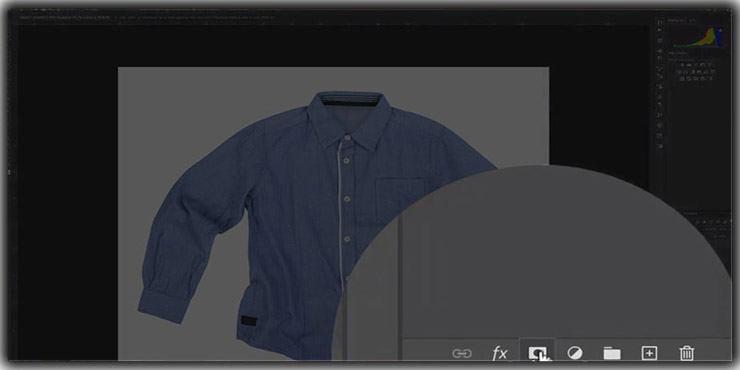
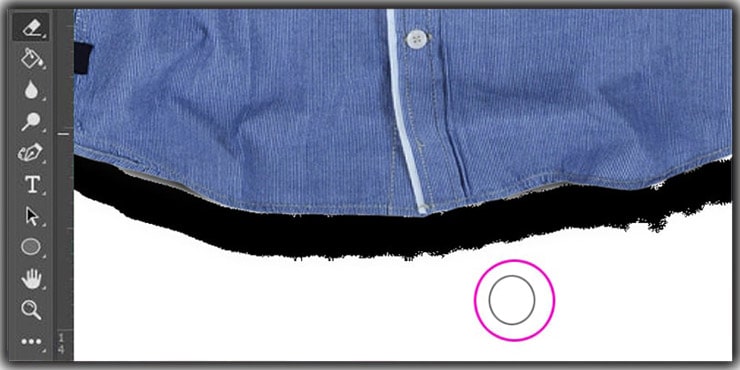
Now you must add a bright color to show it clearly. Instead of using a white background and erasing the edges, you can apply a bright color, showing the areas you have begun to cut out. It works expressly well if the original working BG is a light color.
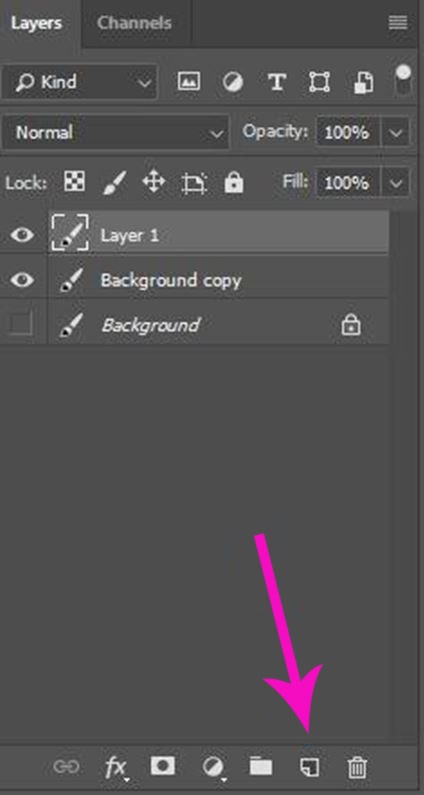
After cutting out the whole image subject outline, you must add a new backdrop. After that, remove the bold color. So, by pressing the page icon, create a new layer, which shows in the layers panel.
You can use the paint bucket tool to fill the new layer with a bright color. And press on the canvas when you select a new layer.
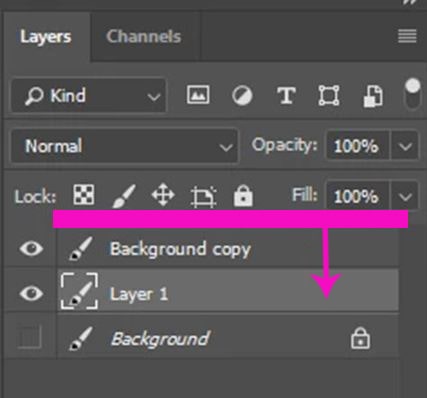
You must set the new solid color layer below the duplicate image layer. When you start editing the photo, it won’t be visible to the naked eye. So you can drag and put it with the mouse.
Remove White Background from Images Using the Background Eraser Tool
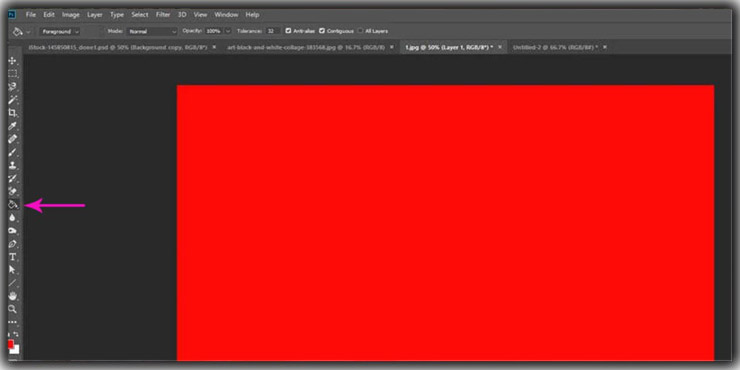
Go to the Tools panel and pick the background eraser tool.

You can use the background swatch sampling techniques when you put a solid color. But remember that you need to set the BG color next to the main BG. In this case, you can use red.
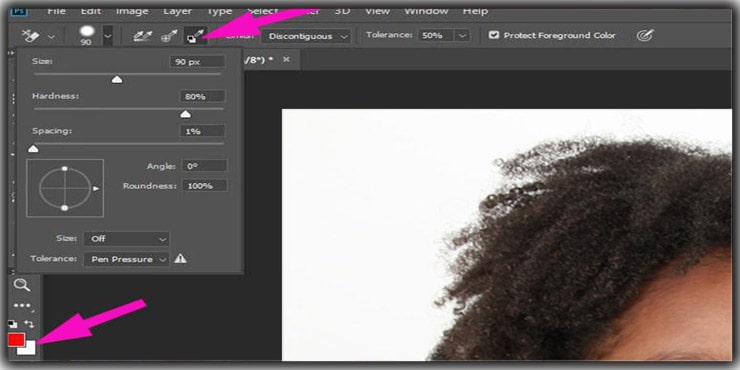
Ensure that you select the protected foreground color. The Discontiguous setting stops Photoshop from blending the color into the foreground. That helps to keep two layers separate. Furthermore, it always doesn’t work on its own.
Photoshop keeps the layers separate, selecting the foreground color. And confirm that you will not take out any original photos when cutting out the background.
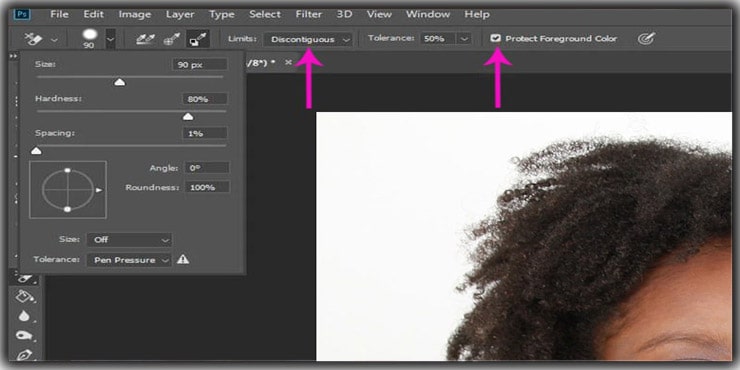
Afterward, the setting is based on your photo. So you must start with the brush settings in the top menu bar. And if they don’t fit your example, then tweak them.
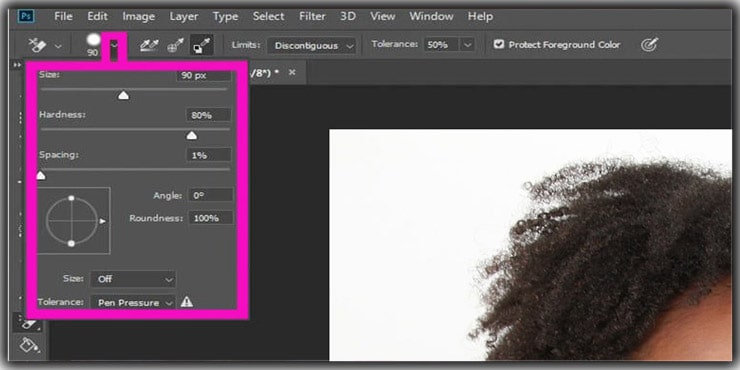
Tolerance is an essential setting. For example, we set the tolerance to 50 percent in this picture. Doing this lets you make the right color balance of the picture’s BG and object contrast.
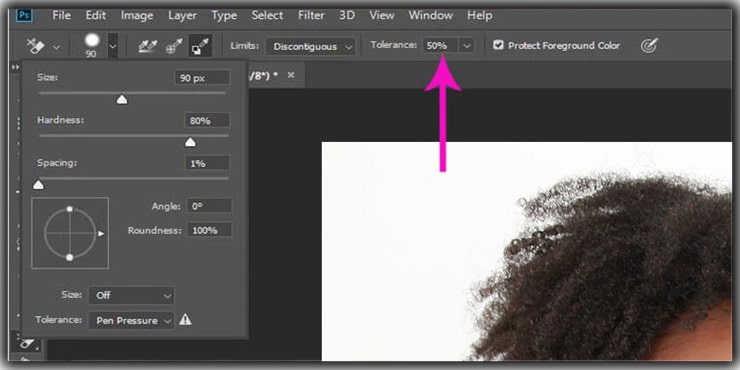
When you use this brush, you must remove the hair outline carefully. And you can see the red backdrop of the layer you created earlier. Also, you can see the scarf. Here the scarf contrast is much lower. For that, we have to adjust the brush set.
Remove The Low Contrast Background Areas by Decreasing Tolerance Settings
If you notice the scarf, its light color resembles the BG and hair. It would help if you decreased tolerance, which is in the top menu bar. Set the tolerance to 5 percent, which will work well. You can reduce the brush size in this case. Set the brush size at 30. This will allow you to edit correctly.

After setting the tolerance and brush size, you must zoom in on the finer details. Also, you need to remove the object carefully. Then you can make a balance between tolerance and the size of the brush in different areas of the image.

Remove The Rest of The Background
After finishing the work, you need to start removing the rest of the white color of the background. Then you can set the tolerance to 50% with a larger brush.
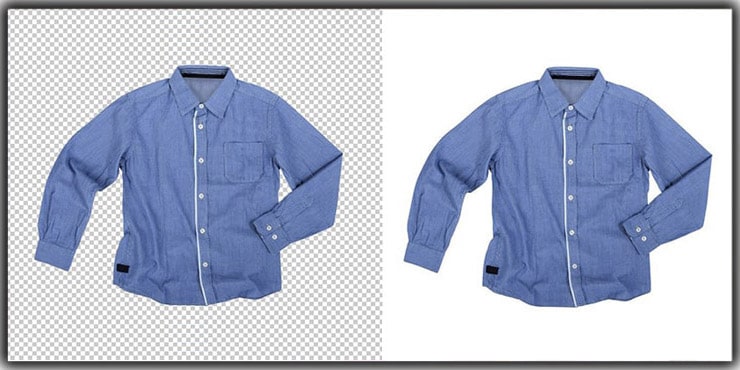
Replace The Background
Now you can replace the background with another solid color or transparent color.

Now you can place your subject on any backdrop you like.
White Background Removal Using Object Selection Tool
An object selection tool is a new tool in Adobe Photoshop CC. This object selection tool can select a subject in an image. And remove a background.
Let’s Start Removing with Object Selection Tool
First, you need to open an image in Photoshop. Afterward, you must select the object selection tool from the toolbar on your screen’s left side.
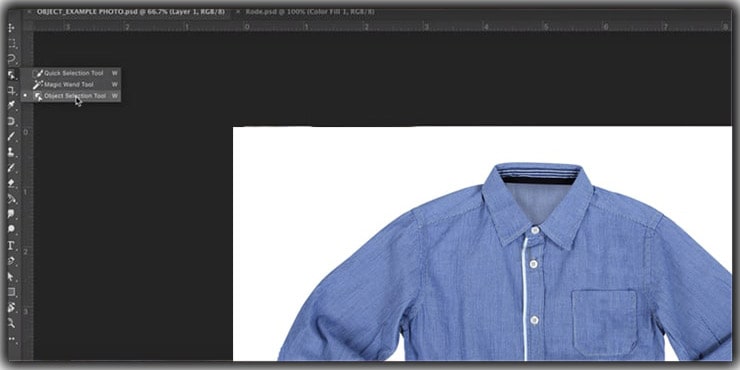
After selecting the object selection tool, you need to select the mood. To select the mood, go to the menu bar at the top of your screen. There are two options, one is rectangular, and the other one is the lasso. If the picture’s subject is easy to select, you must choose a rectangular mood.
And you can also use the lasso mood when the picture has multiple subjects. So for this picture, I’m selecting the rectangular mood. Because in this picture, I choose only one object. For that, you don’t need to set the mood. You can see this in the picture which is given below.

Next, you need to draw a loose selection around the object.
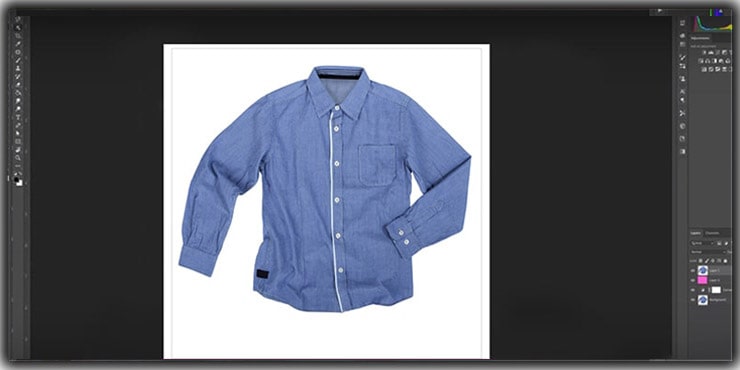
If the selection is not perfect, then you can modify the selection. It would help if you pressed the Shift key to perfect the piece. Also, you need to hold the Option key. Furthermore, you must select the mask option in the bottom right corner of your pc screen.
Then your object selection is made. And you can change the white background easily.
White Background Removal Using Magic Wand Tool
Mainly, the Magic wand tool helps you remove the background of an image without distracting the subject lying on the BG. With the magic wand tool, you must select the subject part of the image with a solid color.
Afterward, the magic wand tool helps you change and remove the selected area in many ways. From the background, the layer removes the lock.
Press the Magic Wand Option On The Toolset
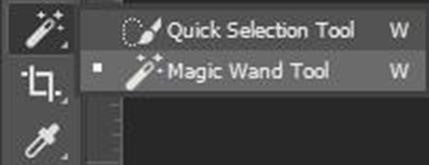
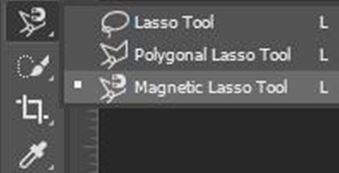
It would help if you chose the magic wand tool from the toolbar on the top left of your PC screen. Or you can press the Shift+w key. If the magic wand tool is not visible, you must try to find it below the quick selection one.
To do that, you can press and hold on to Quick Selection until a window pops up, which will help you choose the magic wand tool.
Press a Single Click On That Area Which You Need To Remove
When the BG of your picture is white, and you want to remove it, you can select the background with the magic wand tool. Then, with another click, you can easily inverse the selected area.
Removing the Background

When removing the background, it’s better to check the duplicate layer. Make sure that you have already chosen the duplicate layer. Next, look at the entire BG and press the left mouse button. Click and hold the shift key and choose the parts of the BG that the magic wand tool missed, like the shadow areas.
If you want to inverse the selection and highlight the object only, press the Shift+Ctrl+I button. Press the Delete button to make it transparent.
Cancel The Selected Area
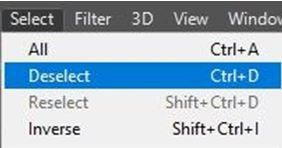
Press on the selection area which you want to deselect. Now you can think that. How can I recognize that? You can identify that area by the dotted line boundary.
After that, You need to click on the select option in the top menu bar. After pressing the select option, you can see the Deselect Option. Press on the Deselect option to turn off the selection area.
Or, if you want to go a short way, you need to press the Ctrl+D Button on your keyboard. Doing that will delete all the selected parts of your image.
For Clean The Photo, You Can Use an Eraser Tool
If the image BG has an intense color, you can remove it with a single click. Moreover, using the eraser tool, you can remove the tiny elements. You can also enlarge the image. Keep in mind that you don’t save the picture in jpg format.
This format will substitute the background transparent to white. That will defeat the whole purpose of image editing. Instead, go to the File and save the picture in PNG format. The background transparency will be preserved when you save the photograph in the PNG format.
Lasso Tool To Cutout The Background
First of all, this is an effective tool. You can remove the background by using this Lasso tool. It’s easy to work with complex backdrops and objects.
Select The Lasso Tool
Go to the toolbar and Press on the Lasso tool. After that, you must add the Lasso tool to select a point in the picture.
Select The Subject Outline
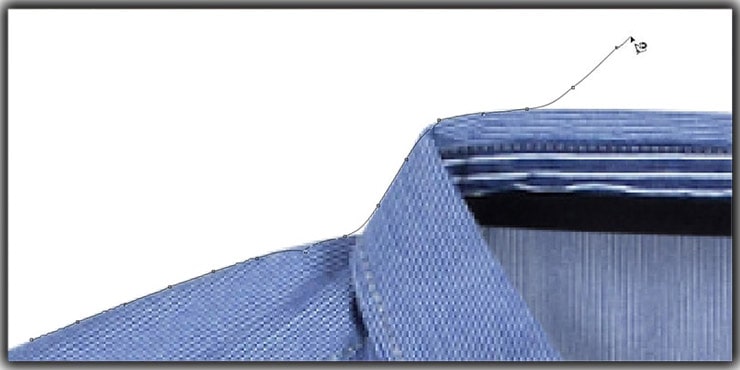
This process can be started by making a duplicate BG layer that you can use as a guide later on. The lasso tool is particularly suitable for selecting complicated BG and objects.
The area you have chosen with the lasso tool is usually one you want to preserve. Next, When the BG is empty, you can press on the Move tool and adjust the selected area.
Make a Layer Through Copy
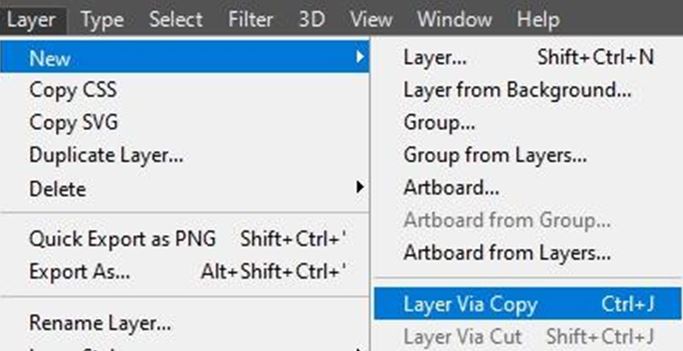
It would help if you went to the menu bar at the top. In the menu bar, you can see the layer option. Press the layer option to see the new option in the dropdown box. After that, again, you need to click on New.
Then another dropdown will be open. You can see the layer via the copy option in the dropdown box for making the layer. Press on the Layer via Copy.
Or you can do it by using the command option on Mac and ctrl for Windows. Click on ctrl+j. It will change your present selection to a new layer. You can transform, rename, or adjust the newly created layer without changing the original one.
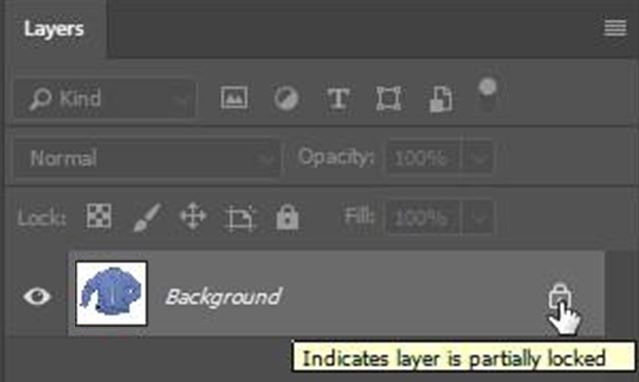
Lock the Lower Layer
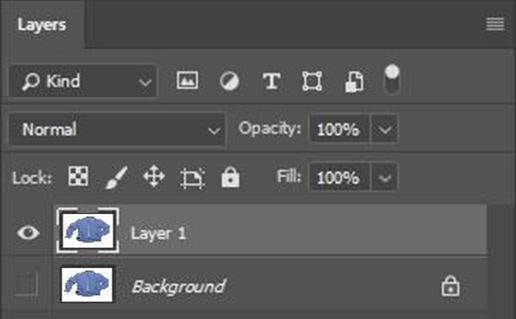
To secure the content of your layers, you can lock the layer entirely or partially. When the layer is locked, a corresponding icon shows right. After locking the layer, the icon will be colored.
But a partial lock will be displayed in its shape. Remember that you don’t need to save the photo in JPG format. It makes all the selections transparent to white due to how this format is coded. You can permanently save the image in PNG format.
You can find the save as an option in the list of formats in the menu bar. A PNG file keeps its transparency that can be used for different purposes.
Quick Selection Tool to Remove Background From Image
First, you must open an image in Photoshop to knock out the background. Then, go to the “file” option.
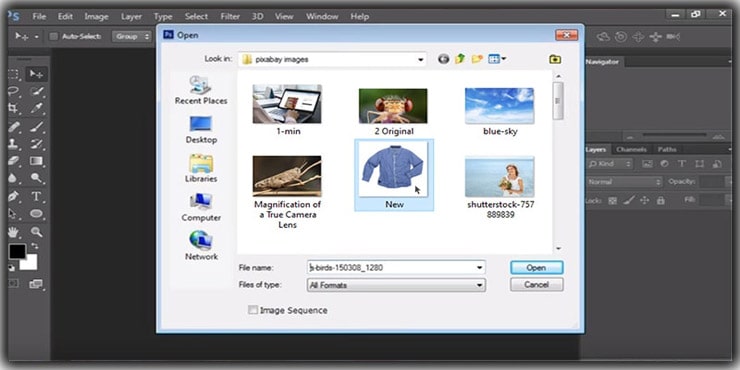
After pressing the file option, a dropdown box will open. Then there is an “Open Option.” Click on the “Open” option and choose an image from a folder where you put some pictures.
The image is now open in Photoshop. Here I’ll show you how to remove the background using the quick selection tool.
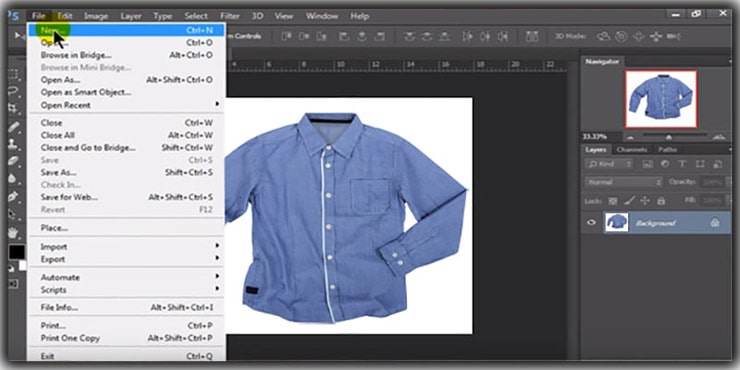
Next, you need to make a new file. Go to the “file” in the menu and click the “New” option.

Keep this in mind. In the background contents option, you have to select transparently. Then click on OK.
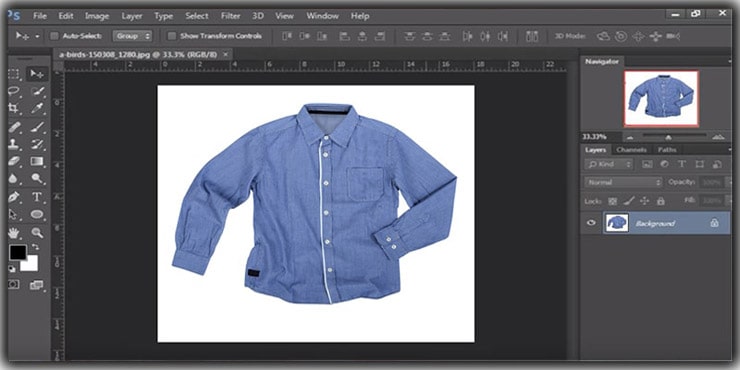
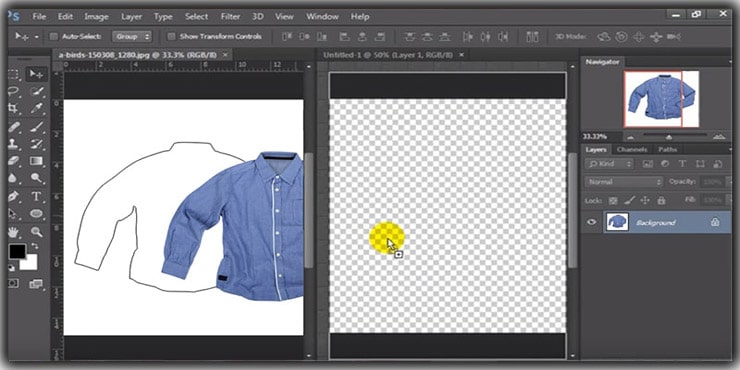
Then go to the original photo. After that, select the QUICK SELECTION TOOL icon and click on it.

Drag the cursor on the subject and click on it. The whole subject’s outline will be selected.
Furthermore, You need to open another file side by side. Go to the “Window” option in the menu bar to do that.
Select the Arrange option. After that, Press on the 2-UP Vertical option. Then you can see two files are open on your monitor screen.
Afterward, go to the toolbar and click on the Move tool icon.
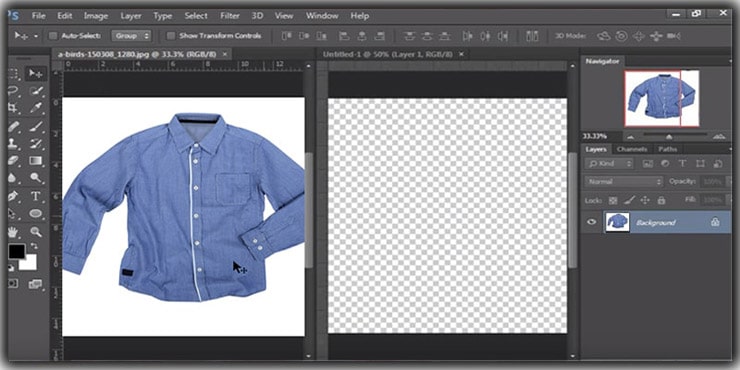
Next, click on the subject that you selected before. Then drag the subject on the created File.
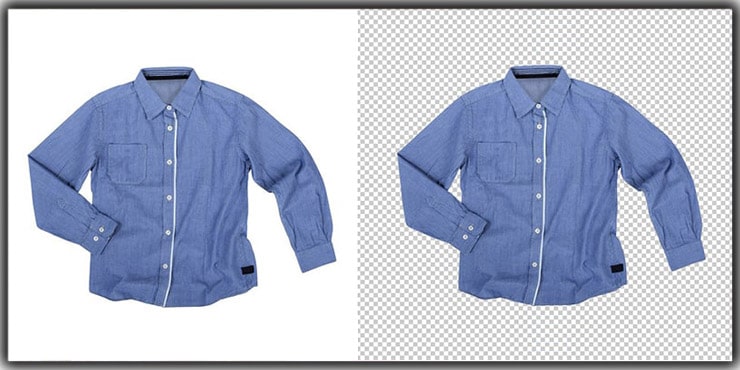
Final Image
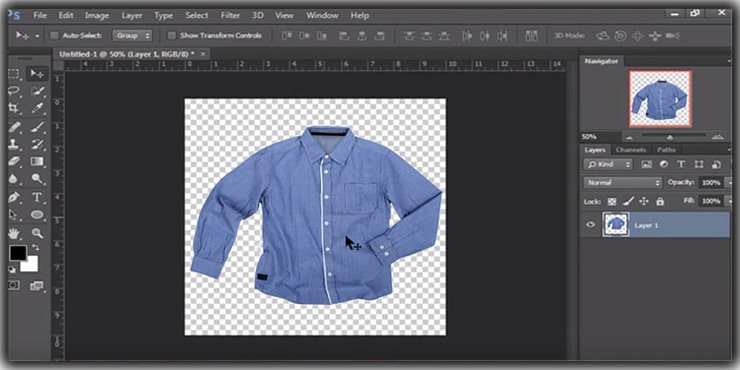
You can easily remove the white background by using a quick selection tool.
Cut out Images with Artificial Intelligence AI
Cut out Image with AI White Background Remover Online is a powerful tool that can automatically make the background transparent. Its advanced algorithms can remove backgrounds in seconds, saving users a great deal of time and effort.
It uses artificial intelligence to detect and separate the subject from its background accurately. Whether it’s a product, person, or any other object, it can quickly and easily remove the background automatically in 5 seconds or less, leaving only the subject in focus.
Automated Online Tools and Software
You can use many online automated software for background removal. Using an automated online tool, you can remove the white background from photos. However, you can’t delete multiple subjects’ BG using an automated online tool. In this tutorial, I have used only one subject image.
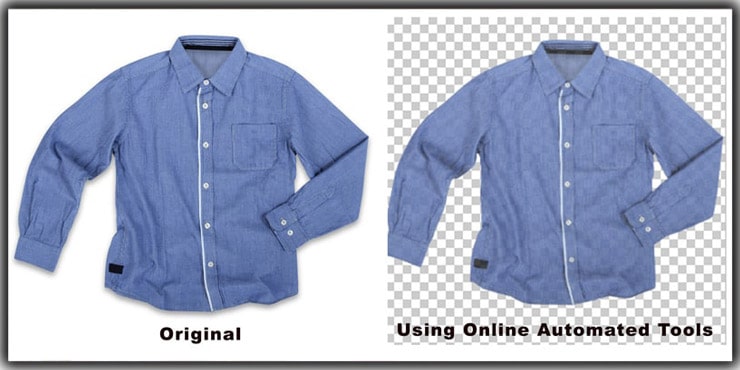
Press the photo upload button, try to outline, and remove the background. This tool has a red brush for selecting the BG and a green brush for selecting the main subject. So you need to drag the red brush in the BG.
And drag the green brush in the foreground photo. Ironically, you can see the main subject will be selected. But the selection could be better if you use this online automated software.
Which Tool is Best for White Backdrop Removal
The above-described selection tools of Adobe Photoshop are effortless to learn and work with. In addition, you can use the lasso, magic wand, background eraser, quick selection, or pen tool for white backdrop removal.
However every tool has some limitations, and the results are different. Some are easy, and some are hard to use. So here, we will show you a comparison and contrast of the tools.
Pen Tool vs. Background Eraser Tool
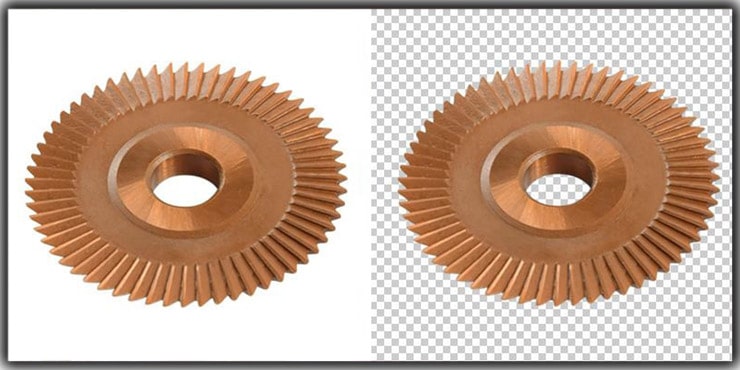
To create a selection for complex or sharp-edged images like mobile, ball, plate, egg, ring, garments, furniture, etc., we use it mainly known as the clipping path. It is effortless and accessible. This tool will help you to make a good shape of the object. And it will allow you to remove any backdrop.
The Background eraser tool is used to select the complex, blurred, transparent, or soft edges images that the pen tool fails to select—hair, muslin fabrics, fur, glass, furry doll fabrics, etc. The outstanding result of the eraser tool is known as the Photoshop Image Masking Service.
Pen Tool vs. Lasso Tool
In general, two sets of features need to be taken into consideration. The first is the lasso tool, and the second is the pen tool. By using a pen tool, you can outline the subject. And you can give a perfect shape to the subject.
As a result, you can easily cut out the background of your image. The Lasso tools help you draw any form you want “manually.” The Lasso tool helps to draw a border-free object within an image. After selecting the object, you can soften the edges with the feathering effect.
Quick Selection Tool vs. Object Selection Tool
The quick solution tool in Photoshop is helpful for selecting a specific object in the picture. This method is beneficial for selecting and painting the object in the picture. Suppose you use the tool to select objects outlined and remove the background.
Or adjust the BG color when there is an object in the image. We usually do not use this tool for our photo editing. You can try it yourself if you are a newcomer and want to work with this tool. On the other hand, Selecting an object is one of the most manual tasks in Photoshop. It is used to make the shape of an object.
We use this tool to remove the background from your photos. These tools are typically used for object selections. Object selection involves recent changes, including selecting any object from an image and removing the backdrop.
Automated Tool Vs. Magic Wand Tool
Automated tools help you make the shape of an object’s outline of an image. It is a simple and easy process to remove the white background. But more than this tool is needed to make the perfect shape of an object.
And if you can’t make an ideal shape of an object, then you can remove the backdrop, but the object doesn’t look right. You can use a magic wand tool to select a particular area of an image. By using this tool, you can remove the background from your image.
This tool is one of the oldest selection tools in Photoshop. Sometimes it takes work to outline an object, and it won’t make the proper shape of an object. So foremost, I recommend using a pen tool to make the selection and shape of an object.
The pen tool is the best tool to remove white BG. You can create a pixel-perfect selection only with the pen tool. Thus it is the primary tool for any Photoshop editing needs.
Change the Background From Hair Area
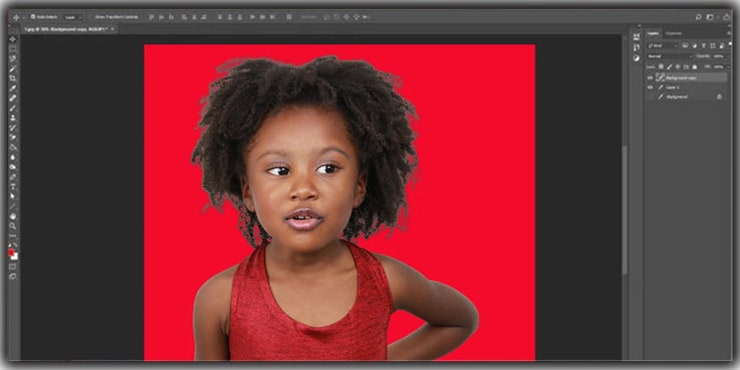
When you remove an image’s white backdrop, the image has a person as a subject. And obviously, the subject has hair. Now, what tool can you use to remove the white color BG?
It would help if you used the background eraser tool, image masking, for that background removal. Because the picture’s subject has hair, you can’t remove the soft-edged hair area properly without this tool. Remember that advanced image masking helps you get more accurate results than clipping paths when the subject has a soft edge like hair.
Because with a clipping path, you can’t make a proper outline around the hair or fur. But with a clipping path, you can make a perfect outline of a subject if the subject doesn’t have fur or hair. It would help if you gave proper concentration when the subjects have hair. Masking tools help you to get a realistic image.
Portrait Photo Background Removal
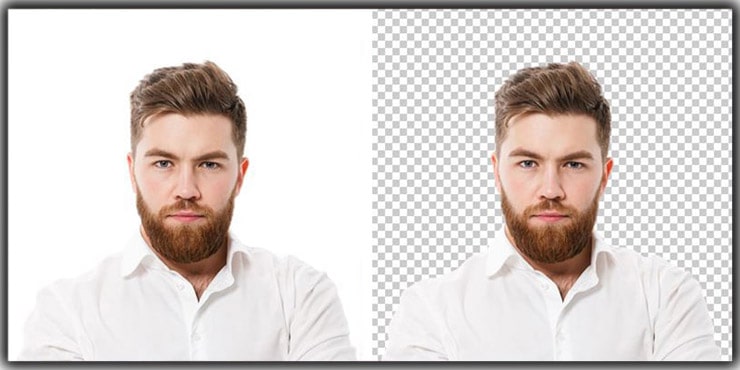
Usually, we use white backdrops in portrait photos. Sometimes, We use solid or transparent colors. You can’t use a white color background when taking pictures of a model. In that case, you need to make the model’s picture natural.
So You can remove the background at that time. And put a solid color BG in the image. As a result, your image looks good. In this image, I use solid color BG. Because in this picture, if I use a white backdrop, it doesn’t look good. That’s why white backdrop removal is essential.
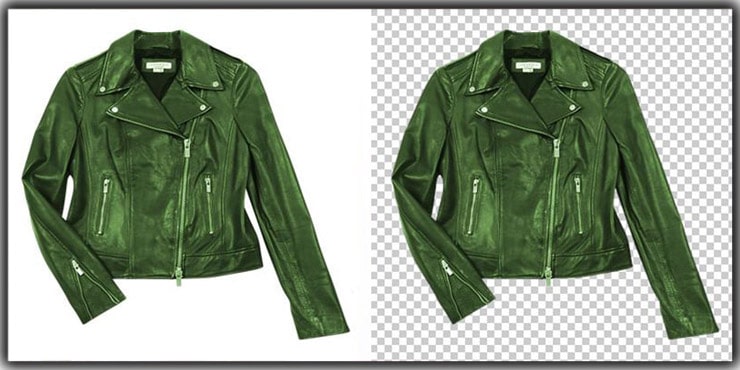
Product Image Background Removal
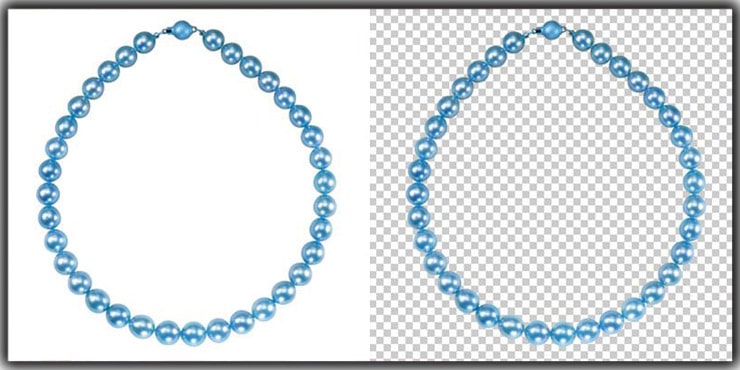
If your products, clothes, and jewelry color are close to white color in an image, you need to remove the background. You must remove the white backdrop because these things don’t look attractive. Suppose you took a photo of a white T-shirt.
You can remove BG in that case. And add a solid color. Because of the solid BG, it will be nice to look at.
When We Need to Remove White Backdrop
If you want to use any other color BG, use the subject images in image composite, or use it in any other Photoshop editing need, you must remove the white BG.
If you get your pictures on A transparent background, you can do anything or change the BG as required. For instance, you’d like to use a gray color. Then you can remove the white and place a gray color backdrop on it.
When Not to Remove White BG
You don’t need to remove white BG when you edit a photo for E-commerce websites such as Amazon and eBay. Because, in the E-commerce business, everyone always uses a white BG in the product photo. The white color makes the product look attractive. It grabs a customer’s attention.
Moreover, If a photograph looks beautiful on a white BG, you don’t need to remove the white color background. Sometimes we can see people use different colors in their product photos. It distracts the focus on the subject.
That is why customers want to avoid buying products from their sites. Using the white backdrop, you can perfectly show every detail of the products.
Frequently Asked Questions
It is very easy to remove white backgrounds and create transparent cutout backgrounds on desktop and mobile devices by launching the background remover tool.
Thus you can use Photoshop pen, background eraser, lasso, quick selection, object selection, object selection, AI, or any automated tool.
Yes, You can do it and the Photoshop background eraser tool is special for this.
Actually, you can do it yourself after reading this article and practicing according to so. If this does not work, various image editing service providers or platforms have outsourcing options that can simplify the process significantly.
Yes, you can use any background you like as the background color allows you to highlight the subject on online showcasing.
Chose The Best Background Remover
If you want the best online background remover, use Graphic Experts India. You can go through the website. If you think it is a good Photoshop Editing services provider and services are good, then you can submit an order or request a quote.
You can get two free trials for testing quality. As a result, you can observe whether services are good or not. So, I am talking about the white background removal service.
Professional Photoshoppers work in this company perfectly. The Photoshop pen tool is used here to remove the BG of an image. Additionally, you will get quality services, on-time delivery, and a money-back guarantee here.
FAQs
The Pen Tool consistently delivers the cleanest results, particularly for products with sharp, well-defined edges. It takes more time than clicking a single button, but the precision you get in return is worth every extra minute — especially when the final image is going onto a professional platform or printed catalog.
The Background Eraser Tool paired with image masking is the right call here. The Pen Tool simply can’t trace individual strands naturally — the result looks stiff and artificial. The Background Eraser, with tolerance adjusted to match the contrast between the hair and background, pulls out fine edge detail far more convincingly.
PNG is the only format that actually preserves transparency. If you save as JPEG, Photoshop fills the transparent areas with white automatically — which defeats the entire purpose of removing the background in the first place. Always export as PNG when a transparent background matters.
If you’re editing product photos for platforms like Amazon or eBay, white is actually the preferred standard — keep it. A clean white background puts the product front and center, removes visual distractions, and meets marketplace guidelines. Changing it unnecessarily can actually hurt how the listing performs.
They’re useful for quick, simple jobs where precision isn’t critical. The moment subjects get complex — overlapping edges, similar tones to the background, fine textures — automated tools start showing their limits. For professional product photography or client work, manual Photoshop editing consistently produces more reliable results.
The Magic Wand selects areas based purely on color similarity — one click grabs pixels within a set tolerance range. The Quick Selection Tool is smarter; you paint over an area and it reads texture and color together to build the selection. Quick Selection tends to handle uneven backgrounds better, while the Magic Wand shines on flat, consistent color areas like a plain white backdrop.
Yes, though it requires more careful work. Lowering the tolerance on the Background Eraser and working slowly around the edges helps preserve subject detail without eating into it. Adding a high-contrast color layer underneath while editing — like red or bright blue — makes it much easier to spot areas that still need attention.
Conclusion
In this tutorial, we learn how to remove the white background from Photoshop in many techniques with different tools. And we have found that we can acquire the best result with the pen tool.
So always try background removal with a pen tool to achieve better results. To learn more Photoshop-related work, follow our website and comment if you have any questions about this tutorial.
You may also read:

Salim Ahmed is the CEO of Graphic Experts India, with over 25 years of expertise in photo editing, clipping path, image retouching, and eCommerce image editing services.