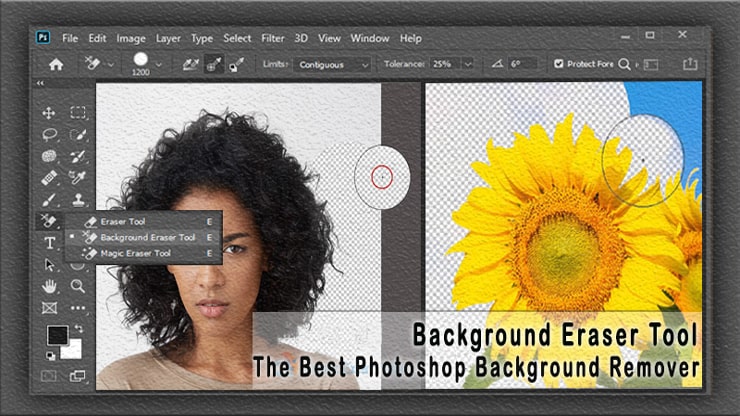
Photoshop Background Eraser Tool is the best background remover for removing soft edge complex backgrounds from images.
It can easily separate the foreground from the complex background with just a few clicks, which helps in specific editing and more reasonable image manipulation.
Do you want to remove unwanted areas from your image? For instance, do you need to remove backgrounds of soft-edged or complex images like hair, fur, and trees? Well, choose this tool.
The Background Eraser tool in Adobe Photoshop allows users to remove unwanted pixels from an image. Although the tool is intuitive and easy to use as a background remover, many users often need help using it and other features to get the best results.
This blog post will unlock the secrets of the Background Eraser Tool in Photoshop. We’ll look at the tool’s different features, how to adjust its settings and some tips and tricks for getting the most out of it.
By the end of this blog post, you will better understand this Eraser Tool and will be able to create stunningly beautiful images with just a few clicks of a mouse rather than an AI background remover.
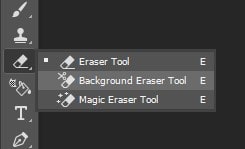
The eraser tool is one of the most used Photoshop tools. This tool can be handy when you are about to erase or delete a section. You can find these tools on the left side toolbar. It has 3 different options.
- Eraser tool
- Background eraser tool
- Magic eraser tool
Moreover, the tool size control panel will be visible after selecting any of those 3 options. It will allow you to change the brush size, pattern, and more. Let’s learn how to become a master Photoshop eraser tool expert.
What is the Background Eraser Tool
Background Eraser Tool is a powerful editing feature of Adobe Photoshop. It allows users to remove the background from an image and create a transparent background, leaving the image’s subject in full view.
The tool works by sampling and selecting the background area of the image and then removing the pixels that are similar to the selected color. This tool is particularly useful for soft edge images like hair, fur, and glass where the magic wand or pen tool doesn’t work well.
The Background Eraser Tool offers a wide range of possibilities for image editing, allowing users to quickly and easily manipulate images to get the desired result.
Looking at the tools panel area, you will not find the tool because it is hidden in the regular Eraser Tool of Photoshop.
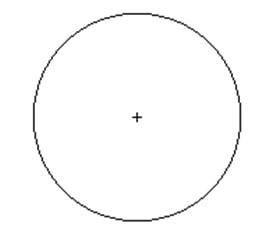
Go to Eraser Tool, and click the correct button (for Windows) or Ctrl-click (for Mac). A fly-out menu will appear, and from there, choose the tool. Once you select the Tool, your cursor will be replaced with a circle with a crosshair in its center.
How to Adjust Brush Size to Remove a Background
The Background Eraser Tool is a brush similar to other Brush Tools available in Photoshop. You can easily adjust the brush size by giving a command to the keyboard.
If you want to make the brush size smaller, continuously pressing the [ (left bracket key) or the ] (right bracket key) will allow you to get a larger brush size. Press the shift key to control the hardness of the edges.
You will get a softer edge by constantly pressing Shift + Left bracket ( [ ), and Shift + Right Bracket ( ] ) will give you harder edges. Hardening edges is much more beneficial because softer edges give you several background artifacts.
How to Remove Image Background with Background Eraser Tool
Removing backgrounds from images can be time-consuming, but with the right tools and techniques, it doesn’t have to be. In the following tutorials, we will discuss removing the image background with the Background Eraser Tool.
The tool works best when you need to erase a photo background. Let’s follow the step-by-step process.
Step 01: Tool Selection

Go to the Photoshop toolbar option and choose the Background Eraser tool. Get the tool revealed from the Eraser tool since it remains hidden behind the eraser tool; click on the Eraser tool and hold it until the eraser tool comes out.
Step 02: Settings of the Eraser
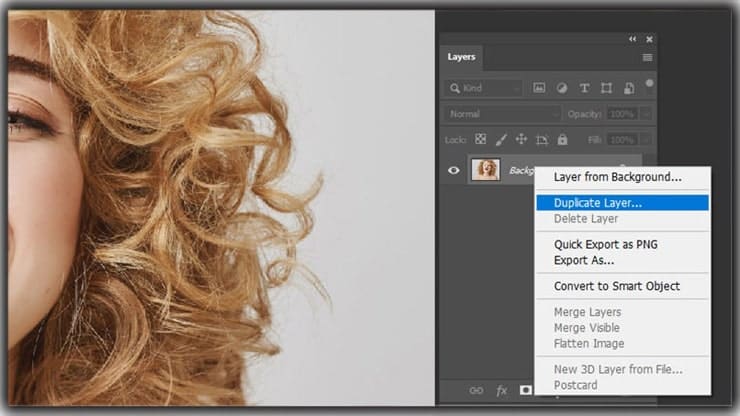
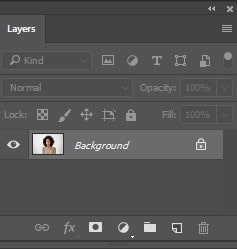
Ensure that the Background Layer is Duplicated following the above image. Also, click on the Eye icon to make the Bottom Layer invisible.
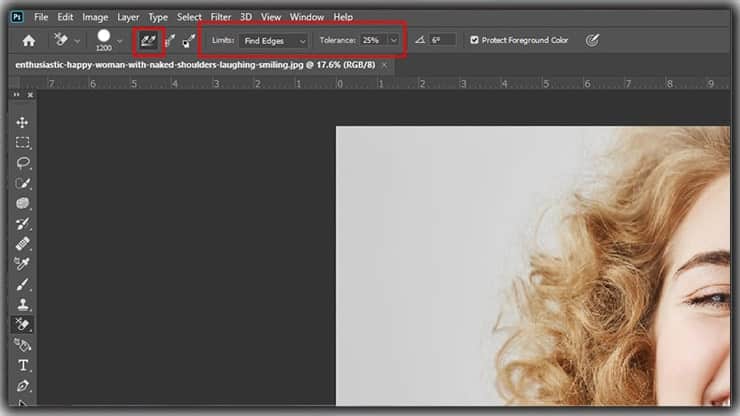
Now go to the Options Bar and pick a round, hard brush. Depending on your required size, choose the brush size. For the image we are working on, select the settings below.
- Sampling > Contiguous
- Limits > Find Edges
- Tolerance > 50%
Step 03: Remove Background

This step is to remove the background of an image. The subject edges will be automatically detected. Go for a smaller brush while working with the challenging corners.
Step 04: Fine-Tuning
Fine-tuning is a must to get a great result because it also has a few drawbacks.
In this image, the background and subject color are quite similar. As discussed above, we must follow the Protecting Foreground Color option to solve the issue. Using this Option, you can comfortably fine-tune the image.
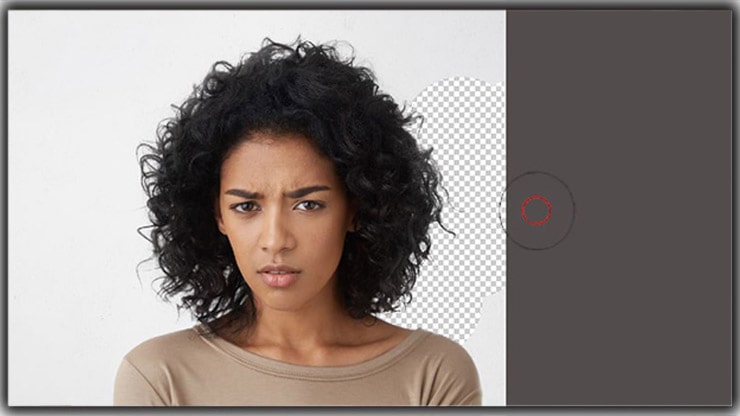
How to Remove the Grey Background Without Affecting the Hair

In the layer panel, the image is positioned in the first layer. Let’s remove the grey background without affecting the hair. Photoshop gives a color sample directly below the crosshair in the middle of the circle – Background Eraser Tool works this way.
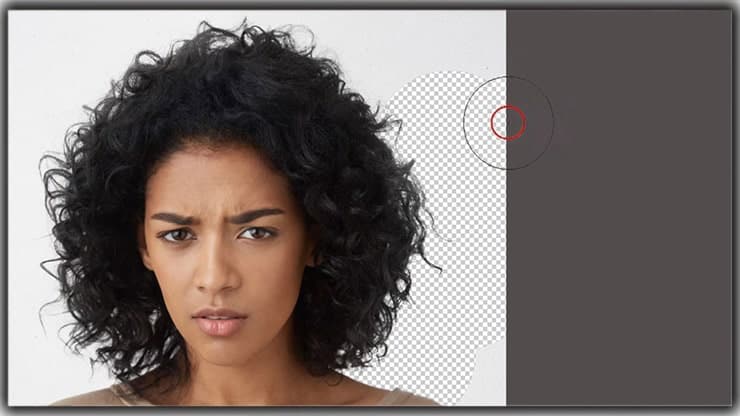
So, to remove the grey background, take the cursor into the black hair. Move it over the column to ensure the crosshair’s center is directly positioned on the black hair.

Once you click the right button, grey colors under the crosshair get selected, and the crosshair erases all the matched grey pixels within the range of the larger circle.

So, to remove more grey color, don’t press the right button and drag the crosshair to different parts of the grey color bg. You will notice one surprising fact: even if the larger circle passes to the black hair, no effect happens to it.
This means the crosshair is removing the grey color pixels only. This way, removing the grey in the corners and edges becomes much more comfortable.
The crosshair will keep removing the grey color until you don’t move the crosshair from the inside of the grey area.
But you will need to be careful not to take the crosshair over the black area. The crosshair will take the pixels of the black and start erasing.
However, solutions are also there for this mistake. To undo the mistake, Ctrl + Z (for Windows) or Command + Z (for Mac) will allow you to solve the problem. If you made multiple mistakes, repeatedly press Command + Option + Z (for Mac) and Ctrl + Alt + Z (for Windows).
Work Overview
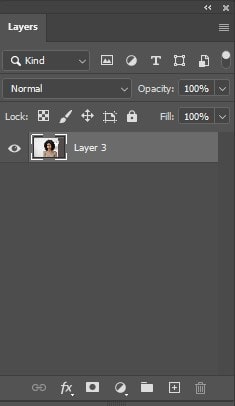
Once you check the checkerboard pattern, you will find the image I have removed there. Photoshop shows the layer’s transparency this way, but if you use Photoshop frequently, you might be thinking about what is happening!
A few moments ago, we found my image in the layer. Photoshop follows a different way of treating layers than normal layers.
But you can’t remove the pixels, and it is because the layer doesn’t support transparency. You might think of one query, “Then how did you delete?” Did you follow any additional strategy to do that?
The answer is NO. The logic is that Photoshop knows what I am going to do. That is why Photoshop changed the backdrop layer to a normal layer so that I could remove it. In the Layer panel, the normal layer is named “0”.
It is not crucially essential, but it is an exciting fact about Photoshop. Learning about how the process works is always great.
How to Remove Background, Keeping the Subject Untouched
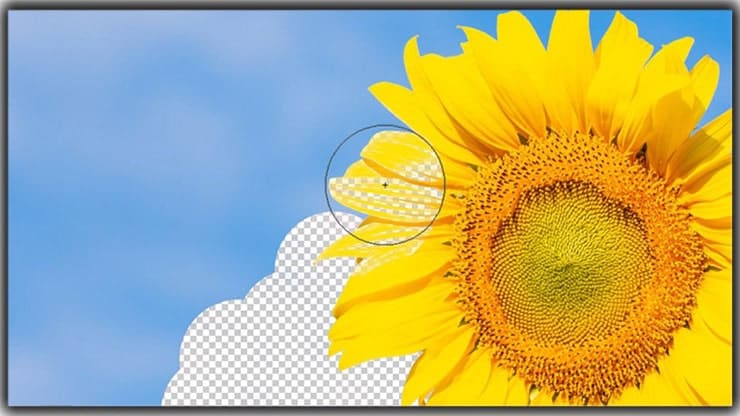
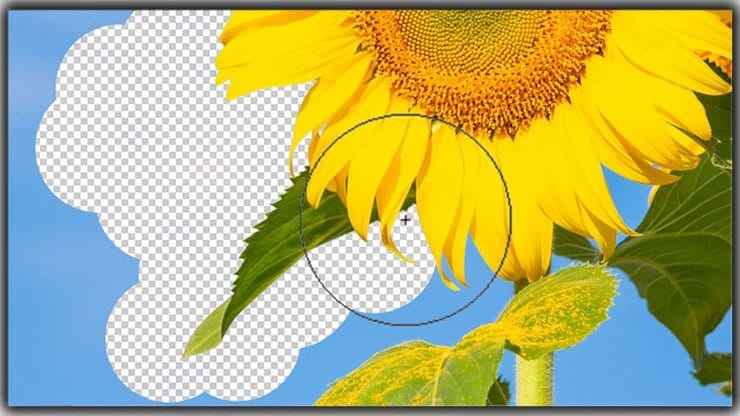
Now, we will start making a tutorial on what we have learned and work on a real-world example of this tool. I will use an image of a sunflower with a blue sky as a background of the image.
Using a background eraser tool will be tricky in this image since I want to keep the sunflower untouched. It means I have to keep the crosshair away from the sunflower and carefully work on the sky.

For instance, the image will look like the one below if I can’t keep the crosshair away from the petal and mistakenly move it over the petals. Photoshop will take the petals’ colors as samples and remove the petals’ colors.
To return to the last step, press Ctrl + Z (for Windows) or Command + Z (for Mac). Once you come to the last step, remove the sky color again. Till now, we learned that the crosshair takes the color as a sample that comes directly under it.
And it removes the same color that comes within the larger circle boundary. Moreover, when another color comes under the crosshair, it takes that color as a new sample and erases the same pixels.
How to Change the Behaviors of the Tool
Above all, the working process is the basic information of a background eraser tool. This is one of many behaviors of this tool. So, how do we change the behaviors of this tool?
We will learn it, too, and to do this, we will need to start working in the Options Bar. After selecting the tool, the Options Bar and screen top show different options for adjusting the tool’s behavior.
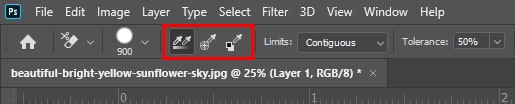
The essential behavior we can change easily is the selection process of the sample color of the crosshair. In the Options Bar, you will find three different icons of sampling options there. The icons are
- Continuous (positioned at left)
- Once (in the middle)
- Background Swatch (at the right side)
You can mostly change the Continuous and Once icons from the above three sampling options.
Adjust Continuous Icon
By default, Photoshop chooses Continuous icons. This is the reason why you move the crosshair cursor. The tool selects the color that goes under the crosshair.
Adjust Once Icon
But what to do when the color doesn’t change much? At this point, the sampling option works best. Click on the Once icon (in the middle) to activate it.
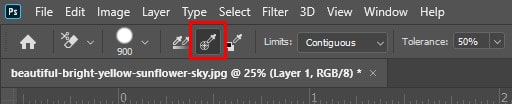
From the Option’s name itself, you may understand that the Once Option means that Photoshop will select the sample color only once at a time, and it will never change when another color comes underneath the crosshair cursor instead of the selected sample color.
It means even if you accidentally move the crosshair cursor over the black-colored area by selecting the Grey colored as the sample, Photoshop will not erase the black color. The Eraser Tool will not affect the black color at all.
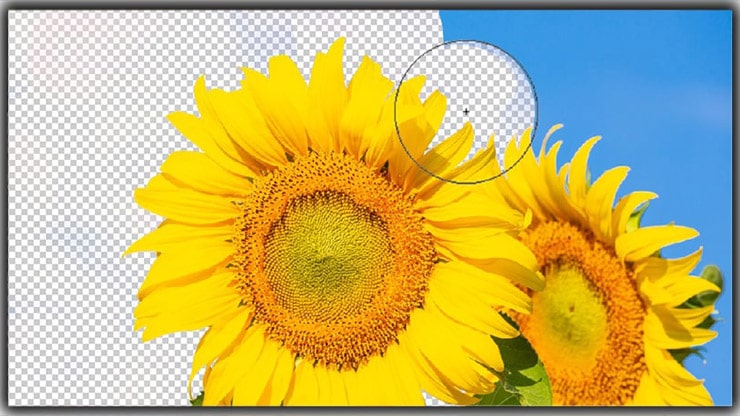
The below image shows the same thing. With the sampling option Once, Photoshop ignores the sunflower even when I move the crosshair cursor over the petals. It happens because you initially selected the blue sky as the sample color.
Sometimes, you may face problems positioning the crosshair tool over the color you want to erase. You should select the Background Swatch Option placed on the right side to avoid problems.

When you select the Background Swatch sampling option, remember to click on the Background Color Swatch option. This Option will allow you to pick a color, and while picking the color, you must be selective as much as possible.
Pick a color as much as a similar textured color that you want to erase. Don’t worry if the selected color needs to be corrected. By changing the Tolerance Value from the Options Bar, you can match the color as much as possible.

How to Adjust Limits of the Background Remover Tool
Without “Limits,” the Background Eraser Tool tutorial will remain incomplete. Firstly, learn the responsibility of the Limits option.
Once you inform Photoshop about the color you want to erase, the Limits tell you about the position of the matched color pixels so that you can erase them comfortably. Limits come with 3 options.
- Contiguous
- Find Edges
- Discontiguous
Contiguous

Photoshop’s default setting is Contiguous. When you move the crosshair cursor over an area, it physically touches the pixels underneath it. Photoshop deletes those pixels only.
So, while working with crosshair, you cannot delete the pixels of blue sky placed under the branches and leaves.
Find Edges
The Find Edges will help you delete the pixels more precisely than the Contiguous and maintain a smooth edge. However, you may not be required to use it when working with the leaves.
But if you want to erase the sky along the building edge, where smooth edges play a vital role, Find Edges will give you the best outcome.

Discontiguous
In an image, you will always have some isolated areas. And you can only use Contiguous or Find Edges in those areas. Well, select Discontiguous for this Option. So, what is the responsibility of the Discontiguous feature?
This feature helps to find the matched pixels of the sampling color, and Photoshop can delete those matched pixels from anywhere in the image.
Even if the crosshair doesn’t touch the matched pixel, Photoshop keeps deleting those matched pixels. So, with the Discontiguous features selected, you can delete any portion of the sky that comes through the petals and the sunflowers.
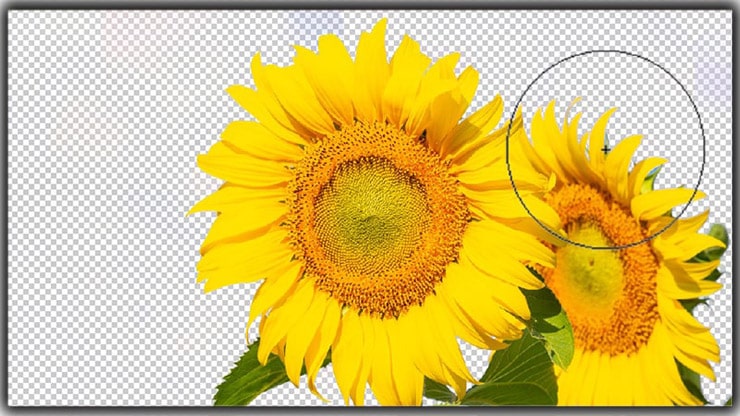
Now, unfortunately, one problem arises. Let’s zoom in on the image. You will still find darker grey areas surrounding the petals and the sunflowers. To see the color, let’s make the background entirely black.
With the Option Discontiguous selected, the petals and the sunflowers still require a little push to get the best result from this tool. At this point, the Option of Tolerance comes. Let’s look at this Option in the upcoming section.

How to Adjust Tolerance to Remove the Background
The tolerance option is the 3rd prime feature of this tool, which will allow you to make a difference between the pixel color and sampled color so that Photoshop can erase the matched pixel color.
So, where is the Tolerance feature located? You will find it in the Options Bar on the right side of the Limits option.
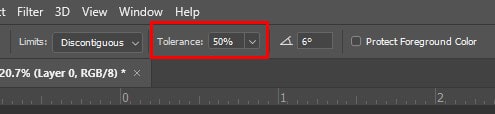
50% is the default value of Tolerance. This value is a good starting level. It is advisable to set the Tolerance level to the lower side of the subject and the backdrop color is too similar.
While going for a higher Tolerance value, the difference between the subject and background color options is too high. This image shows a high difference between the sky’s and leaves’ colors.
So, I will set the tolerance value to 70%. Now, click on any area of the blue sky to select it as the sample color. Since I chose the high tolerance value, you will surely get a better outcome with the tool.

How to Protect Foreground Color
Finally, if you see how many tolerance settings are being applied, you can’t see the background eraser to delete the background except for the part of your image. It is time to use the Protected Foreground Color.
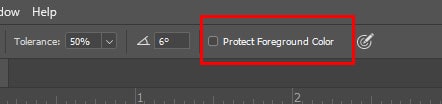
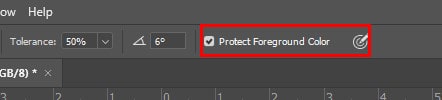
Since it turns off, you must turn it on by clicking the tick mark box. When you turn on the Protected Foreground Color, this feature will pick an image from the image and set it as a new Foreground color.
Thus, the color will be protected, and the crosshair cursor will never erase it.

Let’s look at the below image. The background and subject color are quite alike here. As a result, the image background remover tool can erase a small portion of the subject color unwillingly along with the BG color.
To solve this issue, let’s undo the previous step. So, press Ctrl + Z (for Windows) or Command + Z (for Mac). Clicking inside the checkbox, turn the Foreground Color option ON.
Now, press and don’t release the Alt (for Windows) or Option (for Mac) key to select the sample color.
For the time being, you will switch to the Eyedropper tool. Then, click on one of the flowers to select the sample color. Now, your selected sample color will be protected via Photoshop.

To ensure your sample color is selected as the new Foreground Color, look at the swatch option at the bottom of the Tools panel. You will find that the new Foreground Color changes to your selected color.

Since the flower color is not protected, drag the crosshair cursor over the flowers’ place. The Background Eraser will delete the background only, and you will get a better output this time. The flower color will remain unchanged, and Photoshop will erase the sky color.
It is recommended to Turn off the Foreground Color option once you finish working with the tool. Otherwise, you will be surprised by an unwanted result when you use the Background Eraser Tool next time.

So, we have learned all the related information and basics; we will now move to a full tutorial of this tool’s use.
The Benefit of the Background Eraser Tool in Photoshop
The background eraser tool aims to remove the background from an image or add a new one. Photographs or Photoshoppers use this technique to get the entire focus on the subject.
- By removing the background of an image and adding a new one, the images lend to a new level. Let’s look at the benefits of using this tool.
- A photographer’s hand can shake when capturing an image. And every beginner photographer faces this common problem. A photo background may look shaky because of this issue.
- As a result, the online image looks dull. Background removal is a great option to give a stunning look to a dull image, and you can achieve it with the tool. The image will become more appealing once the tool erases the background.
- The eraser tool is widely used to change the background color and is one of the best techniques. A polished background look is ensured with the tool.
- This tool is beneficial when removing background from your images within the shortest period.
You can also add a professional background to an image with the help of the white background removal technique.
FAQs
Many users have questions about the background removal tool, such as how to use it or what type of images work best with it.
Understanding the answers to these Frequently Asked Questions allows you to confidently utilize the background eraser to get creative and remarkable results.
The Background Eraser Tool is a unique tool of Adobe Photoshop to eliminate unwanted background elements from an image. This tool functions by inspecting the color pixels of the surface and removing those that match the markers. In other words, it identifies similarities in pixel hue, tone, and saturation to discern the intended object from its backdrop accurately.
An eraser tool is helpful if you need to erase any active parts or selections. This can be effective when working with multi-layered images because the lower layers show when the upper layer is removed.
The background eraser tool samples the colors around the brush as you drag it over the image. It erases pixels similar in color to the area you clicked on, making it easier to remove the background.
Ensure none of your active selections are made. Also, ensure you only work on the active layer, and the other layer turns off.
To remove the background color from an image, you can use the background eraser tool of Photoshop. Select the tool, adjust the brush settings, and drag it over the areas you want to remove.
Yes, the background eraser tool erases the background from an image and creates a transparent background commonly used for logos and overlays.
After removing the background using the eraser tool, you can add a new background to the picture by inserting a new image layer or using the fill tool with a solid color or a pattern.
Yes, this tool can remove backgrounds from TIFF, PSD, JPEG, and PNG file formats or many more.
Final Thought
It was a long tutorial. Thanks for your patience in reading this article. You will now get a clear idea of the usage of this Eraser Tool and different background eraser processes.
Choose an easy image for the practice. Everything requires practicing to become a master of it, and Background Eraser Tool Photoshop is also no exception.
You may read:

Salim Ahmed is the CEO of Graphic Experts India, with over 25 years of expertise in photo editing, clipping path, image retouching, and eCommerce image editing services.