Photoshop CC is a versatile software for photo editing. It allows depth-control of editing & flexibility to gain perfection. If you are a newbie designer & looking for the best photo editing software & it’s essential to know how to use it efficiently.
This article is for all the newbie graphic designers, creative designers, and photo editors to give a complete guideline about the best software Photoshop CC and Photoshop tools & toolbar.
Photoshop services are incomplete without Photoshop CC.
No other software can give you as much efficiency of editing as Photoshop provides. The latest version booms with lots of exciting features & modifications to the existing features to make it more user-friendly, transparent & natural.
Launching a new version aims to reduce your workload & provide you with fantastic tools to gain perfection in editing by using this robust software.
Let’s read the article to learn all the essential topics needed to boost your Photoshop skills quickly.
Then, I will share some easy tricks to enhance your talent and strategy to be comfortable with it & give a perfect path from basic to advanced Photoshop editing to make you a pro designer.

What’s New in Photoshop CC?
The latest version of the giant Adobe Photoshop software is mainly for professional designers & photographers to do creative design, Photo editing,
Background removal & all kinds of basic to advanced image editing and retouching. Moreover, this version comes with professional photography tools that can transform your ordinary click into a standard one with a built-in mechanism.
It helps you to improve your photography skills & modify your work ideally to bring an artistic vibe. Another advantage of Photoshop CC is it provides user enhancement & you can do illustrations, 3D artwork & paintings.
It is unbeatable because it has unique effects, a user-friendly editing tool & some amazing advanced brushes that help you to derive a digital masterpiece.
This latest version of Adobe Photoshop includes some interesting new features. However, the big news is that it contains the new Object Selection Tool and enhanced Warp Transformation functionality.
Here is a list of new features and enhancements in the 2022 update:
- Enhanced Content-Aware Fill
- Improved Lens Blur quality
- Enhanced Properties Panel
- Customizable Warp
- New Preset Panels etc.
As lifesaving tools for most photographers, the new update fixes many common problems and issues.
However, the Object Selection Tool will provide an average over its closest compotator GIMP. Are you interested in the rivalry between them and wondering which is the best? Read Photoshop VS GIMP.
Photoshop CC Tools
Designing is not complete without Photoshop. So, if you aim to be a professional designer, let’s learn Photoshop tools. Here I attach all the tools that are available in Photoshop CC.
You will also find which tools you need to use in which situation. Finally, I will focus on each tool’s necessity & use.
Move Tool
After opening your Photoshop, you will find a default toolbar. Move tool is the top one in your toolbar list. You can also get the tool by entering “V.” This is one of the essential & major tools in Photoshop.
You need the Move tool when you need to move any item from your image or relocate any art. First, you need to select the specific object to move it separately. The whole image layer will be moved if you don’t make any selection.
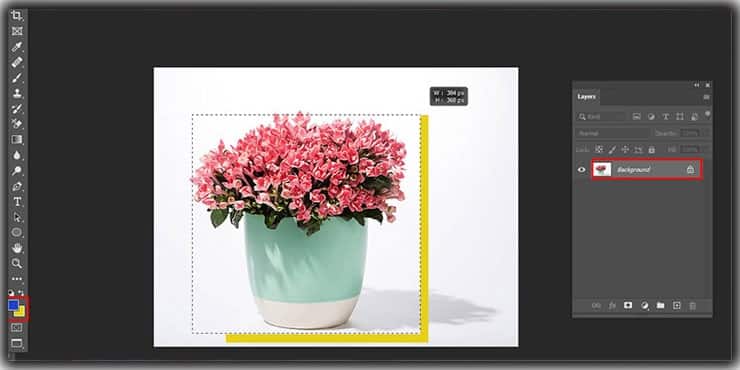
From Photoshop CC, if you want to move a particular layer independently, select the layer, then click on the move tool or use the shortcut key “V.” You can replace the layer according to your needs.
But in the PNG case, JPG images are locked in a particular background layer. If you want to move any specific area from locked or flattering images, you need to select the area with the quick selection tools, such as different marquee tools & then click on the move tool.
Besides, you can quickly move that area to the other side, but the selection area will be covered with a solid color that you choose from the color palate. ( Know the Basics of Photoshop Layers)
Elliptical Marquee Tool & Rectangular Marquee Tool
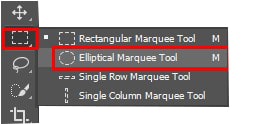
Marquee tool is one of the quick selection tools that help you to make a selection of images. You will find this tool under the move tool in the default toolbar.
However, if you choose the marquee tools & right-click on the mouse, you will get different types of marquee tools that help to select in a different pattern.
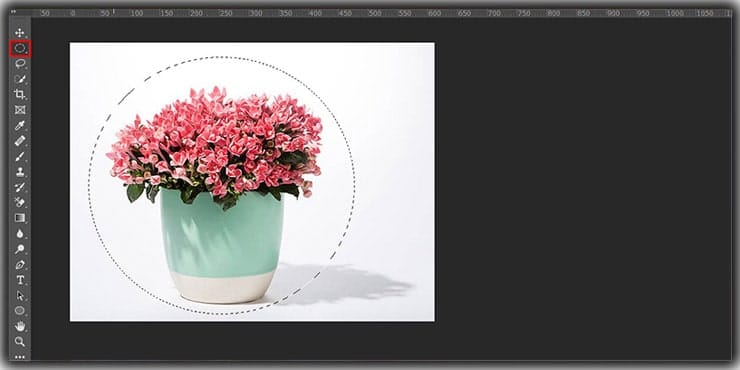
You can use the marquee tool to stretch or Extend the Background in Photoshop. Choose the Elliptical Marquee Tool or use the key “M” to get these tools. Elliptical Marquee tools help you select in a round or eclipse shape.
If you need this selection pattern, you can choose the Elliptical Marquee Tool. If you want to make a circle shape selection, choose Elliptical Marquee Tools & press on shift to get a proper circle shape selection.
Rectangular Marquee Tool
Both the Elliptical Marquee tool & the Rectangular Marquee tool assist you in selecting your images. When you pick the Rectangular Marquee Tool, the only difference is you can make the selection in a rectangle shape.
Press on the shift key to make a perfect rectangular shape selection.
So, according to your needs, you can pick the different types of marquee tools. If you want to remove the selection, you can right-click the mouse & choose to deselect or enter Ctrl+ D from the keyboard.
Lasso Tool

It is another kind of selection tool. You can click on the lasso tool or use the shortcut key “L” to get the lasso tool. There are three types of lasso tools available in Photoshop Cc.
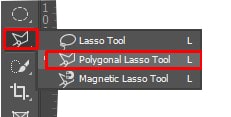
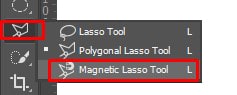
When you click on the lasso tool, you will find a pop-up. You can pick a lasso tool, polygonal lasso, or magnetic lasso.
If you choose a lasso tool, you can draw anything using your mouse. Just choose the tool & start selecting. Of course, you must end the selection from the starting point. But if you need precise selection, the lasso is not good.
Polygonal Lasso Tool
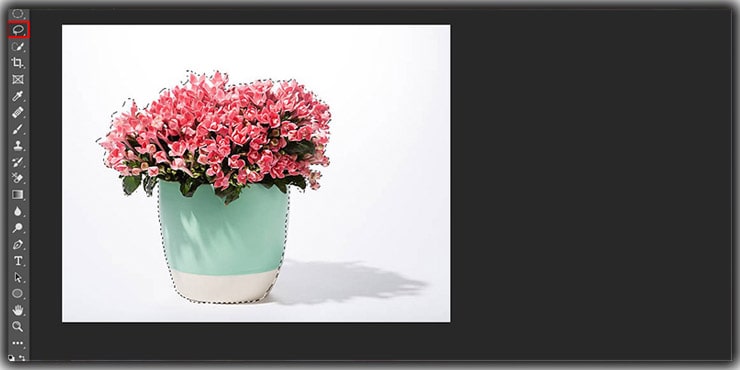
The polygonal lasso tool offers a more precise selection than the lasso tool. However, it is a straight-line selection tool, so applying it in a circular pattern is not wise. Instead, you need to click on the image to start your selection & where you want to end the straight line, click again.
The complete selection will be made when you click the starting point again. It is ideal for selecting any rectangular shape or straight-line object like the below images.
Magnetic Lasso Tool
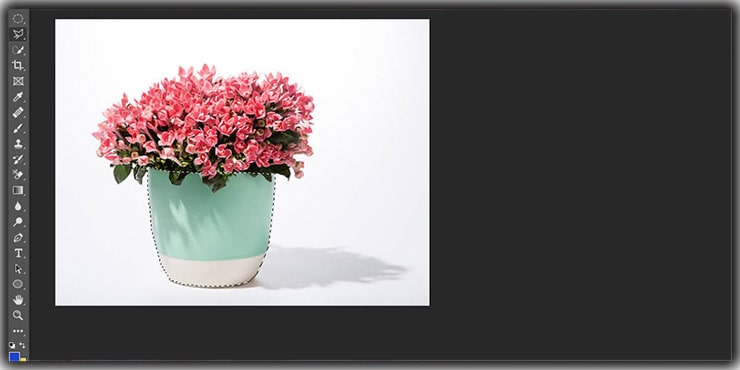
When you need precise selection but the edges are not straight or smooth, the best tool is the magnetic lasso tool. Using this tool, you can precisely select any complex portion from an image like the below images.
Choose the edges you want to select & go through the edges with the magnetic lasso tool to make a perfect selection. Your selection will be complete when you meet the first starting points.
It is a super easy & efficient way to select complex edges precisely.
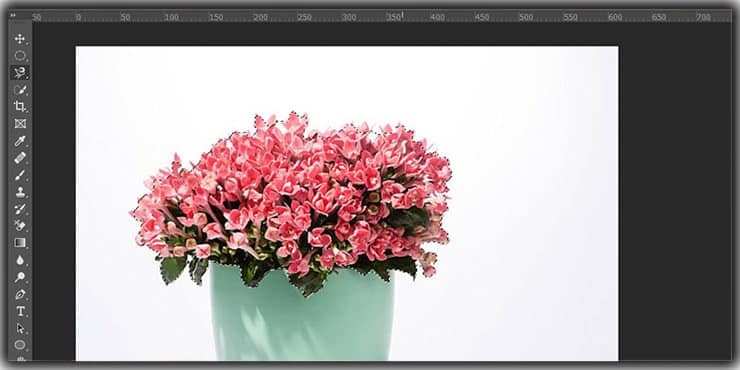
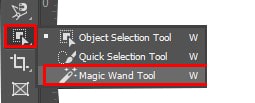
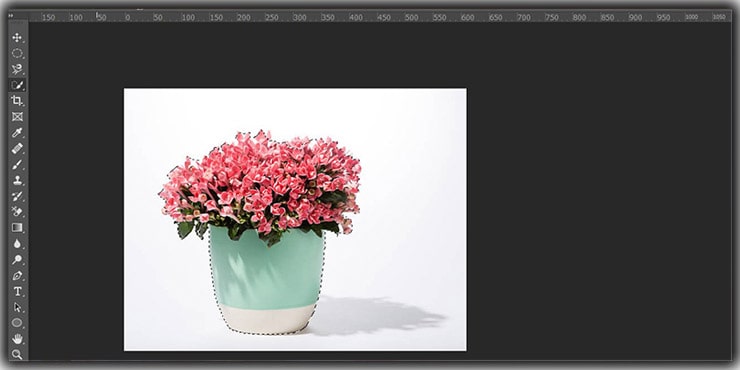
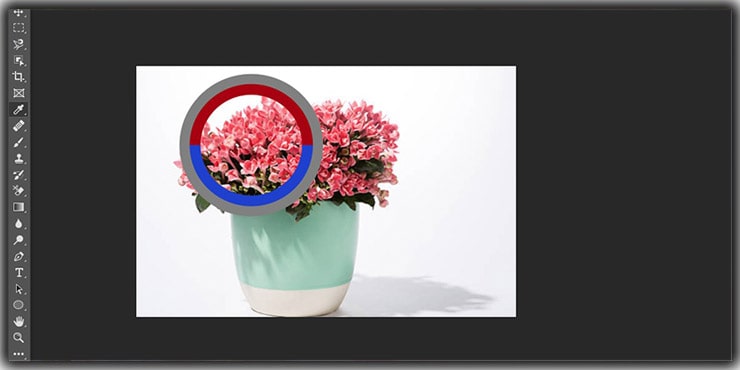
Magic Wand Tool
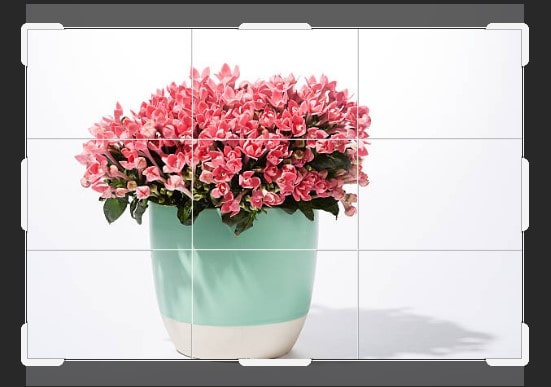
The magic wand tool is another type of selection tool that helps to select a portion of an image with a similar color. For example, if you have an image with a yellow flower, click on the flower petal to select the whole flower.
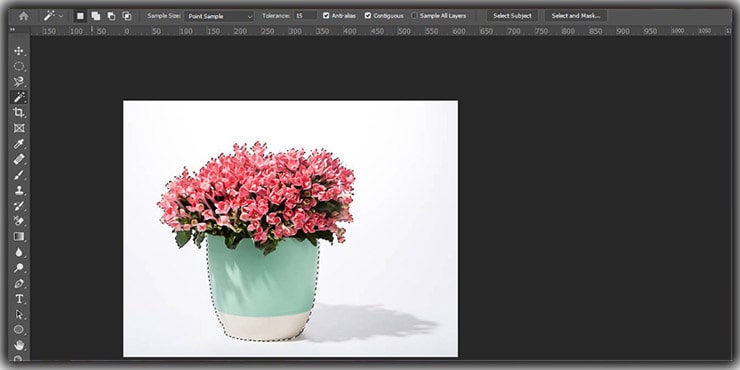
So, you should go for the Magic Wand Tool for the color base selection. It is a useful & most popular selection tool because it derives precise selection in crucial edges.
Quick Selection Tool
When you right-click the Magic Wand tool from the toolbar, you will find a drop-down & click the Quick Selection tool from the drop-down.
It is another magic wand tool that helps you select any particular object from an image. Then, you need to click on the specific object from the image.
The quick selection appears with a + sign. You can adjust the selection to enhance the edges by clicking on the edges. If you need to select any object, you can use the Quick Selection tool.
You can adjust the size of the quick selection tool by entering the “[and]” keys. That helps you to select efficiently.
Object Selection Tool
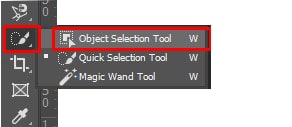
If you find the above adjusting challenging to select an object properly, the latest Photoshop CC comes with an easy alternative objective selection tool.
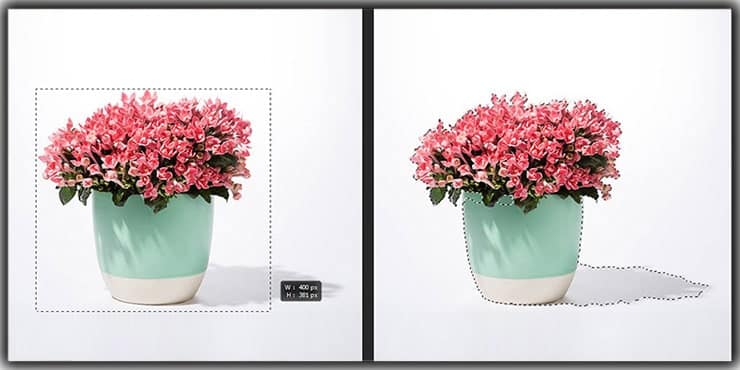
Here you don’t need any adjustment. Instead, from the drop-down, you click on the object selection tool.
Now select the particular object covering the area. Photoshop itself adjusts the edges to you a hassle-free selection experience. See the below images on how it transforms your selection & makes it efficient.
Filling Tools
When you are done with the selection, you can fill the selection with solid or gradient colors. That helps you to do background removal from an object.
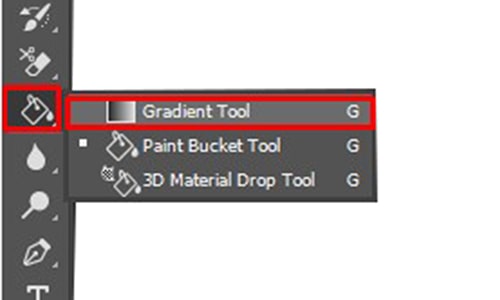
The Paint Bucket Tool
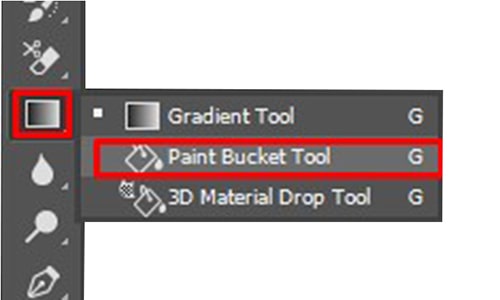
From the toolbar, click on the Gradient tool & you will find a drop-down menu & Choose the Paint Bucket tool from the menu. Now click on your selection.
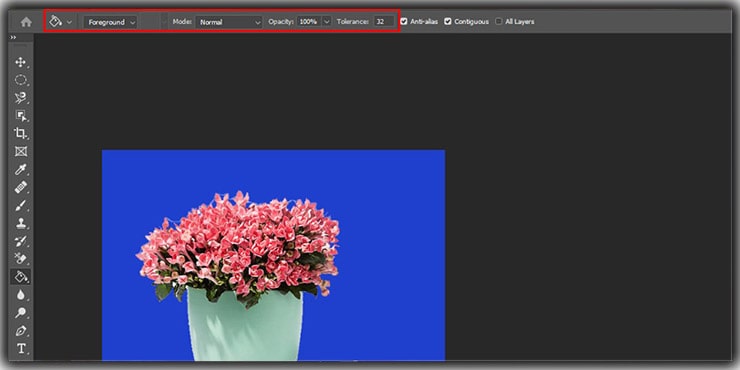
Photoshop will change the whole selection area’s color to the foreground color you pick in the Paint Bucket tool. You can also modify the blending mode, Opacity, and tolerance from the top of the options bar according to your needs & requirements.
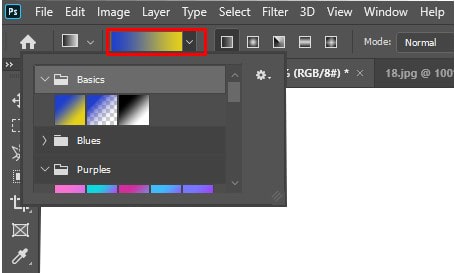
Gradient Tool
Suppose you want to fill your selection instead of a solid color. First, you need to click on the Gradient tool. Now draw a line within your selection. The angle you choose will be the angle of the gradient.
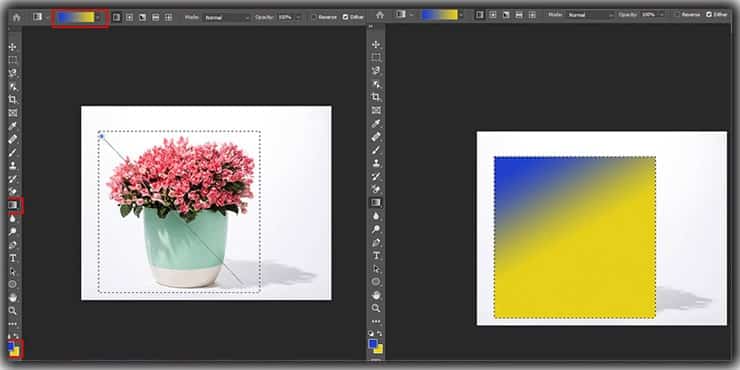
The default setting of a gradient starts with the foreground color & ends with the background color. But you can change the color using the Options Bar.
You can also adjust the Opacity. You can also apply the gradient tool without selection that will cover the whole image.
Crop Tool
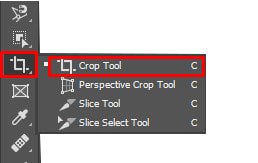
Crop Tool is essential when you have bulk images & need to have them in the same size to upload on a website. The crop tool is an easy solution to resize your pictures perfectly.

Hence, to Resize an Image for Amazon, it is always recommended to crop the image fast. It will save time and make it more attractive.
From the Toolbar, click on the Crop Tool & you will get a drop-down. You can pick the crop tool from that. In the options bar, you can also adjust the height & width & resolution of your images.
After adjusting the height, width & resolution, click on your photos to crop them. You can still modify the cropping by clicking on the corner portion of your images.
Eye Dropper Tool
Eye Dropper is a beneficial tool that helps you pick any color from your images & set it as the foreground color. The eyedropper tool is widely used to make a drop shadow of an object or person.
Click on the Eye Dropper Tool from the toolbar, or you can access it using the shortcut “I.”Now click on the image portion where you want to set the color. After you click on that area, the color will automatically be set as foreground color & you can use it for any other image.
Brush Tool:
The brush tool is essential for painting. You can click on the Brush tool from the toolbar or enter “B” to use the brush tool.
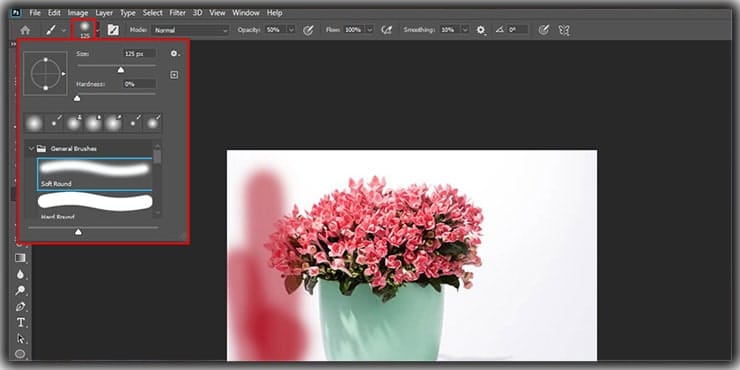
From the Options Bar at the top, you can adjust the brush size, hardness, Opacity, and Flow according to your needs.
Eraser Tool
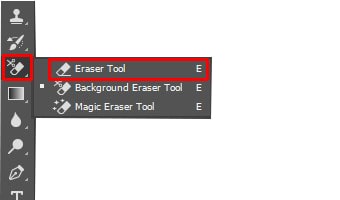
You can select the Eraser tool from the toolbar or enter “E” to get the Eraser tool. Now paint over the area you want to erase or remove from your images. It is an excellent opportunity to remove unwanted backgrounds.
But precise painting needs dedication & hard work. Note: The Photoshop eraser tool is not perfect if you want to make a transparent background. To make a transparent background, choose a tool (pen, lasso, object selection tool, etc.).
Magic Eraser Tool
Magic Eraser tool help you to remove similar pixel from an image. You don’t need to paint or make a selection.
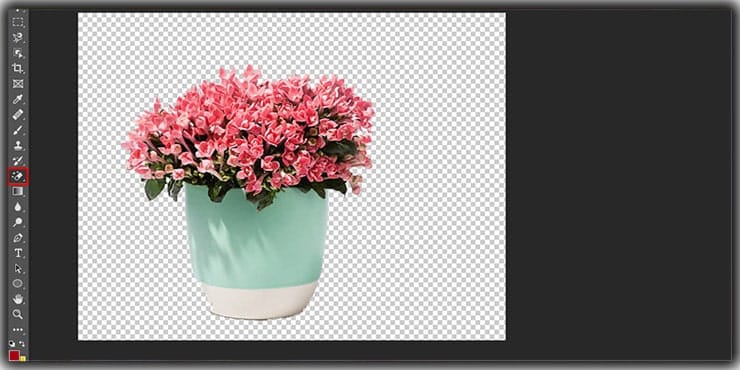
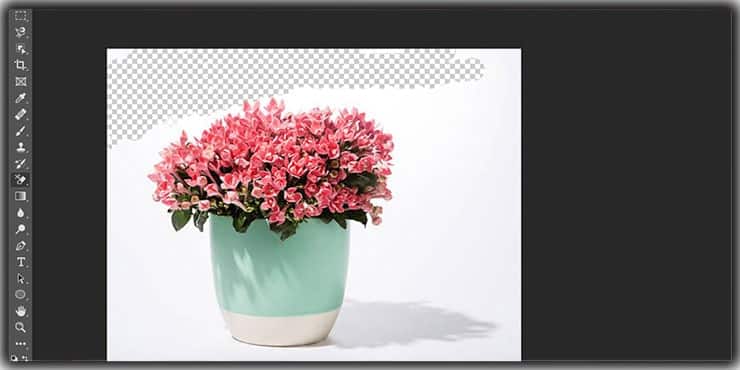
Just click on the portion you want to erase. Photoshop automatically removes a similar background. It is the most accessible tool for white Background removal.
Clone Stamp Tool
It is a fantastic tool that helps you to select any particular portion of your image & copy it within the same layer. It is essential to modify your old photos. Sometimes one side of your pictures can burn.
So it is helpful to recover the old images perfectly. Or you can fix fuzzy hair using the clone stamp tool. You can use this tool by shortcut “S” or selecting it from the toolbar.
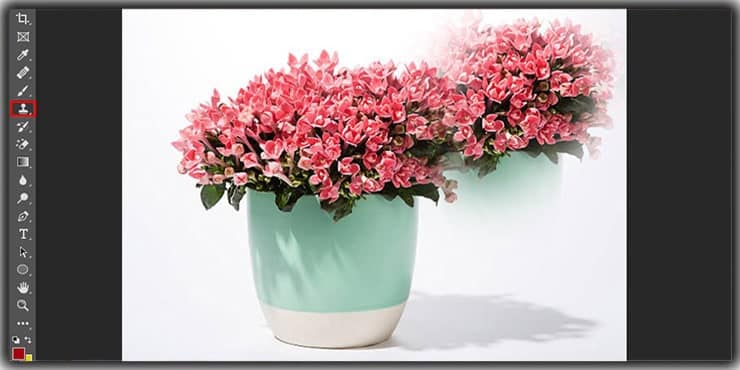
Now hover the mouse cursor over the images that you want to duplicate. Press the Alt key on Mac & press on the image. You will see the target symbol. Now place your cursor on the area where you want to put the duplicate symbol.
Click on your area & start painting. The target symbol will automatically be added here. Photoshop services are essential, but using this tool is a little bit complex & needs more practice.
Healing Brush Tool
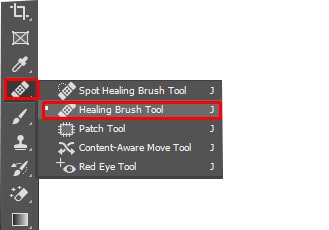
Healing Brush is a magical tool for photo retouching. It helps remove blemishes, spots, scratches, and dust from the images. You can remove the imperfections from a photograph by painting with a healing brush.
You can choose it from the toolbar or use the shortcut keys J. This tool needs dedication to efficient painting & professional retouching.
Photoshop retouching services are not fulfilled without a healing brush. I.e., you can use the healing brush tool to smoothen skin.
Dodge & Burn Tool
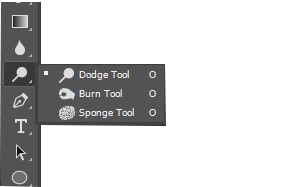
The Dodge & Burn tool is a helpful tool for adjusting the lighting in the image. You can pick it using the shortcut key “O” and click on the toolbar.
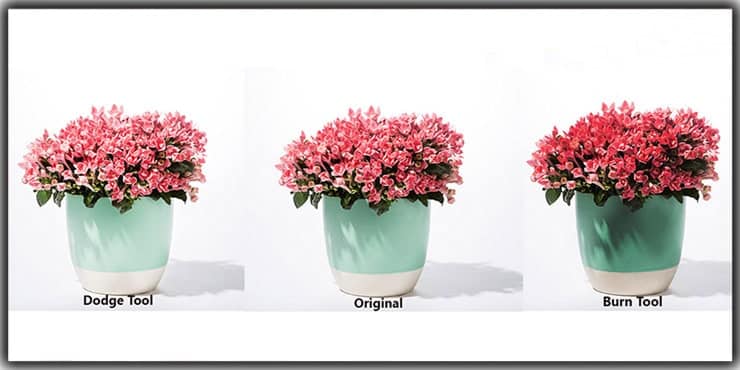
When you need to darken any shadow, you better click on the burn tool & paint over the area. When you need to brighten any area, select a dodge tool & paint over the area.
Zoom Tool
The zoom tool helps you to zoom in or zoom out your photo to select precisely & make efficient editing.
Pen Tool:
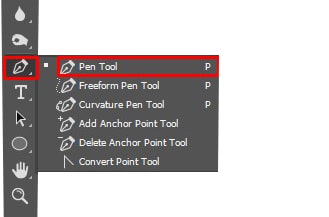
The pen tool is the masterpiece to make you the boss of Background Removal or perfect Vector Art. First, you need to select the pen tool from the toolbar & click on the object & drag it to create a handle that helps you to modify the shape.
You can create a new anchor point by right-click on the mouse. Though the pen tool can derive efficient Background Removal, it is not easy to create a clipping path.
You need dedication & hard work to be an expert in using the pen tool. This process is called a clipping path.
FAQs
The Move Tool is the most logical starting point because it’s used constantly and builds an immediate understanding of how layers work. From there, the selection tools — Marquee, Lasso, and Magic Wand — form the foundation for almost every editing task that follows. Getting comfortable with selections early makes every other tool in Photoshop significantly easier to use.
The standard Lasso Tool requires you to manually draw the entire selection freehand, which makes precision difficult on complex shapes. The Magnetic Lasso automatically detects and follows edges as you trace along them, snapping to contrast boundaries on its own. For subjects with irregular but defined edges, the Magnetic Lasso saves considerable time and produces cleaner results.
The Magic Wand selects pixels based purely on color similarity from a single click point — it works well on flat, uniform areas like solid backgrounds. The Quick Selection Tool lets you paint across a broader area and reads both color and texture together, making it more adaptable for subjects with varied tones or uneven edges. Neither is universally better; the right choice depends entirely on what your image looks like.
It duplicates a specific area of your image and paints it elsewhere within the same layer. This makes it particularly useful for restoring damaged or burned sections of old photographs by borrowing intact texture from nearby areas. The Healing Brush blends sampled content with surrounding pixels automatically, while the Clone Stamp reproduces it exactly — giving you more literal control over the replacement area.
These two work as opposites. Burn darkens specific areas — useful for deepening shadows or adding contrast to particular regions. Dodge lightens areas to bring out highlight detail or brighten a subject’s face. Together they allow subtle, localized tonal adjustments that would otherwise require multiple adjustment layers to achieve.
Every other selection tool makes assumptions — about color, contrast, or edges — and those assumptions introduce errors. The Pen Tool places every anchor point deliberately, giving you complete control over exactly where the selection boundary falls. That precision is what makes it the preferred tool for professional background removal, clipping paths, and vector artwork where accuracy genuinely matters.
Introduced in more recent versions of Photoshop CC, the Object Selection Tool uses AI-assisted edge detection to automatically refine selections around a subject once you roughly indicate the area. Unlike the Magic Wand or Quick Selection tools that require manual adjustment of edges, the Object Selection Tool handles much of that work automatically — making it one of the most efficient options for beginners tackling complex subjects.
Conclusion
Here is a complete guideline for beginner designers to introduce Photoshop CC. Of course, you will be successful if you practice it efficiently & use the right tool according to your needs.
However, if you want to learn image editing using the latest Photoshop, you can follow the links below.
You may read:
Background Eraser Tool in Photoshop CC

Salim Ahmed is the CEO of Graphic Experts India, with over 25 years of expertise in photo editing, clipping path, image retouching, and eCommerce image editing services.