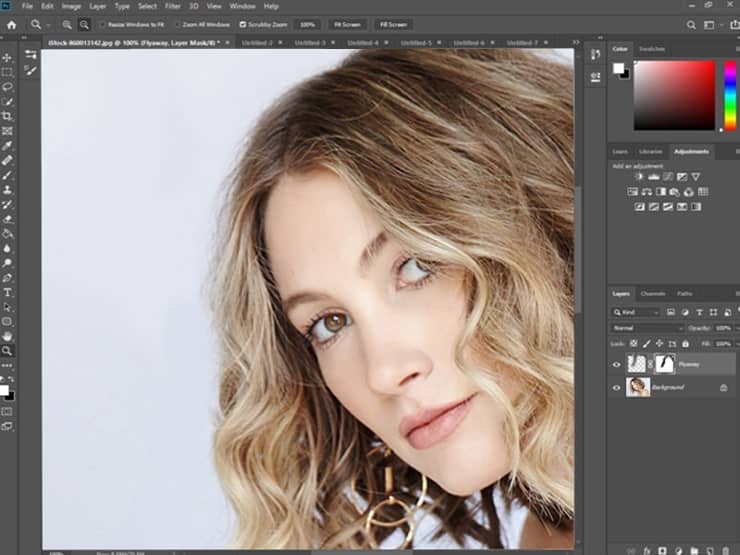
Fixing flyaway hair using hair retouching in photoshop is one of the complicated & crucial steps that every photographer faces. The most challenging part is every hair has its unique style.
The method you pick to fix frizzy hair varies from one hair to another. However, there is no easy one-click solution to fix frizzy or curly hair if you drive for perfection!
You need to fix each hair by hand gradually using some tools & techniques. If you learn the process, that must benefit you. Flyaway hair is sometimes highly distracting.
But yes, if you follow the below method to fix flyaway hair, you are surely amazed to see the output. I am covering here the most popular & efficient method of hair retouching that can apply all kinds of hair.
No matter whether the style or hair color. If you are a designer or photographer, you learn essential skills to eliminate flyaways in the photograph.
Here’s how you can deal with fly away in Photoshop. Keep reading to jump into a fantastic transformation from a frizzy image to an eye-catchy one.
What Causes Frizzy Hair
Flyaway or frizzy hair can cause wind, static, or hair free of ties when you use hats or headbands or wear clothes on the head that make static cling when hair & a fleece are pulled against. This raises an electric charge on your hair.
When your hair doesn’t get any moisture in the air that charges from one hair to another. So, the hair looks wild or frizzy.

Fix Frizzy Hair in Photoshop
If you are looking for a quick fix to frizzy hair in Photoshop, then this tutorial might be just what you need. It’s super easy to follow along with, so if you’re new to editing photos or have never edited one before, you’ll find this guide really useful.
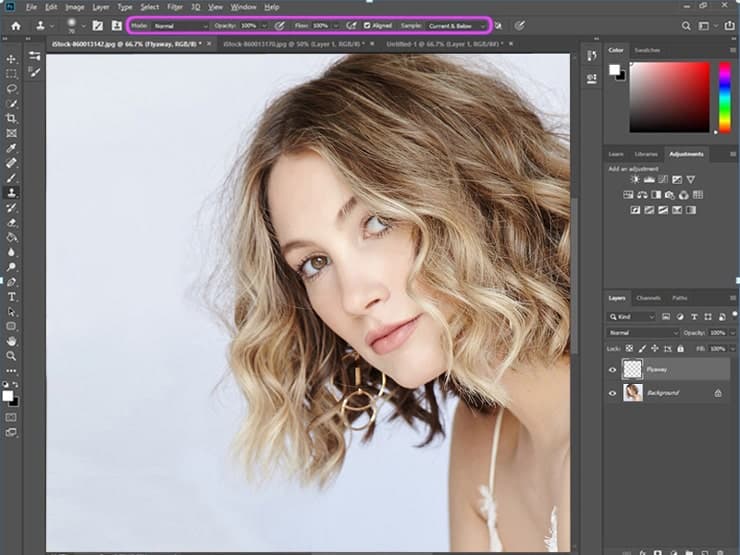
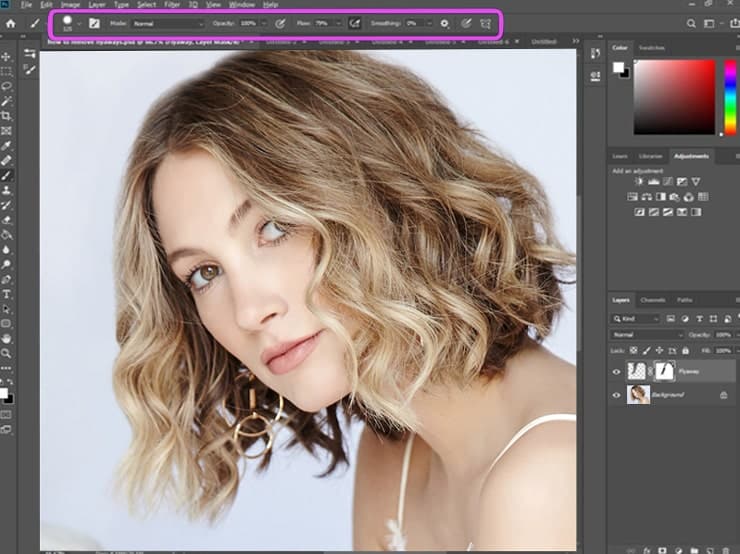
Step1: Open The Image & Apply Clone Stamp Tools
Open Photoshop. From the menu bar, choose File > Open > Select your image. After opening the image, add a new layer. Look at the menu bar on the left side & pick the clone stamp tool & apply the below modification.
- Set the Mode: Normal.
- Keep Opacity: 100%.
- Select Flow: 100%
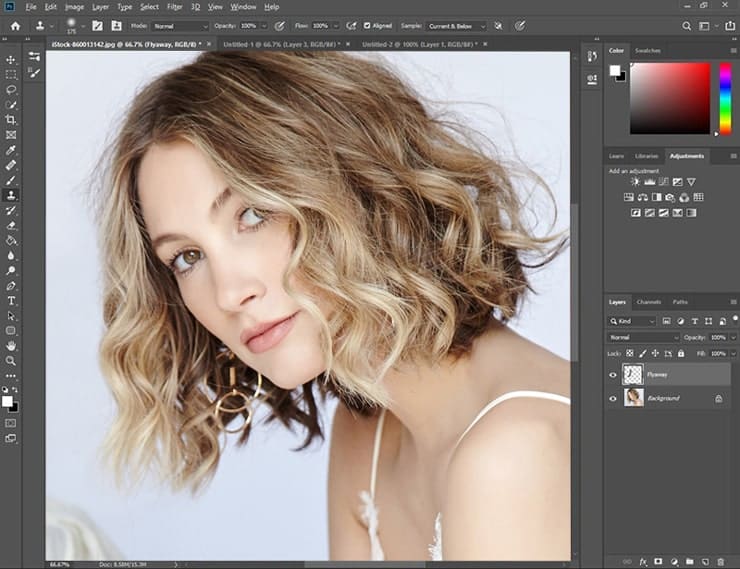
Step2: Let’s Start to Paint all Over the Excess Flyaway Hair
Now the aim is to choose the source. If you use Mac, hold down the ALT key & click on any point in the image background.
Let’s paint all over the excess flyaway or windblown hair. It does not need to be accurate. We can maintain the edge accuracy in further steps using some tricks.
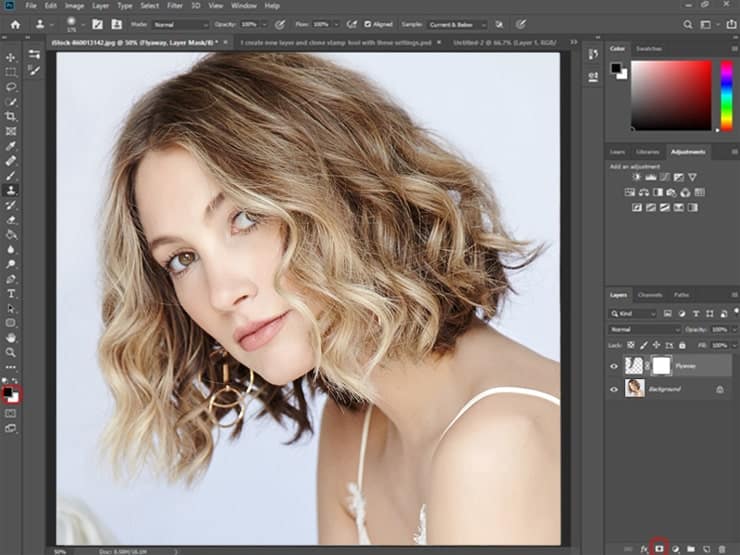
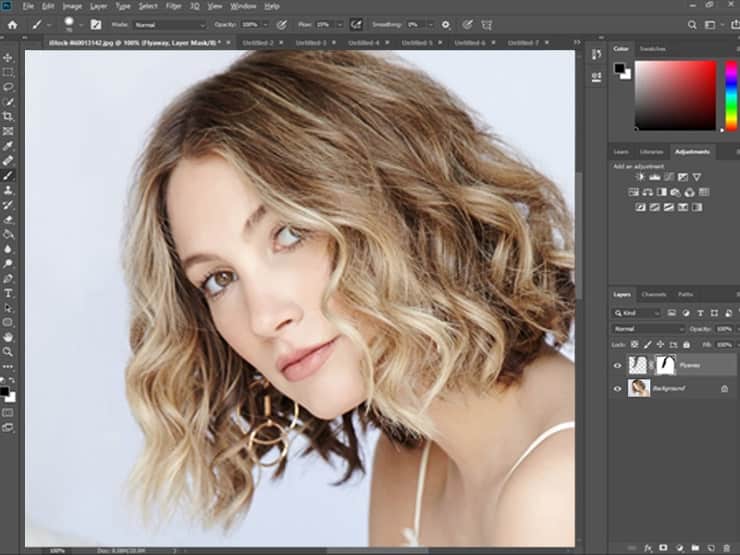
Step3: Add a Mask to the Layer That You Create
Here you need to add a Mask to the layer that you create. Now select the Rectangular tool with a circle shape at the bottom. You should ensure that the foreground color is chosen to be black, as in the given picture.
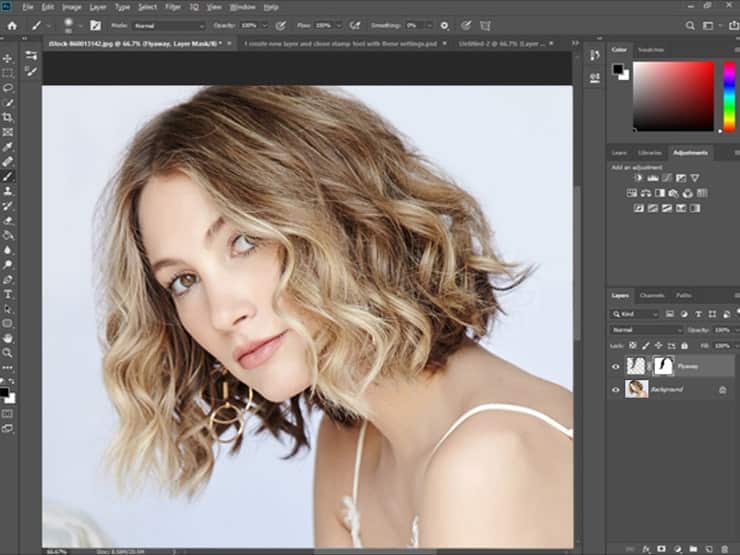
Step 4: Do Any Unwanted Painting Over Excellent Hair
Now, you will pick the Brush tool & apply it to the mask to bring out some hair that was painted before. If you do any unwanted painting over excellent hair, you can now quickly revive the hair.
Step 5: Pen Pressure
Now you need to modify your Brush settings. From the menu, choose window> Brush> settings.
You will find a new pop-up menu like the below images. You need to mark off the Transfer & select the control drop-down to “Pen Pressure,” as in the below photo.

Step 6: Refining Your Work
As you select the foreground color to black, paint over the mask to bring frizzy hair. When you need to hide the flyaway, paint it over using white.
You can easily change the foreground color by pressing X. You can switch between white & black according to your need.
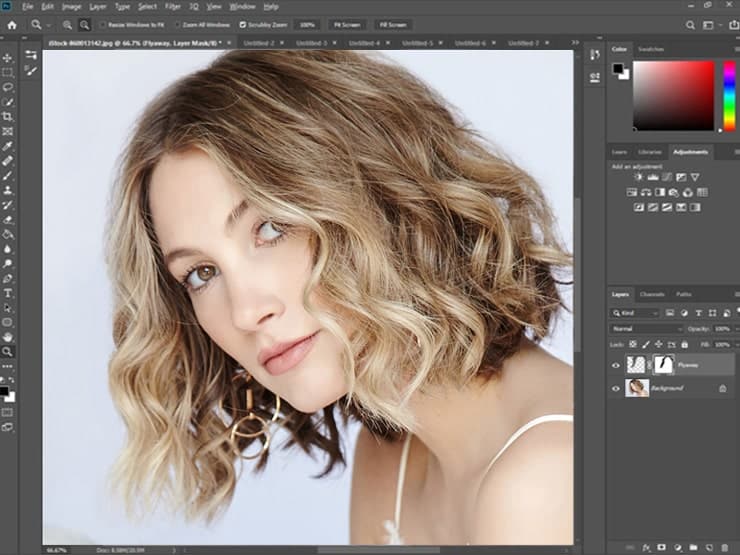
Step 7: Check the Results
Check the result. If the outlook satisfies, you can stop your retouching. But you can see still the image contains some frizzy hair that is slightly visible.
Step 8: Zoom in to Observe Closely
Now zoom in on the photo closely to add or hide frizzy hair precisely according to the picture’s demand.
Step 9: Make it Realistic
Our target is to make the hair shapes more realistic & shiny without any frizz.
So, you jump to hide the frizzy hair with some volumes of hair. You must ensure the edges look natural. If it becomes much thinner or soft, you must swap the brush settings to produce appropriate hair edges.
Step 10: Modify Windblown Hair
Now you need to modify the Flow settings to 80%. Moreover, to make the edges more sparkling, hardened the brush.
You can keep trying to derive better output. It’s the overall instructions you need to follow & maintain to fix windblown hair.
Step 11: Blurring the Edges (Optional)
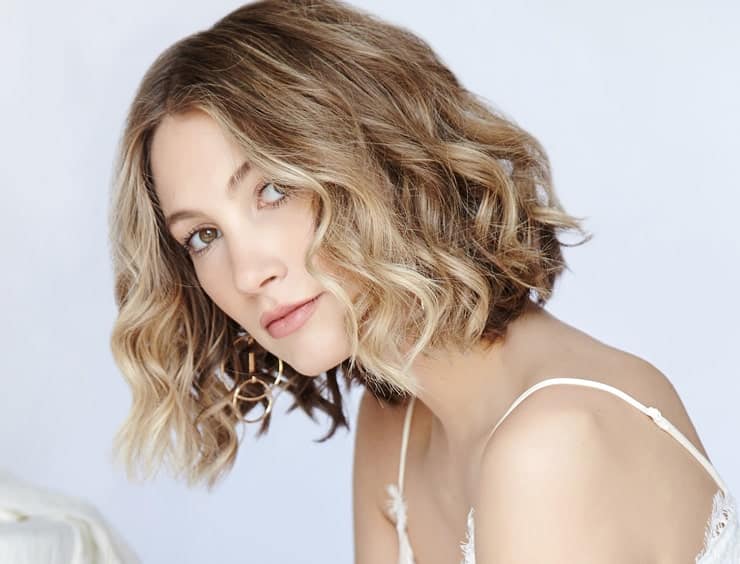
See our final transformation of a frizzy hair image. Here we add an extra step of blurring the edges on a different layer. We apply the Blurry tool that makes the hair softer.
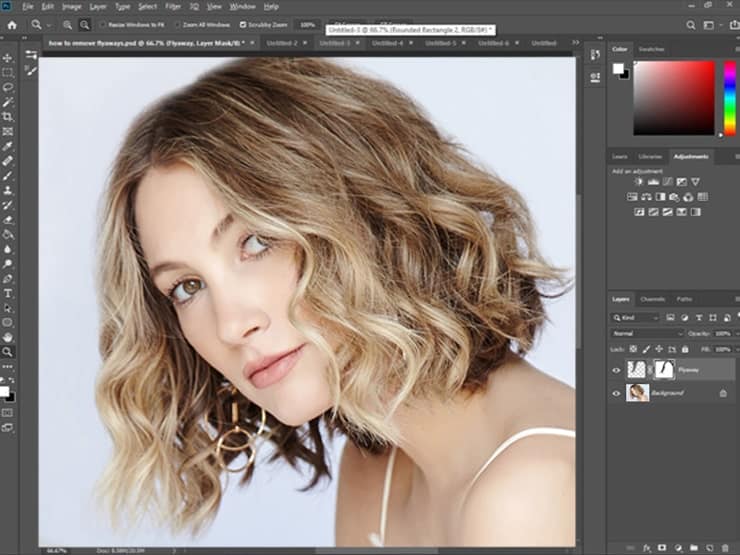
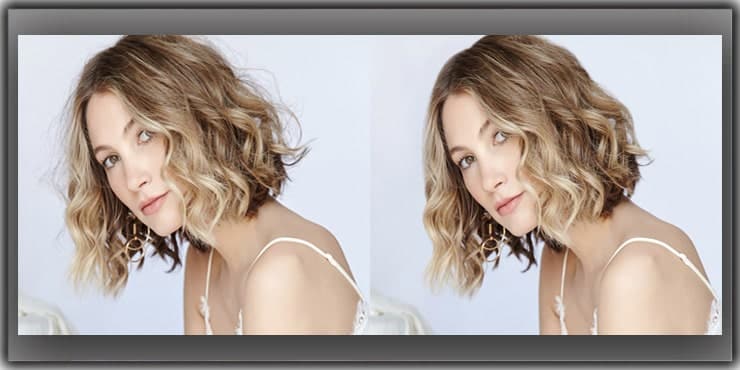
Step 12: Warp up the Work
Check the final comparison to realize the changes by the below before & after images together. You can modify the outlook according to your choice.
Advance Tips on Fixing Bulk Images with Frizzy Hair
Generally, flyaways are crucial to handle. There is no technique to bound the wind to arrange any prevention method from a frizzy hair photograph. So, you need to overcome the problem by applying my technique.
Frizzy hair on a celebrity’s face or an empty surface creates a wrong impression. It can bring negative feedback to your photography.
So there is no scope to avoid frizzy hair. I discuss a hassle-free method below.
Do you think the above method is very tough? Or you don’t have enough time to follow this lengthy step. But you want to fix stray hair perfectly. Don’t worry; I will share a time-saving solution for you.
There is a fantastic Photoshop service provider who can perfectly fix frizzy hair. It is affordable & time-saving. You must pick the proper hair masking or retouching to get exclusive service.
Check their sample work or grab a free trial feature to find the best Photoshop service.
The Photoshop service provider has some professional, skilled & experienced hair retouchers to give you a natural hair look without any slight frizz. Remember one thing experience has the power to do a miracle.
Their years of experience in Hair Retouching can change your photo look. Who knows, an outstanding photograph can build your career & make you famous.
Never compromise with the quality outlook for a bit of money, Whether you pay attention to applying the first method or outsource Photoshop services to get a professional photo without frizzy hair.
The aim is to give the hair a natural look that removes image distraction. But to achieve perfection, do not chase the hair too much, which makes the hair look artificial or edited.
So, you should deal carefully with the healing brush to avoid this.
FAQs
The Clone Stamp Tool is widely considered the most effective option for removing flyaway hair. It lets you sample a nearby area — usually the background — and paint over the stray strands. Combined with layer masks and the Brush tool, you get clean, precise results without damaging the original image.
No, and you really shouldn’t. Always create a new layer before applying the Clone Stamp Tool. This keeps your original photo intact and gives you the freedom to undo or adjust specific areas without starting from scratch.
This usually happens when the edges are too sharp or the painted area doesn’t blend with the surrounding hair. Try softening your brush, adjusting the Flow to around 80%, and enabling Pen Pressure under Transfer in the Brush settings. Small tweaks like these make a huge difference in how natural the final result looks.
That’s where the layer mask comes in handy. Select the mask, set your foreground color to black, and paint over the area you want to reveal. If you need to hide something again, just switch to white by pressing X. It’s a back-and-forth process, but it gives you full control.
Yes. The Clone Stamp Tool works across all kinds of backgrounds — solid, gradient, or even complex textures. The key is sampling the right source point that closely matches the area you’re covering. For tricky backgrounds, zoom in and take your time choosing the source.
If you’re dealing with a large batch of photos, doing it manually for each one gets exhausting fast. Many photographers outsource bulk hair retouching to professional Photoshop service providers. It saves time, ensures consistency, and often turns out cleaner than rushing through dozens of images on your own.
When you enable Pen Pressure under the Transfer option in Brush Settings, the opacity of your brush strokes responds to how hard you press on a drawing tablet. Light strokes produce subtle changes, while firmer pressure applies more effect. This gives you finer control over edges, which is critical when working near real hair you want to keep.
Honestly, less is more. Once the obvious flyaways and distracting strands are gone, step back and zoom out to view the full image. If the hair still looks like hair — with natural volume, texture, and edge variation — you’re done. Over-retouching is just as noticeable as leaving the frizz in, so trust your eye and know when to call it finished.
Final Words
If you are a newbie & required perfect Hair Retouching, undoubtedly choose Photoshop Service. It is the better & right choice for you.
But if you are confident & expert, please follow my method carefully to get the best result. Let’s play with your image according to your choice & requirements.
This method will increase your photo editing skills in photoshop & satisfy you with the output.
You May Learn more:

Salim Ahmed is the CEO of Graphic Experts India, with over 25 years of expertise in photo editing, clipping path, image retouching, and eCommerce image editing services.