Do you want a transparent version of your logo? Or do you want to create a product cutout to create a composite? Converting a white background into a transparent BG is necessary for several reasons. The good news is that Adobe Photoshop CC 2025 has many tools to help you do so.
So, how do you convert a white background into a transparent background? You can use the Magic Eraser tool, Background Eraser Tools, or Quick Selection tool. Choose the tool type according to your background editing requirement.
In this tutorial, we will share each method step by step. Continue reading.
How to Convert a White Background into a Transparent Background – Step-by-Step Tutorial
Remember that the industry standard for a transparent background is the white and gray checkered grid. So, the BG is transparent when the grid appears in your image.
Method 01:
Convert Image Background Transparent With Quick Selection Tool
Many graphic designers use quick selection tools for the process. Here are the steps you need to follow.
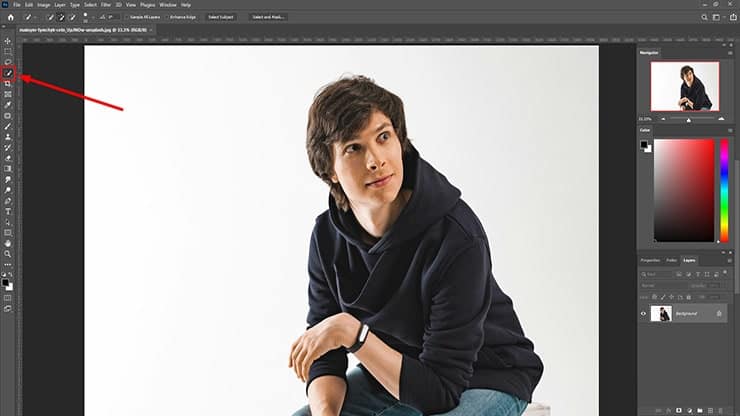
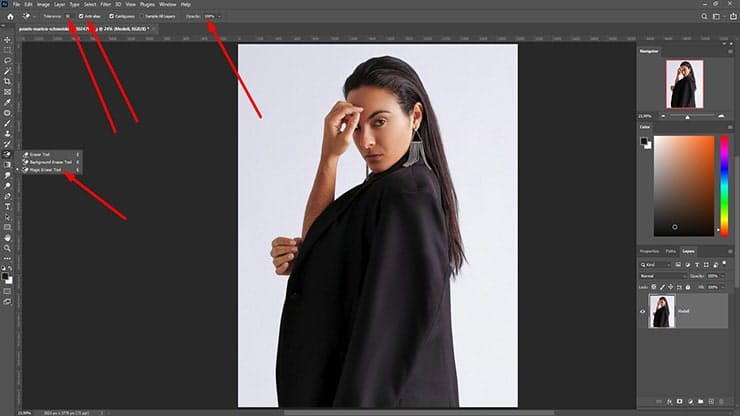
Step 01: Open an Image with a White Background
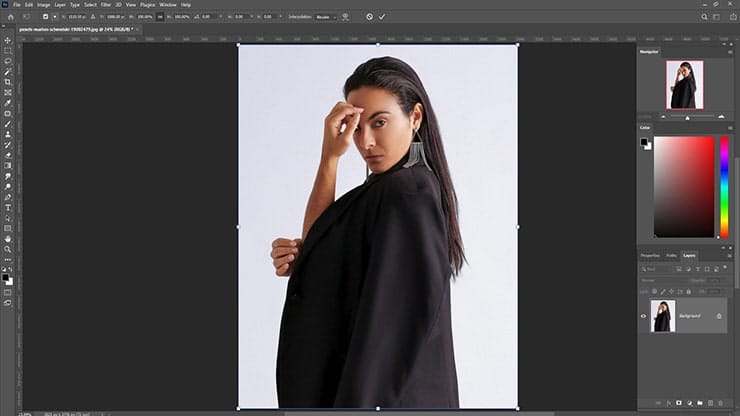
Open the image in Photoshop. Go to File> Open and choose the required photo. Following this tutorial, you can change a white background into a transparent background of any image.
I chose an image that has a white background.
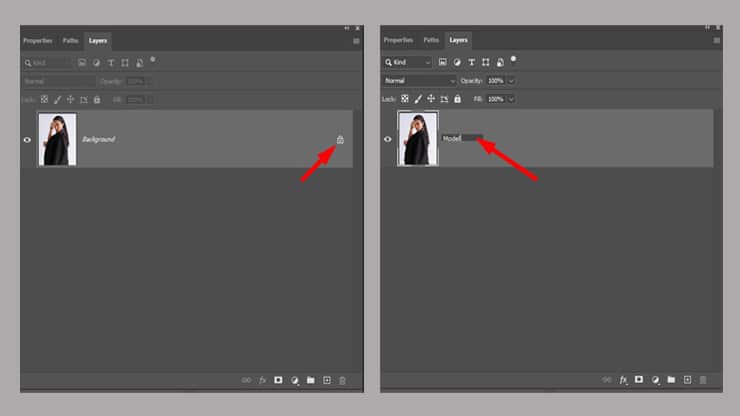
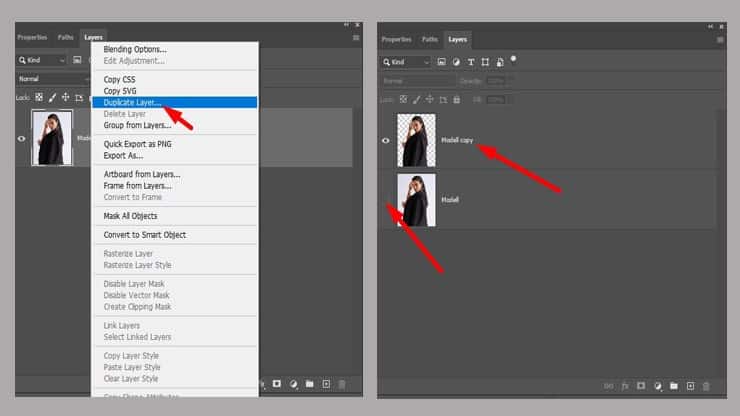
Step 02: Duplicate the Photo
Now, hit Ctrl + J to duplicate the layer. Duplicating the layer is a crucial and common task while working in Photoshop. Thus, you are keeping a backup of your original photograph. So, you have two layers: background and copy of background

We will wait to work with the background. You can delete or hide it by clicking the eye icon next to the BG layer.
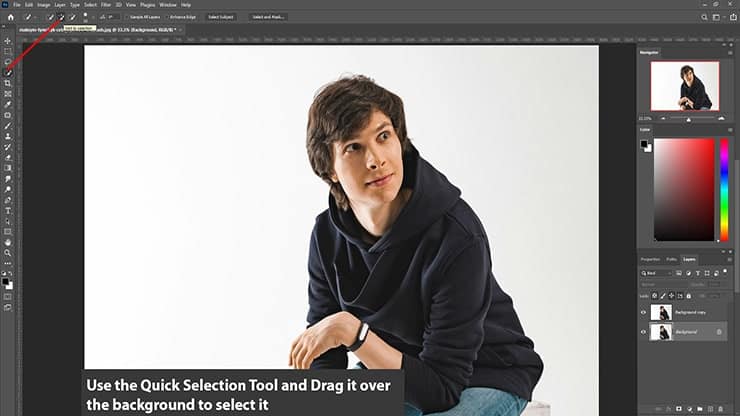
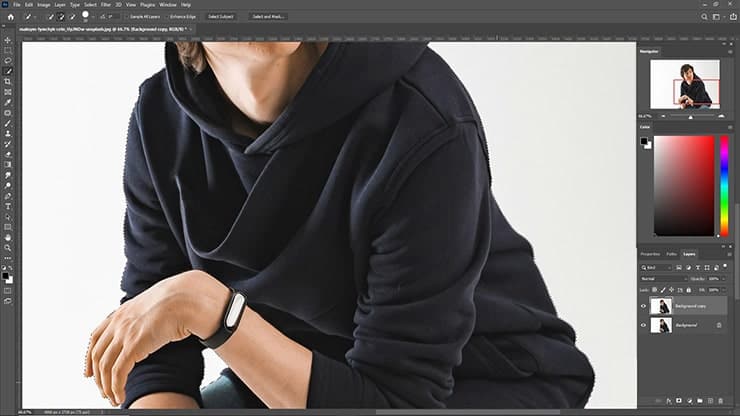
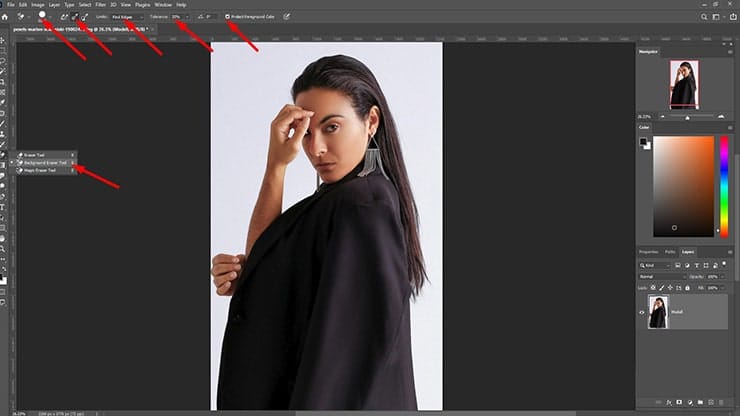
Step 03: Choose Quick Selection Tool and Make Selection
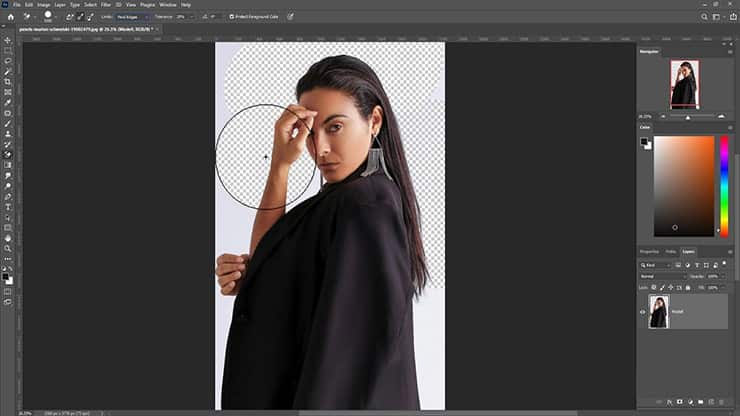
We will select the BG using the Quick Selection Tool in this step. Choose the tool from the left-side toolbar. You can also use shortcuts. So, press W.
Also, activating the “Add to Selection” option is essential. Please enable it from the option bar. Then, drag your mouse on the BG. This command will let you select the background. Marching ants will appear when the BG is selected.
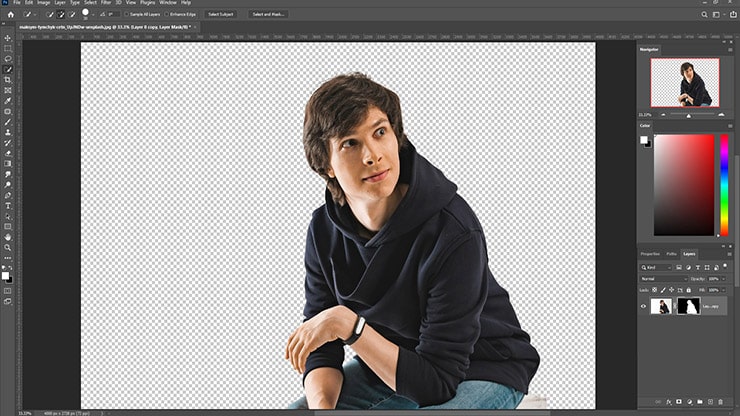
Remember that the Quick Selection Tool works based on color sampling. It means the tool may select the color if your object is near white or white.
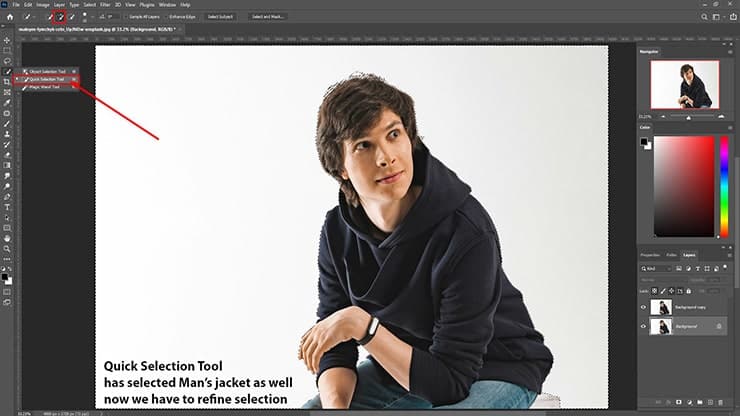
You might have seen that the gray color of the subject’s jacket is nearly white. The chance is that the tool will select the gray color. See the image below, where the tool has selected a part of the gray jacket.
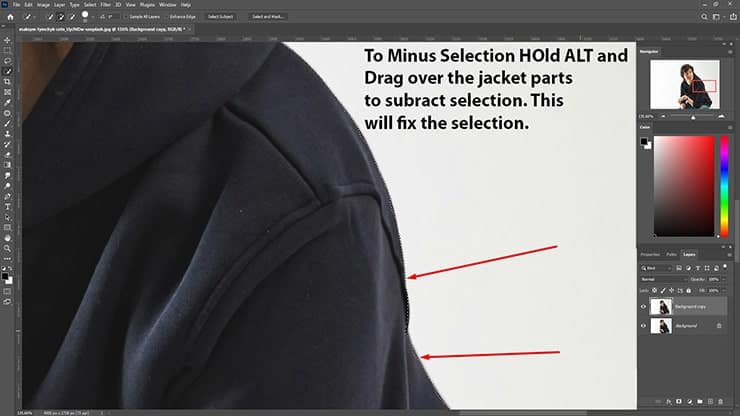
How to fix the Selection?
All you need to do is minus the selection. You can do this in two ways.
- Hit the Alt key
- Go to the Options Bar and click Subtract from Selection
Now, click on the area where correction is necessary. Find the photo below where I corrected the image.
Step 04: Make the Background Transparent
In this step, we will remove the background using a layer mask. The benefit of a layer mask is that you can UNDO the work anytime there is an error.
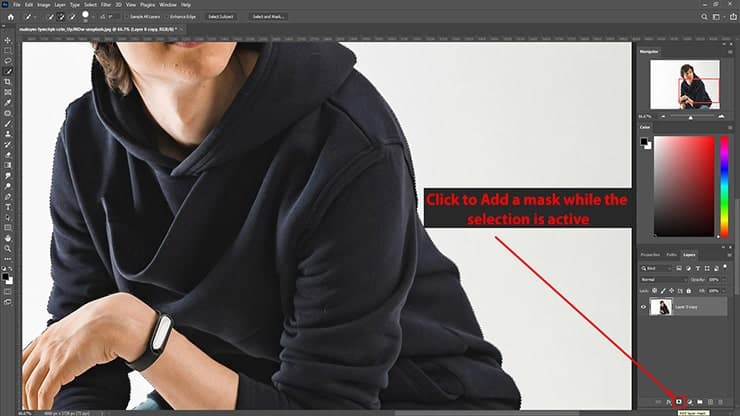
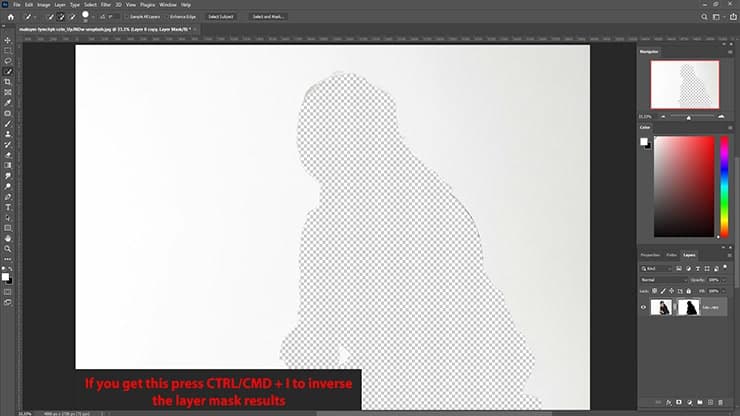
Hover your cursor to the bottom of the layer panel and click the second button. The selection will enable the Layer Mask in the bottom panel. The image below is the outcome with transparent BG.
If you want to inverse the result, hit Ctrl/CMD + I
Did you remove some parts of the image you don’t want to delete? No worries!
Layer Mask will let you solve the error. For this, select the Layer Mask again and start painting over the area you want to make visible using the White Brush.
The quick Selection tool can leave unwanted visible hard edges around the object. The hard edges need to soften. Select a soft, round black brush and paint over the layer mask to solve it. This way, the outcome will be better than before. I prefer using this process to clean up the undesirable parts or edges.
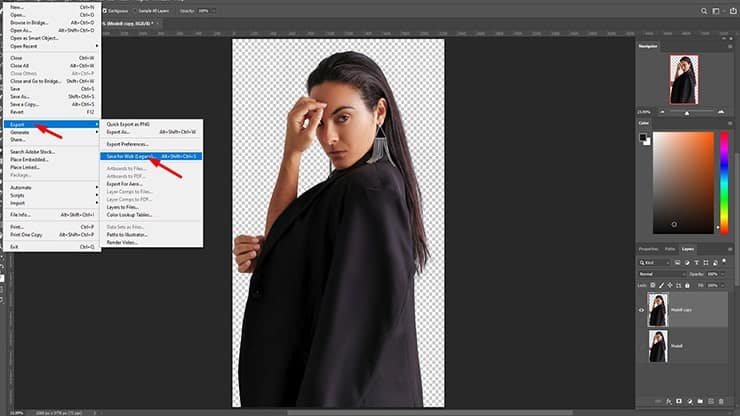
Step 05: Save the File as a Transparent PNG
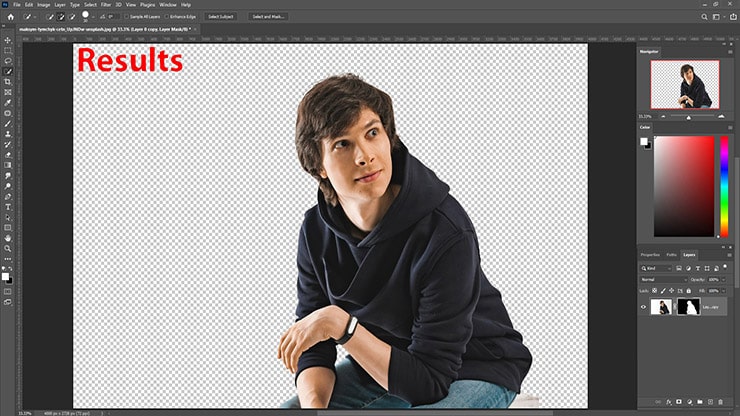
You have converted a white BG into a transparent BG.
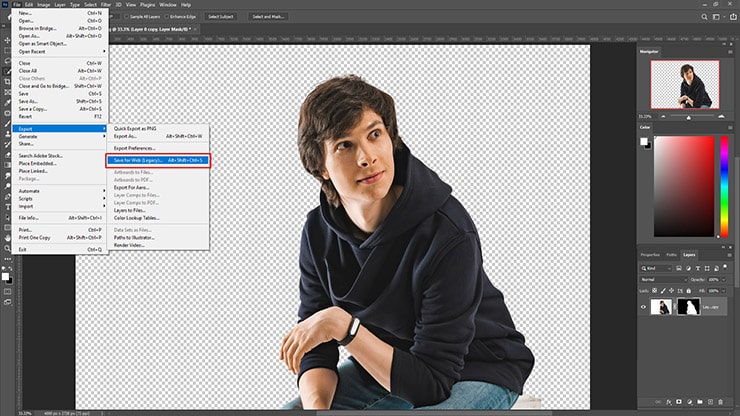
But the work still needs to be completed. We need to save the File.
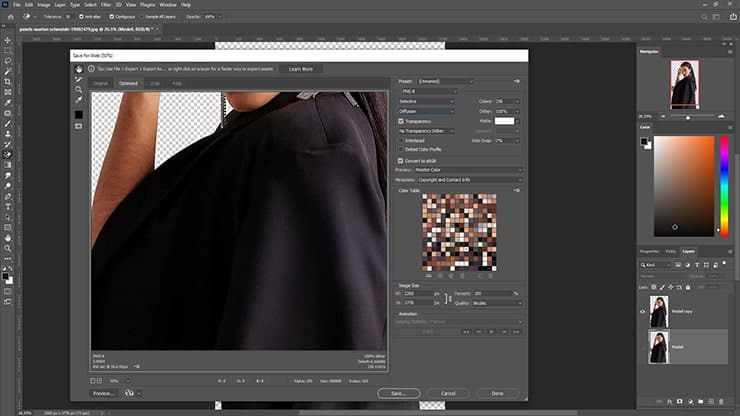
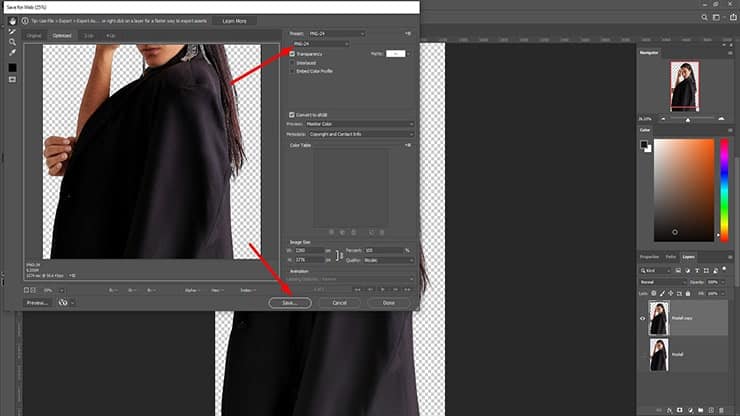
Hover your mouse over the Options bar and select File> Export > Save for Web. Then, you will see a dialog box.
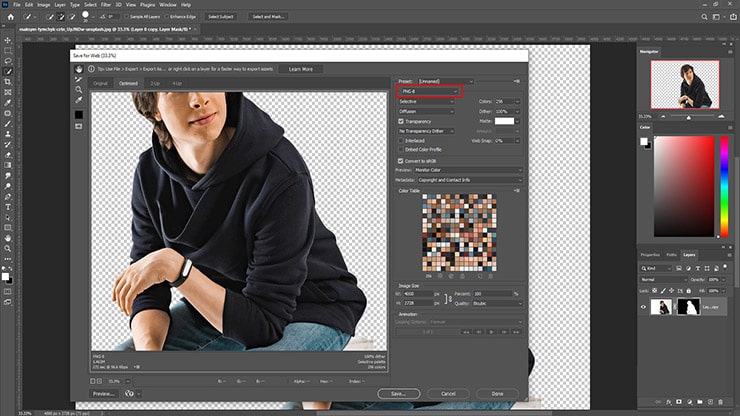
I recommend saving the image in PNG-8 format. Avoid saving the image in JPEG format because the White BG may reappear in the photo.
Locate the PNG-8 format beneath the Preset Box. It will help you save the File in PNG.
However, I prefer the Save for Web option.
Wondering why?
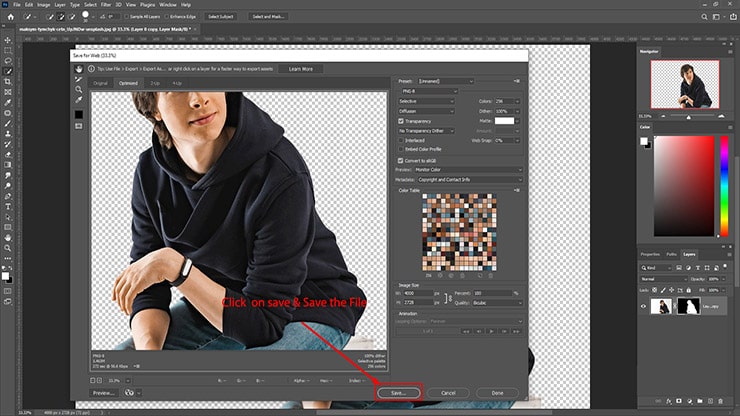
“Save for Web” offers several benefits. You can set the image resolution, minimize the quality, or blur the photo. The option even allows you to preview the image with multiple color settings. Remember to give the File a name when saving it. This will help you find the File without hassle later.
Here is the outcome.
Method 02:
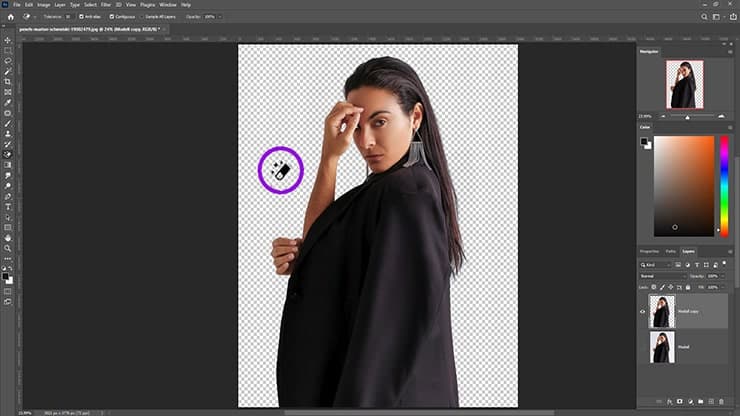
Make Transparent Image Background Using Magic Eraser Tool
The Magic Eraser tool is another excellent option for changing a white background into a transparent BG. To use it, follow the steps below.
Step 01: Open Your Image
Open the photo you want to edit in Photoshop. Align the image to the center of the artboard. This will help you edit the image easily.
Step 02: Layer Unlocking
Click the lock icon to unlock the layer in the Layer Panel. The layer will then become editable, and you can rename it according to your preferences.
In contrast, duplicate the first layer and make a new layer. Next, click on the “eye icon” next to the new layer to hide it. This requires fixing the errors that you can make during the editing process.
Step 03: Choose the Magic Eraser Tool
Hover your mouse to the tools panel and select the Magic Eraser Tool. I recommend using the references below.
- Tolerance: 30
- Anti-Alias: Checked
- Opacity: 100%
Step 04: Background Erasing
The white BG will disappear once you click on it.
However, the process has yet to finish!
Our image has a light-colored section that disappears after we use the Magic Eraser Tool. However, the Magic Eraser tool will not work perfectly if your image has a light area. In the following method, we will use the Background Eraser tool.
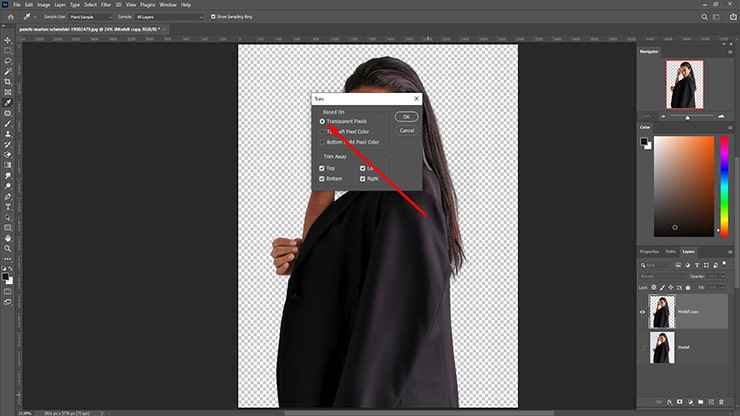
Step 05: Trim & Save the Image
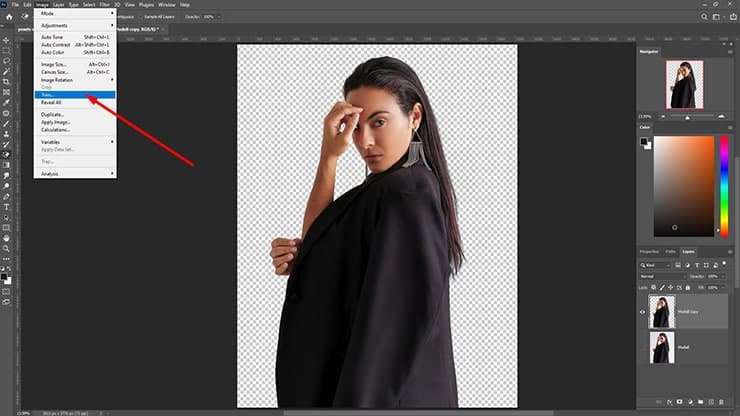
The Trim option is available under the Image Tab. The Trim will cut off Extra Transparent Bits around the cutout.
Then, save the image in PNG file format. To do this, click on the Save for Web option. Also, avoid saving your photo in JPEG format. If you do so, all your hard work will go in vain. The PNG image format ensures transparency.
Method 03:
Convert a White Background to Transparent With the Background Eraser Tool
As said, if your image has a light-colored section, the Background Eraser tool will be handy.
Step 01: Follow the Mentioned Steps
Follow the Step #01 and #02 from the Magic Eraser Tool method.
Step 02: Background Eraser Tool Selection
The background Eraser Tool is available in the toolbar on the left side. The Background Eraser tool has a circle-like cursor with crosshairs in the center. The crosshair samples the color beneath it.
Maintaining the preferences below is crucial as we are working on an image that has a colorful graphic with a white background.
- Size: 300-800 pt
- Sampling: Once or Background Swatch
- Limits: Find Edges
- Tolerance: 20%
- Protect Foreground Color
Moreover, make sure the Foreground color must be Black.
Step 03: Erase the White BG
Hover the cursor on the white BG and press the mouse together. Drag the cursor to where you want to make the BG transparent while holding the mouse.
The easer will not affect the other colors as we selected the Tolerance to 20%. Higher Tolerance may affect the colors. So, you should adjust the Tolerance based on the primary graphic. If you notice a few white pixels are available, use a regular eraser and remove them carefully.
Step 04: Follow the Mentioned Steps
Follow the Step #04 and #05 from the Magic Eraser Tool method.
FAQs
To make an image with a white background transparent using Photoshop, use the ‘Magic Wand Tool‘ or ‘Quick Selection Tool’ to select the white background. Once selected, you can hit delete to remove the background, making it transparent. Remember to save the image as PNG to preserve the transparent background.
You can use online tools like Erase to make a JPG image transparent. Bg. These tools are designed to automatically remove background of an image, making the background transparent.
The easiest way to create transparent PNGs from a photo with a complex background is to use an advanced photo editing tool like Photoshop that offers sophisticated background removal features, such as the ‘Background Eraser Tool.’ This tool allows you to manually select and erase the background, providing more control over the output.
You can create a transparent BG in an image without Photoshop using free online background remover tools. These tools automatically detect and remove background of your image, converting it to transparent.
Choose an online PNG maker or background remover tool to make a PNG with a transparent background background online. Upload your image to the platform, and it will automatically remove the background, allowing you to download your image as a new PNG file with a transparent background.
Wrapping Up
The above methods are all about converting a white background into a transparent background. We discussed methods so you can follow them according to your image type. Remember that you should permanently save the file in transparent PNG format.

Salim Ahmed is the CEO of Graphic Experts India, with over 25 years of expertise in photo editing, clipping path, image retouching, and eCommerce image editing services.