Do you know? What is a clipping path? Moreover, why and how to create a clipping path?
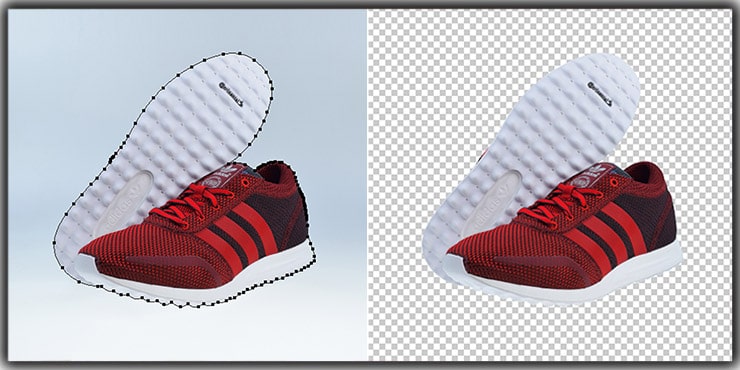
Clipping path is not a new term in image editing techniques. It refers to the technique, that simply drow lines/ paths around objects inside a photo using the pen tool. It helps to make a selection for background removal and other Photoshop editing needs.
For example, to remove the background, you need to make a selection. To improve image pixels in Adobe Illustrator, you need a vector path. Similarly, you will require a path to cut out a subject from its background.
The importance of paths is growing in the Photoshop editing world in these modern times. Because…
- It’s easy to learn and perform.
- The path allows professional photo editing.
- It saves time and money.
- As it’s a vector path, it’s resizable.
What is a Clipping Path?
A clipping path is a secured vector path or shape used to make a selection to cut and separate subjects from their backgrounds. A special tool, Pen Tool in Photoshop, is used to create clipping paths.

The Purpose of the clipping path is applied to create a pixel-perfect selection for:
- Removing the background from an image.
- Changing or replacing objects or parts of photos
- Eliminating unwanted objects from pictures
- Highlighting E-commerce products in their photos
- Using any specific item on an individual background
This method is widely used for E-commerce product photography to provide finer sharpness and cropping.
Types of Clipping Paths in Photography
There are different types of clipping paths available in photography, each serving a specific purpose.
- Basic Clipping Path,
- Medium Clipping Path
- Complex Clipping Path
- Multiple clipping paths
How Does Clipping Path Work?
The process of clipping the path involves the use of the Photoshop pen tool in the image editing software to create an outline around the desired object. By carefully tracing the object’s edges a precise path is created that follows the contours of the object.
Once this path is closed, the object is effectively “clipped” from its original background. Additionally, it allows the editor to manipulate it independently, such as applying color adjustments, retouching, or even relocating it onto a different background.
Why is Clipping Path Important?
The clipping path is especially significant in the e-commerce, advertising, and product photography industries, where the presentation of product images plays a crucial role in attracting and engaging customers.
By using the clipping path to remove distractions and enhance the object’s focus, businesses can create visually appealing advertisements and catalogs, thereby driving sales and improving their overall market presence.
Clipping Path vs. Image Masking (What’s the Difference)
Clipping path and masking image masking are both useful to isolate subjects from their backgrounds. Both of those techniques allow designers to utilize the subjects more effectively in a variety of graphic design elements.
However, the clipping path technique is favored for its meticulous accuracy and ability to produce clean, crisp edges. Traditionally, this technique is used when the subject exhibits sharp edges or consistent color contrasts, making it easier for the designer to create precise paths with software tools like the Pen tool in Adobe Photoshop.
On the other hand, Image Masking involves hiding or revealing specific portions of an image through the application of masks, which act as filters that either conceal or display elements with respect to different parameters, such as lightness, hue, or saturation.
The masking technique is particularly useful when the subject features complex textures, like hair or fur, or when the background showcases intricate visual elements that are difficult to separate through the clipping path.
Both Clipping Path and Image Masking are essential for designers, and the choice between them ultimately depends on the nature and requirements of a particular project.
How to Make a Clipping Path in Photoshop
The clipping path is indeed a simple edit, yet to master it, you must go through several practices with perfection. So, it’s a must to learn the procedures right. So, let’s begin learning with the steps below.
Step 1. Opening File
If you don’t have Adobe Photoshop installed on your PC or Mac, quickly install and launch it. After accessing the software, reach the File option and click over Open. Next, select a file and jump to the next step.

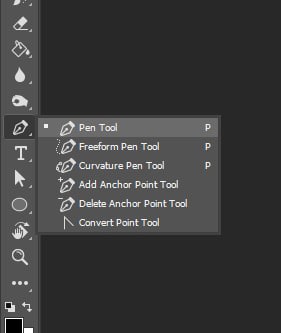
Step 2. Selecting Pen Tool
Now, check the Toolbar, where you will find the Pen tool with a pen icon. However, there are more tools inside the pen icon, but you should choose the first one.
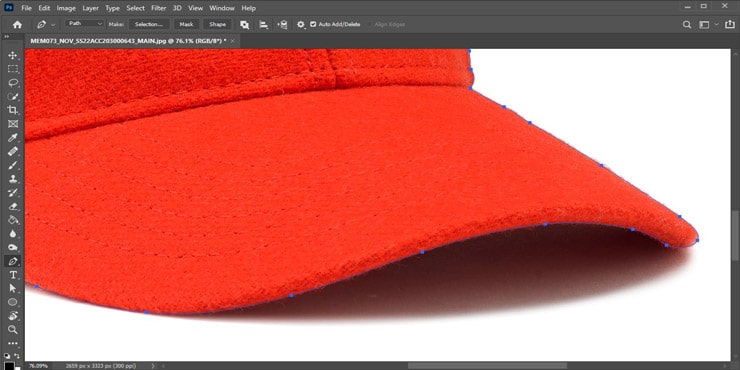
Step 3. Creating Anchor Points
This is the primary part. Zoom in the photo first so that the edges are seen. Then, by pressing Ctrl and (+) buttons simultaneously, you should zoom in to 200%.
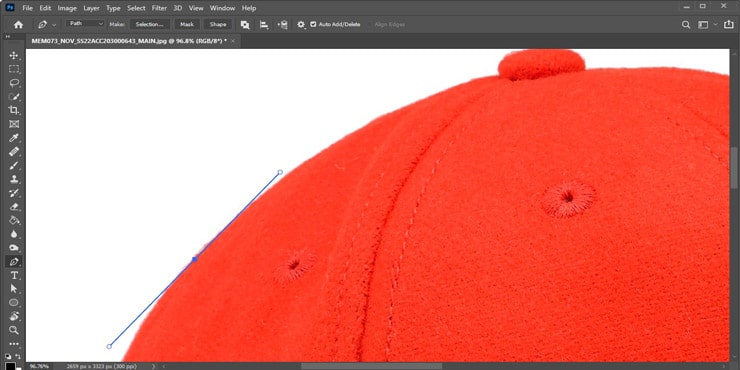
After zooming now, you can easily draw the path with perfection. To begin with, draw anchor points, click over any edge, and keep drawing until you reach the point from where you started.
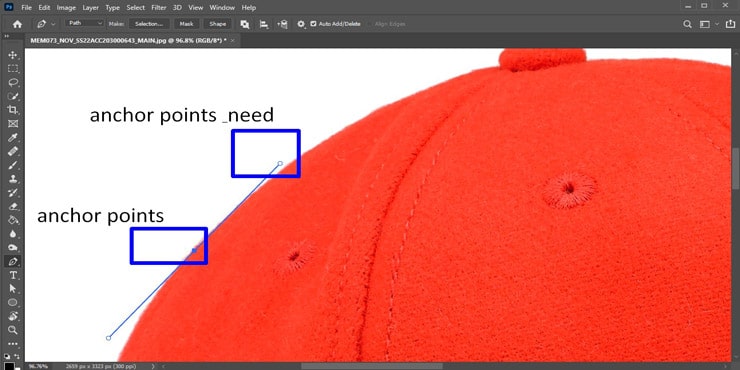
You might require drawing many curve lines for drawing with accuracy. You can do this by pressing the Alt key and dragging the head of the anchor point as you need.
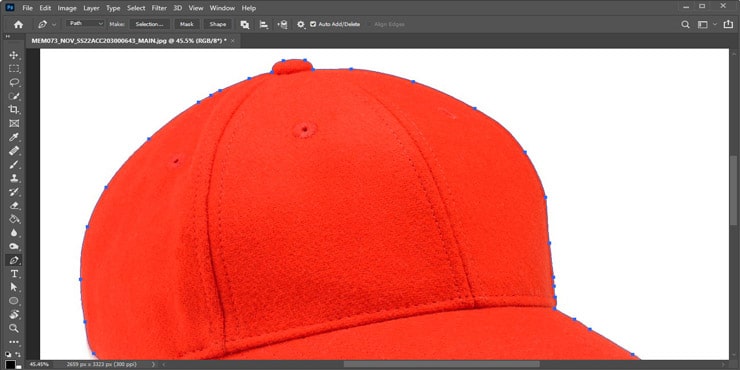
While isolating objects from one another, you have to work cautiously. Try to make the edges look natural by marking them as accurately as possible.
Step 4. Inside Path
Some images like this will have some vacant places inside the original picture. Therefore, it requires parted clipping paths.
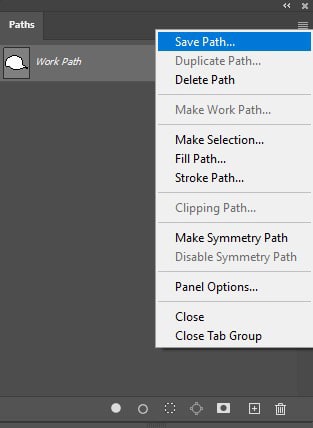
Step 5. Saving Path
After finishing lining the edges:
- Access the layer panel that you will see on your right side in Photoshop.
- Check the path tab; there is a menu from where you can Save the Path.
- Give it the “Path 1” name to completely save it.
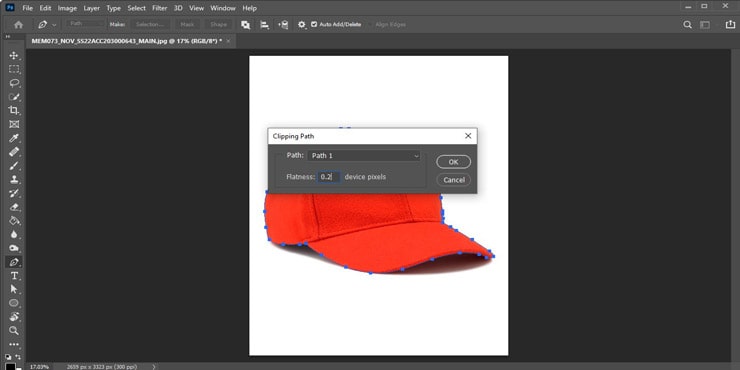
Step 6. Clipping Path
You will find the Clipping Path option; click it.
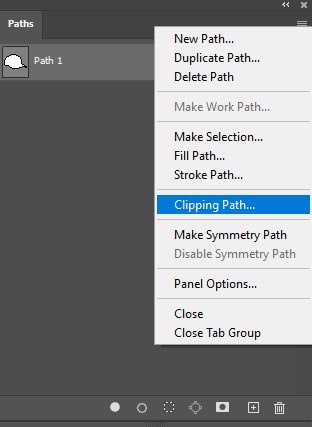
On the screen, a box will be shown with some options. You need to lessen the value of the box named “Flatness.” The lesser the value, the clearer the edges.
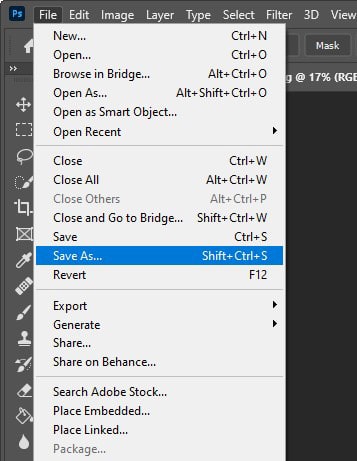
Step 7. Saving the Picture
Lastly, save the clipped image. Make sure to save the image in JPEG and PSD files so that you can use them further.
How A Clipping Path is Used to Add or Remove Background
After creating outside and inside paths, you can bring further changes to the image by either adding another background or removing the existing one.
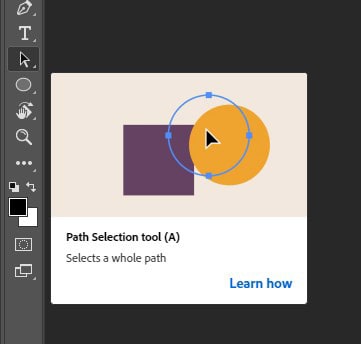
To do so, access the Toolbar again. Beneath the “T” icon, a path selection tool is located. Click on that.
It’s time to draw a square shape around the cutout subject to select every created path.
Don’t forget to choose “Exclude overlapping shapes” from the menu.
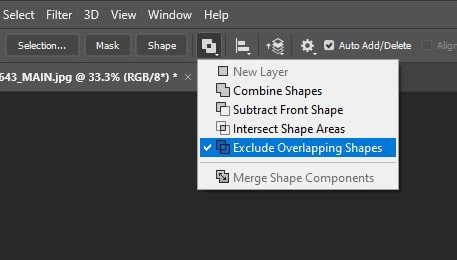
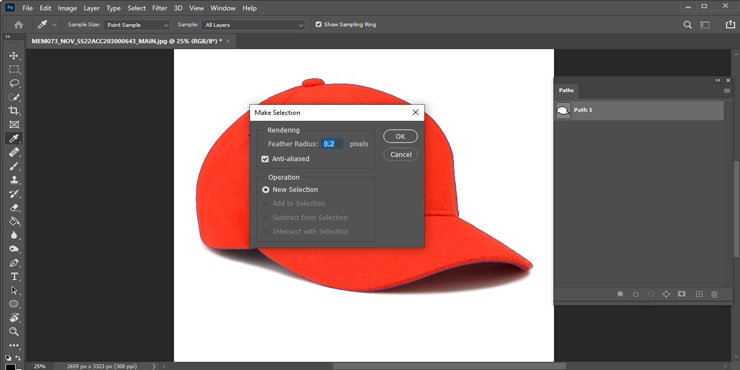
Now you have to right-click your mouse and click over “Make Selection.
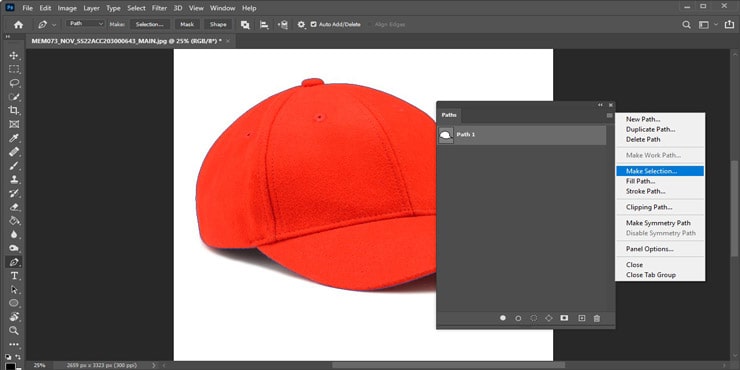
A box will be shown. After setting the Radius again, click over “OK.”
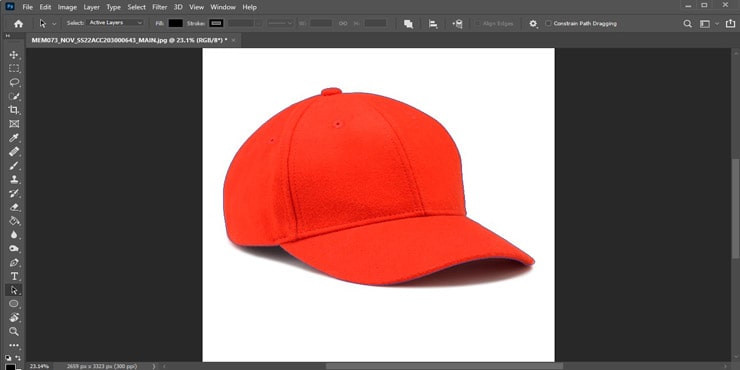
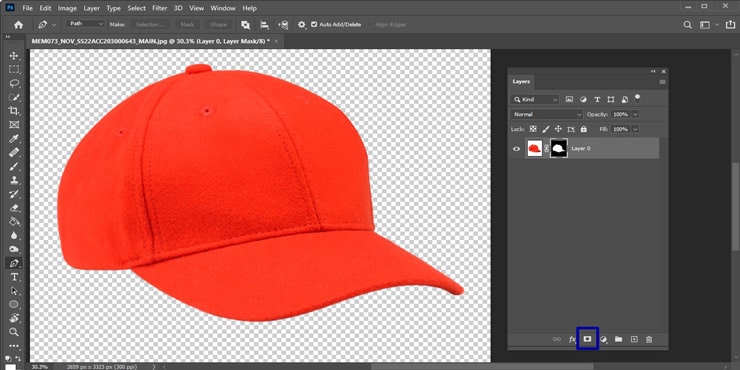
Access the Layer Panel to pick the rectangular icon and attach a layer mask. One-click over that icon and your image background is removed.
The Benefits of Using Clipping Path
In this 21st century, we can see that online-based markets are becoming more competitive day by day as more people are interested in shopping online. Hence, online sellers should bring perfect messages through their product pictures. Here, the vital role is played by the paths.
Through the path, you can clear your product concept and give viewers an approximate view of what they are made of. However, these are not the only reasons to depend upon paths. These are the necessity of paths.
Convincing Clients
Online shopping platform is vast, so there is huge competition among eShop holders. Therefore, each e-commerce shop owner should try to show their products uniquely, which is impossible without a path. Clients get interested in products that appear to be unique but great.
Showing Quality
Quality pictures of products ensure they look like quality items to the viewers. While raw photos fail to show the original quality of your products, clipped images with some little enhancement can.
Increasing Sales
The better your product photos get, the more they will attract consumers. As a result, your sales will increase automatically. According to e-commerce experts, products that attract people can make them buy them mostly, even if it’s an item they don’t need.
Establishing a Brand
Quality images play a significant role in establishing a brand. As a result, your business will slowly become a brand with popularity among buyers.
Buyers prefer quality products, and quality products are shown through high-grade images. So when you eventually grow more followers on your shop page with those top-notch product photos, your business will get established as a brand.
FAQs
The primary job of the clipping path is to separate objects from pictures. Using this excellent technique, you can cut out a whole subject or some photo parts.
There are two main differences between path and masking. First, the Photoshoppers utilize the pen for creating paths over the object’s edges. On the contrary, masking requires three tools to remove a background: color separation, background eraser, and magic eraser.
Yes, a JPEG file of an image can have a clipping path. However, you need to download larger-size photos.
There a quite a few companies providing top-notch services- like clipping path Center, graphic experts India, path edits, etc.
Final Notes
If you have enough time to cut out subjects from your product photos, you better learn how to use and create Photoshop clipping paths and What is it? Try following our tutorial because we have explained the steps as simply as possible.

Salim Ahmed is the CEO of Graphic Experts India, with over 25 years of expertise in photo editing, clipping path, image retouching, and eCommerce image editing services.