You must have gone through a situation like after capturing a portrait, you are excited to share the epic photo on your website or social media. Then, you found that there are distracting objects in the background of the image when editing. So, you are thinking about blurring the background in Photoshop.
Happily, the process is straightforward. Whether distracting objects or other elements minimize the image’s appeal, you can fix the concern easily using Adobe Photoshop.
This guide shares a step-by-step procedure to make your image BG blur.
How to Blur Background in Photoshop
Read the photoshop tutorial intently. Learn how to blur backgrounds perfectly. Otherwise, you may get a different result. Finally, you will end up with an unpleasant image. Moreover, update yourselves about blur effect, blurry background, gaussian blur, blur tool and others.
By the way, this Photoshop tutorial will cover everything about how to blur a background in photoshop and convert the background blur.
Step 01:
Duplicating the Background Layer
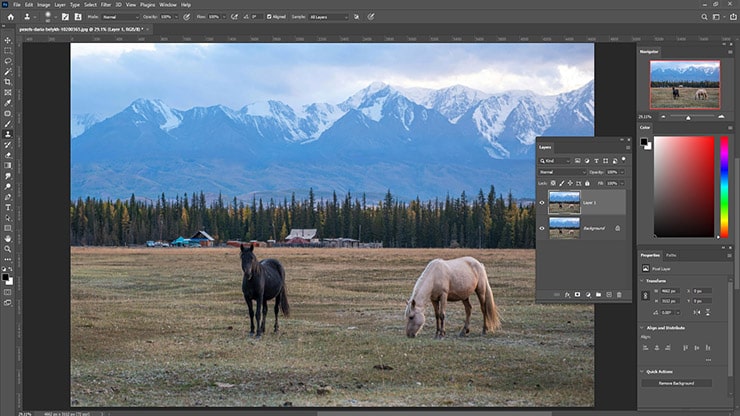
Please start by selecting the BG layer and duplicate it. The keyboard shortcut for Windows is Ctrl + J, and for Mac, it is Cmd + J.
Step 02:
Select the Subject & Mask
We will work on the top layer of the image. So, could you select the subject and Mask it? You will need to go to Select > Subject. This command will let you choose the family.
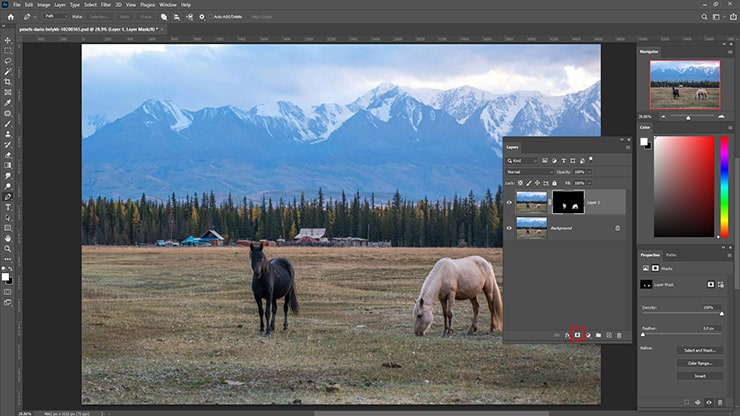
Now, hover your mouse on the Add Layer Mask icon from the Layers panel. Once done, the family is visible only in the layer.
Step 03:
Filling the Background Layer
The family shouldn’t be visible in the BG layer. Don’t avoid this step, as a “Halo” of the family members’ bodies can be created if you skip the process. You can easily avoid the “halo” using the content-aware fill.
Look for an eyeball to the left of the layer thumbnail and click it. Thus, the top layer will be hidden. Then, hit and don’t release the Ctrl (Windows) or Cmd (Mac) key and select the Mask. As a result, a selection will be created from the Mash you generated earlier.
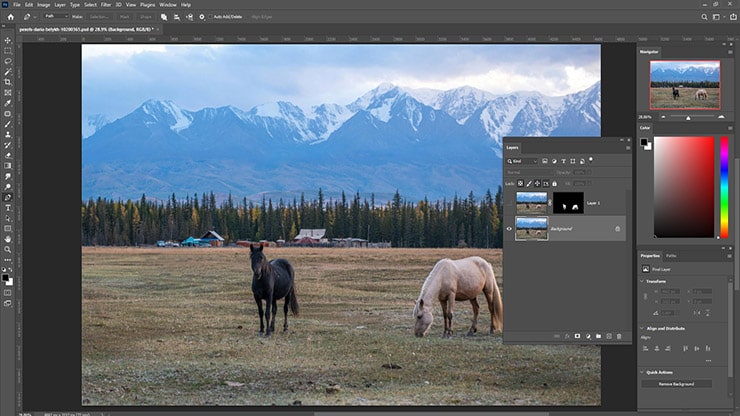
Now, zoom in on the selected area by choosing Select > Modify > Expand. Here, you will need to adjust the pixel. For the image, I used 50 pixels. My image size is (240 resolution or 4145 X 5439 pixels). Adjust the pixel amount if the size varies from the mentioned size.
Select Edit > Fill, then locate Content Aware from the drop-down menu of Contents.
After that, press Ctrl + D (Windows) or Cmd + D (Mac). This will help you deselect the area.
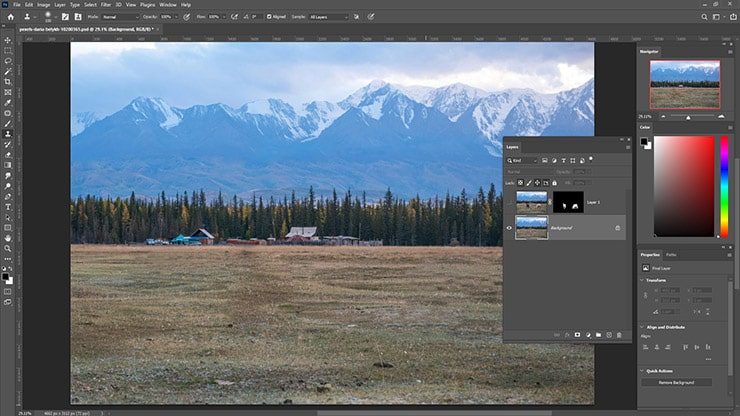
Did you see pixelated or off areas in your fill area?
If the answer is Yes, no worries!
These areas will become invisible once the image background is blurred.
Step 04:
Blur Background.
We are at the main step of blurring the background.
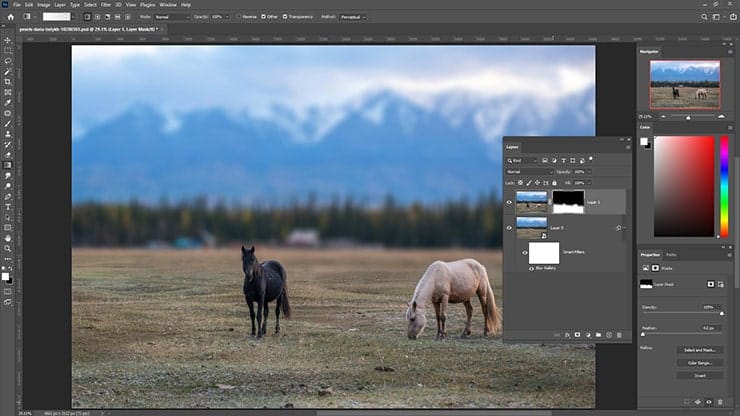
See the below image, where I converted the BG to a small object.
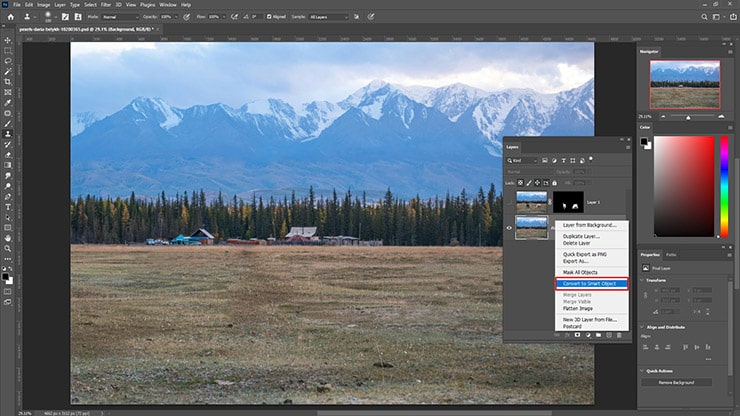
Why did I do so?
It is beneficial to change the blur in case the BG requires adjustments.
However, to convert the BG, you must Right-click over the BG layer. Then select Convert to Small Object. Remember, this is optional.
Now, click the eyeball so that the top layer becomes visible. This way, comparing the blurred BG and subject becomes easy. Moreover, adjusting the amount of blur in your image is helpful.
Next, select Filter > Blur Gallery> Field Blur while keeping the BG layer selected.
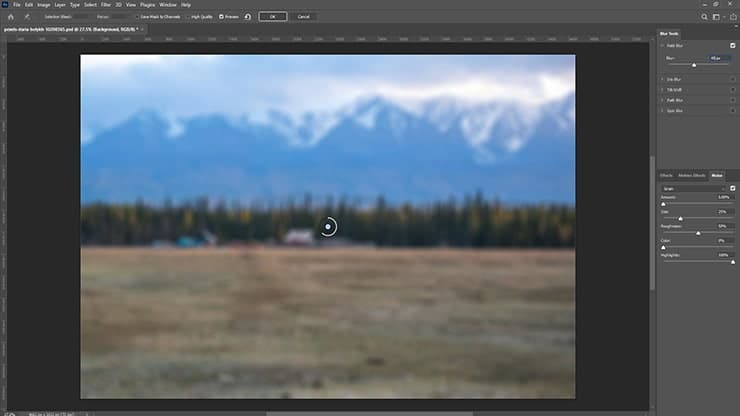
You will see a Blur Slider. Increase the slider according to your preferences. I set the level to 45 px in the photo. Make sure the blur looks realistic.
Keep in mind that blur may minimize the natural Grain of your photo. You can use the Noise Panel, which adds Grain to improve the image quality.
Once you are satisfied with the quality of the Blur, Click OK at the top.
Step 05:
Mask the Image to Remove the Foreground Blur
After completing, look at the image intently.
Does it not look like the subject is floating? How to solve it?
The image will get a realistic look if you Mask the image again.
Activate the Layer Mask of the top layer by clicking it. Then, hover your mouse over the Toolbar, locate, and click Gradient.
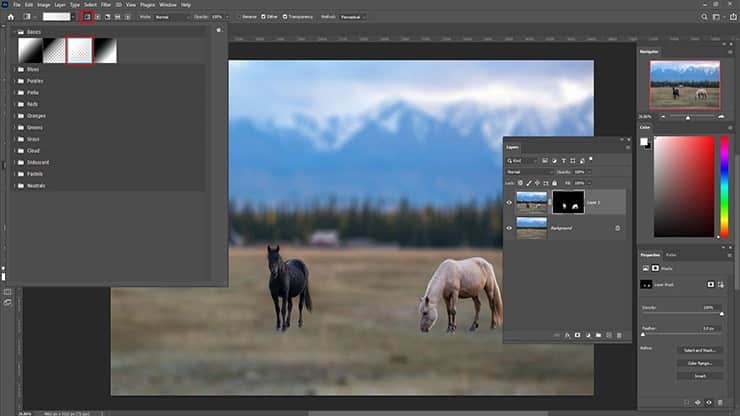
The color swatch has to be set to its default settings, White and Black. You will need to press the “D” key on your keyboard.
Then, on the top toolbar, select Linear Gradient and choose Foreground to Transparent.
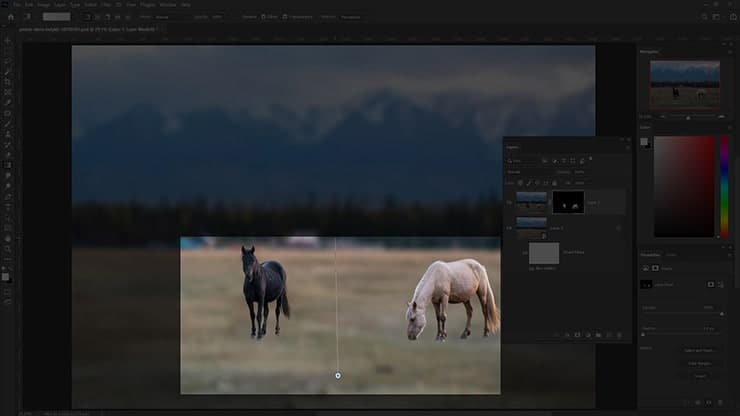
Start drawing a gradient from the bottom of the image to the top. Keep the Gradient straight while drawing. For this, press and hold the Shift key. See my image, for example.
FAQs
To begin, open your original image in Photoshop. Duplicate the layer to preserve the original. This initial step is crucial before blurting a photo’s background.
Learn about selections using the Quick Selection Tool or the Magic Wand Tool to select the background easily. These tools allow a more intuitive way to select the background you want to blur, keeping the main subject in sharp focus.
After selecting the background, apply the lens blur through the Filter menu. Lens blur in Camera Raw provides a more natural and versatile shallow depth of field effect, closely imitating how a camera’s lens operates.
Radial blur can be applied for a zooming or motion effect, emphasizing the subject. Use it by selecting the background with a radial gradient on the layer mask, then apply the radial blur from the blur gallery.
Yes, the tilt-shift blur in the Blur Gallery simulates a tilt-shift lens, creating a shallow depth of field effect with a clear focus line. This technique dramatically makes your photo’s subjects stand out against a softly blurred background.
Wrapping Up
The entire process may take a maximum of 30 minutes. I described each step briefly so you can follow them without hassle.
Hopefully, you will never have to worry about distracting BG after learning how to blur the background in Photoshop after reading this guide.
You may read:
