Know how to fix blurry pictures in Photoshop CC and get stunning images to use, share, or sell.
Nowadays, getting high-quality photos is challenging since we capture them through different cameras or share them on various photo-sharing platforms. Moreover, the variety of uses of the picture, like adding filters or resizing them, also makes the pictures grainy and noisy.
These issues can ruin the beautiful views and make a picture look unattractive. Except for celebrities, people don’t take their images with expert photographers. However, we still don’t want to compromise with the photo quality. It’s OK if you don’t upload blurry photos.
You can fix a blurry photo in Photoshop and give the images a pro touch. So, without further ado, let’s get to learn how to fix blurry pictures.
How to Fix Blurry Pictures
There are two different ways that by following, you can fix a blurry image. But it would be best if you used Adobe Photoshop. So it’s better to learn both the methods correctly and use them according to the needs.
We will discuss in the first method the steps to reduce blurriness and increase the sharpness of an image. So, without wasting any more valuable time, let’s get down to the business.
Method 1: Use the Sharpness Tool to Fix Blurry Pictures
Photoshop has been a powerful tool to edit photos and give them pro touches. However, it charges some money. Although you need to purchase it to enjoy all the valuable tools, the fantastic effects of its editing tools are worth the investment.
You have to go through a few steps and tada! But, the blurred picture is repaired within some seconds. So come and see how we can use the sharpness tool to fix the blurry image issue.
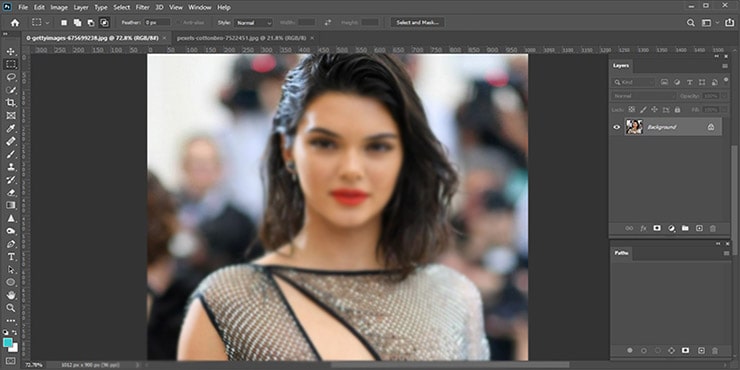
Step#01
Open the photo in Photoshop that you want to fix.
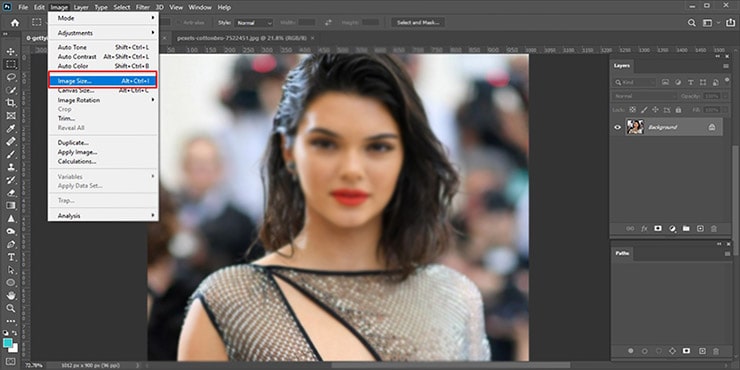
Step#02
You will see an option named “image” click on it and change the picture size from the “image size.” You can also use the shortcut by pressing and holding Ctrl+Alt+I. Increase the photo size because the low resolution causes the blur problem. It will still make the image look blurry, but we will fix it later.
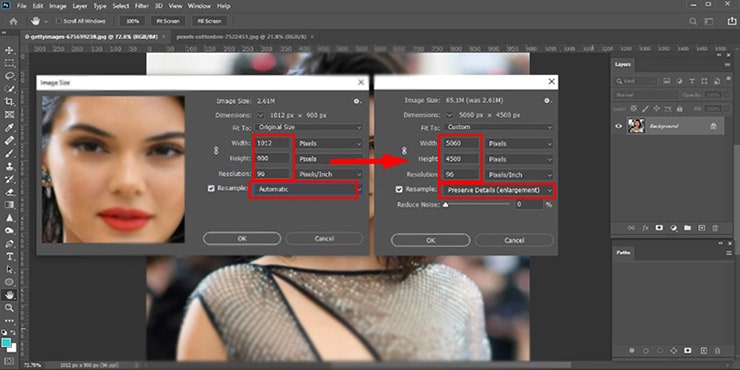
Step#03
Selecting the option named “image size” will open a window that looks like the picture below. Then, according to the photo requirement, change the size.
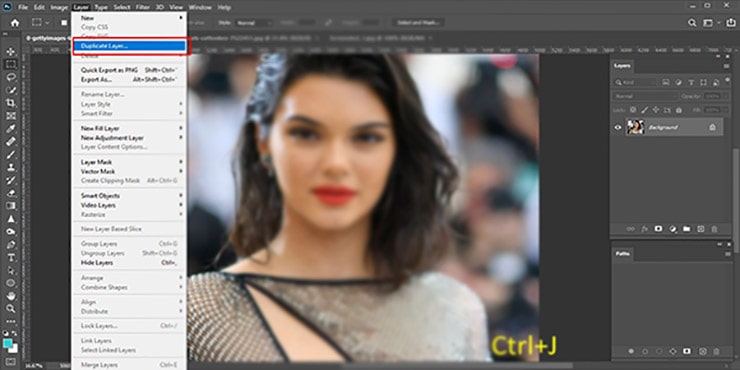
Step#04
Now it’s time to make a duplicate layer. Create it by clicking on “Layer > Duplicate Layer or use the shortcut of holding and pressing Ctrl+J. This same layer is for safety because the original file will remain intact if we accidentally mess up the editing. We can restart editing.
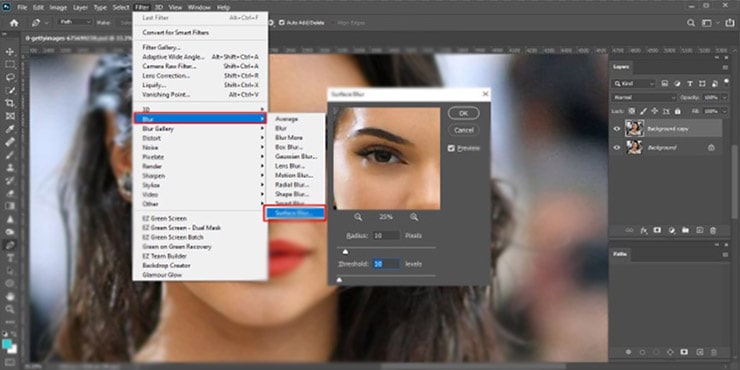
Step#05
Select the created duplicate layer and click on Filter> Blur > Surface Blur to open the window of blur adjusting. Change the Threshold and Radius value when it opens to adjust the image blur.
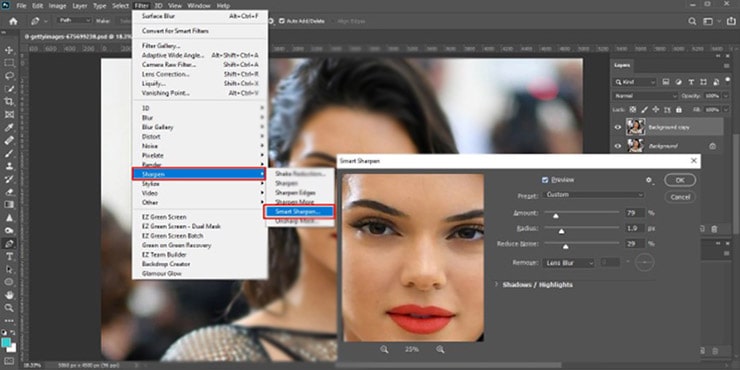
Step#06
When you are done adjusting blur, you have to change the photo sharpness. Go to the option Filter > Sharpen > Smart Sharpen. A sliding bar will pop up on the screen to adjust the sensitivity according to your requirements.
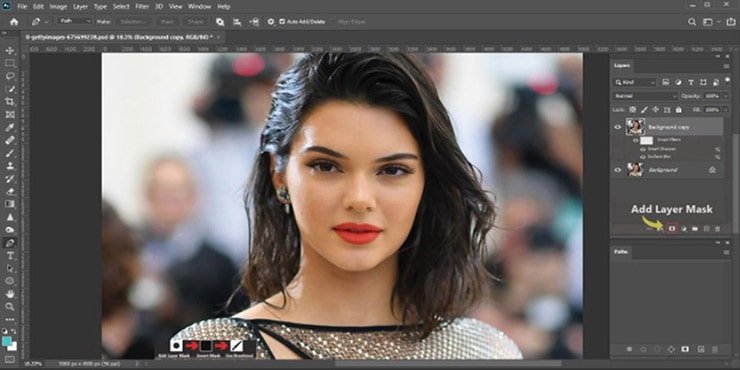
Step#07
Remember you had increased the photo size in the second step? It made the image blur more. This is the step where we will reduce it. To do it, you have to add a layer mask, just as shown below. After adding the layer mask, the brush tool reduces the blurry effects.

Step#08
To give the expert’s touch, you need to balance color. But you should follow this step only when the image color is imbalanced. Now coming to the point, press the Adjustment Layer > Color Balance to fix the color issue.
A popped-up window will show you settings to find your desired color. Finally, if you are finished with the color balancing, you have your expected output meaning the fixed blurry image.
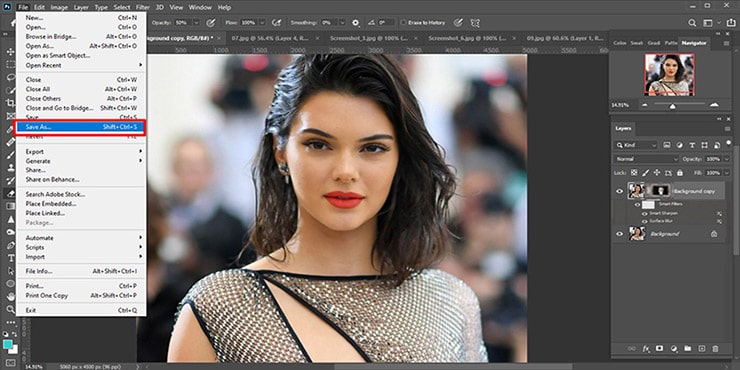
Step#09
The final thing to do is save the new file. To keep the image, click on file> Save As and give it a name to save the file wherever you like.
Method 2: Use the Noise Reduction Tool to Fix Blurry Pictures
This second method has many similarities with the first method. The only difference is that you used the Sharpen tool earlier, and now you will use the Noise reduction tool.
Follow the earlier steps in the first method until the fourth step. The change comes from the fifth step. Step 5 mentioned below starts the actions of the second method.
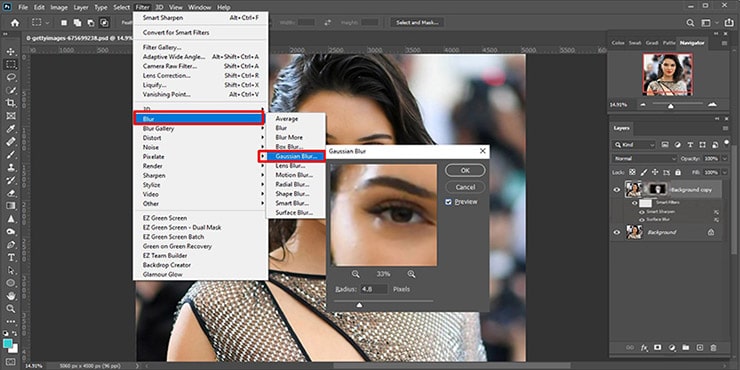
Step#05
If you have finished step number 4 in the earlier method, you should already have a duplicate layer of the photo. Now, click the Filter> Blur > Gaussian Blur, and you will see the Gaussian blur bar, just as shown in the image below.
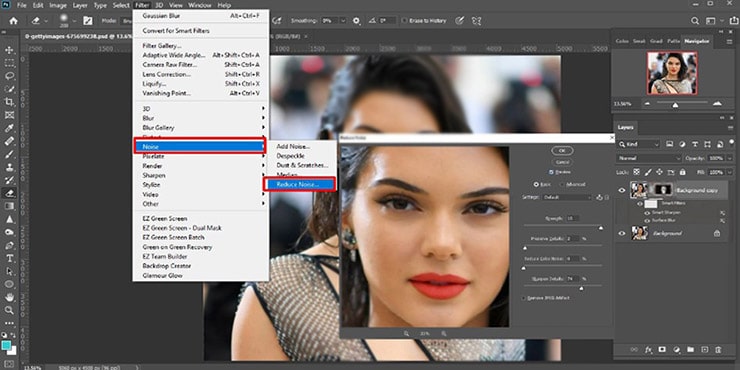
Step#06
Once again, click on Filter> Noise >Despeckle and, through the settings, get the best output for your picture. You should then follow the previously mentioned steps 7, 8, and 9 for further editing.
Photoshop Sharpen Tool or Noise Reduction Tool – Which Works Better?
So, we have shown you two methods to fix a blurry image in Photoshop. You might be thinking which one works better? The answer is both the tools. Because users will use different photographs, the sharpen tool will make some pictures look best.
Again, some will get the best results from noise reduction tools. But the professional editors suggest using the sharpen tool more than the noise reduction tool. Because most of the time, the expected results of fixed blurry pictures come from using the sharpen tool.
FAQs on Blurry Pictures Fixing
Yes, Photoshop does the best job of fixing blurry photos. Blurry images are fixed following some simple steps, and there are two different methods that you can use. The first method is done using a sharpness tool, and the second one is the noise reduction tool in Photoshop.
If your picture is blurry a little or heavily, Photoshop can fix it. For improving heavily blurry images, you should try the Gaussian blur first and then sharpen the Filter next. After that, adjust the pixels from settings and then reduce the blurriness according to your requirements.
Photoshop never Blurred pictures unless it’s a raster image. Raster images are graphics, and these are created by pixels only. So, if you are stretching it in Photoshop, the results will be a more pixelated image.
This issue is straightforward to solve in Photoshop. You have to make a mask first from the selection and go to the “Properties” window option. You will then find sliders written to increase the “Smooth.” Smooth it a little, and the rough edges will look perfect.
Final Words on How to Fix Blurry Pictures
Blurry images look so dull and ruin the attractiveness in them. Sharing a blurry image will give you a wrong impression, so you should fix it. There are many other tools where a Blurred image can be fixed, but the best results will only come using Photoshop tools.
We hope you have learned How to Fix Blurry Pictures in Photoshop from reading our article. We can assure you of getting the exact output as shown if you correctly follow each step.
You May Read:

Salim Ahmed is the CEO of Graphic Experts India, with over 25 years of expertise in photo editing, clipping path, image retouching, and eCommerce image editing services.