These days for photo creativity, we need to do a clipping path. E-commerce is unimaginable without the clipping path service. With the advancement of technology, Photoshop has got its new version called Photoshop CC.
Whether you have normal Photoshop or CC, you can learn how to create a clipping path in Photoshop with our perfectly explained tutorial. But, first, let’s see the two methods for two different Photoshop versions. So, let us walk you through the process without wasting further time.
How to Create a Clipping Path in Photoshop
Here are the step-by-step procedures for the clipping path using Photoshop. You should apply the steps according to the two software you have on your PC installed. So, let’s begin.
The basic version Photoshop has all the necessary photo editing functions, but those are not updated. However, you can get a perfect path using it.
Step 1
Open the Image
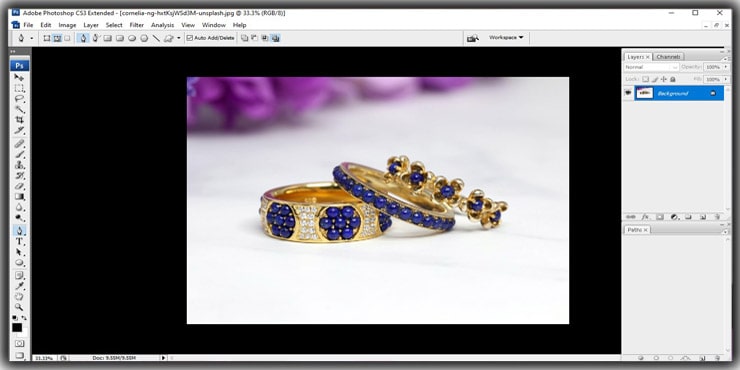
First, open the Photoshop software and upload the photo you will edit by clicking on File > Open.
Step 2
Select Pen Tool
Check the left toolbar; you will find the Pen tool there. Select it.

Step 3
Selecting Path
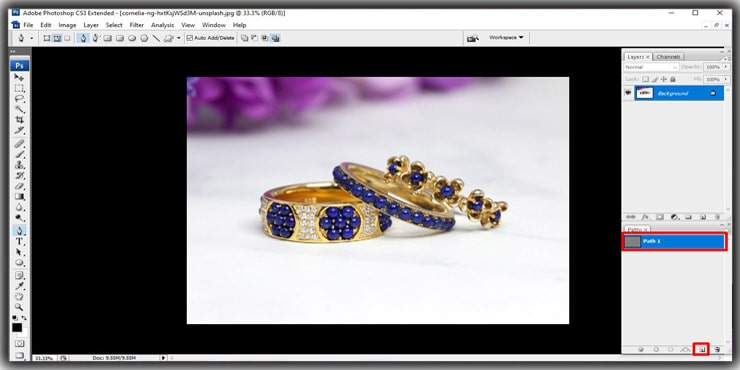
You need to choose a new path to create a clipping of the picture. If the path option is not shown automatically, search for the “Window” option above in the menu.
Step 4
Drawing Path
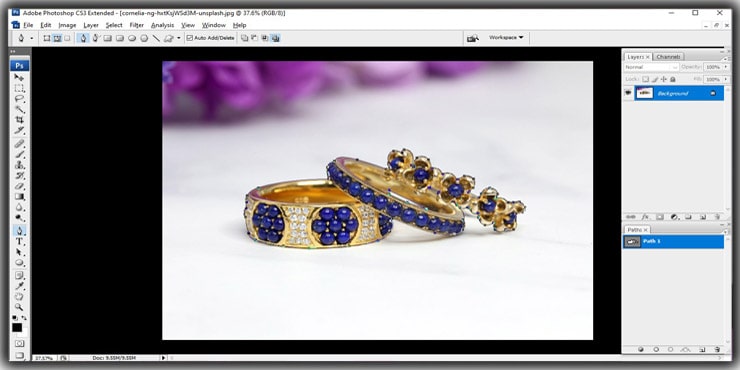
Start drawing the path and give it the right shape of the photo you are working on.

Step 5
Drawing Clipping Path Around the Subject
Whatever the subject is in your image, draw a path around the edges and perfectly clip the path.
Step 6
Make Selection
Select the path by pressing Ctrl + Enter.
Step 7
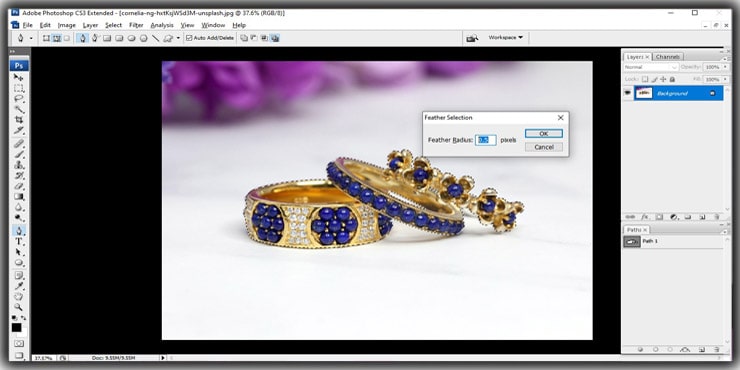
Add Smoothness
Add some smoothness to the subject edges by applying 0.5 feathers. Go to Select > Modify > Feather to do so. For the shortcut, press Shift + F6.
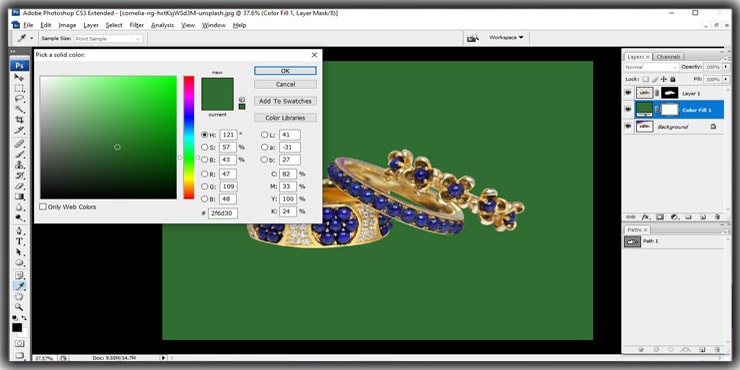
Step 8
Make a Duplicate Layer Layer and Mask it
Make the duplicate layer of the image background, mask it, and pick a firm color layer toward the center.
Now you have successfully made a path for the photo.
How to Create Clipping Path in Photoshop CC
Photoshop CC is the advanced and updated version of Photoshop. Also, it will cost you money since it’s a subscription-based package. However, you can do pro-level photo edits with less effort if you have it, even doing clipping paths.
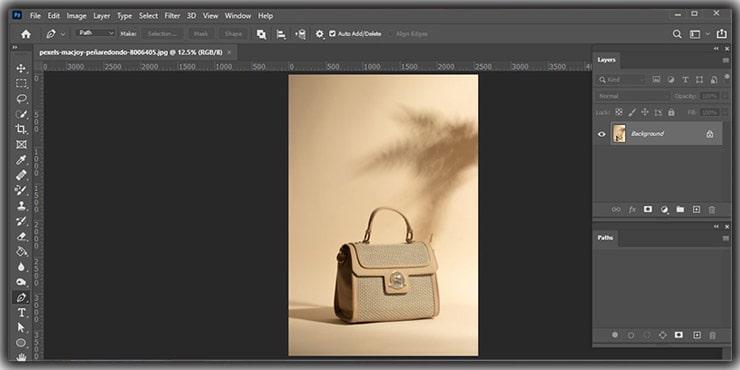
Step 1
Open Image
Upload the photo you plan to edit by Ctrl + O (on Windows) or Cmd + O (on Mac).

Step 2
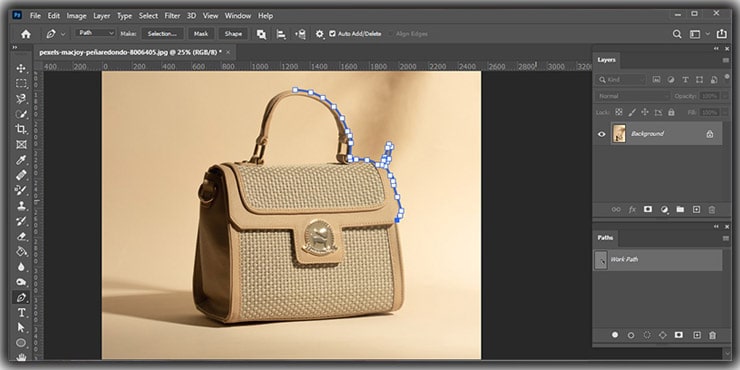
Choose Pen Tool and Use
Select the Pen Tool from the left option box. For the shortcut, press [P]. Next, click upon the image for the selection and start drawing a path. When drawing the path, make sure you don’t cross the edge lines. This way, you will get the perfect output.
When you need to create a path inside a subject like this cup handle, there will open a new path. Look at the photos shown below to avoid any inconvenience.
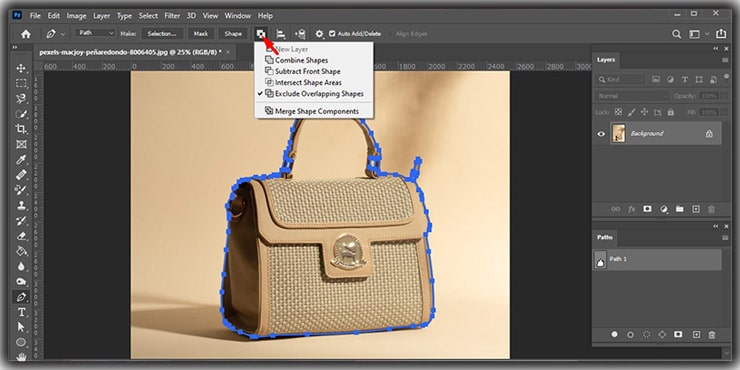
Step 3
Pick Exclude Overlapping Shape
There is a selection submenu to find an option labeled “Path Operation.” Now, from the drop-down menu, choose Exclude Overlapping Shape. We chose this since we are working on an image containing more than one line.
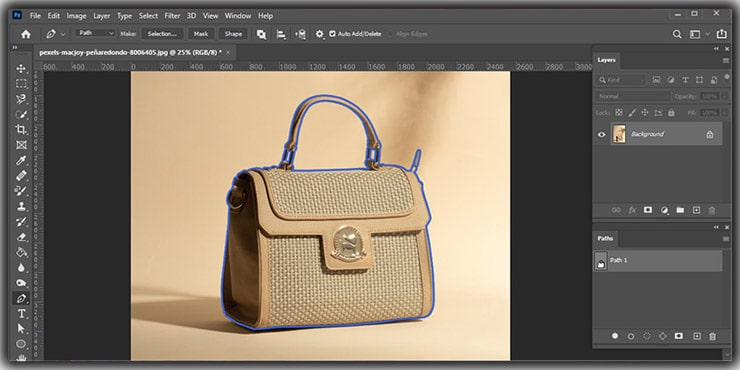
Step 4
Create a Path and Apply
Hold down the key Alt (on Windows) or Option (on Mac). Next, create a path by going around the entire subject. After creating the path, click over the real path point and close it.
Step 5
Save Path
Save the path by going to the path panel and clicking twice over the Work Path. Then, rename the path as you want.
Step 6
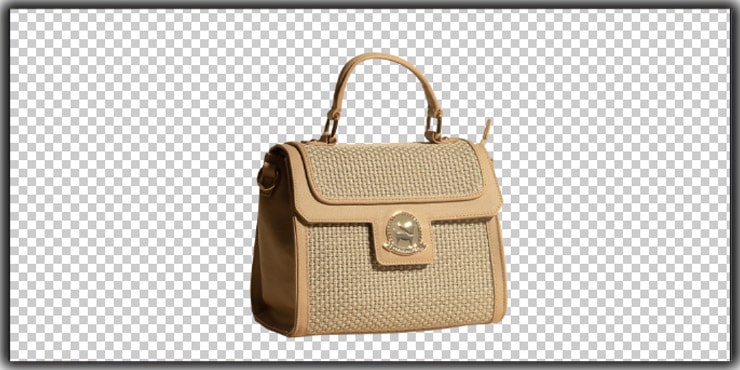
Remove Background
It’s time to eliminate the background for cutting out the subject. To do so, click on the submenu selection on top and select the mask option.
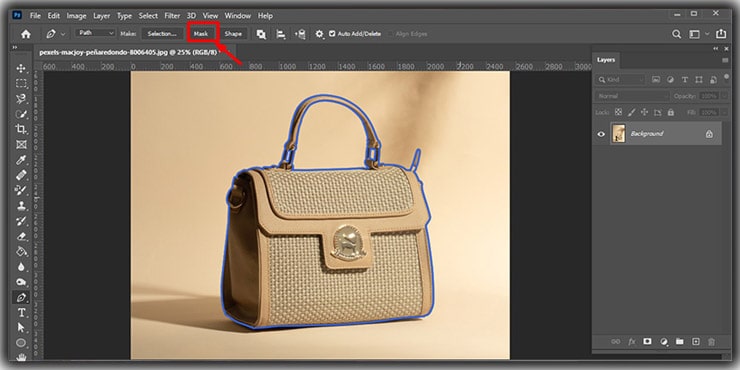
Step 7
Apply Layer Mask
Click twice on the “Add Layer Mask option and press okay to remove the background. Then, choose the photo and save it in any file format you wish from PSD, JPEG, TIFF.
FAQs
There are various ways of creating paths in Photoshop. Use these tools below and make paths in Adobe Photoshop. The tools are:
● Pen Tool
● Shapes Tool
Turning a path into selection is very easy. Press Ctrl + Enter (for Windows) or Cmd + Return (for Mac), all you need to do. Then, Ps automatically will convert the path into a selection.
Combine paths in Adobe Photoshop CC following the steps below:
1. Click over any path from the path palette.
2. Click again over any other path from the palette to paste the previous path in it.
3. Now, both the paths will get combined.
4. Continue doing it until you combine all the paths.
A clipping path is a vector path or shape used in Photoshop to isolate and display only the specific parts of an image, ignoring the rest outside the path. This is commonly used for creating transparent backgrounds, making specific image adjustments, or preparing images for layout designs in illustrator or other programs. The primary tool used for creating a path is the photoshop pen tool, leveraging its capacity to draw detailed paths.
To create a path using the Pen tool Photoshop, start by selecting the Pen tool from the tool in Photoshop. Then, begin to draw a path around the object you want to isolate. Use anchor points to adjust the curve and shape of your path so that it closely follows the contours of the object. Once the path completely encircles the object, you can convert it to a path by accessing the paths panel, right-clicking on the “work path”, and choosing “save path”. Finally, to use your path, you need to select it and choose “Clipping Path” from the panel menu, ensuring to click OK in the dialog box that appears.
Yes, you can save a clipping path from Photoshop and use it in Illustrator by saving the image with the path as a Photoshop EPS file. When saving the Photoshop document, you choose “save path in photoshop” within the EPS options dialog box. This saves your path along with the image, which can then be opened in Illustrator, keeping the path intact for further editing or layout design.
The paths panel in Photoshop plays a crucial role in creating and managing paths. After drawing a path with the Pen tool, you will use the paths panel to save your path by double-clicking on the “work path” to save it as a named path.
Yes, clipping paths are an effective way to create a transparent background for a product photo. By meticulously drawing a path around the product with the Pen tool, you can isolate the product from its background. Saving this image as a PSD file or in any format that supports transparency, like PNG, perfect for use in web design, catalogs, or e-commerce platforms.
Closing Remarks
Clipping Path service is getting more and more demands since the number of online product promotions is increasing. Customers show interest in items that look appealing. Through the path, it’s possible to make product images look more eye-catching.
The importance of a path is huge, and so you must know how to create a clipping path in Photoshop.
I hope this tutorial was a big help for you. We have more such Photoshop tutorials to learn how to remove shadows, double chins, etc. You should check them out too.
You may read:

Salim Ahmed is the CEO of Graphic Experts India, with over 25 years of expertise in photo editing, clipping path, image retouching, and eCommerce image editing services.