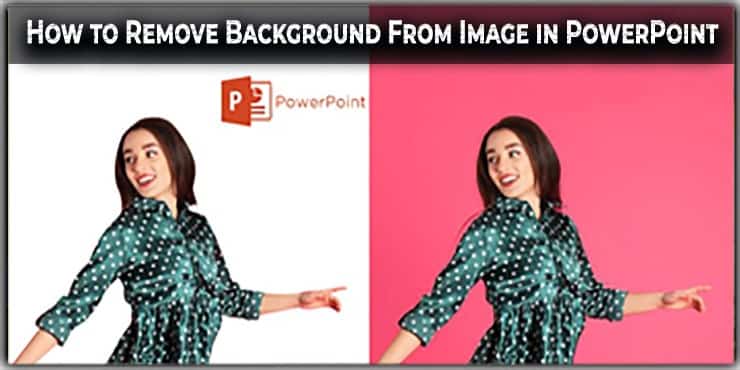
Do you want to know about the tricks on how to remove the background from the image in PowerPoint? Then, if you want to learn this nifty trick, This is the right place for you. Here you can learn how to background an image using Microsoft PowerPoint.
Background Replacement or Making it Transparent is a bit tricky in Powerpoint. So let’s dig into that…
Removing Photo Background In PowerPoint | Overview
Now I’m talking about PowerPoint. Did you know that removing background images in PowerPoint is possible? It will be possible to remove the background in PowerPoint.
It’s easy to remove the image background in PowerPoint. First, pick the Image and try to make a perfect shape of the subject. Then, after cutting out the subject, you can remove the background.
Imagine that you have got a picture of Magpie Bird. And behind the scene, there are green leaves. So you don’t want the green leaves because you want to implement the white background behind the subject.
If You want to remove the background objects
using PowerPoint, it’s possible. Usually, This type of work requires expensive graphics software such as Adobe Photoshop.
But if you want to do it in PowerPoint, then you have to use the best version of PowerPoint.
As a result, you will get better output from PowerPoint.
Remove Background from an Image Using PowerPoint
It is better to choose an image that has a lot of contrast between both the subject and background. So, if you want to erase the background from a picture, pulling the background away from the original subject will be difficult if they are of the same pigment and brightness.
This tool works better to remove complex and difficult backgrounds from photos with a solid background. This way also allows you the greatest versatility to determine what aspects of the background you want to remove.
PROS:
- You can create something visually attractive using standard models and templates, even though you do not understand basic graphics.
- It will allow you to remove distracting backgrounds that are not looking good. For that, the essential parts will be shown. And you will get stunning photographs.
- By using this, you can save valuable time and also money.
- Easy to create a vibrant, elegant design.
CONS:
- It is not recommended for professional projects. Thus, in those situations, you should use Photoshop clipping path or image masking services (Powerful to meet any photo editing demands).
- If you want to edit the pictures in PowerPoint, the photos won’t be that attractive. To get perfect, precise, and gorgeous images, you must go for adobe photoshop.
- When you work in photo editing, there are some limitations. Because in PowerPoint, you will get limited tools.
- It gives the illusion of content and consistency when the different points on the dispositive do not have much factual basis or connection.
NB: Check out our excellent background removal service page for high-quality editing.
Background Removal in Powerpoint | Step by Step Tutorial
Now I am explaining how you can remove the background from an image In PowerPoint.
A transparent color tool is the quickest way to remove the background of an image. The only way to identify is to remove solid colors, such as white backgrounds.
This method works well with 100% solid background images, such as the White Background in stock photographs. However, you will also need to use the Background Tool if your background is not 100% strong.
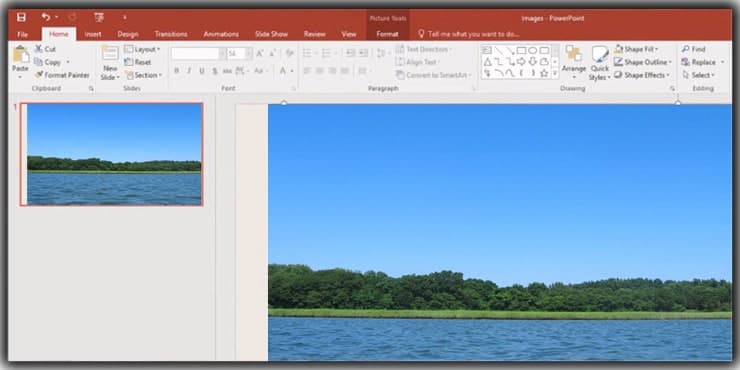
Step #1: Pick a Picture
Click on the Insert button from the top menu bar. Then click on the Pictures to add an image in PowerPoint.
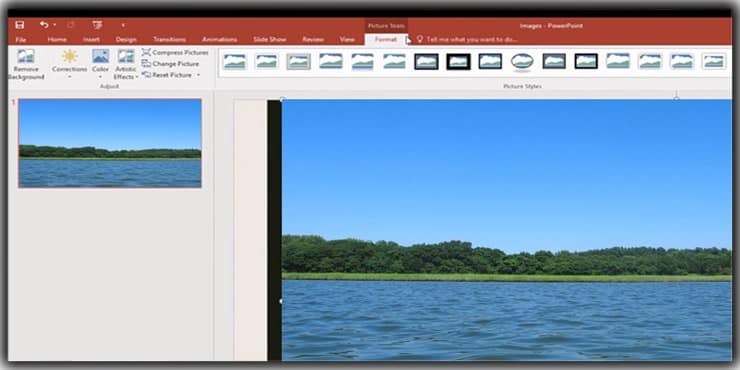
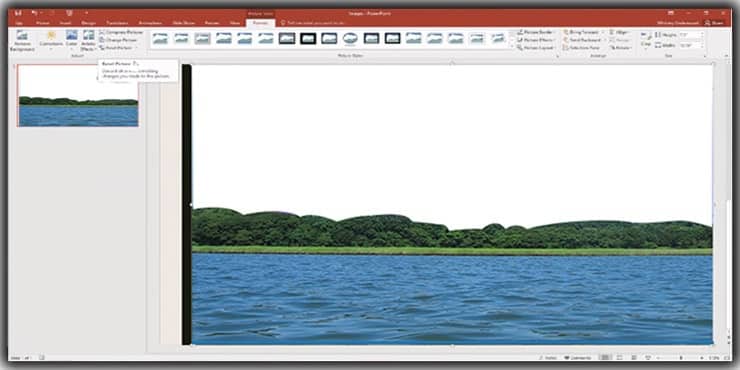
Step #2: Navigate The Format.
Press on the format tab on the top menu bar. Follow the picture below. It will open a new option for controlling the Image.
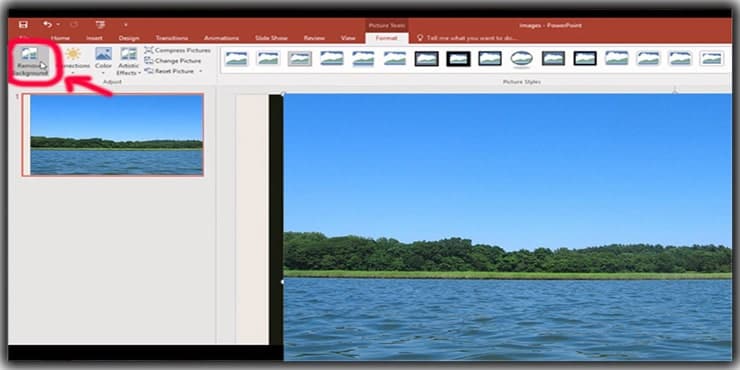
Select Remove Background
Now, press Remove background from the dropdowns.
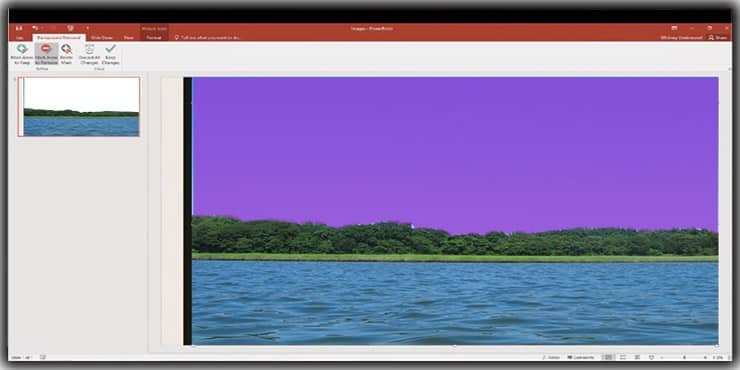
Step #4: Select Automatically.
After pressing on the remove background, The picture is captured automatically.
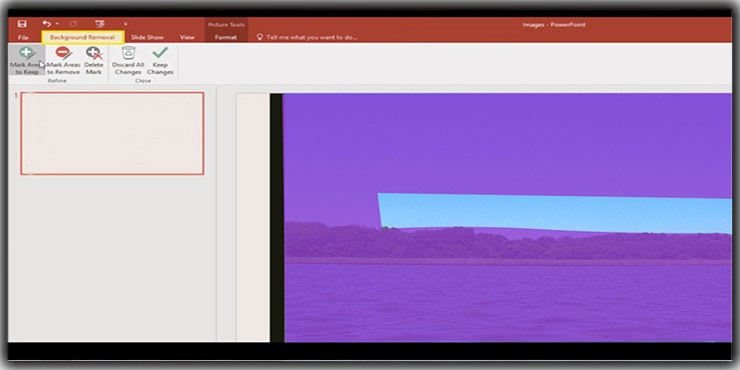
Step #5: Mark Areas To Keep.
Next Change the selection to cover the picture mark area you want to keep.

Step #6: Mark Areas To Remove
Press on the Mark area option to remove the background, which is in the background removal tab. And pick any other area you want to delete.
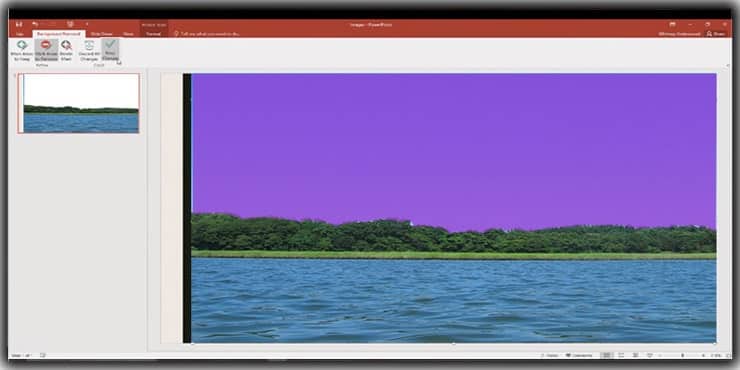
Step #7: Completed the image.
After finishing all kinds of processes, press the Keep Changes option.
On the other hand, if you want to remove the solid background, click on the color. PowerPoint transforms the solid color across the entire transparent Image.
This method works best if you already have a relatively simple background, as demonstrated below. You will need to remove the background tool instead if your background is more complicated.

Adjusting What Gets Removed in Your Image
PowerPoint is going to assume what you want to delete. So, first, select the “Backdrop delete” command. For example, in the Image above, I wish to remove the pinkish area in which PowerPoint conjectures is a pictorial backdrop.

Although PowerPoint does an excellent job of guessing, it’s not always right. For example, you notice the female and male subject’s arms are Blue. Since the background photo is identical, Powerpoint assumes they should also be deleted.
All you have to do is change the background removal alternatives to indicate what you want to keep and erase.
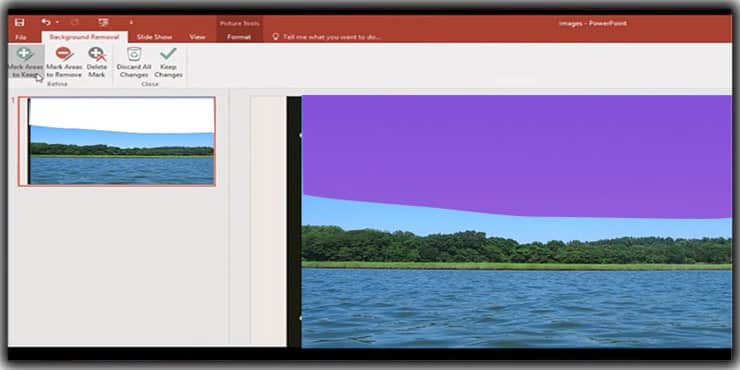
Mark Areas to Keep in Your Image
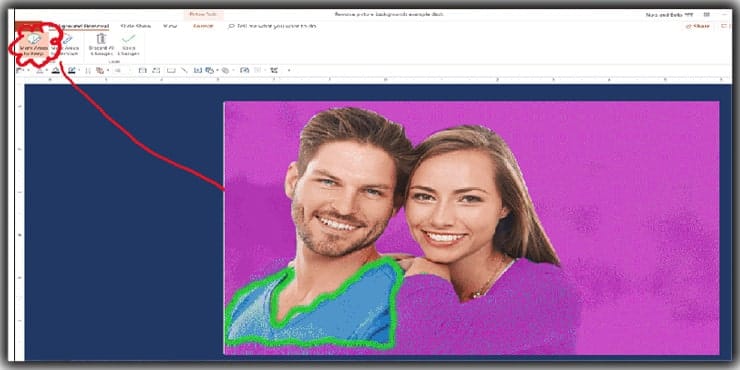
If PowerPoint fails to guess correctly, you may mark areas you wish to maintain.
- You have to pick the Mark Areas To Keep in the screen’s top left corner.
- Tap on and draw the picture pieces you want to preserve.
- And finally, press keep changes
- PowerPoint changes the portions of your image context by retaining the shift.
You may need to mark places to protect them a couple of times until you get it right.
Mark Areas To Remove In Your Image
You could also use the mark areas to remove in your picture if PowerPoint incorrectly conjectures.
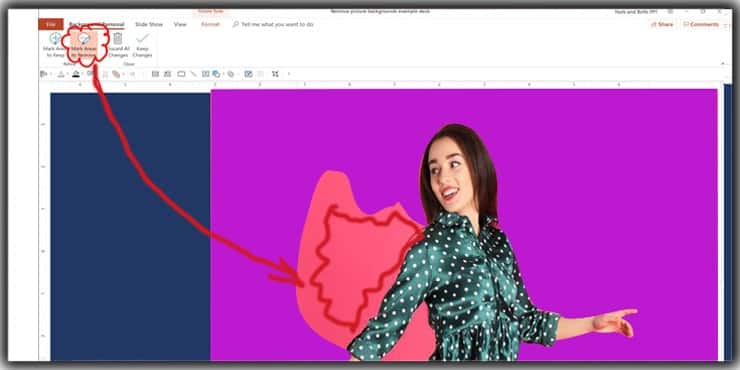
- Pick the to remove.
- Select and draw the picture parts that you want to hold in red.
- Press on the Keep Changes
If choosing to keep the adjustments, PowerPoint readjusts the pieces of your background picture.
Be mindful that you may have to do this a couple of times to make it correct based on your image’s nature.
When Remove Background doesn’t work
There are certain limitations when you remove the background. Thus, I’m describing the limitations below.
Limit 1: If your Image is too close, even with mark areas to retain. And mark areas to erase; removing all the right parts can be incredibly difficult. Clear pictures work best.

Limit 2: Some small details are difficult to remove, such as the scenery across hair strands, binder rings, etc., from the background.

Limit 3: Removing the background when the background is gradient color is challenging.

Remove Slide Background
PowerPoint removes the slide’s background from an image.
- Go to the first. Then choose the Slide Master
- Click any diagram style in the thumbnail panel on the left to delete a graphic watermark.
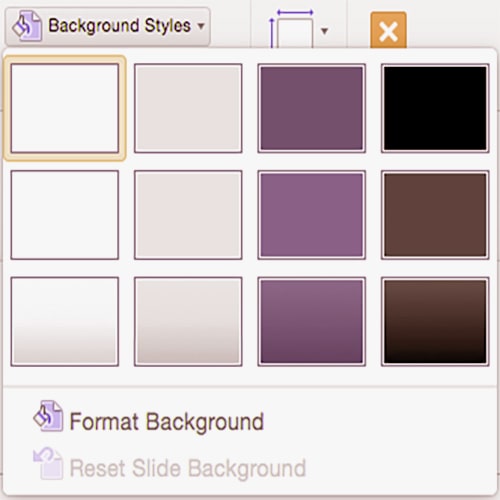
- See the Slide Master tab and press on the Background styles.
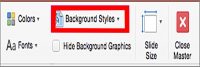
- Then tap on the Format Background.
- Tab on Solid Fill in the Format Background pane.
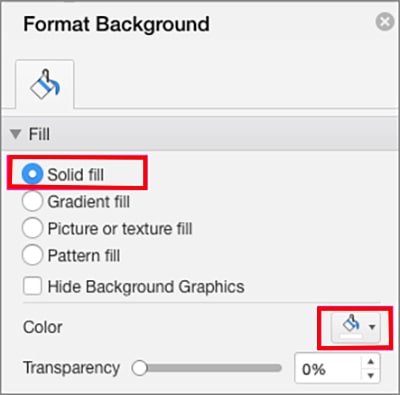
- Pick white or some other color you want by clicking the Color button.
- If the background of all spins is to be removed, press Apply to All.
The Color is not Working When Set Transparent.
The transparent color tool works well if you have stock images of solid color backgrounds. For example, on several stock pictures, you find these kinds of backgrounds.
Also, note that it has limitations even if the Transparent Color Tool is fantastic.
This technique won’t perform well when you have too equivalent color in your background and photograph. So, Note that because the whole photo is essentially the same color below, the background of the woman’s face is gone.

This method doesn’t do as you will see below with color-gradient backgrounds. Since the device Set Transparent Color eliminates just one color, most of the gradient is not carried out.

This technique doesn’t work better with small details such as flyaway hair or clothes. This also involves pixels around the hands of the people, as shown below. You would instead use the Remove Background tool for any of these situations.

How to Undo a Background Removing
Once PowerPoint removes the photo background, it hides from you by default. This ensures that you can always return to your main Image. Your views regarding which parts of the image background you wish to remove. To easily undo or start over the background removal:
- Pick the dropped background for your picture.
- Click on the Picture Format Tools.
- Press on Removal background.
- Change or Discard all differences in the settings.
You’ll see that the background changes come back by pressing on the delete of the screen. You may reorganize which parts of your picture background are to be preserved or removed if you compress the pictures that you can’t move back to your previous Image.
Save The Picture
You must save the image with a new name in a (jpg/png) format. For that, you can find the image easily.
FAQs
PowerPoint handles basic background removal surprisingly well, particularly for images with solid, high-contrast backgrounds like white stock photos. For anything more complex — gradient backgrounds, fine hair detail, or subjects that share similar colors with their backgrounds — Photoshop’s dedicated tools produce noticeably cleaner and more accurate results.
Images with strong contrast between the subject and background respond best. A clearly defined subject against a plain white or solid-color backdrop gives PowerPoint enough visual distinction to make accurate automatic selections. The more the subject blends into the background in terms of color or brightness, the harder the tool has to work — and the less reliable the results become.
PowerPoint makes an initial guess about what belongs to the background and what belongs to the subject, but it doesn’t always get it right. Mark Areas to Keep lets you draw over portions it incorrectly flagged for removal. Mark Areas to Remove targets sections it mistakenly kept. Using both together lets you manually correct the automatic selection without starting over completely.
Three situations consistently cause problems. Images where the subject and background share similar colors make separation nearly impossible. Fine details like flyaway hair, jewelry, or thin straps get lost or poorly handled. Gradient backgrounds also cause issues because the Set Transparent Color tool only eliminates one specific color at a time, leaving most of the gradient untouched.
It’s a quick one-click option that makes a single selected color transparent across the entire image. It works well for stock photos with completely uniform white or solid-color backgrounds. The moment any variation appears in the background — shadows, gradients, or texture — this tool becomes unreliable and the full Remove Background tool is the better choice.
Yes, and this is one of the more useful aspects of PowerPoint’s approach. The original image data stays intact behind the scenes. Selecting the image, returning to Picture Format, and clicking Remove Background again lets you discard all previous changes and start fresh. This only works if you haven’t compressed the image, which permanently discards the hidden background data.
Whenever the image is being used for professional marketing materials, client-facing content, e-commerce listings, or any context where precision genuinely matters. PowerPoint is convenient for internal presentations and quick edits, but it simply doesn’t have the toolset to match what Photoshop’s clipping path or image masking services deliver for demanding commercial use cases.
Conclusion
Set Transparent Color tools are the quickest way to remove background from image PowerPoint. but only work for a long time. In short, That’s why I suggest you get to know the PowerPoint background removing Tool.
Then, you can switch to Photoshop editors for further editing if any of these approaches don’t work.
You may also read:
- How to Make Background Transparent in Photoshop
- Image Background Removal Service
- A Guide to Remove White Background Using Photoshop Tools
- Change Color of Image in Photoshop CC –07Tutorials
- How to Use Content Aware Fill in Photoshop

Salim Ahmed is the CEO of Graphic Experts India, with over 25 years of expertise in photo editing, clipping path, image retouching, and eCommerce image editing services.