These days, Photoshop users demand to learn the quicker and simpler way to use the lasso tool. Sadly in most tutorials, you will find baffling settings and complex tools.
If you want to use the most effective tools for creating a perfect selection and cropping out photos, stay with us from top to bottom since we are here with the complete guide on using the Lasso tools. So, let’s get things underway.
A lasso tool is a default tool in Adobe Photoshop. It lets you select objects or areas within images and draw around them. This allows you to easily create selections and interesting compositions without manually cutting out parts of photos from other images.
The Lasso Tool in Photoshop CC
The Lasso Tool Photoshop works best at creating selections across simple edges. So it will not require a lot of curves or bends.
But before using the tool, make sure you can move your hand slowly enough because you must drag your mouse to create selections. The selection will not be accurate if you are steady while dragging the mouse.
That is why you should not use this tool to make complex selections since it depends on your cursor’s movement to create paths.
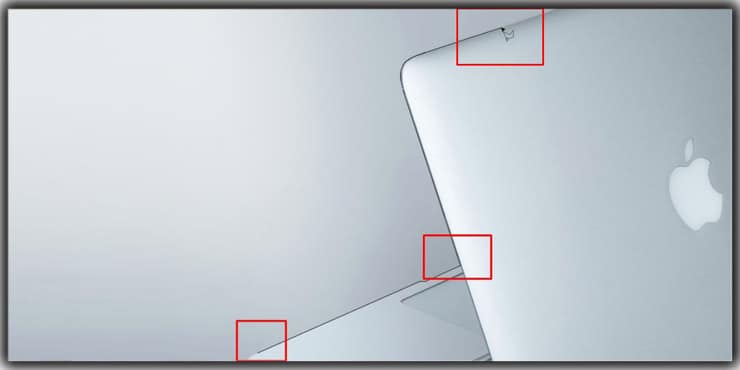
For example, working with hair or tree branches will ruin the image instead of cutting the subjects out. But you can, of course, make easy selections of subjects with fine edges like boxes.
Types of Lasso Tool in Photoshop CC
There are 03 types of lasso tools available in Photoshop CC. Each one has different selection options, uses, and advantages. Let’s look at each type of lasso tool and how they work.
Lasso Tool
The regular lasso took the primary class among the three kinds. To draw a path with it, click over a point on the canvas to start and drag the cursor over the object. It will automatically create paths.
The lasso will make paths following your cursor’s exact moves from start to end. In addition, the selection will cut unwanted objects out of their background and layer masking.
Polygonal Lasso Tool
If you want short straight lines, the Polygonal Lasso tool will help you. There is no need for freehand selections because this special tool can create lines evenly in between the space of your mouse’s clicks.
To work with the tool, select it and click anywhere over the layer. A point will be created there. Now from that point, drag the mouse to another place where you want to create the second point to connect them along your edges.
You will find the Polygonal tool has connected the two points and made an accurate straight line. This works great at cutting out box-shaped objects from images.
Magnetic Lasso Tool

The last one is the Magnetic Lasso Tool. It’s a more advanced and automated tool. However, you still need to create manual paths.
While other tools produce paths after you have made the selection, the magnetic lasso will keep creating paths while you draw paths.
The great thing is that it will make you draw lines over complicated objects that have so many complex edges.
These were the concepts of the three tools; now, you can understand how to use them effortlessly. So, let’s start learning to operate them one by one.
How to Use Lasso Tool Photoshop
The lasso tool Photoshop allows you to select objects or areas within images easily. This tool has become very useful in graphic design because it helps you create shapes and lines.
Using the lasso tool in Photoshop is quite simple. Let me show you step by step “how to use the lasso tool Photoshop CC.”
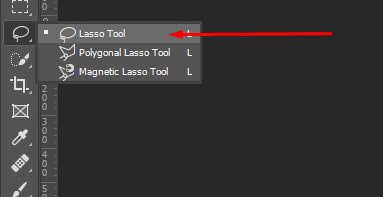
Step 1. Accessing Lasso Tool
The first job is to find the tool and open it. You can get it from the toolbar or press the L key on your keyboard for a shortcut.
Step 2. Changing Settings

Don’t just start yet! You better bring some changes to the lasso tool’s settings. You need to change the values of the feather. You will get fine and shared edges if the feather is set to 0px. For a softer edge increase its value to either 20px or 30px.
Step 3. Check Off “New Selection”

Now, click over a box that has a solid white color. It will change your selection type to “New Selection.”
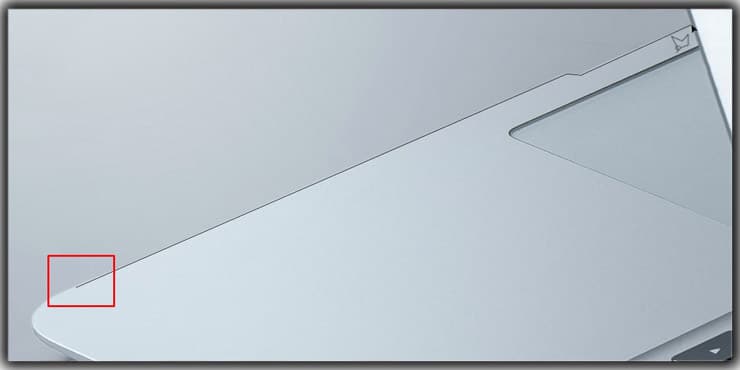
Step 4. Create a Selection
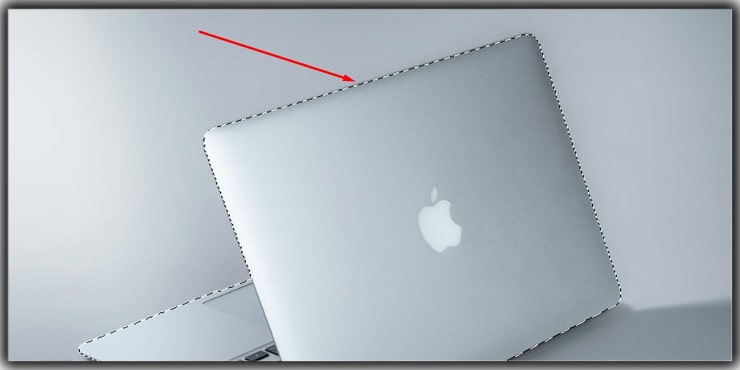
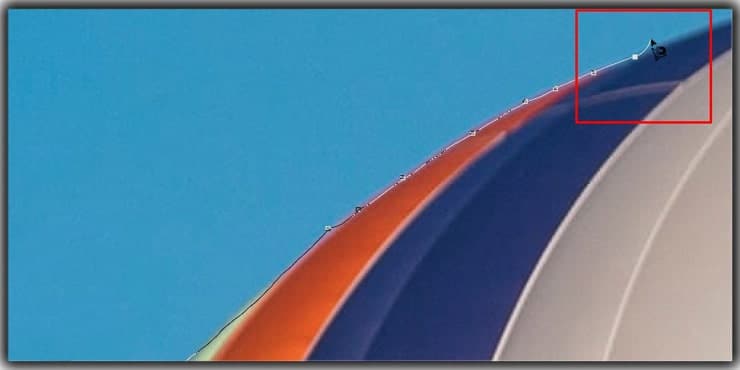
You are now ready to create your first selection and to do that, you have to click on any place on the edge. Then, start dragging across the edge. The Lasso tool will keep creating paths behind you as you move your cursor.

Continuously drag the cursor until you reach the end edge’s endpoint (probably the point from where you began). Lastly, click the path, and the selection will be completed. You will see marching ants, which indicate the paths have turned into a new selection.

Step 5. Use the Selection Further
You can either delete the background of the selected object or attach it to a layer mask. You can also cut it to use on other photos as well. To make these options available for you, right-click on the path.
How to Use Polygonal Lasso Tool Photoshop
Sometimes we need to cut out pictures containing many straight edges. The polygonal tool is the right pick to cut out such images.
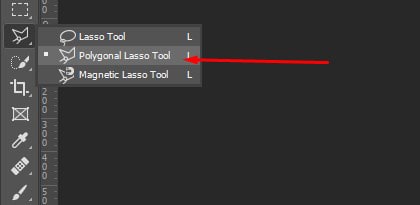
Step 1. Access Polygonal Lasso Tool
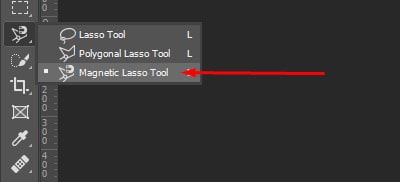
Click the Lasso Tool icon and hold it for a little while to reveal a polygonal lasso tool. Alternatively, you can get to this tool by holding the Shift key and L simultaneously.

Step 2. Make Adjustments
We did this before. Make adjustments like selecting the proper feather radius to harden or soften the edges.

Also, remember that you should set the selection type to “New Selection.

Step 3. Attach Anchor Points
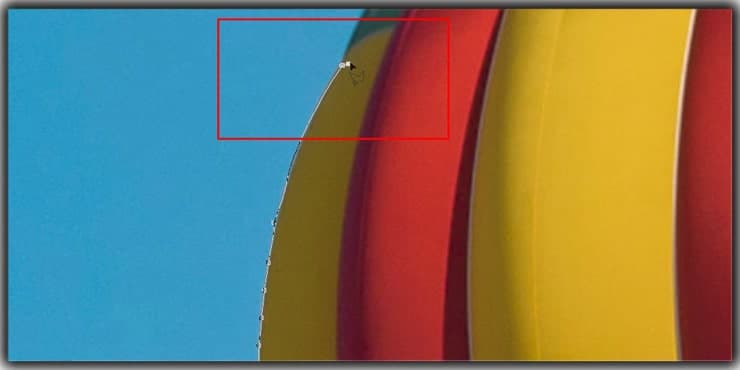
Now, click from wherever you want to start and end to make straight paths. The points will be connected.
Step 4. Continue Stretching Points
Until you get to the starting point again to complete the selection creation, keep stretching your path out for changing directions.
Step 5. Complete Your Selection
When you are done adding all the points to one another, click over the path and finish making a selection.
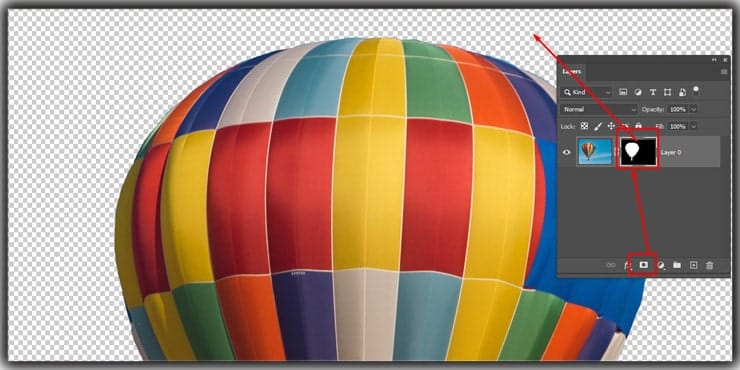
Step 6. Get Non-destructive Changes
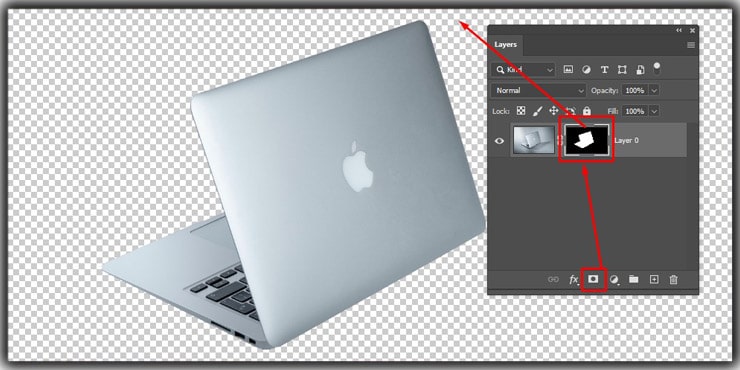
This tool is a super useful one for eliminating the background non-destructively. To remove the background, click over the layer mask symbol.
How to Use Magnetic Lasso Tool Photoshop
This selection tool is the simplest and most perfect form of the Lasso tool. It’s also added to the lasso tool’s hidden list in the toolbar. Hence, you have to follow the same rule of finding Lasso and the Polygonal Lasso Tool to find it. Now let’s learn the process of using it.
Step 1. Opening Magnetic Lasso Tool
First, access the tool.
Step 2. Adjusting Settings
The Magnetic Tool also requires some setting changes, which you must do before beginning to work with it.
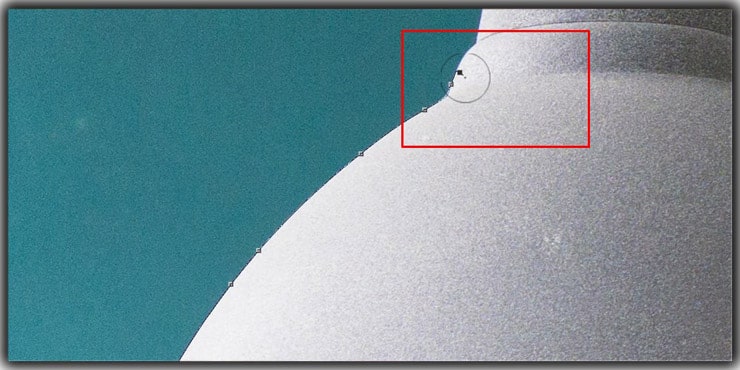
Step 3. Fix a Width
You have to press over the “Caps Lock” key to use the tool, and your cursor will be turned to the “Selection Brush” icon. The change in the width is needed to change the Selection Brush’s size. This way, you can work more precisely.

However, it isn’t easy to understand which value or size for your brush size will work the best for the magnetic lasso tool. Still, there is nothing to panic about since it allows you to keep changing the width value using the [ or ] key.

The ideal value is a large width because you can keep the edge with a bigger width. Also, it should not be too big, or Photoshop will count things outside the edge and lock them, creating issues for you later. So it’s something that you should carefully choose.
Step 4. Change Contrast
Changing contrast is essential because it can make the edges look more precise. However, the magnetic lasso tool keeps its value at 10% by default which is considered more than enough.
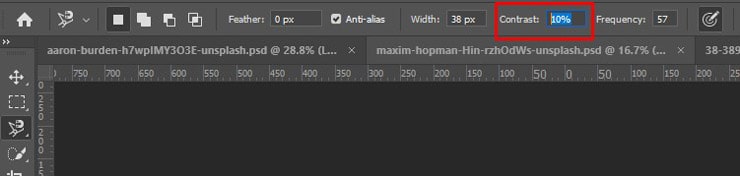
Hence, if you don’t want to make edges look more hardened, lower the value from 10% or keep it the way it is.
Step 5. Switch to Another Frequency

Depending on the frequency, the anchor points are increased or decreased. Therefore, if you are working on an object with simple edges, keep the frequency low and if it’s a complex-edged object, choose a higher value.
How to Make Selection Using Magnetic Lasso Tool
Now, we will learn the selection procedure with a magnetic lasso tool.
Step 1. Adjust Feather Radius
First, keep the radius of the feather 0px.

Step 2. Activate the “New Selection” Mode
Choose your lasso type as “New Selection.”

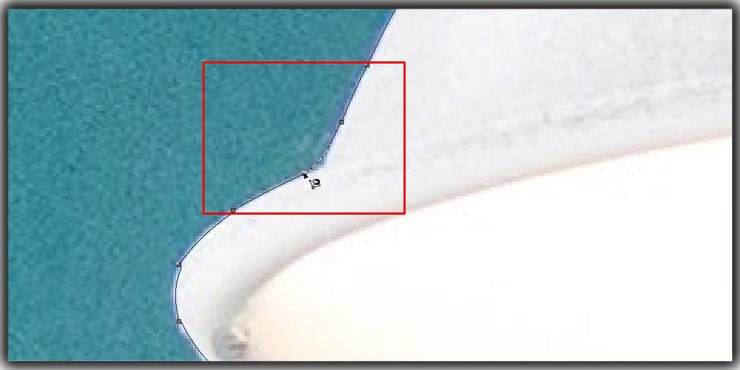
Step 3. Make Selection
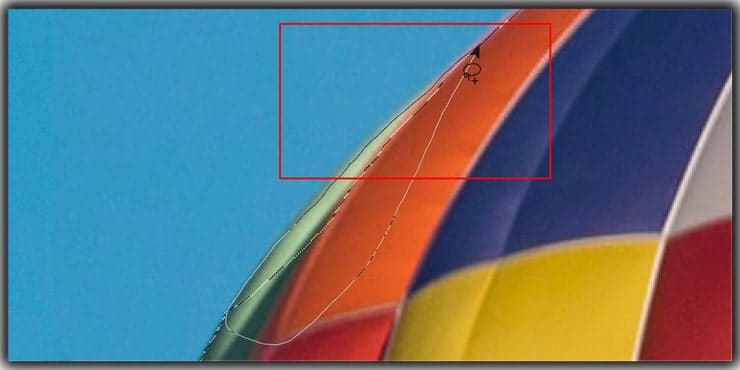
Click once over the path’s edge and drag the cursor; press the keyboard’s caps lock for better-creating selections. It will disclose the selection brush symbol, easing the selection process.
Step 4. Complete Selection
Connect the cursor to the edge’s starting point by dragging and completing your selection creation. Then, to get options for further steps, click inside the path.
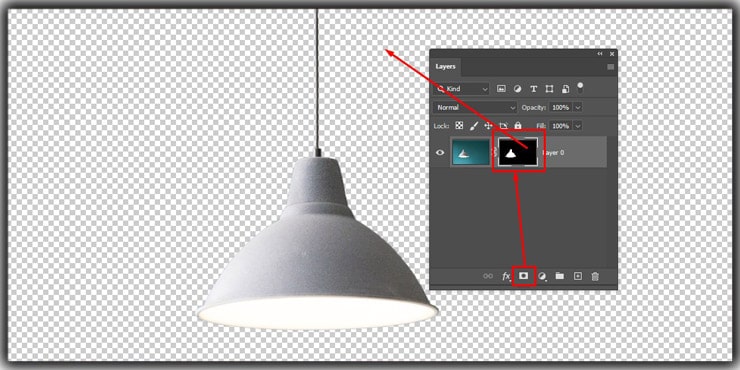
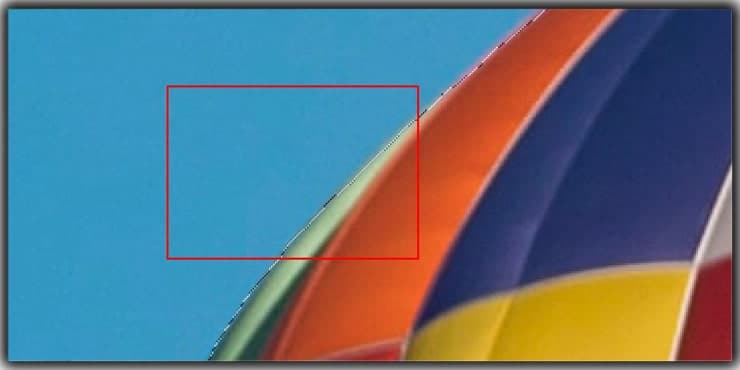
Step 5. Remove Background
To remove the background, take the cursor to the layer panel and click on the layer mask. It will instantly remove all the external portions.
How Can You Swap Between Lasso Tools While Making a Selection
These three lasso tools are helpful. Differently, they are beneficial once, but the next non-beneficial. You need to use all three lasso tools together for better creativity most of the time. You can use them all by swapping between them in such cases. Let’s learn how.
To switch between the tools, begin with the Magnetic Lasso Tool. After that, it’s easy to jump on two other lasso tools after making the magnetic selection.
If you want to swap to the Polygonal Lasso Tool, you need to hold the Alt on your PC or Option on your Mac and click continuously, or else when you stop clicking, the anchor points will return to the magnetic lasso tool again.
Now for switching to the general lasso tool, hold the Option key or Alt but instead of clicking simultaneously, click once and hold down the mouse as you go.
It will activate the regular lasso tool and let you make freehand draws. Once you release the key (Alt of Option), Photoshop will swap you to the magnetic tool.

How to Refine Selections With the Lasso Tool Photoshop
Unless you are a pro at this job, the chance is high for you to have imperfect selections. Fortunately, you can effortlessly fix selections using the Lasso tools Photoshop shortcuts. These are simple shortcuts.
Add to Selection
If you haven’t selected enough edges, you can add to the selection by holding the key “Shift” and making a brand new selection around the place you need to add.
This way, you can decrease the hassle since it will not make a whole new selection; instead, this additional location will be attached to the existing selection.
Remove From Selection
Sometimes by mistake, you might select some area outside the edge you want to remove from your selection.
In this case, Hold on your PC keyboard’s Alt or Mac’s Option key to create a secondary selection across the place you want to remove. It will refine the area by deleting that selection.

How Can You Fix Errors Created With Polygonal and Magnetic Lasso Tool
The specialty of both tools is that they can make single anchor points, so refining paths with these tools is extraordinary.
To remove an anchor point in the wrong area, press the “Delete” button to eliminate that specific point. Don’t stop pressing delete until you get to the point where you want to start again.
Ending the Lasso Tool Paths
You end the lasso path in various ways. The simplest way is to continue the path until reaching the starting point and when you’ve reached that point, click over that exact point.
Another way is for two different straight lines. To connect them and complete the path, click as soon as you require, and voila! Photoshop will connect the points for you.

When you are creating your selection but don’t want to continue anymore, instead start anew and delete it by hitting the Esc key to cancel the path.
The last way is useful when you are almost at the point of changing the path to the selection and want to delete this one. In this case, hit the buttons Ctrl + D (on Windows) or (Command + D) (on Mac). The activated selection will get deselected.
FAQs
The Lasso tool Photoshop is a favorite tool for selection outlines. This selection tool helps the user cut out subjects with three different tools.
The general lasso, polygonal lasso, and magnetic lasso tools are so helpful in the selection of shapes, flat edges, jagged edges, as well as complicated-edged objects.
The regular lasso tool is called the standard lasso tool because it gives the user complete control over drawing paths. It means you can draw freehanded paths.
Sometimes it’s pretty hard to find the lasso tool among the many editing options in Photoshop. Hence, it’s wise to access it in a shortcut way. For example, you can open the tool in just a few seconds by hitting the Shit + L key.
The magnetic Lasso tool is considered the best lasso tool because starting with it will let you switch on other tools, too (standard and polygonal lasso tools).
Final Notes
You can create a rough selection using the Marquee tool or others or remove the background with a background eraser. Nevertheless, the Lasso tool Photoshop gives you the freedom to create selections.
You can use the selection to make the background white or Photoshop editing services.
The selection is essential in editing and background removal. eCommerce products’ advertising and promotion are impossible without making the background white or cropping original photos.
Hence, it’s better to learn to use the Lasso tool Photoshop from the step-by-step article “The Lasso Tool in Photoshop CC- A Detailed Guide.”
You may read:

Salim Ahmed is the CEO of Graphic Experts India, with over 25 years of expertise in photo editing, clipping path, image retouching, and eCommerce image editing services.