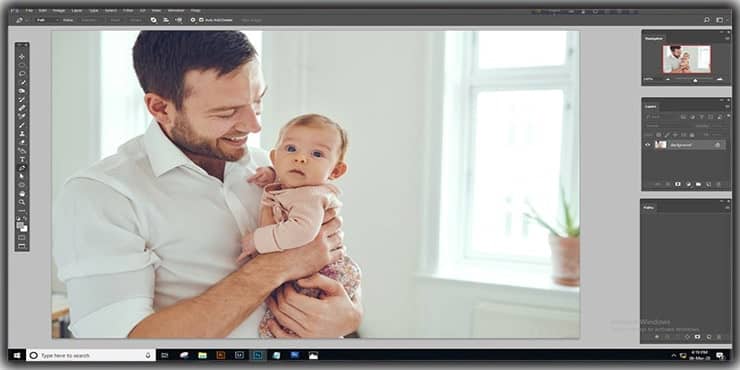
Would you ever like that smooth and seamless picture background? But wasn’t their appropriate wall, or was there too much chaos in the room?
Well, it’s effortless to make your view a reality. Thanks to the magic of Adobe Photoshop. There are several situations to do this, as with any modification, but I discovered it to be the easiest and fastest.
This article illustrates how to extend background in Photoshop.
So, Let’s start.
Extend Background in Photoshop
Extend background in Photoshop helps to improve image composition and change the aspect ratio of an image. If you want to extend a background image in Photoshop, there are several ways to go about doing this.
Images should have enough space to put text, graphics, and logos in the age of websites and advertisements.
So, first, there’s a valuable skill in learning how to expand Photoshop background. Then, pursue and learn to expand the context to recreate the original colors, light, and texture!
How to Extend Background in Photoshop Using Marquee Tool
To extend background in Photoshop, you can use the marquee tool. Here we will show, how to use the marquee tool to extend the background in photoshop.
This tool allows you to select areas of the image and then drag them outwards to make the area larger.
So, let’s look at extending the background in photoshop.
You must open a photo in Adobe Photoshop to extend the background image.
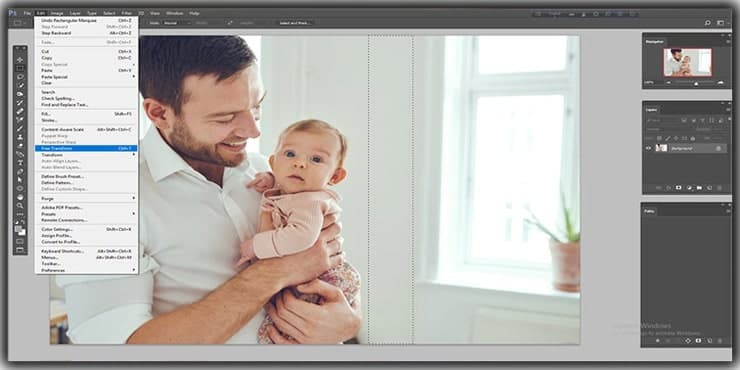
Step 1: Marquee Tool
Instead of concentrating on what we don’t have in our picture, let us take advantage of what we have and add the marquee tool. For work of this kind, I am using the rectangular marquee tool.
For using that, I aim to emphasize the blank or white color background wall. And You Want the Rest of the background to look white or blank.
Utilizing the marquee device, take it from the highest point of your picture and stretch it to the base. It’s alright to go past the borderline; it will settle along the edges of your picture.
Furthermore, if the rectangle is not positioned the first time correctly, move it around, or “break” and retry it until it matches.
Step 2: Free Transform
The marquee is still underlined. Initially, Go to the edit menu until “Free Transformation” is shown. Select this choice. Markings should be shown along with the marquetry.
Step 3: Fill The White Or Blank Space
Using the button, press one, and lift the clean wall in the area you want to wrap. After that, Keep pulling until the whole area is covered.
If you try to remove something else in the actual marquee, such as the lampshaded shadow in my picture, you may lift through the picture’s point.
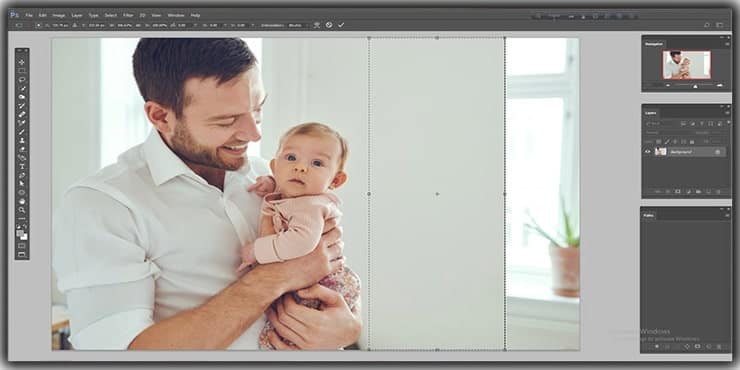
Now you can deselect the marquee from here. See, it’s effortless to do.
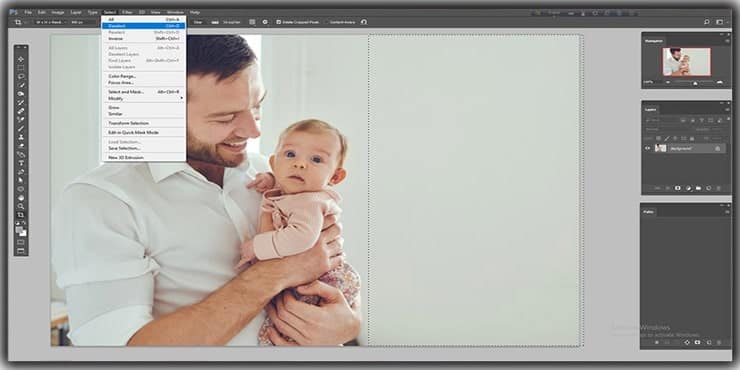
And don’t forget about saving your image. But if you overlook it, be assured that less than 30 seconds will be needed again.

Finally, you extend the background of the image.
Step 4: Extending Backgrounds
Not all backgrounds can be expanded quickly and easily. For example, if your subject stands in front of a busy sidewalk, it will take a lot of time to stretch the background and may not even be achievable if a deadline is set.
But Photoshop makes it much easier to make accurate background expansions of any dimensions if your subject is on an open or simple background.
For our example, the theme is in the face of a red background, but the smoothness in the scene shifts somewhat. The background is darker to the tops and bottoms and lighter to the center. In the background, we also have some smooth elements to capture.
Step 5: Add Noise
We’re right on track! You’ll probably see something wrong in our extension if you close yourself to the original picture and our newly painted backings.
Every picture you take, no matter how great the camera, there will always be a little noise. So it is important to notice the noise that matches the actual photo if you paint new features.
Learn:
- How to Add Image to an Existing Layer in Photoshop
- Fix Frizzy Hair in Photoshop
- How to Edit Photos in Photoshop
Use the Content-Aware Scale to Extend Background
If you want to extend the background of an image beyond the edges of the frame, you can use the Content-Aware Fill tool.
This tool works by analyzing the pixels around the edge of the object and filling them with similar colors. It’s best to use this tool only if you have some experience working with images because it requires a lot of manual tweaking.
Step 1: Rasterize the Background Layer
Let’s attempt a different approach. First, open your image, then double-click the background layer to rasterize it.
Step 2: Launch the Crop Tool
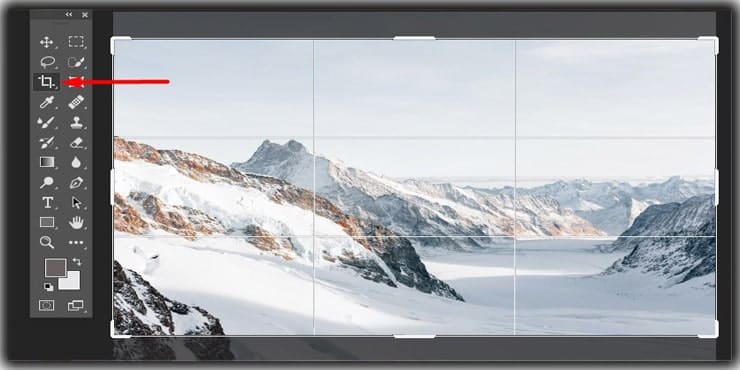
Next, press C to launch the Crop Tool.
Step 3: Extend the Background as Needed
To extend the background as needed, drag the crop tool’s lines.
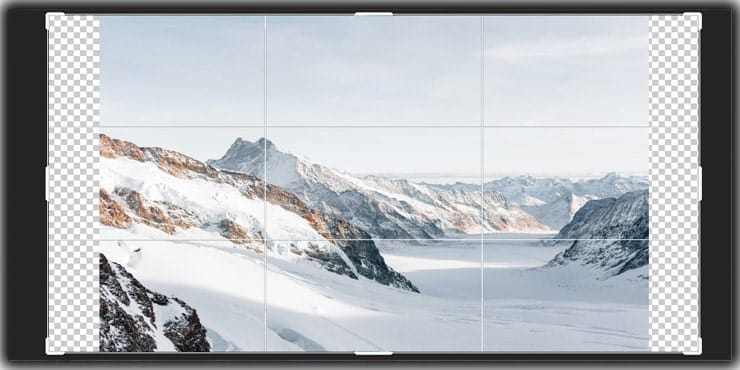
Step 4: Dragging the Lines to Extend the Background
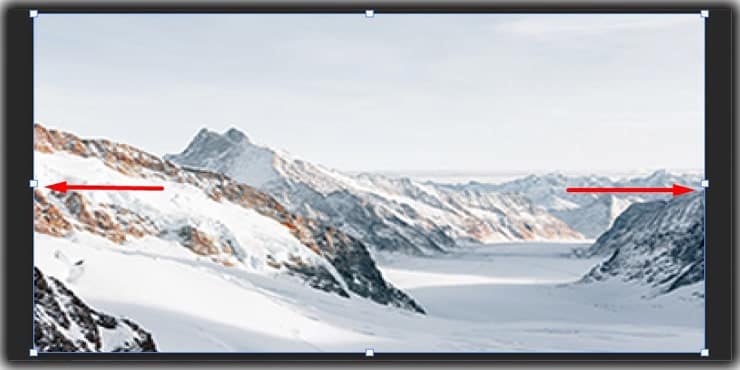
To use the Content-Aware Scale tool, press Alt-Shift-Control-C. The backdrop of the Photoshop image can be extended by dragging the lines while holding Shift.
Your image will be as follows:
Step 5: Content Aware Scale Tool in landscape Images
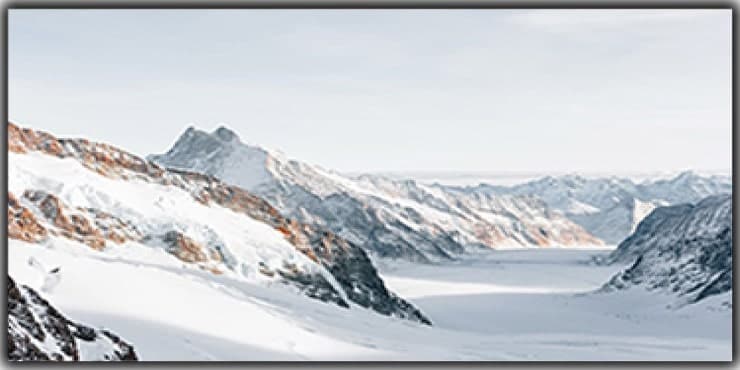
When working with landscape images, the Content-Aware Scale is an excellent tool because it’s acceptable for some natural elements like water, grass, and bushes to get slightly stretched or squashed.
However, I don’t recommend using this technique with portraits because it can distort facial proportions and produce results like these:
Extend Background In Photoshop Increasing Canvas Size
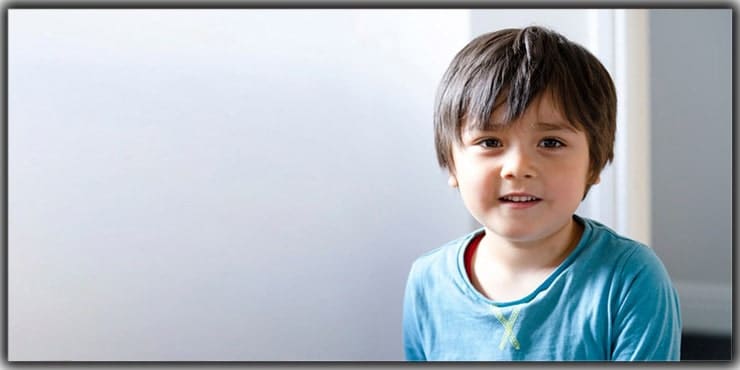
I’ll extend in Photoshop on the right side of the main portrait image to include my topic on the left of the middle of the photo.
This gives the picture a better composition and creates a more balanced and attractive picture by moving it around in the frame just a bit closer to a rule of a third vertical hotspot.
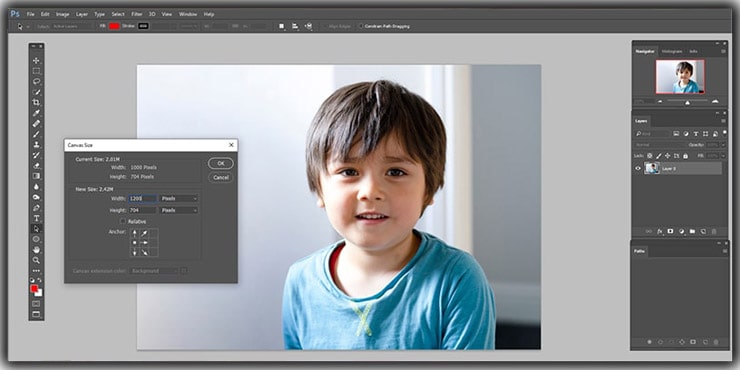
Step 1: Add Canvas
Open the Adobe PhotoShop first. After that, please choose a picture and make it canvas size. This will lift a pop-up box. You can adjust the dimension vertically or horizontally, in whatever direction.
For instance, I would like to extend the picture to the right side. So then I increase the width from 75.25 to 80. After that, I will choose the arrow pointing to the left side to lift the picture over.
And It will create more space on the right side of the image. While it’s done, then press on ok.
You should also have open space on your image’s on the right side or any area where you can enlarge your image.
Step 2: Choose The Newly Added Area
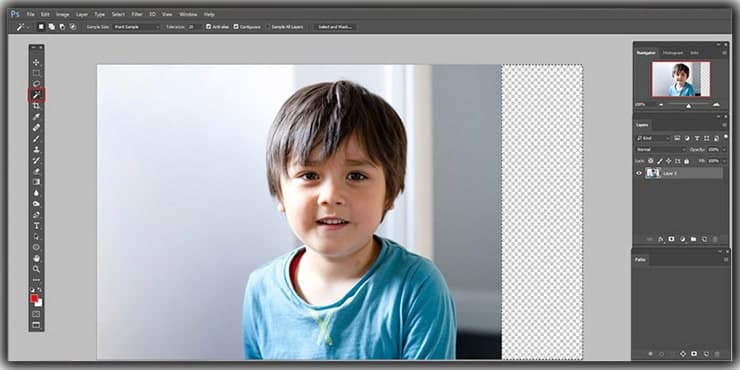
To choose the new area, you must go to the Photoshop toolbar. And the photoshop toolbar is located on the left side of the PC / Laptop screen.
After getting the toolbar, you can select the Magic Wall Tool. Then, select photographs and press on the newly added area.
Know more about Adobe Photoshop Tools.
Step 3: Fill the Added Area Using Content-Aware
To fill the added area, you need to go to the Edit option and click on the fill Option. Then a pop-up will open. Top of the fill pop-up, you can see the Content-Aware options. Select Content-Aware, then press ok.
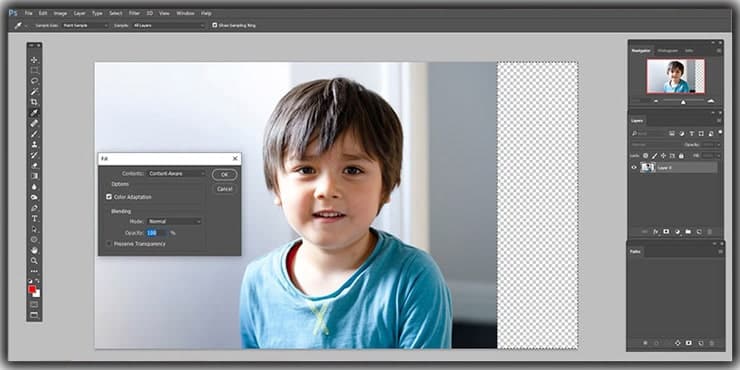
Be aware that Photoshop Content-Aware Tool draws the background from the nearest places you want to expand. This easy method works great if you want to extend a common pattern or background to areas of your picture.
You should also remember that it might not work excellently in every scenario. For instance, I wouldn’t have enough background to apply this method if I decided to extend the left side of the picture, whereas my subject is already so close to the left bank.
Final Image

Fixing or Matching Extended Background with Brush Tool
Before starting the extension, we must decide what size we have in the last picture. You can adapt the liner size to meet your requirements with the Crop Tool. We wished to create a style for a website banner with text space next to the topic.
When your canvas is set up, you can use the reliable Brush Tool to continue the extension. First, make a new layer and sample the red close to the picture’s center. Then paint a 100% flow until you have filled out all the recently added transparent regions. This will provide us with a good basis.
Now we have to reproduce the darker areas up and down the picture. Use this darker color to make a natural gradient and replicate the shadows in the main image across the upper edge.
Repeating the process close to the bottom of the photo. And please sample as much red because you need to create a clear, soft gradient in various colors from the natural photo.
When you have painted the actual photo on all sections, paint the layer mask of the Brush Tool Layer with black still low flow. This will allow you to hide excess red and also help to fuse in with the freshly painted background of the main image.
FAQs
Reshooting isn’t always practical — the location may no longer be accessible, the timing might have been a one-off, or the original shot is otherwise perfect except for the background space. Extending it in Photoshop lets you fix the composition after the fact, add room for text or graphics, or simply improve how the image fits a specific layout like a website banner or advertisement.
The Rectangular Marquee Tool combined with Free Transform is the fastest and most straightforward approach for plain or mostly solid backgrounds. You select the edge of the existing background, stretch it outward, and Photoshop fills the space seamlessly. It takes less than a minute on a clean, simple background.
Content-Aware Fill works better when the background has some texture or pattern to it — grass, water, brick, fabric — because it analyzes surrounding pixels and replicates them intelligently. For completely flat or solid backgrounds, the Marquee Tool approach is faster and just as effective.
You can, but with caution. Content-Aware Scale in particular tends to distort facial proportions when applied to portraits, which produces obviously unnatural results. For portraits, increasing the canvas size and then painting the extended area manually with the Brush Tool gives far more controlled and realistic results.
Every camera sensor introduces a tiny amount of grain or noise into photos, even in good lighting. When you paint or generate new background areas digitally, those areas come out unnaturally smooth by comparison. Adding a matching level of noise to the extended region makes the whole image feel consistent and prevents the extension from looking obviously edited.
Increase the canvas size in the direction you want to expand — using Image > Canvas Size — and then point the anchor arrow toward the opposite side. This creates empty space on your chosen side without moving the original subject. From there, use Content-Aware Fill or the Brush Tool to populate the new area with matching background.
When automated tools don’t perfectly replicate a background — especially one with gradients, subtle color shifts, or shadows — the Brush Tool lets you manually paint matching colors and tones into the extended area. Sampling colors directly from the original image and working at low flow keeps the painted sections gradual and natural rather than flat or obvious.
Conclusion on Extend Background in Photoshop
Now, if your photo doesn’t capture sufficient background, you can take these easy steps to quickly broaden the Photoshop background and enhance the dynamics of your picture!
Do you have any concerns or comments about How to expand the Photoshop bracket? Just let us have a comment-we’d love to hear from you!
Read More:

Salim Ahmed is the CEO of Graphic Experts India, with over 25 years of expertise in photo editing, clipping path, image retouching, and eCommerce image editing services.