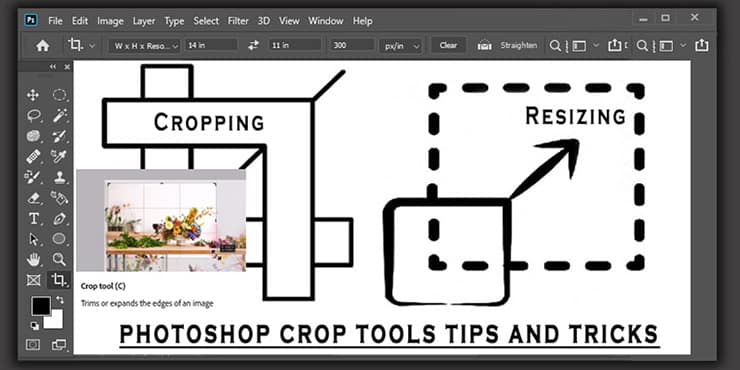
Are you a beginner in image editing? Do you need to crop your images and resize them? Photoshop Crop Tool helps you crop and resize your photos effortlessly.
The crop tool allows users to remove unwanted parts of an image, adjust the aspect ratio, and resize the image to fit specific dimensions.
Whether you’re looking to crop your image for social media or print, the Photoshop crop tool offers a simple and effective way to get the job done.
In this blog post, we’ll dive into the basics of using the Photoshop crop tool and explore some of its advanced features. So whether you’re a beginner or an experienced Photoshop user, this blog post is for you. Keep reading.
What is Photoshop Crop Tool?
Photoshop crop tool is one of Photoshop CC’s most commonly used tools by Photographers and photo editors. Crop Tool is a versatile feature that allows users to trim, resize, and remove unwanted or distracting elements from an image.
Its intuitive interface and various options make cropping an image a simple and enjoyable task.
However, mastering the Crop Tool requires some understanding of its functionality and the various ways it can be used to improve the composition and overall quality of an image.

How to Crop Images in Photoshop CC
Do you have an image that you want to crop but don’t know how to use Photoshop? Here, We’ll show you how easy it is to crop an image using Adobe Photoshop CC. We’ll explain each click of the process step-by-step, so you can quickly adjust your image.
You can crop an image quickly using the Crop Tool. Crop Command is another option that also can be used to crop an image.
Follow the below instruction for image cropping with the Crop tool or Learn the clone stamp tool, brush tool, or any tools & toolbar of Adobe Photoshop CC.
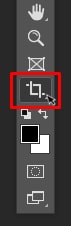
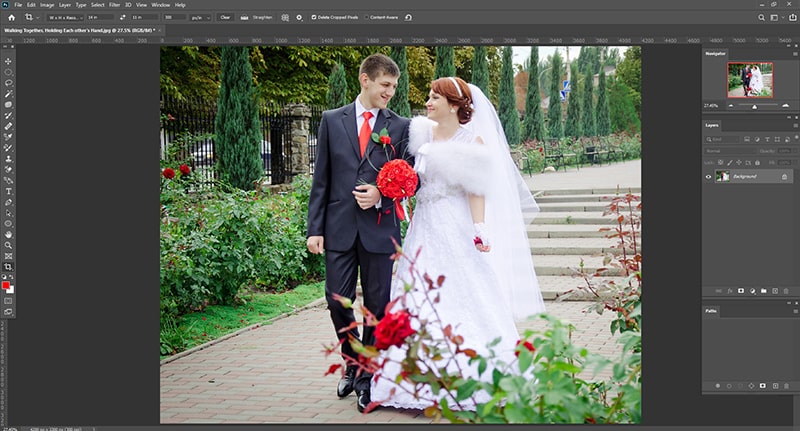
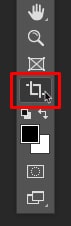
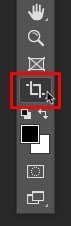
Choose the Crop tool from Tool Panel
Go to the Tool panel and select the Crop Tool. Also, you can hit the keyboard shortcut key “C.”
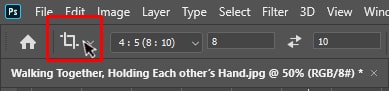
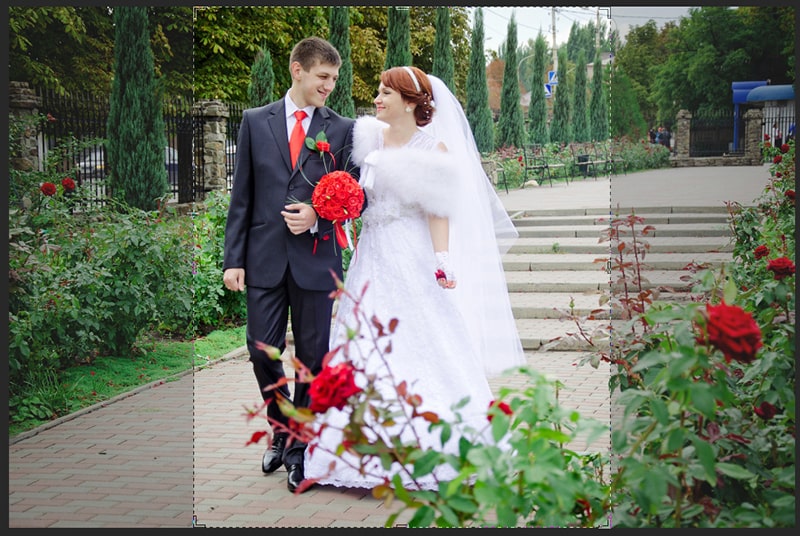
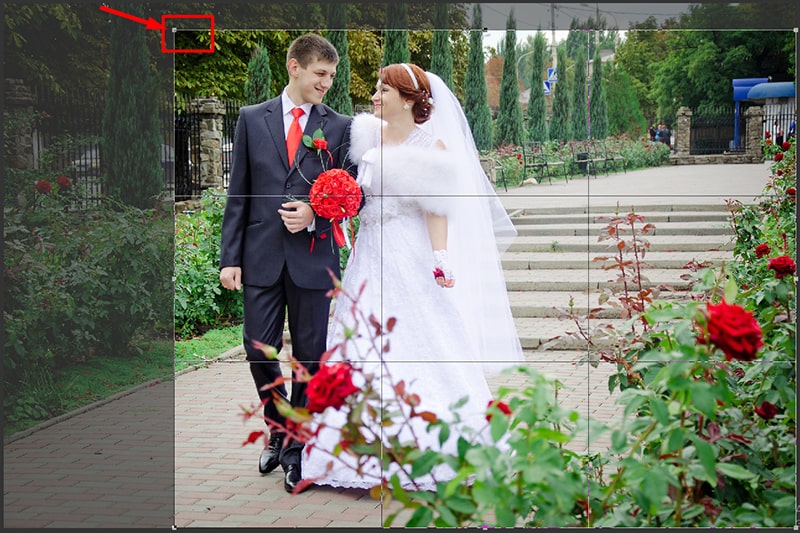
Select the Crop tool; you will find a Cropping border in the image. Remember, if you worked with the Crop tool in any other image, the settings are set to the earlier settings.
So, before making any progress, we will need to reset the settings of the Crop tool.
Look at the below image. It shows showing the earlier images were cropped at 8 X 10 measurements.

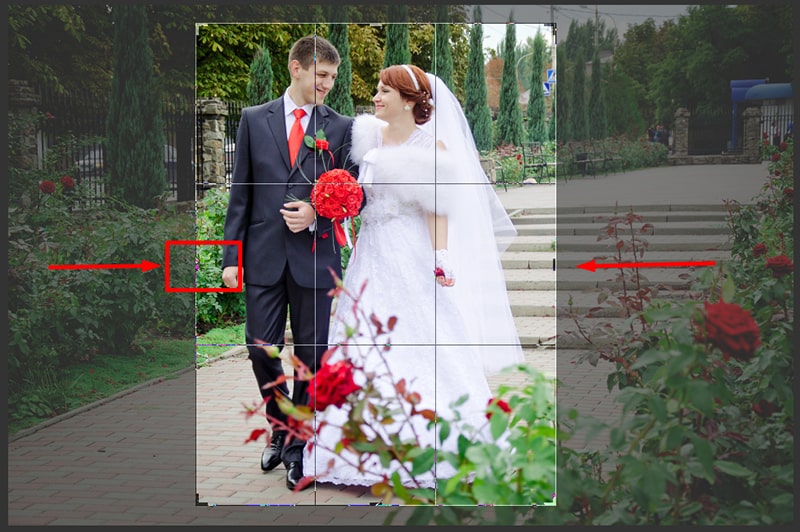
And below is the current image with earlier cropping measurements.

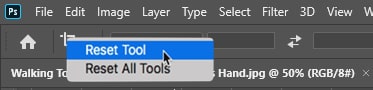
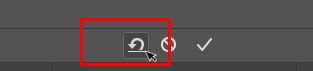
Crop Tool Resetting
To restore the Crop tool’s default settings, go to the Options Bar, put your cursor on the Tool Icon, and right-click (for windows) or Control-click (for Mac).
Now you will have 2 options: “Reset Tool” & “Reset All Tools.” If you click on the Reset Tool, it will allow you to Reset the Crop Tool only. So, click on it.
This way, the Width and Length boxes will get empty, and the Aspect Ratio option will become Ratio.
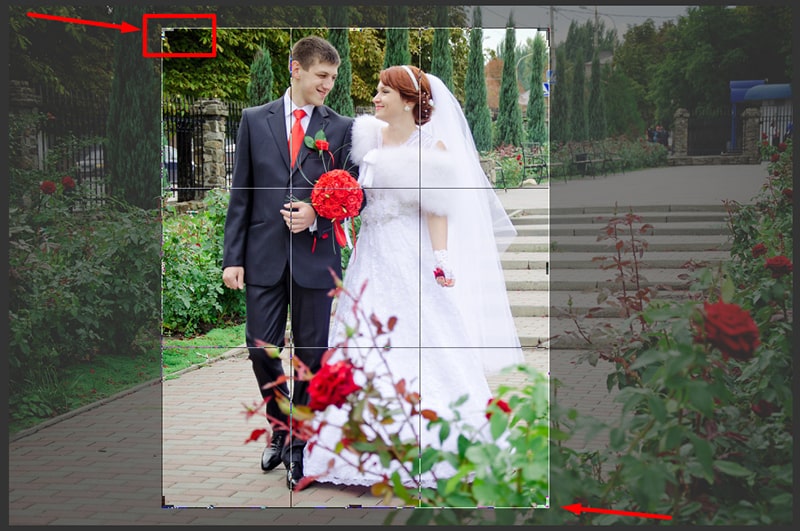
You will have a small problem at this point. Looking at the image, you will find that the image is still showing with an 8 X 10 measurement. You have to reset the Border.
To do this, press the ESC key. If the Cropping Tool border doesn’t appear in the image, select any Tool from the Tool panel and again resect the Crop Tool. And you will have the Cropping border in the image.

Cropping Image Border Resizing
Look intently at the cropping border area; small handles are on every side.
Using these handles, you will be able to Crop an image. And this is the easiest way since you don’t need to follow any other process. Click on any handles, and drag them.
Thus, the image will be automatically reshaped, and you can choose any size you require. The inner portion of the border will be the cropped area, and the outer parts will be removed.
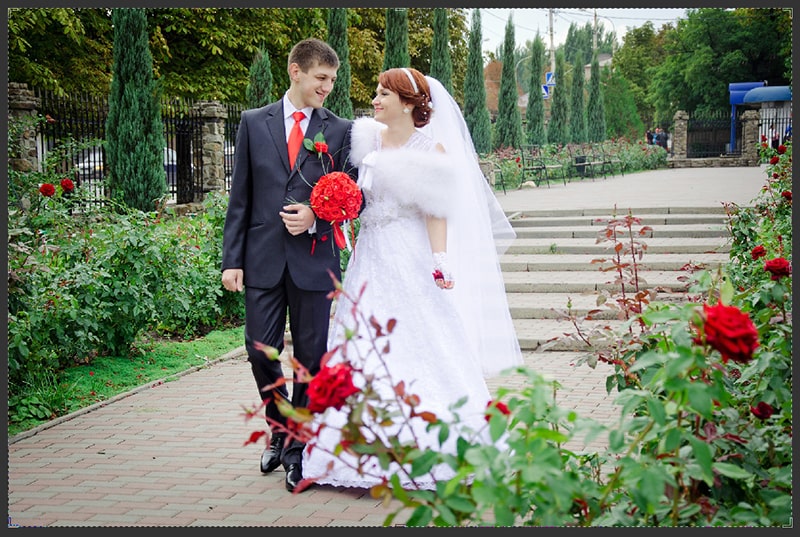
Once you finish the above steps, you will have your cropped image.
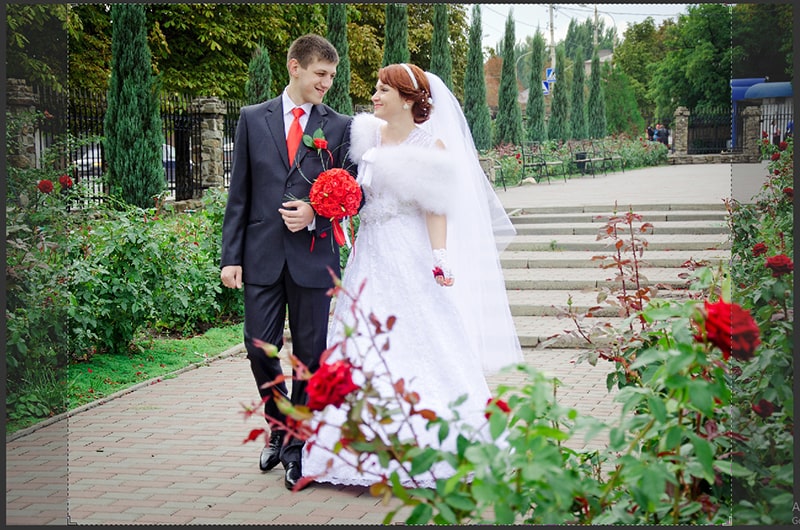
In the above image, the subject is in the center. Would you like to see the subject on one side of the picture? Let’s learn from below.
How to Move an Image Inside the Crop Border
This is a simple process; thus, a beginner can accomplish it easily.
The process is repositioning the image inside the border. Click on the image and drag it inside the border. Position the image as per your requirement.
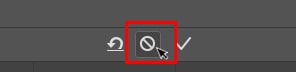
We will examine other options to Crop an image. So, we have to cancel this Crop option. Follow below
At the Options bar, click on the cancel button. The current Crop option will be canceled.
We will draw our crop border. Are you excited to learn how to do that? Read the below instructions.
How to Draw Your Crop Border
We can draw our crop border rather than using the Crop tool from the Options bar.
You can quickly draw your crop border by clicking any image area inside and dragging.
Now, resize the image.
You can follow 2 options for resizing an image.
Click on any of the handles and drag them to resize the image.
Or, click inside the border and drag it to reposition it.
Remember to click on the Reset button to reset the Crop tool whenever you are doing any new process.
How Should I Lock Crop Border’s Aspect Ratio
Generally, Photoshop allows us to freely shape crop borders without taking care of the aspect ratio. How to keep the original image aspect ratio?
Ist Step: Press the Shift key and hold it.
2nd Step: Click on the cursor on any corner handles and drag it. The aspect ratio will be locked at this stage.
How to Reshape the Border of the Crop at Its Center
Windows: Press the Alt key and hold it and drag the handles.
Mac: Press the Option key and hold it and drag the handles.
Resizing an Image from Its Center and Lock an image Aspect Ratio
For Windows: Press and hold the Shift and Alt key together. Then drag the handles of the corner.
And for Mac: Press and hold the Shift and Option key together. And drag the handles of the corner.
How to Select a Specific Aspect Ratio and Crop an Image
Sometimes we may need to use a specific aspect ratio for cropping. It is required to take a printout of a particular frame.
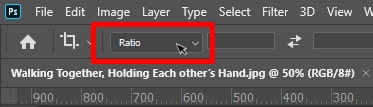
At this point, you have to set the Aspect Ratio at the options bar,
Selecting a Preset Aspect Ratio
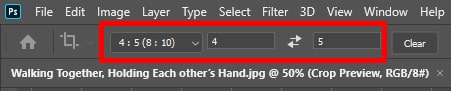
8 X 10 is the standard photo aspect ratio. Go to the Aspect Ratio option to preset it.
After clicking, you will find a preset aspect ratio list. Different aspect ratios, such as 1: 1 (square), 4: 5 (8: 10), 5: 7, and 2 : 3 (4: 6), will appear.
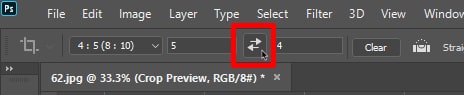
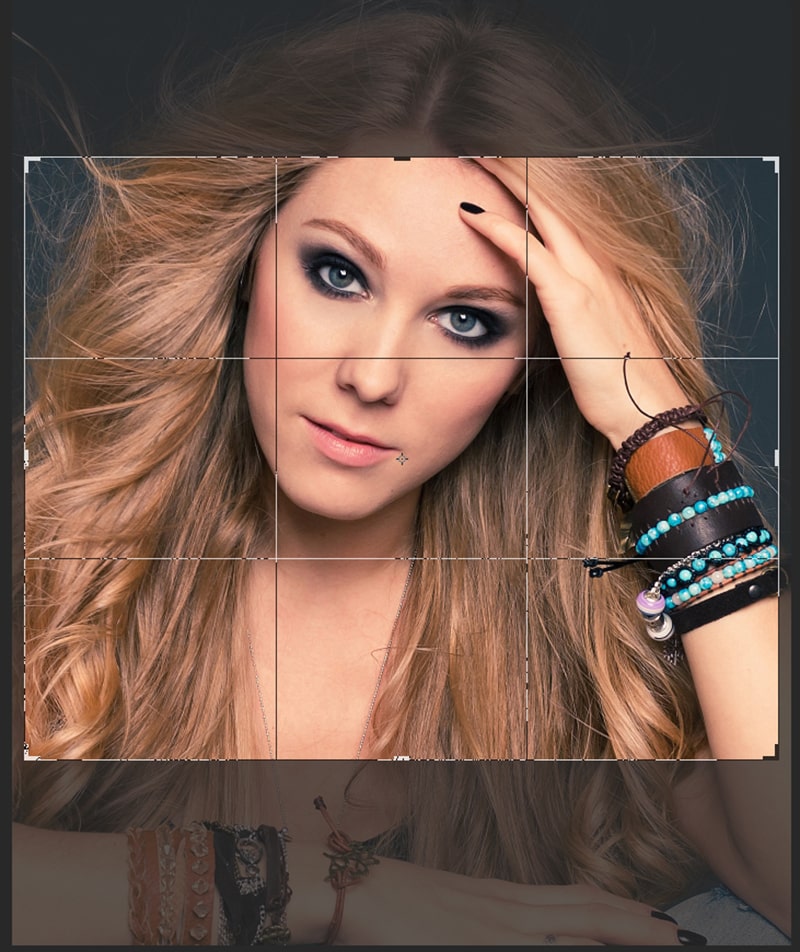
For instance, we will choose 4: 5 (8: 10).

Once you choose your required aspect ratio, Photoshop will automatically enter the width and length box measurements. After entering the required aspect ratio, the image will jump to the 4: 5 (8: 10) aspect ratio option.
Swapping the width and length value
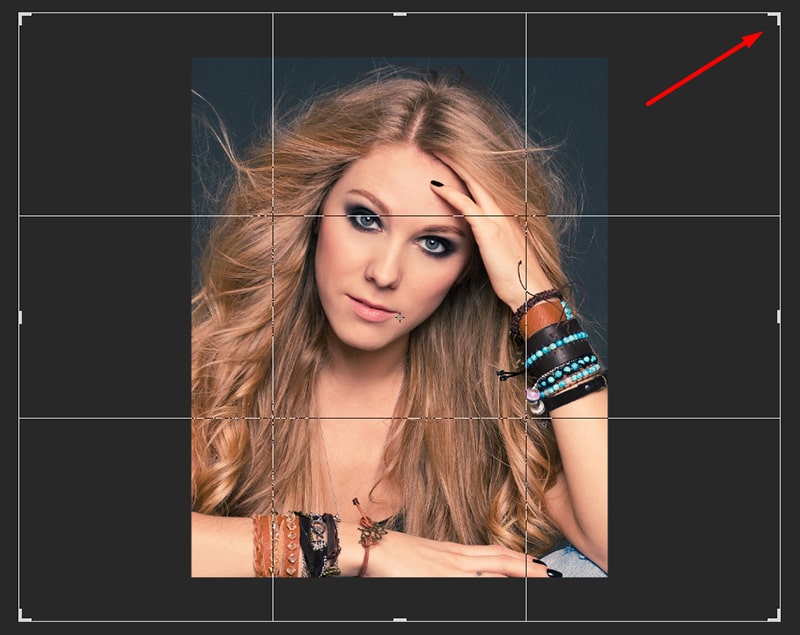
You will find the Swap Icon between the width and length measurement box. Click on it if you must swap the width and length values.
Using this option, you can smoothly switch between landscape and portrait modes.
Selecting Customized Aspect Ratio
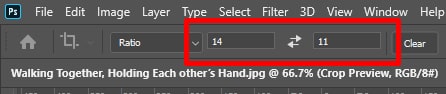
Often you will need to put an aspect ratio option that is unavailable in the aspect ratio value. For example, you have to crop an image that requires an 11 X 15 aspect ratio, but this ratio option is unavailable in the preset option. How will you do that?
Well, the solution to the problem is also straightforward.
Click the width box and put your required number. Then press Tab. Now you will be inside the length box and again put your desired number. Let’s say you set width 11 and length 15.
Photoshop will show you the result of the customized aspect ratio without making any late.
At this stage, resizing the border is also possible with the help of the handles. Drag the handles, and don’t assume the aspect ratio will change. The truth is, since you customized the aspect ratio manually, the aspect ratio is automatically locked.
So, pressing and holding the Shift key is unnecessary. But pressing and holding the Alt (for Windows) and Option (for Mac) will allow you to resize the border from its center.
How Can I Save Customized Preset Crop
We will sometimes require the same aspect ratio to use in other images. So, saving the customized preset crop will help us to save valuable time. How to save it, then?
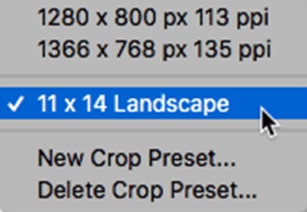
Go to the Options Bar and select the Aspect Ratio option.

You will see an option named New Crop Preset from the Menu.
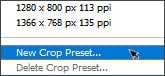
Click on that, and a new dialog box will appear where you must put a new name of your customized aspect ratio.
I named the new preset “11 X 15 Landscape”. Once you click OK, the dialog box will be closed.
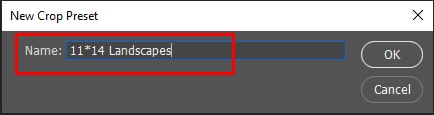
You will find it on the list whenever you need it next time.
How to Clear an Image Aspect Ratio
Are you finding an option to clear an image aspect ratio? This means resizing the crop border independently is your primary purpose.

There is a Clear option on the right side of the aspect ratio length. Click on it to Clear the customized aspect ratio.
After clearing the customized aspect ratio, you can drag the handles freely.

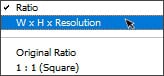
How to Adjust Photo Size and Resolution
We discussed cropping an image following a general aspect ratio or shape in the above steps.

The most surprising thing is you can crop a photo to a specific image size & resolution using the Crop tool. For this, the Aspect Ratio menu needs to be opened.
Then from the list, select the W X H X Resolution option.
For example, I want to take a printout of a fixed size of 11″ X 15″ rather than making an aspect ratio of 11″ X 15″ of my image.

At this stage, the width must be more extensive than the height. So, I will click into the Width box and out 15 and write “in” (for inches) inside the box. Then click on TAB, jump to the height box, and apply the same method.
Changing the Resolution Value in Photoshop Crop Tool
Did you notice that we have a 3rd box where we must put the resolution value? 300 pixel/inch is the industry standard resolution, and I will put the same resolution value into the box. Remember to select px/in as a measurement of the resolution.

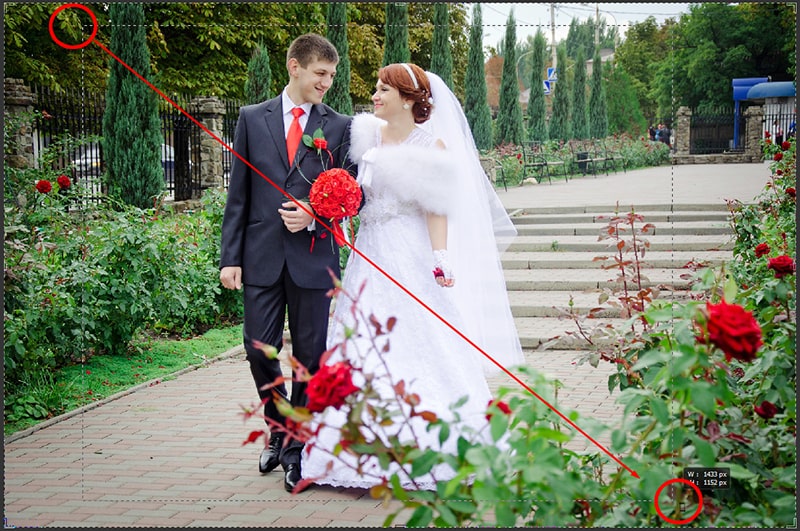
With the above settings, I’ll resize the crop border.
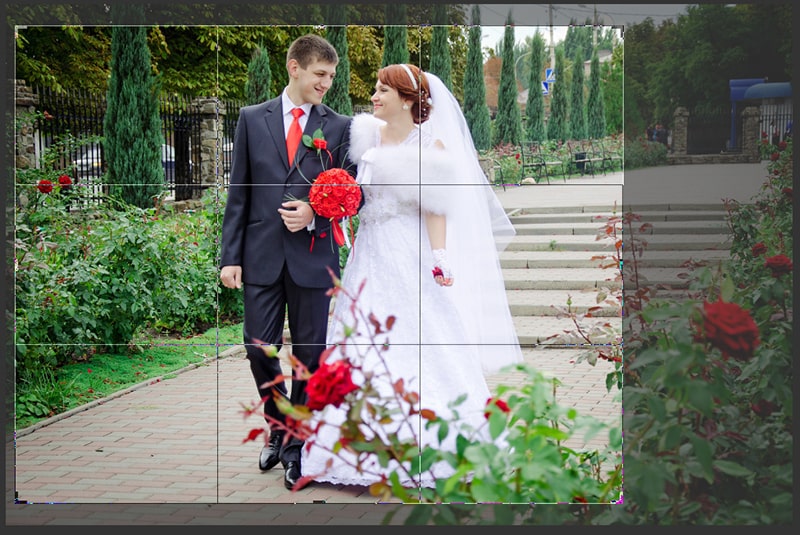
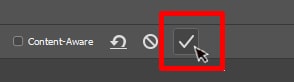
Image Cropping by Photoshop Crop Tool
Now while cropping the image, click on the Checkmark of the options bar. You can follow the shortcut key to crop an image by pressing Enter (for Windows) and Return (for Mac).
Once the image is cropped, press the Spacebar and don’t release it. Drag the image into the viewing area so that you can see it.
How to Check the Image Size
To check size of an image, go to the Image Menu and choose the Size from the list. A new dialog box will appear to find the image’s width, height, and resolution.
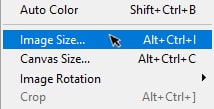
Click Cancel to close the dialog box.

What is the Procedure to Undo the Crop
Go to the Edit menu and select Undo Crop.

You also can follow the Keyboard Shortcut.
For Windows: Ctrl + Z
And for Mac: Command + Z
Thus, you will get the original image.
To fit the image on the screen,
For Windows: Ctrl + 0
And for Mac: Command + 0
If you require to zoom in/out, press the +/- key holding the Ctrl (for Windows) or Command for Mac).
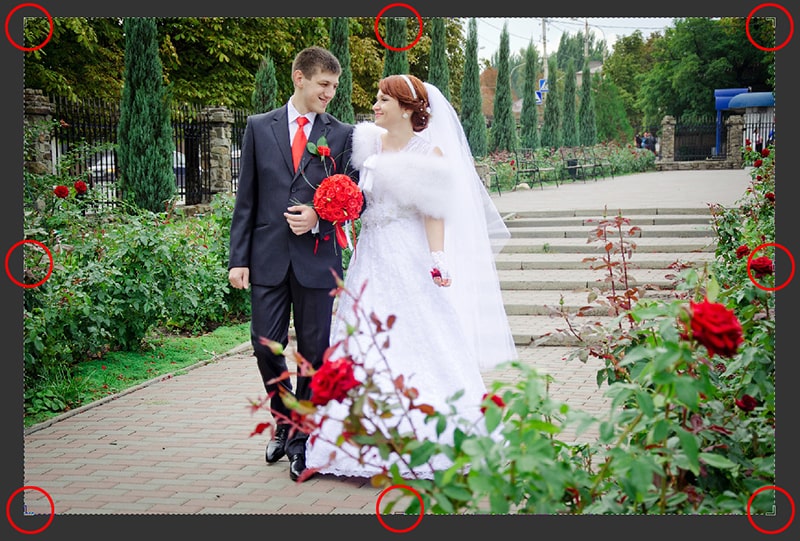
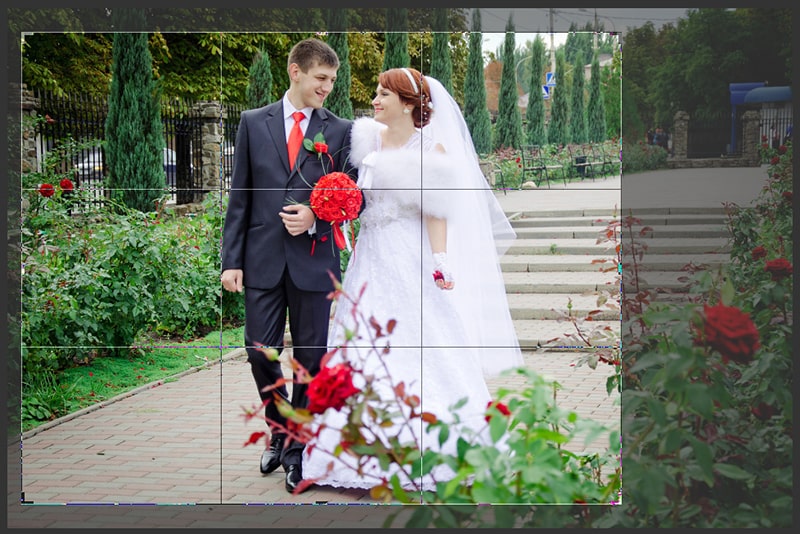
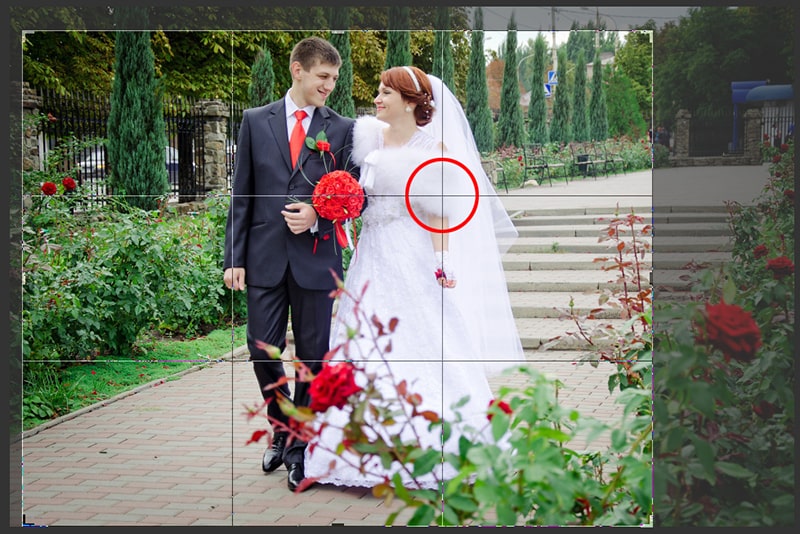
How to Crop Overlay Using Photoshop Crop Tool
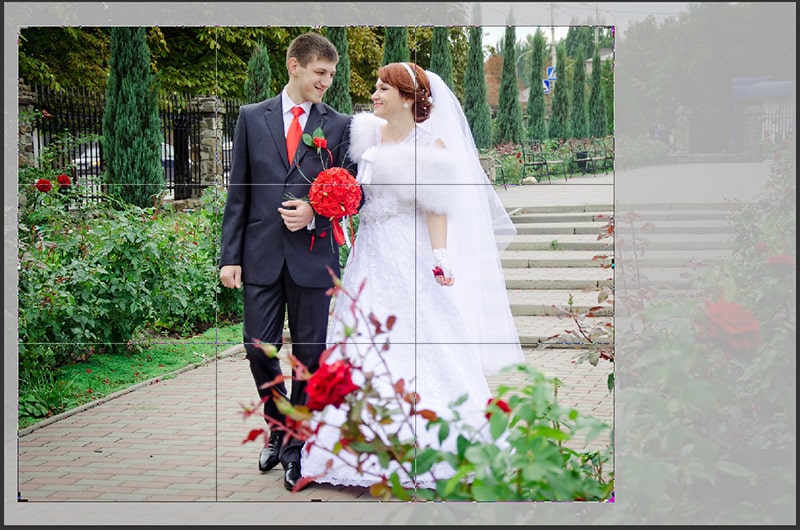
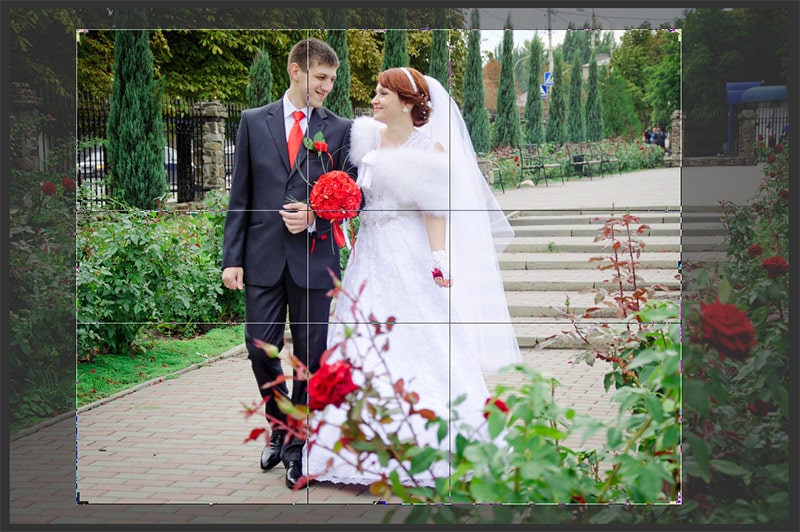
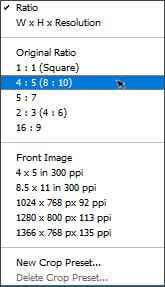
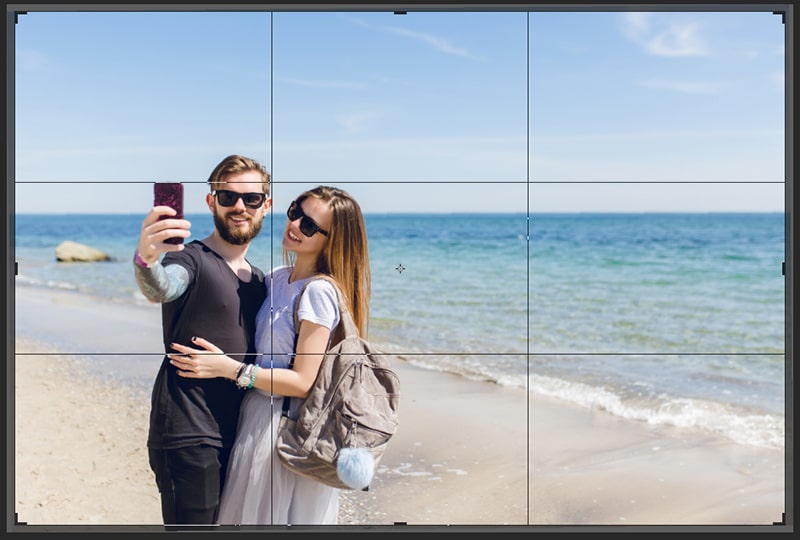
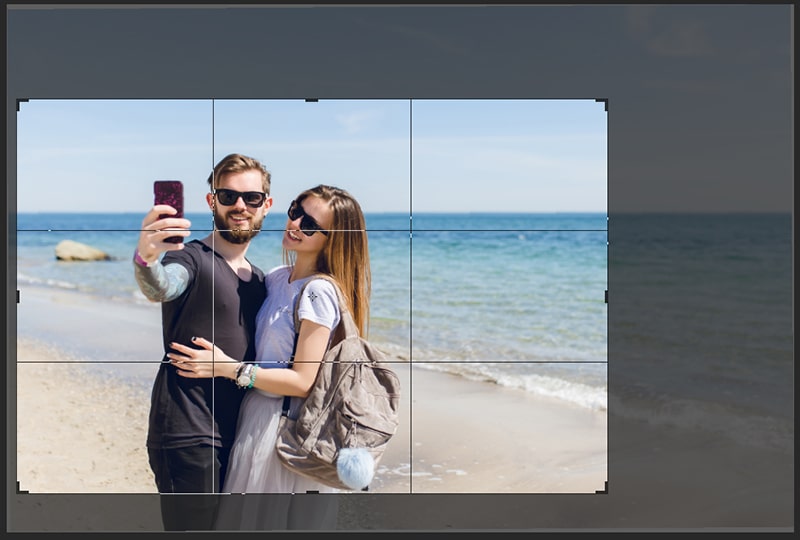
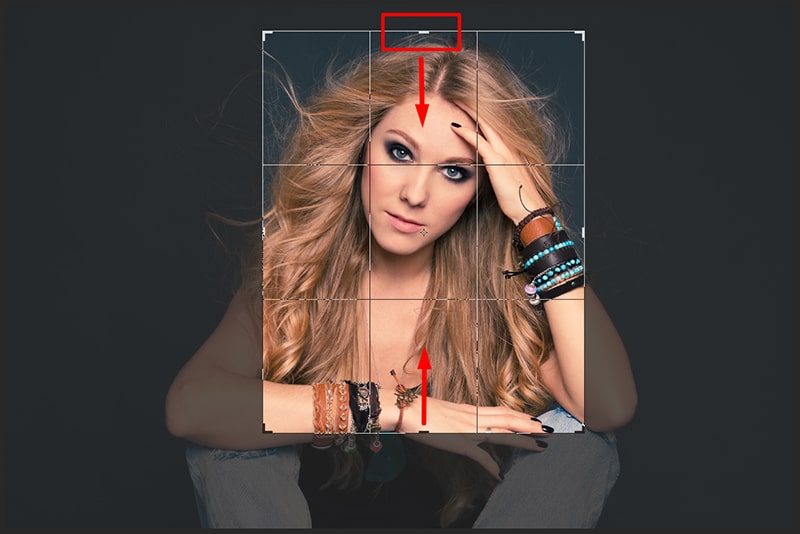
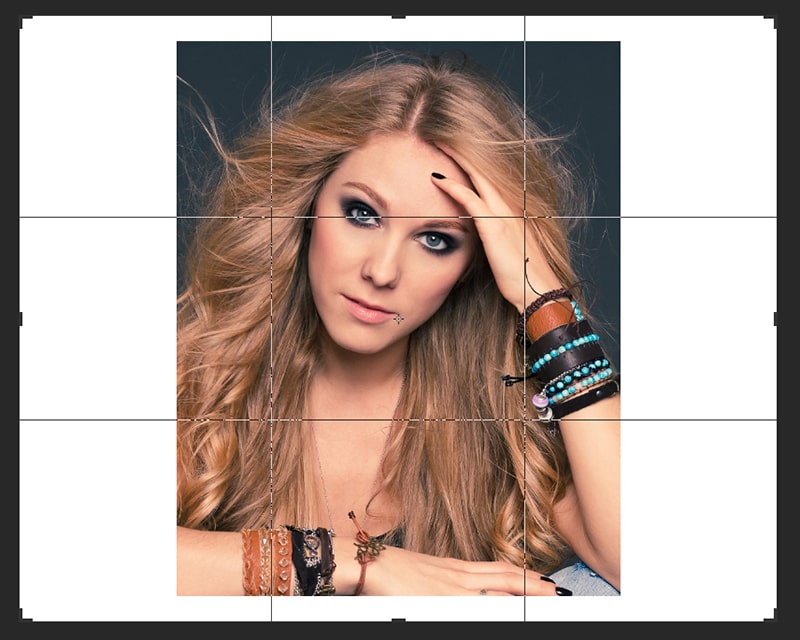
Using the crop tool, you can also create a crop overlay, another handy feature. The cropping border is invisible in the image; click on the image to get it again. A 3 X 3 grid will appear inside the border, and its name is Rule of Thirds.
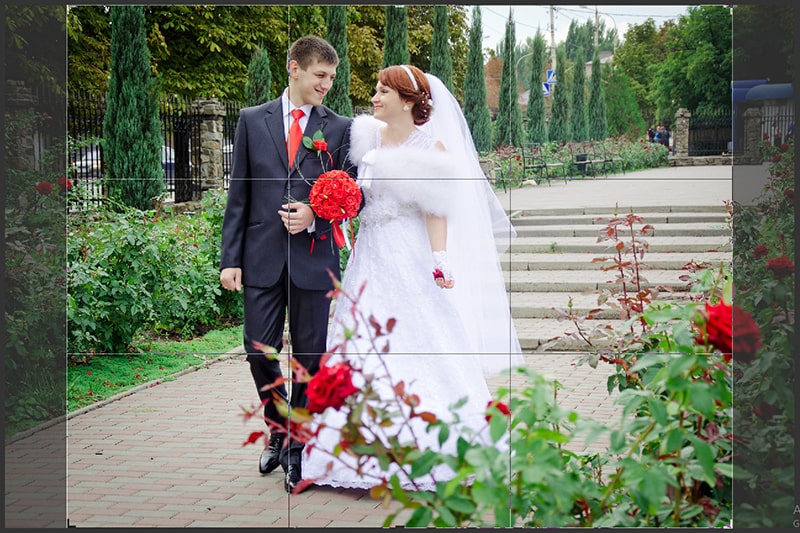
With the Rule of Thirds, you can easily place the image subject in or near a spot where grid lines intersect.
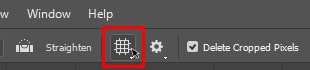
How to Select a Different Overlay
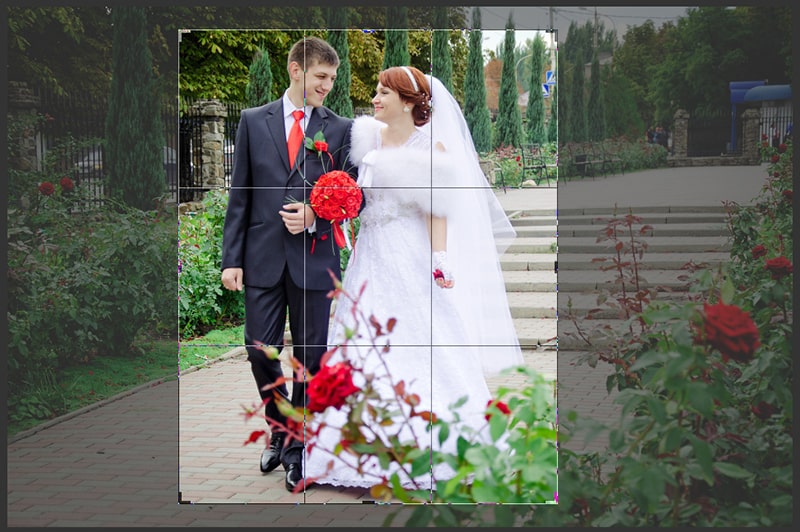
Don’t assume that the Rule of Thirds is the only option to create an overlay. Other options are also available; to use them, you must go to Option Bar and click on the Overlay Icon.
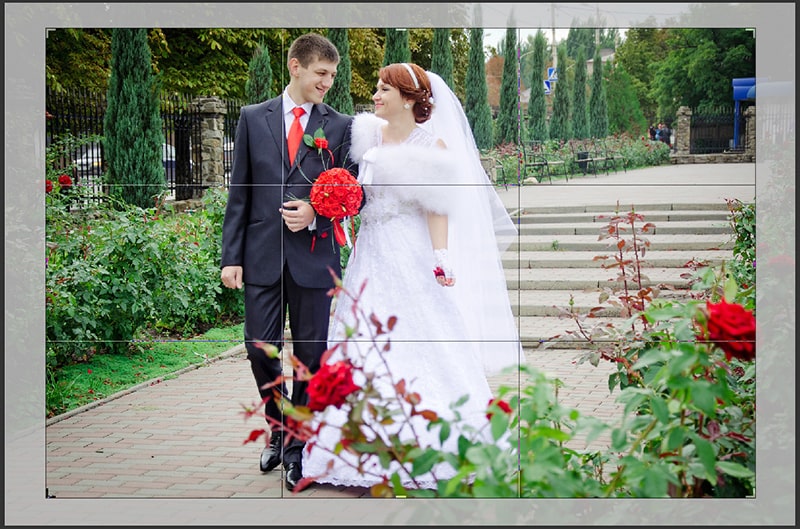
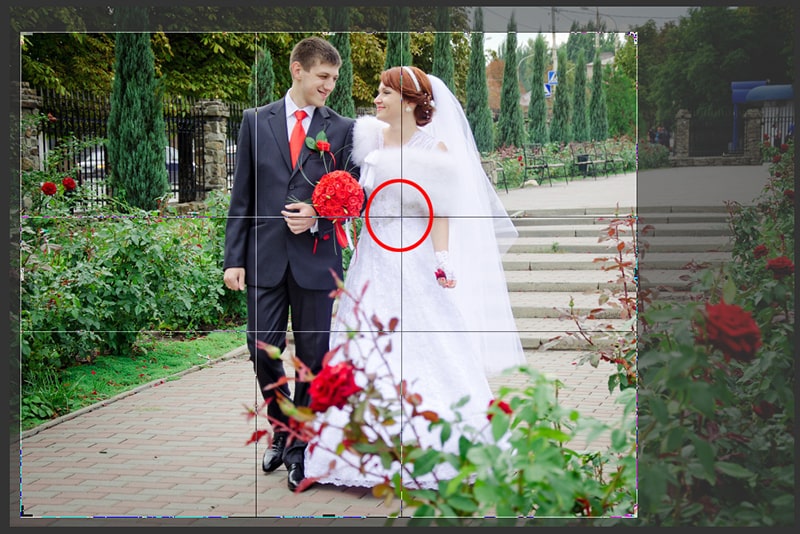
A list will appear where different overlaying options are available. I am selecting the Golden Ratio.
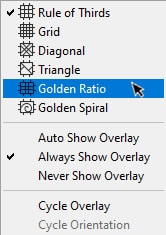
You may find the Golden Ratio similar to the Rule of thirds. But intersection points are closer to the center of the image in this overlay option.
These are all the basics related to the Crop Tool.
How to Straighten an Image in Photoshop Using Crop Tool
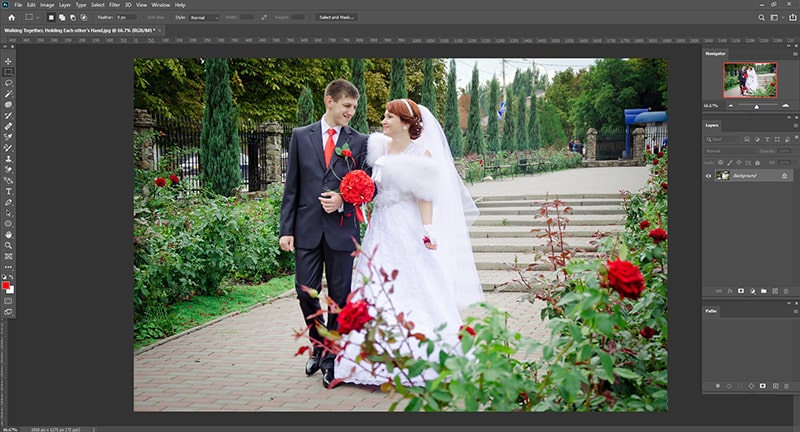
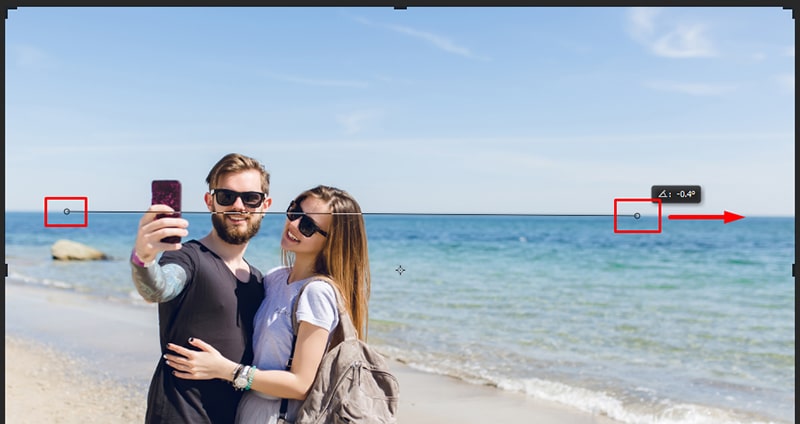
At this stage, we will work with a different image. Look at the below image. The horizon line is entirely unconventional.

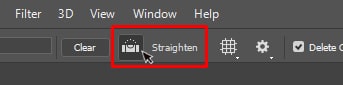
So, go to the toolbar and select the crop tool to straighten images.
And you have to select the Straighten Tool too.
Using the Straighten Tool Photoshop
When using this tool, find something in the photo that should be vertically or horizontally straight. In this image, it is the horizontal line that is not straight.
First, you have to draw a path. Place your cursor on any point of the left side horizon line and click the left button. Then drag it to the right side to draw a path. Between the two points, you will find a path.
Following this path, the image will be rotated, so the path has to be straightened.
Once you release the mouse, the image will be rotated by Photoshop to straighten it. Because of the image rotation, some transparent areas will appear in every corner of the image. Photoshop will keep these transparent corners out of the photo by resizing them.
You can now use the crop borders to give your image a new size per your requirement.
Once cropping is done for Windows, click on ENTER; for Mac, click RETURN.
And you have accomplished straightening the photo by applying the Crop Tool.

What is the Process of Non-Destructive Image Cropping
At this stage, we will use another new image. We will learn the process of non-destructively image cropping.

Go to the Toolbar option and select the Crop Tool.
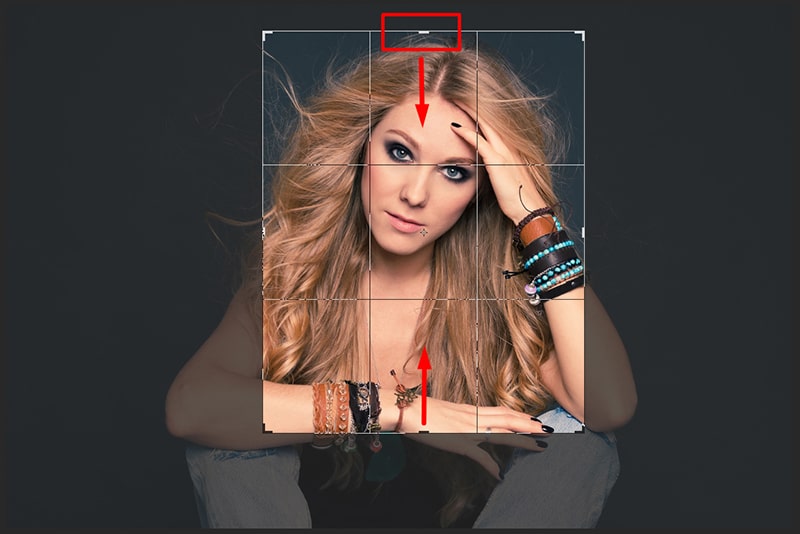
You must change the Aspect Ratio settings from the Options Bar. 8 x 10 will be the aspect ratio preset setting.
Hold the top handle of the crop border and drag it downward. Since you are resizing the image from its center, hold Option (for Mac users) and Alt (for Windows users).
Now, press ENTER (for windows) or RETURN (for Mac) to Crop the image.

How to Delete the Pixels of the Images
So far, we have done excellent work. Some may not like the changes in cropping images and thus look for an option to change the crop. What to do now? What to do if someone wants to change the orientation from portrait to landscape? This is a relatively easy task.
Go to the Options Bar again and click the Swap icon to swap the aspect ratio.
The crop border will again appear in the image.
Cropping the image so closer to the center will not be looked great. So, hold the handles and drag them back to bring more area to the background.
After making the selection, release the mouse. Ops! All different areas of the image become white. No worries, it also has a solution.
Do you know why it happens?
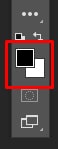
When you cropped the original image, Photoshop deleted all the pixels that surrounded the image. And the surrounding area is filled with a white background because the background’s current color is selected as White.
Now you might be wondering why Photoshop deleted the surrounding pixels.
If you look at the options bar intently, you will find an option named Delete Cropped Pixels. This option is turned on.
Let’s effectively restore the pixels.
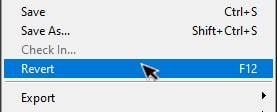
Go to the Options bar. And click on the Cancel button to cancel the crop.

Then go to the File menu and choose Revert. This way, the image will revert to its original copy.
Now all surrounding pixels will be restored.
Then again, the aspect ratio needs to be swapped.

And then Crop Border will appear again. Hold the handles for resizing the border as per the requirement, as you did previously.
Click on the Delete Cropped Pixels box.
Finally, press ENTER (for Windows) or RETURN (for Mac) to complete the Cropping Process.
FAQs
Photoshop crop tools allow a person to crop or straighten any image as per requirement. This tool is non-destructive. Following the cropping option, a person can create more focus on image composition.
Applying a crop tool is a straightforward task.
First, crop an image using the Crop tool from the Options bar. Inside the crop area, give a double click. Hit the ENTER button (for windows) or RETURN button (for Mac). The cropping process will finish.
For cancel Crop, select the Cancel icon. Or press the Esc key.
The process of image cropping is taking a part of an image, not making any changes. The truth is that the crop tool doesn’t affect image quality; only magnification does.
Final Words
Out of many Photoshop tools, the Crop tool is widely used for different purposes. Thus, any of the discussed Photoshop Crop Tools tips and tricks will help you while doing any Photo editing work.
It would be best to remember that you couldn’t progress in these tips and tricks without practicing. So, If you don’t practice, you will soon forget all these Crop tools, tips, and tricks.
Thanks for reading this article.
Learn more:
- Use the Photoshop Pen Tool to Draw a Clipping Path
- How to Resize Images for Amazon in Photoshop
- Remove White Background Using Photoshop Tools
- How to Edit Photos in Photoshop
- How to Whiten Background in Photoshop | Make Pure White Bg
- Masking Hair in Photoshop CC in 5 Basic Steps

Salim Ahmed is the CEO of Graphic Experts India, with over 25 years of expertise in photo editing, clipping path, image retouching, and eCommerce image editing services.