If you want to make your hands better in photo editing, learn how to edit photos in Photoshop.
Photoshop is commonly known as one of the best software for editing photos. The photo editing process isn’t very complex and won’t take your heart out. But, without basic knowledge of the tools, this simplest task may look humongous to anyone. There is a vast option and function available in Photoshop for editing and retouching photos.
You will see a bunch of tools in Photoshop when you open this software on your computer. There are tools situated on both left and right sides of the Photoshop page. Many functions are available in the top portion alongside several windows. You need to acquire the core knowledge of this versatile and powerful photo editing software.
As a newcomer, you should master all these tools and functions to get better at Photoshop editing and retouching. But the learning process requires huge dedication and a lot of practice. “Practice makes a man perfect” is a must remember proverb for you if you are learning how to edit photos in Photoshop.
Why Edit Photos in Photoshop
Photoshop is a basic photo editing and retouching software with easy access. It comes with a vast function and tools along with a versatile nature. You won’t face much complexity, yet this software will offer you to work with many varieties. While learning, this powerful software will provide you with many tools and functions to work with.
You can edit and retouch a photo and give it a whole new definition and look with Photoshop. There are many sectors and benefits which will make your Photoshop journey fascinating. The reasons why you should learn to edit and retouch photos with Photoshop are:
- You can give any shape and size to any images
- With Photoshop, there is a chance to revive old photos and give them recognizing the look
- It is possible to do non-destructive edits with Photoshop
- A selected area of any image can also be edited
- You can delete any particular area of a photo and add something new there
- There is also the opportunity of straightening a crooked image using Photoshop
Apart from those, there are many tools and functions in Photoshop where you can explore freely. With every tool and window, you will learn a new way of work every day. Photoshop will open up a new world of experience in front of you.
Crop Image for Editing Photos in Photoshop
While editing an image or retouching it, focusing on the exact portion is highly necessary. You won’t work on the whole picture, and it is not possible and necessary as well. There are many unnecessary parts in any image, and by cropping, you can eliminate those parts from the picture.
Cropping those unnecessary parts off will enhance your focus on the necessary portions. The photo will zoom in by cropping, and the aspect ratio of the image will also change. Now let’s take a look at the necessary steps on how you can crop a photo:
1. Import an Image on Photoshop
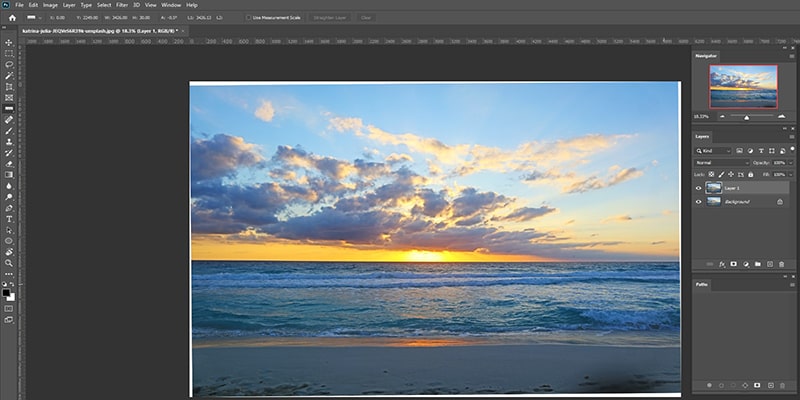
First thing first, download and open the latest version of Photoshop on your laptop or desktop. Then import the image you want to edit on the Photoshop page from the files section of your computer.
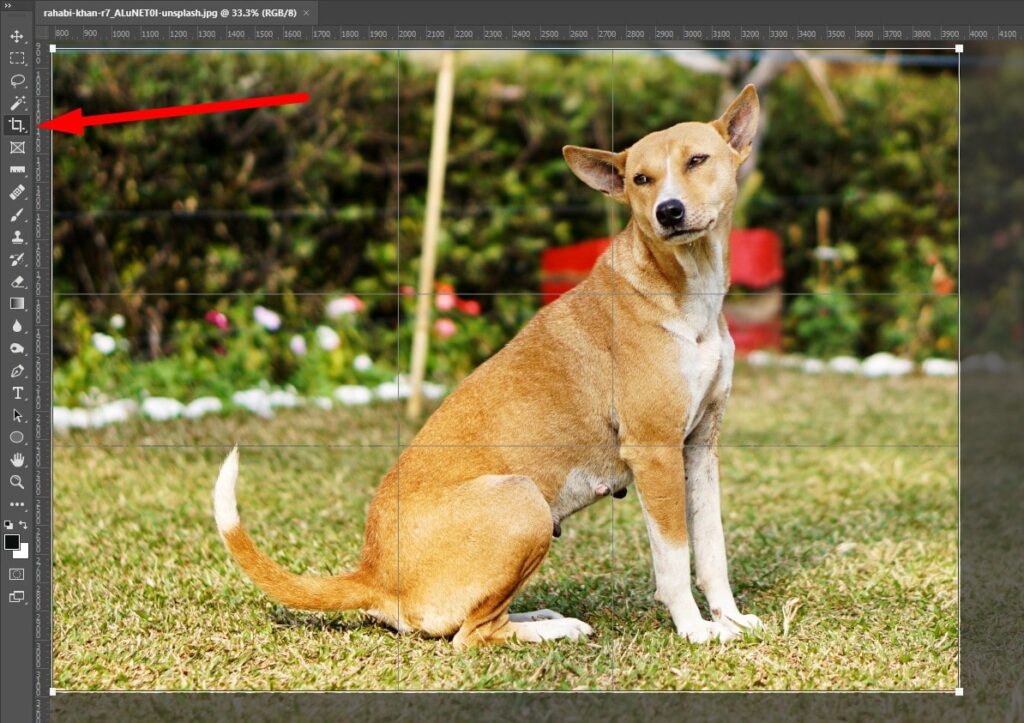
2. Locate the Crop Tool
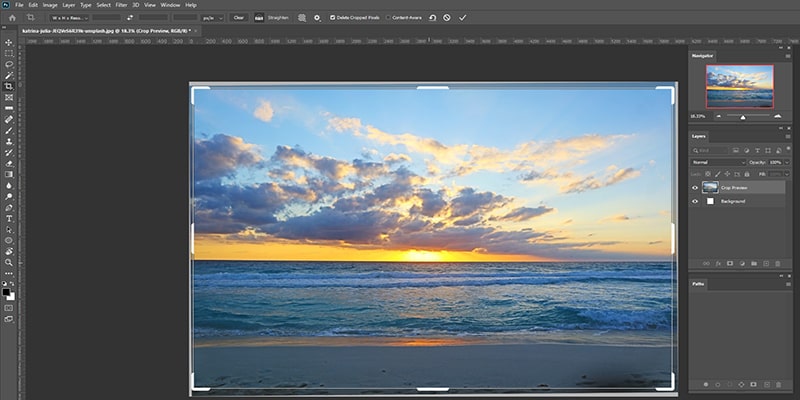
After importing the image, you may need to crop it for re-arranging the shape. To do so, you will have to locate the “Crop tool” from the tools window situated on the left side of your screen. From there, most possibly, the fifth tool will be the “Crop tool,” and you need to click there.
3. Ratio Selecting
As you will click on the “Crop Tool” icon, a crop box will appear around the photo. You can change the ratio of your image and set it as per the editing requirements as well. On the top of the image page, you will see a ratio box for the image. When you click there, a small page will appear beside the tool window.
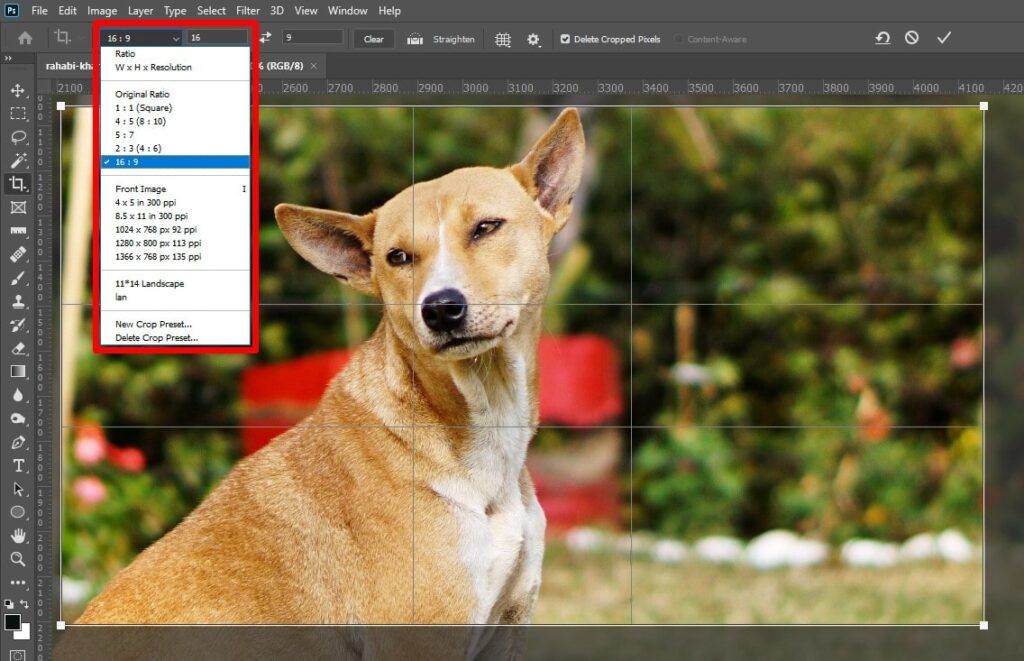
This box will contain various ratio options for the image, and choose one of those as you want. You can even customize the ratio from the box and provide the suitable ratio best for your work.
4. Image Shaping
You can also clear the ratio box and crop your image in the way you want. The crop handles will be available on each side and used to change the box’s height and weight separately. You can even drag the crop box over the image and place it in a suitable spot as you desire.
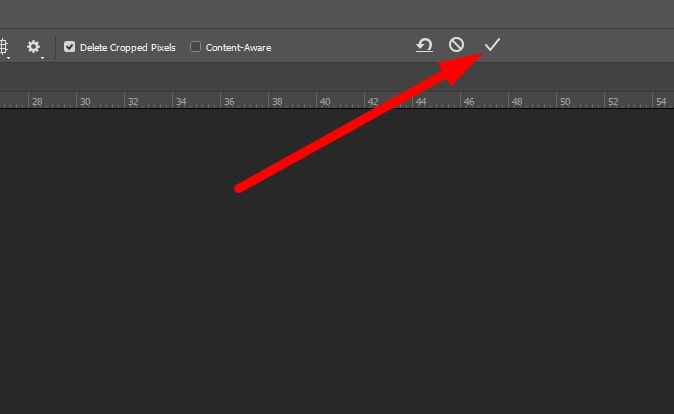
5. Finalize the Crop Image
When you get the perfect shape of the image that matches your desire, you need to save the work. For doing so, you will see three options with their sign on the top-right portion of the Photoshop page. Take the mouse there, and press on the tick sign to finalize the crop image.
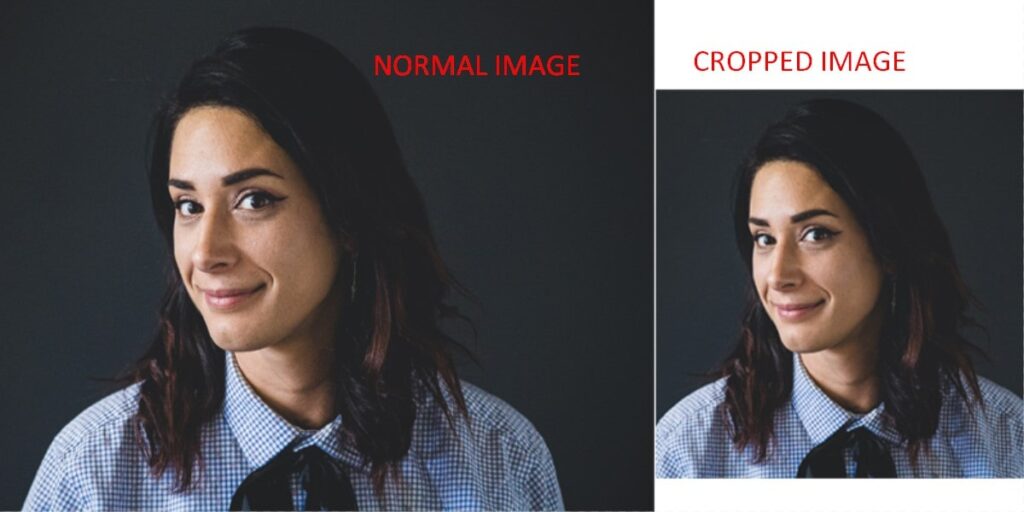
Hopefully, after all the cropping and finalizing, you will get the perfect shape and size of the image to work with. You can focus on the necessary portions as the image will zoom in. The composition of the picture will also improve without ruining the properties of that image.
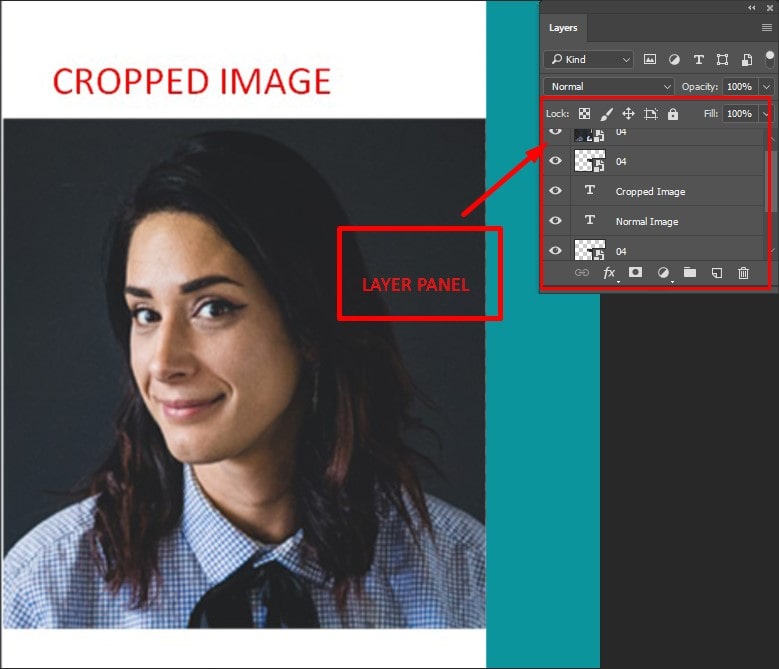
Edit Image through Layers
As you will get to know about the layer adjustments, you can modify your image. At the time of editing, you should remain careful about which layer you are editing.
When you open any image on Photoshop, you will see a window at the bottom-right side of the page. That’s the “Layers Panel,” and you can rename any layer based on your work which will be helpful.
1. Layer Duplicating
You can duplicate the layers as well if you feel any necessity to keep the main component safe. All you need to do for that is, select your original layer from the layer panel first.
Then press “CTRL + J” on your computer’s keyboard, and for the Mac users, press “COMMAND + J.“ By doing so, you will create the duplicate of your original layer.
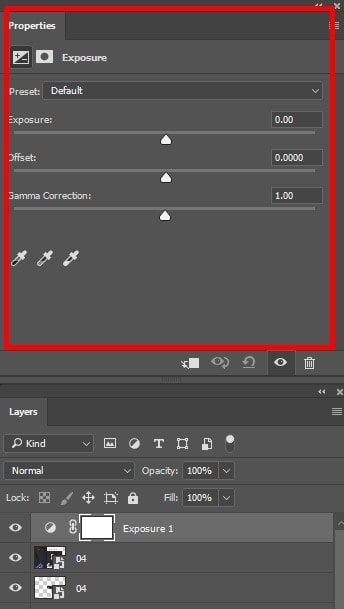
2. Layer Adjustments
On the top of the Photoshop page, you will see a window with many options and functions. From there, select the “Layer” window, and a new tab will come up with other options. You will see the “New Adjustment Layer” section in the middle of that newly opened tab.
Press that option; another new page will pop up, and select “Exposure” from there.
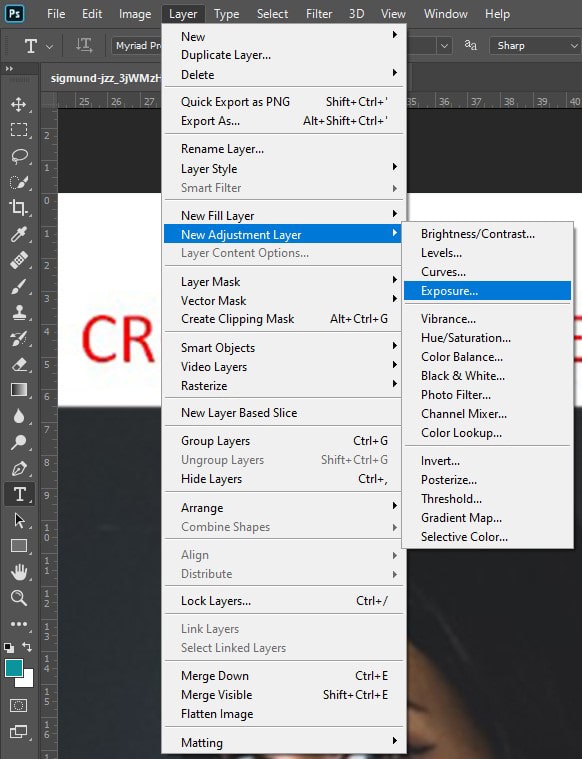
Thus, a new panel will appear with the properties of all the layers opened in there. You can modify the image by thereby changing “Exposure,” “Gamma Correction,” “Offset,” etc. All the changes that you will make on the image from the “Layer Adjustment” section will affect all the layers.
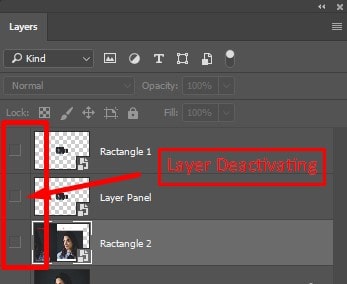
3. Layer Deactivating
While editing an image, you can deactivate any particular layer from the “Layers Panel.“ You will see an “Eye” sign at the left of each layer name and layer thumbnail. Take your mouse cursor there, and click on that “Eye” sign, and it will turn off right after your click.
Thus, the layer will deactivate, and you can re-activate that as well by again clicking on that “Eye” sign.
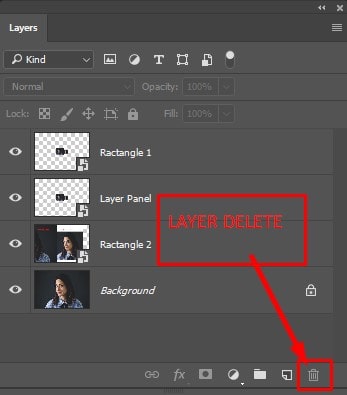
4. Layer Deleting
You can delete any layer from the “Layers Panel” either you want or for necessity. Take your mouse cursor there, press it over that layer you need to delete and select the layer. After selecting, you will see a delete icon at the bottom-right corner of the Photoshop page. Click here to delete your selected layer.
Edit Images Using of Marquee and Lasso Tool
“Marquee Tool” and “Lasso Tool” are two of the most necessary tools to handle if you are a beginner in this sector. While editing any photo, you may need to select any particular area for deleting or editing. That’s when these two tools will come into the game, and accessing them is much easier.
1. Select Area by Marquee Tool
If you need to select any specific-shaped area, the “Marquee Tool” is the best tool to work with. From the discussion above, you have found the location of the toolbar at the left of your screen. The “Marquee Tool” is also situated there, and you will see it at the second position of that toolbar.
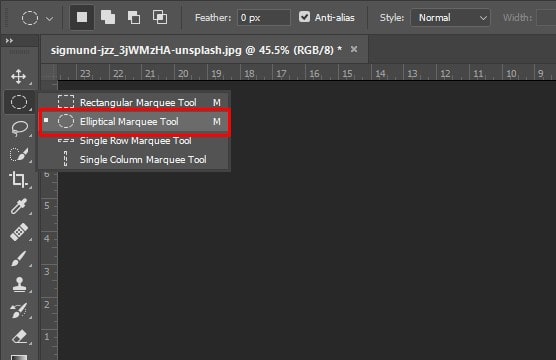
Click here, and you will see four different shaped marquee tools. If you need to select any quadrilateral area, you can use the “Rectangular Marquee Tool.” For the rounded areas, you need to use the “Elliptical Marquee Tool.”
It is also possible to use the “Single Row Marquee Tool” and “Single Column Marquee Tool” based on your editing requirements.
2. Select Area by Lasso Tool
Another way of selecting areas is the “Lasso Tool,” and it’s mainly used for uneven areas. There are a total of three types of lasso tools, and they are “Normal Lasso Tool,” “Polygonal Lasso Tool,” and “Magnetic Lasso Tool.”
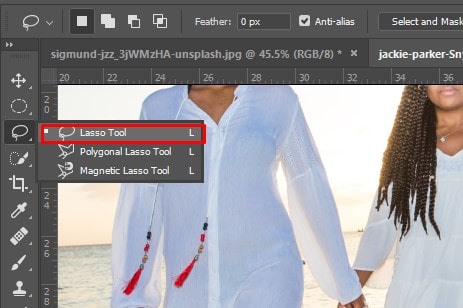
For freehand selection over the image you want to edit, you can use the “Normal Lasso Tool.” Just select it from the “Lasso Tool” icon, as it will be the first one in there. Right-click the mouse to start the selection process, twirl it around the area, and continue clicking to select.
The “Polygonal Lasso Tool” is for selecting the straight and even areas of the image. To select the areas, all you need to do is click on the edges of the area that you want to select. Another “Lasso Tool” that you will need to use at some point is the “Magnetic Lasso Tool.”
The selection process with this is the simplest one, as you need to right-click on the starting point. Then roam around the respective place, and the tool will automatically select the area.
Edit Images Adjusting Color
Color adjustment of any image is one of the essential tasks to do. Correction in colors and color cast will give the image a whole new attractive look. You can access it through the window situated on the top. Select “Image” from the window; a new tab will pop up on the Photoshop page, and click “Adjustment” from there.
You will find many options in the “Adjustment” section, from where you can retouch the image.

1. Color Balancing
When you enter the “Adjustment” section, you will find the “Color Balance” option. There is a shortcut way of accessing it, as you need to press “CTRL + B.“ If you are a Mac user, you need to click “COMMAND + B,” and you will access the “Color Balance” option.
When you enter there, select the tone of your photo. You can adjust “Shadows,” “Mid-Tones,” or “Highlights” in a way that suits your image the best. After doing so, check the “Preserve Luminosity” box, preview box, and move the sliders for perfect color balancing.
2. Selective Color
There will be a lot of colors on your image because of the presence of different components. You can adjust the prominent colors from the photo with this selective color option. Once you access it through “Image” and then “Adjustment,” you will see a window with color adjustment sliders.
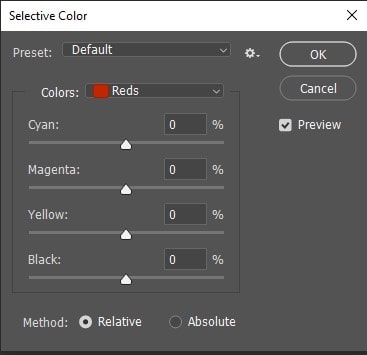
Use those sliders to get your desired color tone in the image, and hopefully, the image will look more attractive. And don’t forget to keep the method “Relative” always while doing this on Photoshop.
3. Usage of Dodge and Burn Tool
At first, you need to create a new layer, and you can do that by clicking the “+” icon just beside the “Delete” icon. Set the mode to “Overlay,“ and select the “Dodge Tool” from the toolbar at the left of your screen.
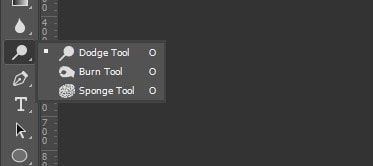
You will see three tools there, the “Dodge Tool” is for brightening, and the “Burn Tool” is for darkening. Always use the softer and smaller brush to keep the effects in check.
Edit Images to Remove Dust and Spot
If there is dirt in your camera lenses, it can show up on the image as well. You will never want to have dust or spots on your photo, and removing them is compulsory. Any dust or spots can appear on the image for many different and unwanted reasons.
You can do the dust and spot removing jobs with the “Healing Brush Tool,” “Spot Healing Brush Tool,” “Patch Tool,” and “Clone Stamp Tool.”
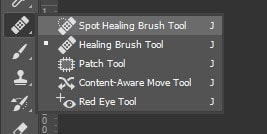
1. Spot Healing Brush Tool
At first, access the “Spot Healing Brush Tool,“ and you will find it in the eighth position of the toolbar. Set the brush at your desired size for removing the dust and spots. Then, click on the spot you want to remove and continue clicking until the spots are eliminated from there.
2. Healing Brush Tool
You can access the “Healing Brush Tool” in the same way as it is situated right below the “Spot Healing Brush Tool.” Then you need to customize the brush size and the hardness of the brush by right-clicking. Then set the size and hardness as required, and apply the “Healing Brush Tool” to eliminate dust and spots from your photo.
3. Patch Tool
The location of the “Patch Tool” is just below the “Healing Brush Tool.“ Select it to eliminate dust and spots; rasterize the image from the “Layers Panel,” and mark the spot-containing area. Then take your mouse right, left, up, or down to replace the spot-having area with a perfect new portion.
4. Clone Stamp Tool
The location of the “Clone Stamp Tool“ is also in the toolbar that is on the left of the Photoshop page. Select the tool, and adjust the hardness and brush size by right-clicking. Now clone clean dust and spot by clicking “ALT + dragging the mouse in the clean spot.“

After cloning, drag the cursor on the spot-containing areas to eliminate the spots and blemishes.
Edit Images to Straighten a Crooked Image
You may have to deal with a crooked image and edit that. You will need to straighten it first. Now let’s see how you can do it:
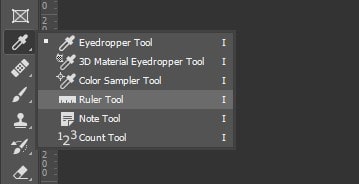
1. Accessing the Ruler Tool
Press “CTRL + R” from your computer keyboard, and the ruler will appear from all around the artboard. You need to press “COMMAND + R” to bring the ruler if you are using the Mac. Or you can just access it manually from the toolbar.
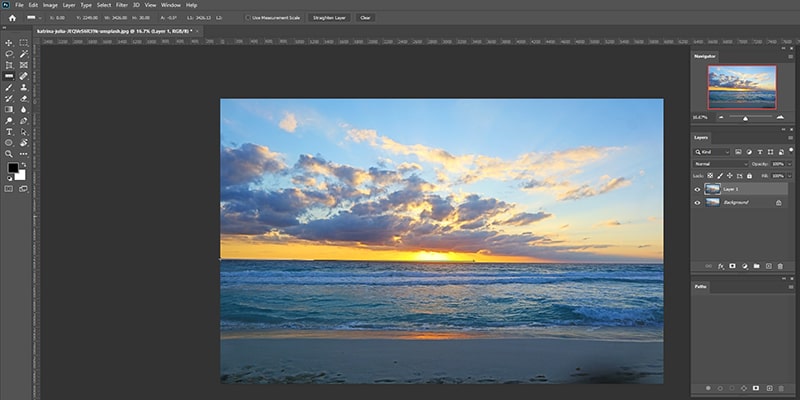
2. Find a Crooked Line that Needs to be Straight
Look for a crooked line that needs to be straight in your image, and that can be anything like a horizon, roof, or table. Once you find the line, right-click at one side of it, and drag the ruler to its ending point. Photoshop will measure the angle of this line and tell you how much straightening the image requires.
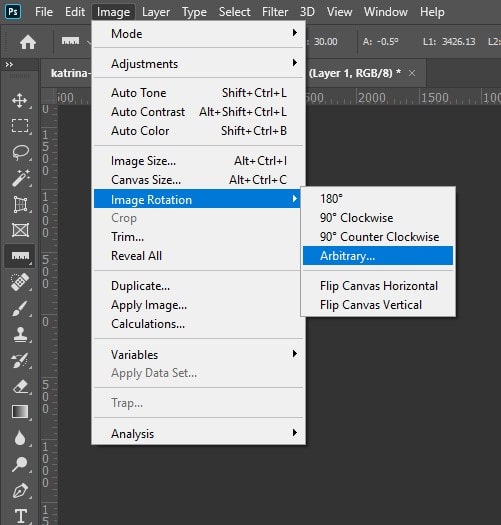
3. Correcting the Angle
You need to correct that angle deflection and click on “Image” from the window above. Then, a new window will appear with many sections along with “Image Rotation.“ Press that section, and a new small tab will come up on your screen right beside the old tab. Select arbitrary from there, and the angle will be corrected automatically.
4. Image Cropping
As you will correct the angle, the image will straighten, but white canvases will remain around the image.
You need to eliminate those unwanted canvases from the image and use the “Crop Tool” for that. Access the “Crop Tool” from the toolbar, and click at one corner of the straightened part. Then drag the cursor to the other side of the straightened portion, and thus you will remove the white canvas.
When you complete all these works, press enters to fulfill the straightening process. Then, press “CTRL + S” to save your work and “COMMAND + S” for the Mac users.
Workspace Selection
The functions and tools collection of Photoshop is vast, and you won’t use all of them. So, you need to get familiar with as many tools and functions as you can. Then, understand which tools you will use most and which tools will never come into your work.
For all of these, the “Workspace” selection is much needed to save your time and enhance your editing. Right below the “Close” option, there will be the icon for choosing a “Workspace.” Take your mouse cursor there, and click on that icon to access it.
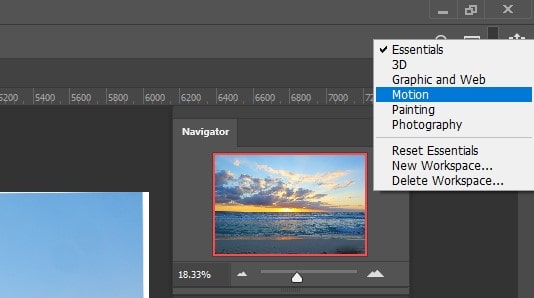
As you will click there, there will be a new tab containing some workspace options. You can choose one of those six, as per your need, based on the situation and necessity. There will be an option for you to customize the “Workspace” from the “New Workspace” section.
You can create this by taking all the needed tools and windows in place from where you can easily access them. It is even possible to delete any “Workspace,” and you need to click on the “Delete Workspace” section for that. Resetting the “Workspace” to default is also accessible by pressing the “Reset Essentials” option.
Filtering the Image
“Image Filtering” is an important task to get familiar with if you are a newcomer in Photoshop. When you sharpen an image or “Reduce Noise,“ the edges of that image get more and more definitions.
1. Noise Reducing
From the window above, press on the “Filter” section, and a new tab will open up. On that tab, you will see some more sections along with “Noise,“ and you need to select it. Then a new window will come up, which will contain “Reduce Noise” at the bottom. Click on that option to “Reduce Noise” from your picture.
2. Sharpening the Image
From the same filter option, you can select the “Sharpen” option and access it. When you click there, four different sharpening options will be available in front of you. Use any of them as per the situation and the image desires, and repeat sharpening as long as necessary. You will even have the opportunity to “Unsharp” the image.
File Saving
You need to save the image file that you edited and retouched with all your efforts. You need to save the file both as PSD and jpg, and it is not complex to do so.
1. Saving as PSD
Click on the “File” section; a new tab will appear on the monitor and select “Save” from that tab. Right after the tab, a window will pop up, and from there, select “Save on your computer.” Then name your file as you want; always keep the file type as “PSD.”
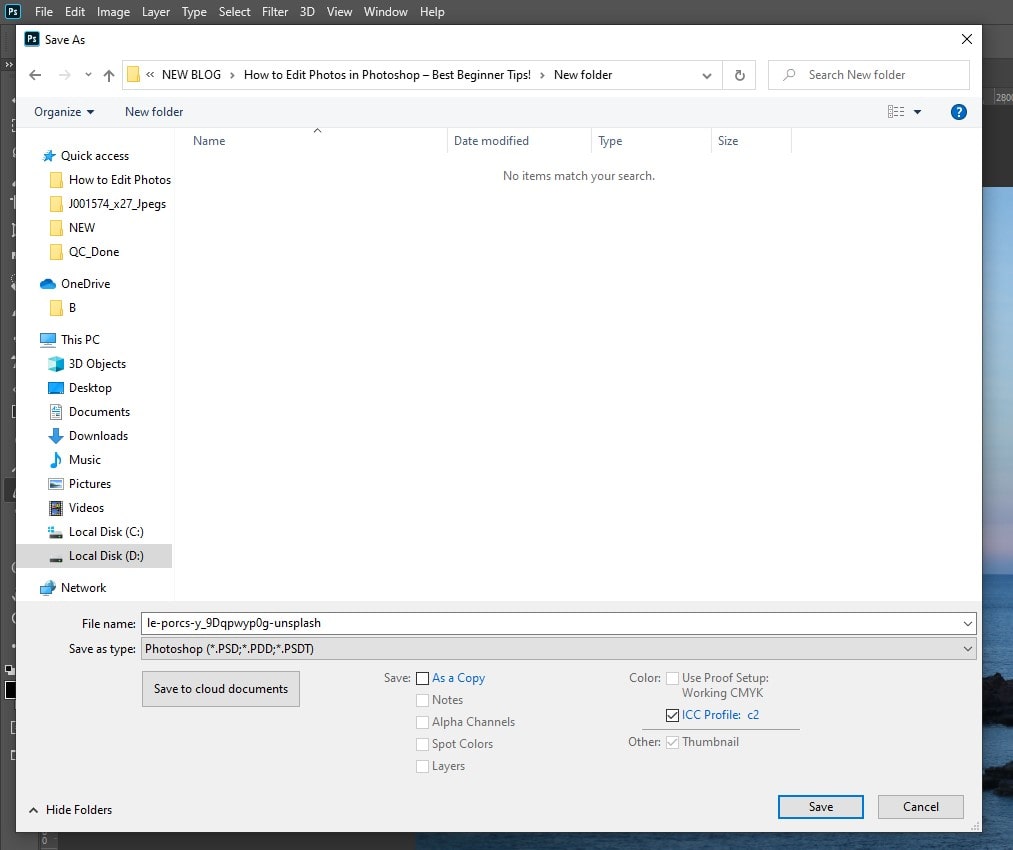
Before you do so, choose a secure destination where you want to keep this PSD file. After all, these are done, click “Save” to save your finalized PSD file.
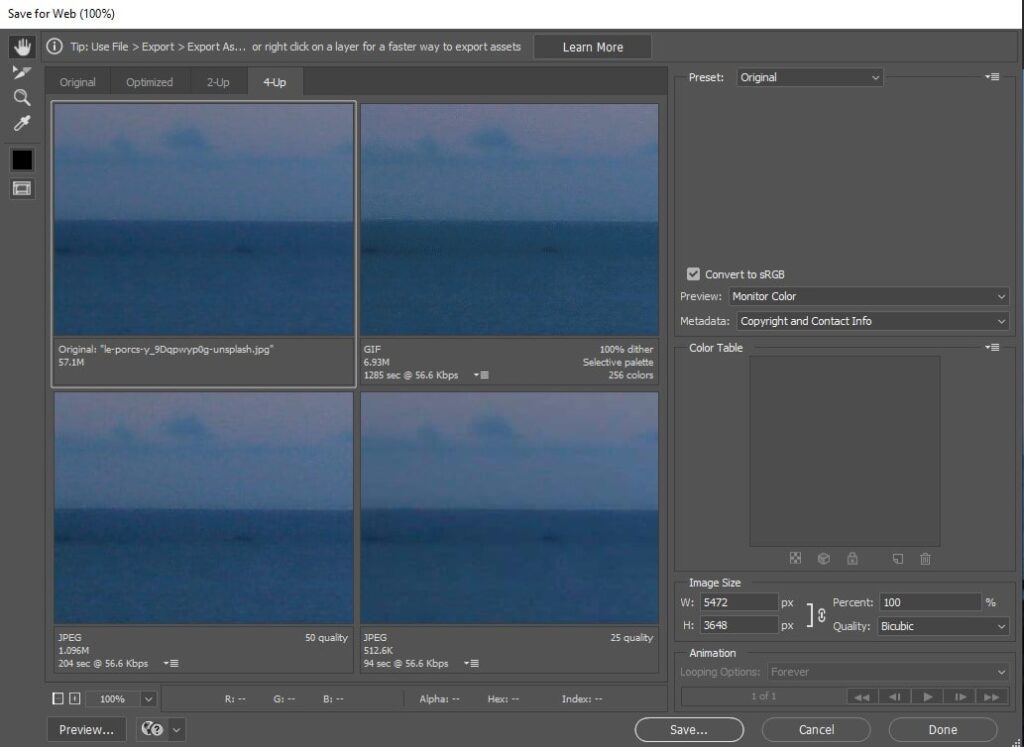
2: Save for Web
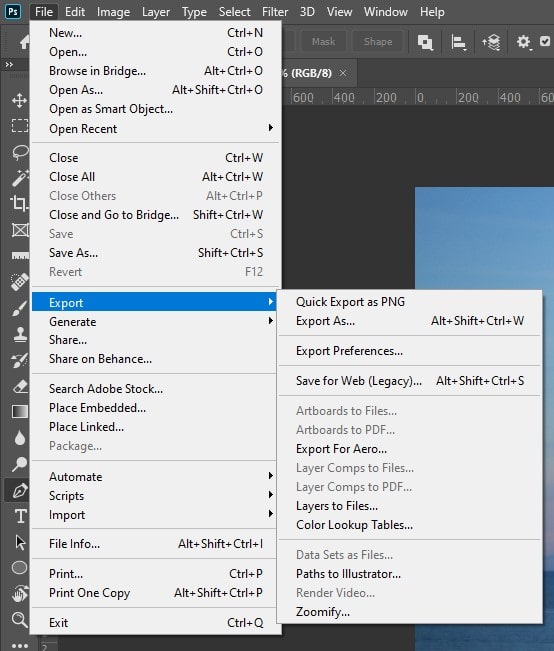
You need to keep the image variant of that PSD file, as you edited that for your use. Like before, click on the “File” section, and after that, select “Export” from the newly opened tab. Then press on the “Save for Web (Legacy)” option, and a new page will appear because of this.
From there, you can change the background color and image quality, along with selecting the final jpg size. It is also possible to compare the basic image and the edited image by keeping them besides. After all the checking, click “Save” to finally save the image file.
FAQs on How to Edit Photos in Photoshop
At first, you need to click on the “File” section from the top-right corner. Then a new tab will appear with the “Open” section at the second position. After you do so, select the image you want to edit and then press “Open” to bring the image to the Photoshop page.
“Photo Bursting” is the problem that many newcomers in Photoshop have faced once in a while. After importing the image, you will need to zoom in for editing. But while zooming, the photo can burst in the worst way, and there is a cure for that as well.
After importing, right-click on the image layer, and click on “Convert to Smart Object,” and the image will never burst while zooming.
Yes, you can change the image visibility on Photoshop if necessary. To do so, select the image layer from the “Layers Panel.“ Then, you will see an option named “Opacity” right above the panel of layers. There will be a slider for changing the opacity, and as you will decrease the slider, the image will fade gradually.
If you increase the opacity with that slider, the image will get back its older look.
Conclusion on How to Edit Photos in Photoshop
Photoshop is a great tool to edit images, whether you are a newcomer or a professional. The vast collection of tools and functions will help you travel freely in the world of Photoshop. The topic of how to edit photos in Photoshop may seem complex to you at the beginning of your use.
But not anymore, as you will practice editing photos regularly, it will gradually become a lot easier for you. Getting familiar with most of the tools is the best way to understand their usage. As you will get used to these tools and functions, photo editing on Photoshop won’t seem challenging anymore.
You may read:
- A Beginner’s Guide to Photoshop CC | Photoshop Tools & Toolbar
- Smooth Skin by Using Adobe Photoshop
- Edit 360 Degree Photos in Photoshop CC
- How to Make Background Transparent in Photoshop

Salim Ahmed is the CEO of Graphic Experts India, with over 25 years of expertise in photo editing, clipping path, image retouching, and eCommerce image editing services.