Masking hair is, without question, one of the most time-consuming and challenging tasks in digital picture manipulation. Many editors don’t know the easy way of Masking Hair in Photoshop.
The best part is that these procedures are no longer traumatic. With specific know-how, you can accomplish this in a matter of minutes.
Photoshop’s automated selection tools Quick Selection Tool or Object Selection Tool, aren’t just for masking hair; they’re also helpful for masking different objects, tree leaves, and even dog fur, among other complicated masking jobs with lots of fine detail.
In this article, we’ll show you simple five steps that will help you optimize your workflow and make sure your composites look natural.
So what are we waiting for? Let’s begin!
Masking Hair in Photoshop CC
Masking hair in Photoshop can be tricky and tedious. With the right techniques, tools, and practice, you can mask hair easily. We will now show you how you can mask hair only in 5 steps using the Quick Selection Tool of Adobe Photoshop.
Just follow the steps and become the hair masking master in Photoshop.
A lengthy blog article on the subject is likely doable but will do our best to remain understandable even in this comprehensive guide.
Step 1: Select the Subject
Before we start, there are different versions available for Photoshop. I recommend you use the newer version to get the latest feature.
First of all, open the Photoshop software on your PC or Mac. Open your desired image there. After that, you can see the Layer panel ( probably the right corner of your screen ) already selected with the image layer. There will be a small thumbnail of your image.
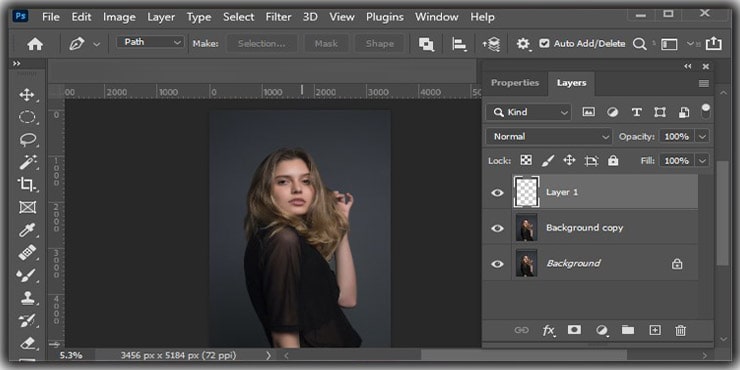
So, you must make a copy of your image by pressing Ctrl+J ( On Mac Command+J). There are many tools available for selecting the subject. You can choose any of them.
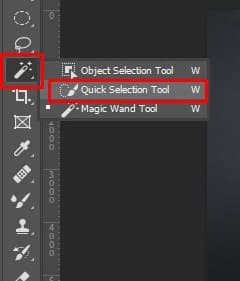
If you use the Quick Selection Tool or Object Selection Tool, make a rough selection around your subject. Remember, always select the subject only, not the background. After selecting that, come to the layer panel.
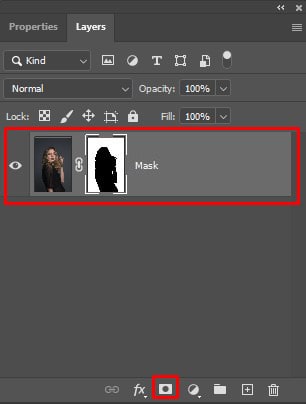
Below part of the layer panel, there will be a rectangular icon with a circle inside. If you hover your mouse pointer, you can see it is a Layer Mask Tool. Remember, you have to do all this in the duplicate layer of your image.
After selecting that, your selection will be a mask. To know what is happening, you must select your image’s original layer. Besides the layer, there is an eye icon. If you turn that off, you can see what exactly is happening.
Isn’t that surprising? Your background has been removed. But if you look closely, the selection isn’t perfect yet. You have to work more on this.
You can do that if you use other tools, such as the lasso tool, Pen tool, etc., for the selection. But you have to do the layer mask, of course.
Don’t be hopeless about the selection. Stay with me. Let’s jump to the next step.
Step 2: Refining Hair
You must select the duplicate image layer with the mask to make the selection perfect. Then select the Quick Selection Tool.
You can see in the options bar an option named Select and Mask. Clicking that, a new window will pop up.
Well, on the left side, different tools are available. Firstly, you have to go to the right side. Select a suitable mode for your edge understanding from the view dropdown box.
Then, if you hover the mouse over the image, you can see the pointer looks similar to the quick selection tool.
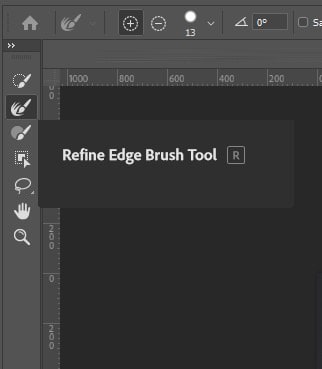
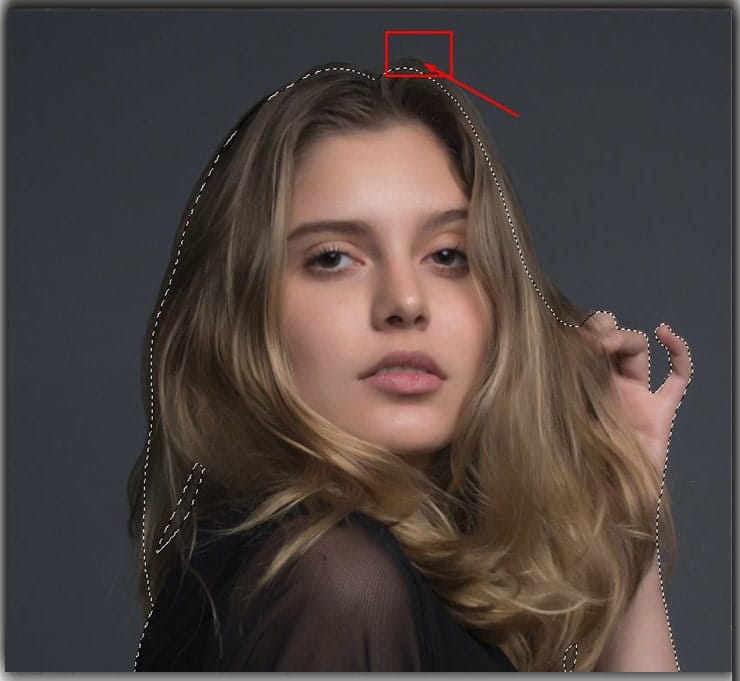
So from the toolbar, you have to select the Refine Edge Brush Tool. Now, you have to select those imperfect areas of your images.
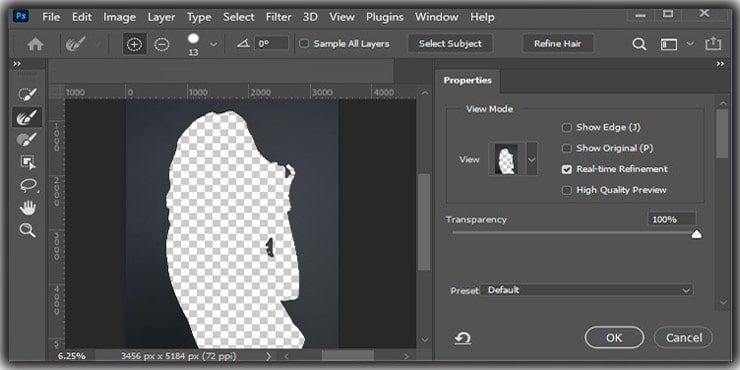
If that doesn’t go well, come to the right sidebar area. Adjust the transparency, contrast, smoothness, feather, etc. This will take a while.
After doing the refine edge perfectly, you must go to the Output Settings ( right sidebar). You can choose your favorite output style for the image from the output drop-down box. Now hit OK.
Step 3: Remove Halos from the Image
Sometimes, after refining the edges, some areas are brighter than the other part of the image. It is Halo.
To remove this, you have to go through some small steps.
Select the hair mask and select the subject. From the menu bar, click on Select. Then from the dialogue box, select Modify>Contract. A new dialogue box will pop up. Just keep the pixel to 1 and hit OK.
Now, you have to select the background. There is an easy shortcut for this. Select Shift+Ctrl+I on Windows, and for Mac, Shift+Command+I. It will automatically select the background. It works as an inverse selection.
You have to fill the background with black. You can do this by holding Shift+Delete. From the dialogue box, select back and hit OK. So you are done with these halos. How cool is that!
Step 4: Manually Refine Images (Additional Step)
Last by no means least, if you want to be Mr.perfect, this step is for you. This step is quite lengthy and laborious. But this will undoubtedly give the best result.
So, select the mask layer and go to the brush tool. You can use the shortcut by pressing B on the keyboard. Set the brush opacity and flow to 100%. Make sure you do that.
There are two factors in terms of the layer mask. One is a black mask, and another is a white mask. Generally, we use the black mask. You have to give focus on the background and foreground color.
On the black mask, use black color as the background color. This will make visible the background of the image. If you use white as the background color, this will hide the background of the image.
On the white mask, you have to follow the opposite procedure for color. However, this procedure also works well in removing any background.
To choose a brush, you can choose any of them as you like.
By doing this, you can get a fine detailed image. That will satisfy you enough.
Step 5: Channels(Optional Step)
When the hair becomes too complicated to select and mask, this channel tool works
well. It works nicely for a light background and dark hair.
Now, open the layer panel. You can find Channels just beside this. If you can’t find that, go to the menu bar and select Window>Channels.
You can now see the available colors of your image. Your motive is to make the background white and the subject darker.
By clicking on the colors layer, you can find out which layer has more contrast or which color makes the subject darker. Make a copy of that color layer. Keep the focus on your subject’s hair.
Opening the Level Panel, adjust the shadows and highlights of the image. Try to take the black pointer to the right, which will make the photo darker. But you need more, or you need to retain the detail.
Once you are done adjusting, it will not be completely dark. To make this darker, use the Brush tool and paint it. If you have a problem with edges, use the Lasso tool instead.
Now make the inverse selection by pressing Ctrl+I for Windows and Command+I for Mac. Make a selection to that Channel duplicate layer by holding Alt for Windows and Command for Mac and clicking on the thumbnail of that layer.

Then, click on the RGB channel layer to return to the original image. To get back your selection, click on Layer Mask Tool. It will also remove the background.
Finally, you can get the hair mask image with fine detail.
FAQs
Masking hair in Photoshop uses to mask hair from its background and make it more natural and realistic. This process can help to make the hair stand out in a photo and give it a more glossy look. It makes a selection of hair and then refines it.
Primarily for advertising, presentation, and professional service, the holder needs to hair masking service. Many freelancing sites and marketing sites demand these services more.
Sometimes modeling photographs need this kind of edit. The popularity of this kind of mask hair service is increasing.
The different masking tools in Photoshop CC are the Quick Selection tool, the Object Selection Tool the Magic Wand tool, the Background Eraser Tool, the Color Range command, the Layer Mask tool, and the Refine Edge tool.
Final Words
Hair masking in Photoshop may be done in various ways further than the preliminary mask, but how to use the Select and Mask tool makes removing hair much more accessible.
Stay encouraged if you are starting in the editing industry. This edit won’t be entirely perfect on the first try. But you can become an outstanding editor if you practice this method frequently.
However, specific photographs benefit more from using Refine Edge than others. It’s good to be aware that it’s fast and straightforward, but it’s only sometimes appropriate.
It could be adequate for a particular image and setting but might not be sufficient for developing a silo that functions appropriately in all settings. There are several methods for Masking Hair in Photoshop. Explore the various techniques in use in the field of editing. Please do your best to make it your own
You may read:

Salim Ahmed is the CEO of Graphic Experts India, with over 25 years of expertise in photo editing, clipping path, image retouching, and eCommerce image editing services.