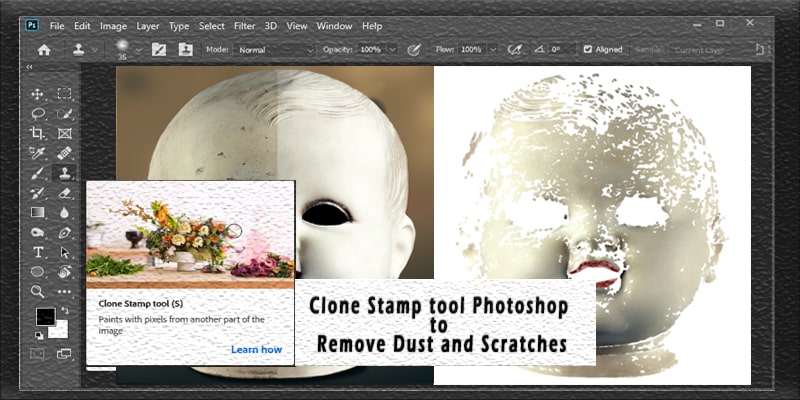
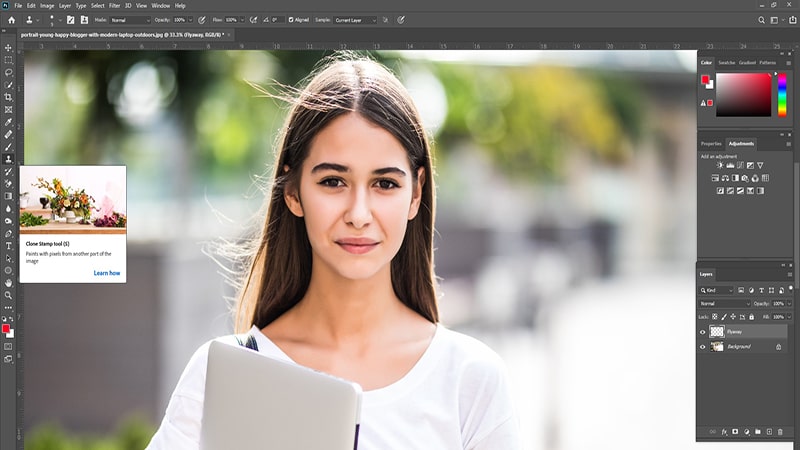
Have you ever wondered how to easily remove dust, unwanted objects, and imperfections from photos with the Clone Stamp Tool?
It is difficult to get a perfect shot when taking photos of models, products, nature, and buildings. No matter how carefully you take photos, there will always be one bothersome detail… dust.
The undetected dust particles appear during post-processing and distract from the photo’s original form.
Adobe Photoshop offers a Clone Stamp Tool to remove dust or scratches from digital photographs. Photoshop’s Clone Stamp Tool helps to solve this problem easily by removing dust and scratches or flyaway hairs or correcting imperfections, etc.
With the clone stamp tool, you will get the result for sure. Now you might be thinking, why am I so confident with my statement?
In this article, I will share definitions, working processes, tutorials, and advantages of the clone stamp tool Photoshop. After reading this article, you will also agree with my above statement.
Let’s begin the tour.
What is the Clone Stamp Tool?
In Adobe Photoshop, the clone stamp tool selects and samples an image’s area and uses the sampled pixel to paint over any blemishes or imperfections.
Characteristics of the clone stamp tool are similar to a brush. As a result, changing the size and opacity level of the clone tool allows you to make a subtle change to your image.
Generally, the clone stamp tool’s characteristic is removing any object from an image. In simple words, airbrushing out an unexpected portion of your image is the main functionality of the clone stamp tool.
Other common uses of the clone stamp tool are
- Removing skin imperfections
- Removing dust and sketches from the original image
- Fly hair removing
We will discuss the tutorial for every use of the clone stamp tool. If you are a beginner, this guide will help you a lot.
Know more: A Beginner’s Guide to Photoshop CC 2020 | Photoshop Tools & Toolbar
How Does the Clone Stamp Tool Work?
Working with the clone stamp tool is so easy. All you need to do is, input two pieces of information in Photoshop
- The targeted area for replacing the pixels
- Sourced area of the replaced pixels
Below are a few simple steps for using the clone stamp tool.
Clone Stamp Tool Selection
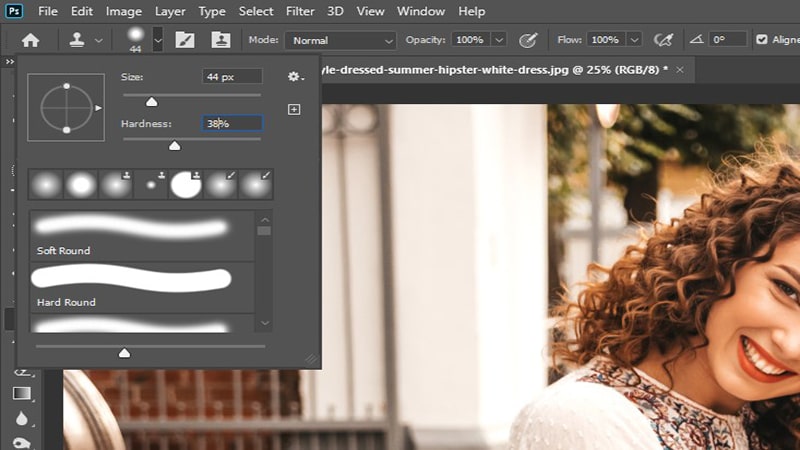
Go to the toolbar menu, and select the clone stamp tool. You can also press the shortcut key “S.” After selecting, ensure the brush size and hardness is set up.
Hover the Cursor on the Selected Area
Now select the area that you want to work in.
Selection of the Sourced Area
Pressing the Alt key, move your cursor to the sourced area, and click on the location.
Working on the Targeted Area
Once the pixel of the sourced area is selected, release the Alt key. Move the mouse to the targeted location. Click on the left button, and without releasing it, paint the sourced pixels on the targeted area to remove the imperfections.
Is the process more complex? When you remove unwanted objects from an image with the clone stamp tool, you will realize that many other things are involved with the process. And without practice, you won’t be able to become a master of it.
Now we will look into more detail working with a few tutorials using the clone stamp tool Photoshop.
(Tutorial 01)
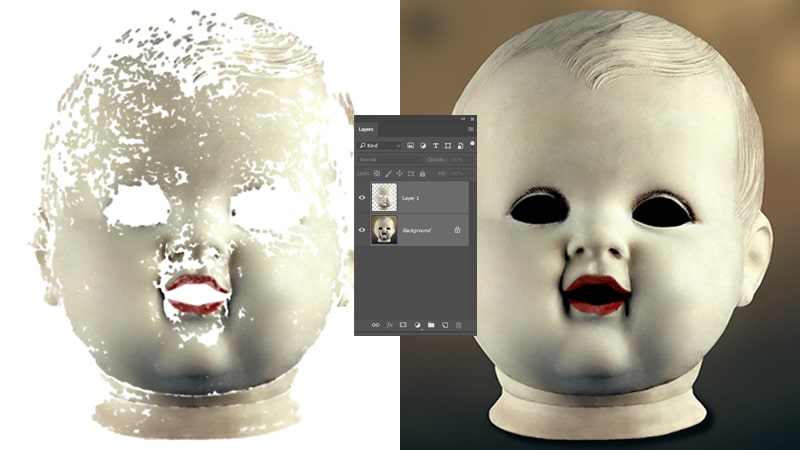
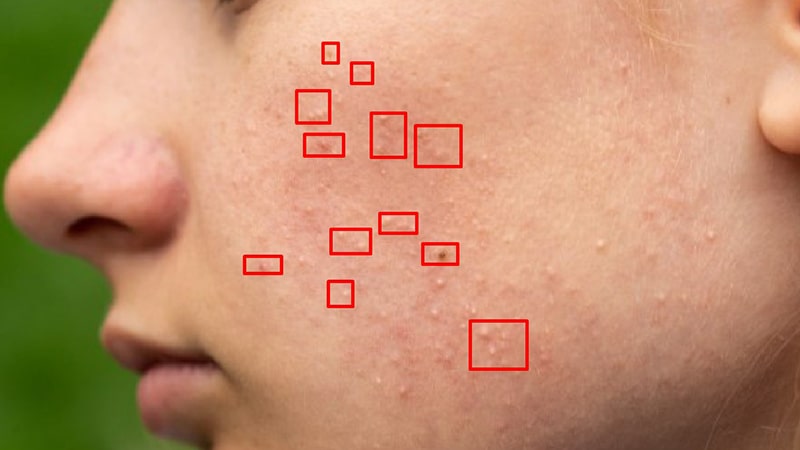
How to Remove Dust From an Image With the Clone Stamp Tool
The original image in this tutorial has lots of dust and scratches. In some of the areas, the dust spots are obvious.
Let’s start working on it to remove those dust and scratches.
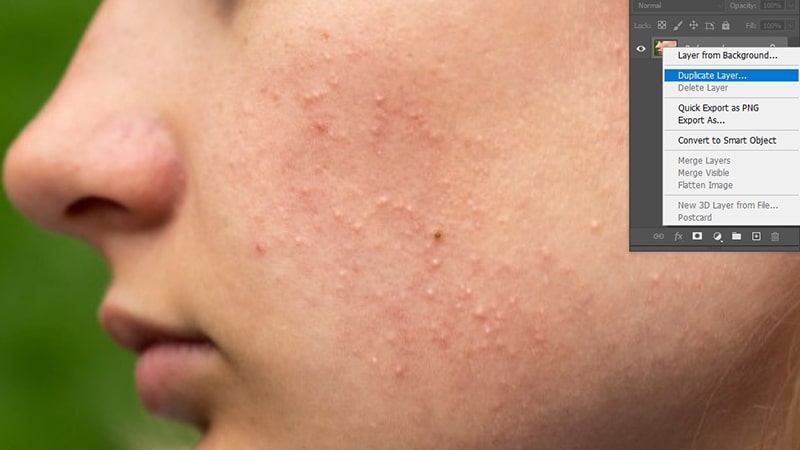
New Layer Selection
Select the new layer icon from the layer panel.
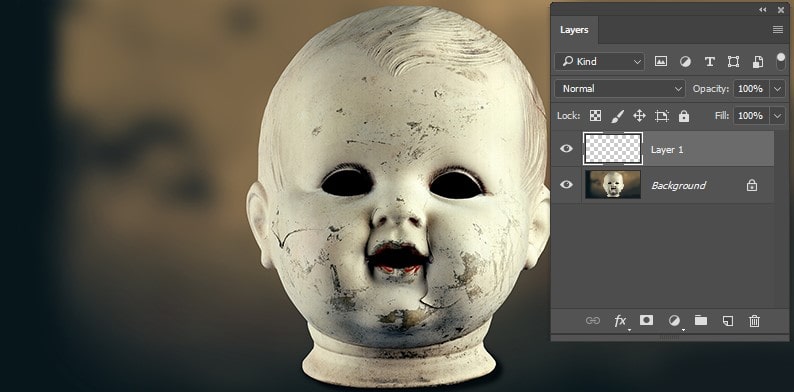
Clone Stamp Tool Selection
Go to the Tool panel and select the Clone Stamp tool. You must also select Current & Below from the Sample menu in the Options Bar. This way, no effect will happen in the background, and a new layer will be affected.

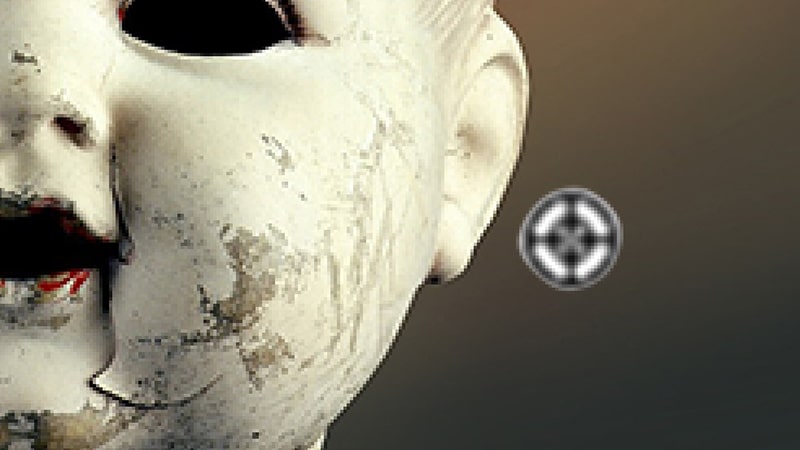
Sampling Point Selection
The clone stamp tool pulls its sampling points following aligned and non-aligned options. When you select the non-aligned option, the clone stamp tool pulls information from the same sampled area repeatedly.
While working with the Aligned option selected, the sampling point will move along with the cursor position.
Working with Aligned Option
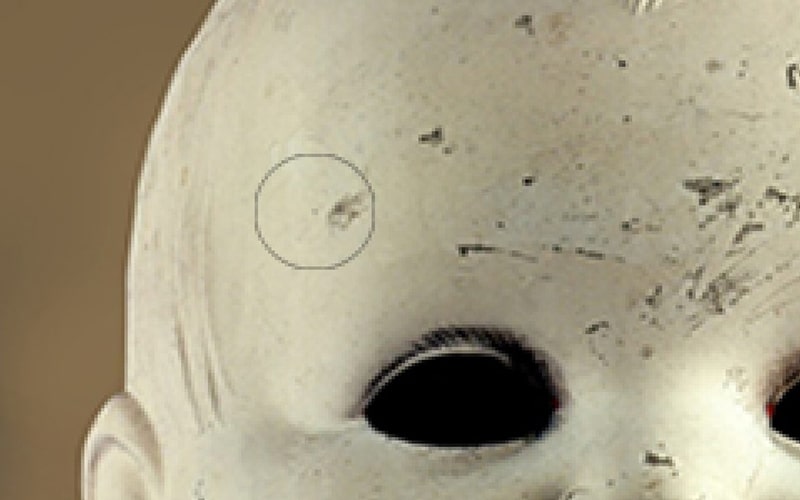
This tutorial will select aligned options since we want to change the sampling point. When the sampling point repeatedly takes a sample from the same area, the image will receive an unnatural look.

Painting Process
A larger brush size will give the best result. So, select a little bit larger brush to remove dust and scratches. Set the brush hardness to 0.
Unnatural lines will come if you select a hard-edged brush to accomplish this tutorial. The cursor needs to be moved to that place where a suitable replacement of the spot is available.
When doing so, press Alt/Option so that the cursor takes a look at a target. Paint over the spot and see the magic. The spot will start removing.
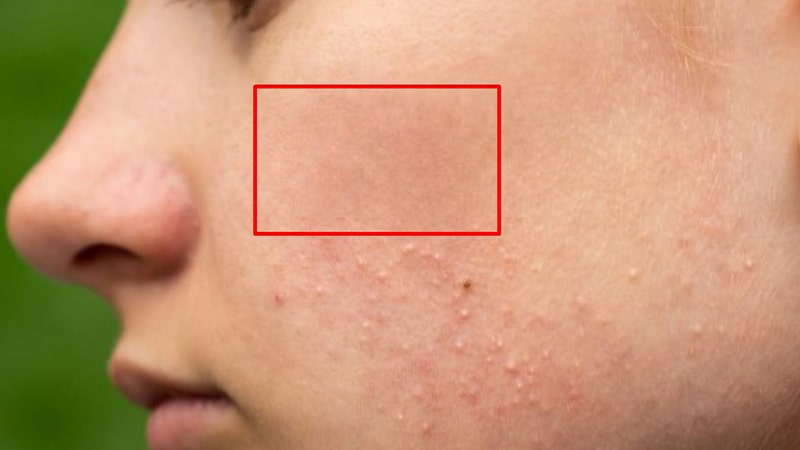
Final Touch Up
Continue the process in the entire image. And resample where necessary. When selecting the sampled area and brush size, do this carefully.
If some areas are unrealistic, you can use the Eraser tool to rectify those areas.
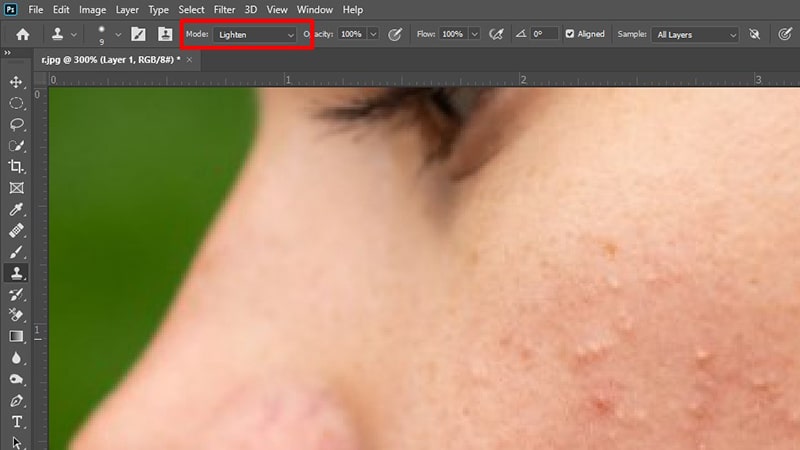
Another great feature of the Clone Stamp Tool is Blending Mode can be changed to Lighten or Darken. As a result, you can comfortably remove dark or light spots. Using the Lighten blending mode helps us to work faster with this image.
Tip:
- Concentration is mandatory when working with the Clone Stamp Tool. Ensure working with the areas where dust and scratches need to be removed.
- The opacity settings of the Clone Stamp Tool have to be less. The touchups blend surroundings and will be better when you do so.
(Tutorial 02)
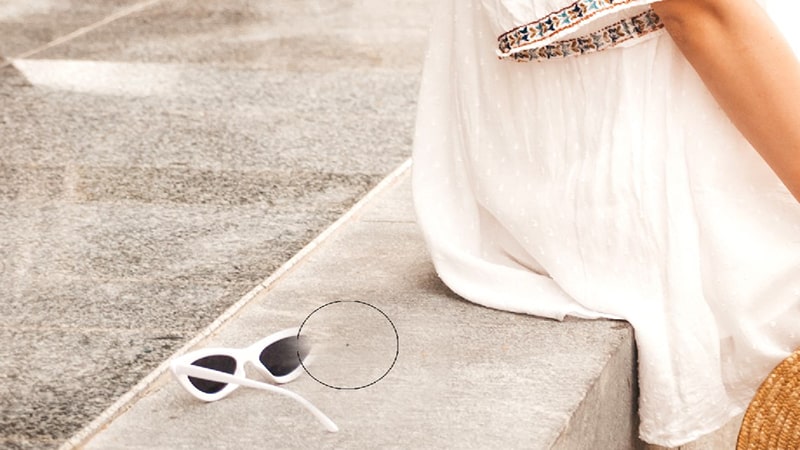
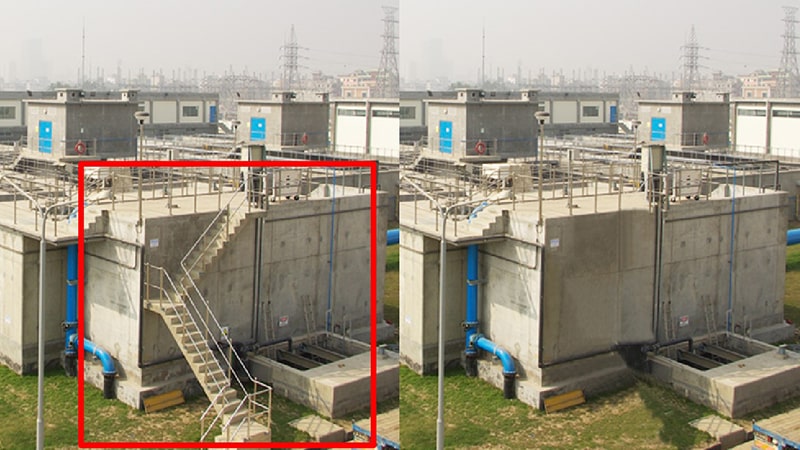
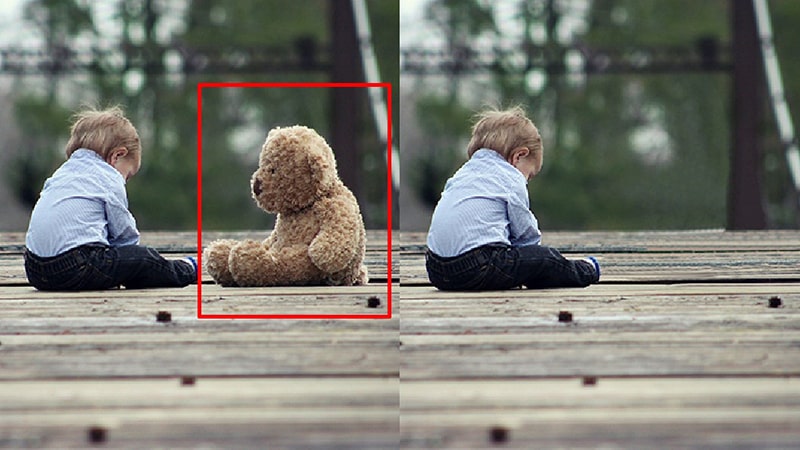
Remove Unwanted Objects From an Image with the Clone Stamp Tool
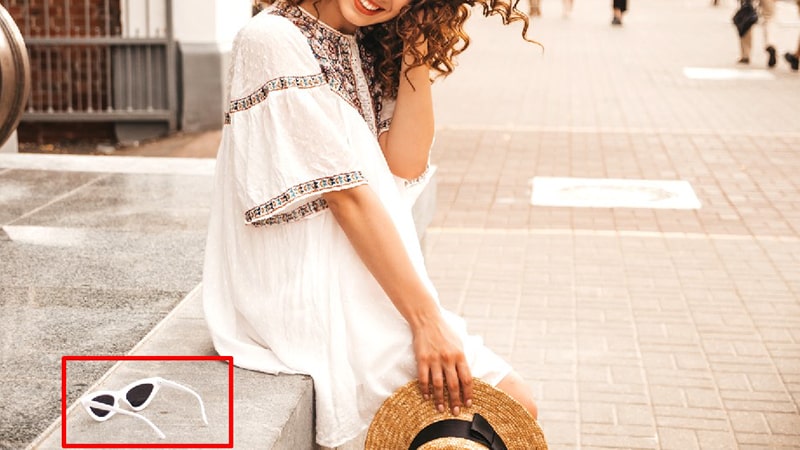
A great image can become dull because of unwanted objects. The good news is; that with the clone stamp tool Photoshop, you can easily remove unwanted objects.
Let’s look at the below image. I want to eliminate the sandals from the image. Below are the steps to follow.
Zoom in After Opening the Photo
First, you must open the photo, which requires zooming in on the work area. Ensure to zoom in only a little because you must understand what is happening in the image.
You will find the clone stamp tool on the toolbar’s left side. Click on it.
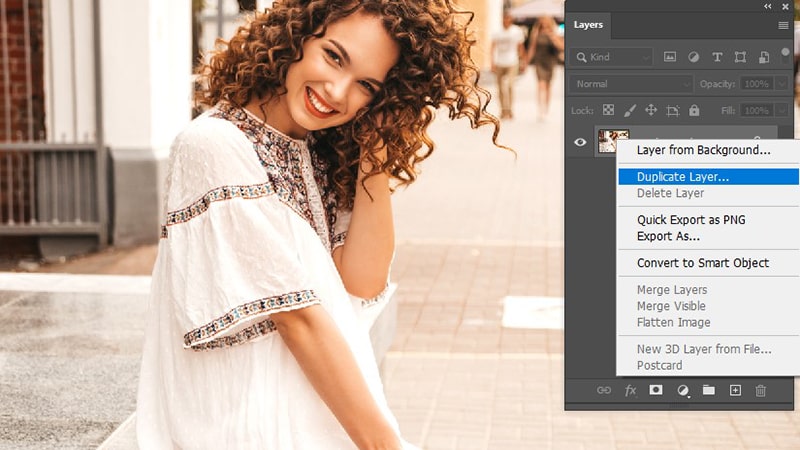
It is mandatory to duplicate the background before starting the work. Copying the background will allow you to return to the actual image whenever necessary.
Please hover your mouse over the background layer, right-click on it, and choose the duplicate layer.
Selecting the Sourced Area
A soft brush needs to be picked. Also, ensure setting up the clone stamp size so the tool can easily cover the area you want to remove.
However, in the beginning, you will face difficulty knowing the exact brush size to cover up the unwanted object. Little practice will familiarize you with selecting the right brush size.
Start with a medium-soft brush to help you achieve a smooth edge.
Now, move your cursor to the sourced area. At this point, the sourced area is sand. To confirm the source pixels, press Alt. And the cursor will get changed to a crosshair.

After clicking, the crosshair will appear, and the cloned pixels will be shown.
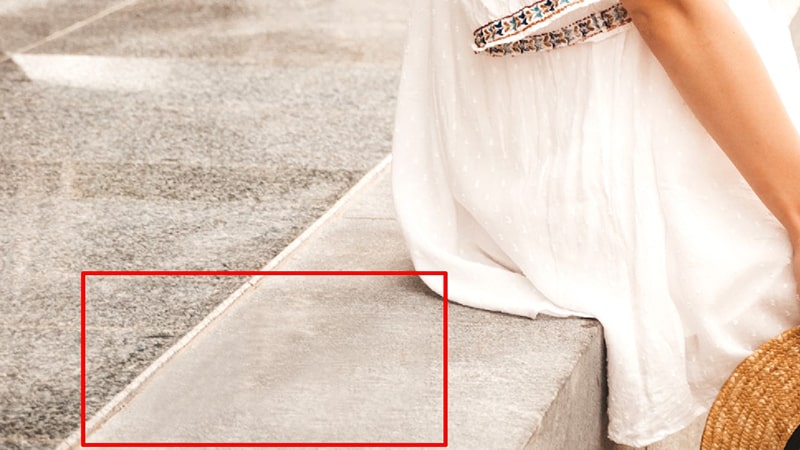
Start Painting Over the Targeted Area
Now with the selected sourced pixels, paint on the unwanted object. Make sure that you have chosen the right pixel to remove the object.
If you select the wrong pixels, return to the earlier process, choose the right pixel, and remove the object.
Continue painting until you get the required result. Ensure the image looks natural.
Suppose you must return a few steps of the process, choosing Undo. For Windows, Ctrl + Z, and Mac Cmd + Z.
Patterns are what you need to look for. Due to different patterns, the image may look unnatural.
Avoiding patterns to get a natural look in the image
You can comfortably do it from the clone source panel when avoiding patterns from an image.
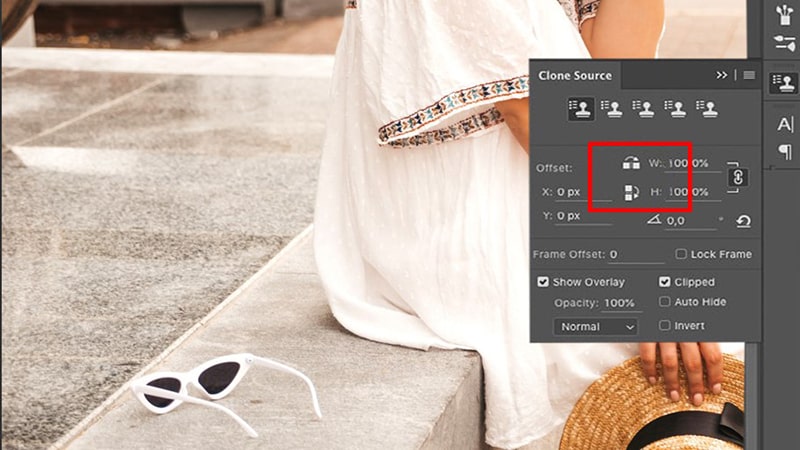
The 2 mirror buttons will allow you to give a natural look to the clone. The pixels will get mirrored when you draw on the unexpected object.
Undoubtedly, the result will be much better.
You also can play around with the brush opacity level. The best result is confirmed when you combine multiple sources of clones and settings of opacity.

Clone stamp edges have to be smooth to get a natural look.
(Tutorial 03)
Remove Imperfections using the Clone Stamp Tool
This is another use of the clone stamp tool. Skin imperfections are a common problem in an image, and using the clone stamp tool is the best solution to solving this problem.
We will work on an image that requires removing spots from the skin.
Open the Photo and Duplicate the Background Layer
The image that requires perfection opens it and duplicates the layer.
Zoom in on the image in the areas where skin perfection is needed using the clone stamp tool Photoshop. It would be best if you do a 100% zoom.
Selecting the Clone Source
Follow the same instructions from Tutorial 01 and Step # 02.
Brush Mode Selection
Due to this, removing skin imperfections with the clone stamp tool becomes an effective technique. You can focus on the precise details you want to eliminate.
The Brush mode needs to be set to “Lighten.” This selection will let the clone stamp tool work on darker skin areas compared to the clone source selection.
The darker-colored area will be affected only, and no change will come in the other areas of the image.
And if you choose “Darken” in the brush mode, it will work vice-versa.
Removing any wrinkles or black spots from the skin is an effective method. The result will become natural when you remove any dark spots by selecting the brush mode to “Lighten” or “Darken.”
Paint Over the Targeted Area
2/3 times painting on the targeted area will allow you to remove the dark spots from the image.
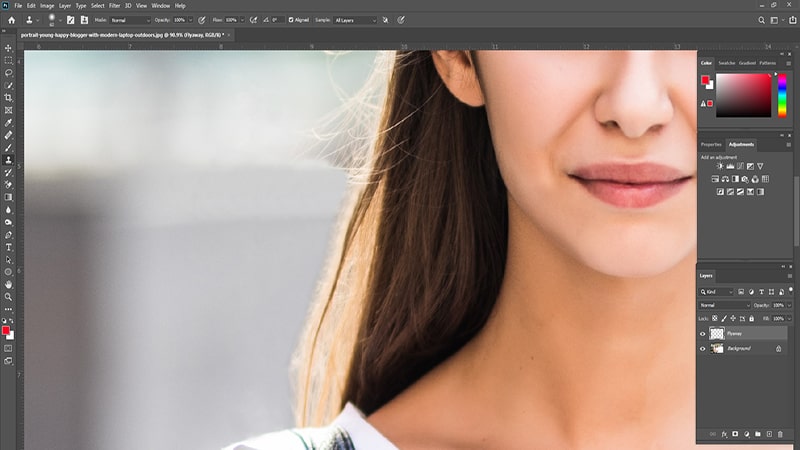
(Tutorial 04 )
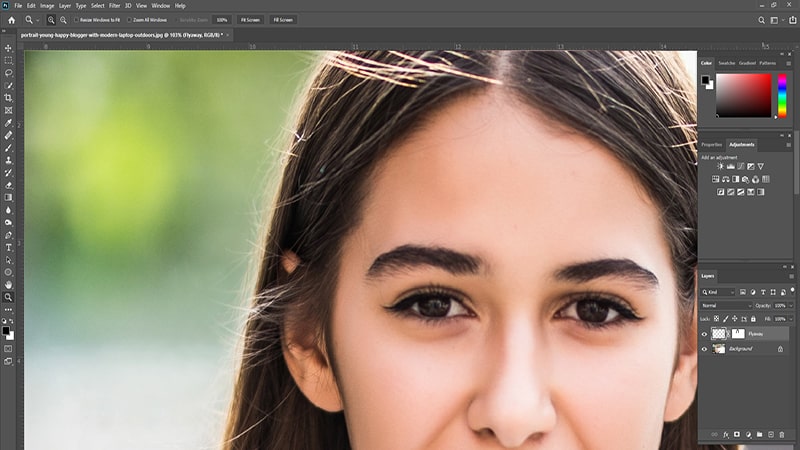
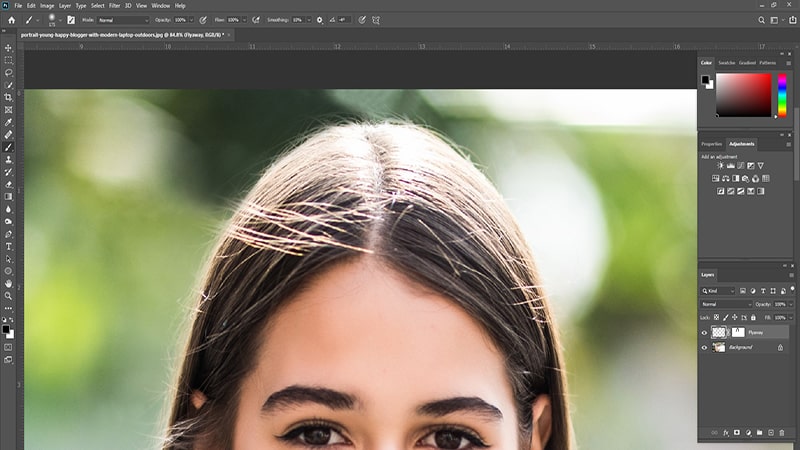
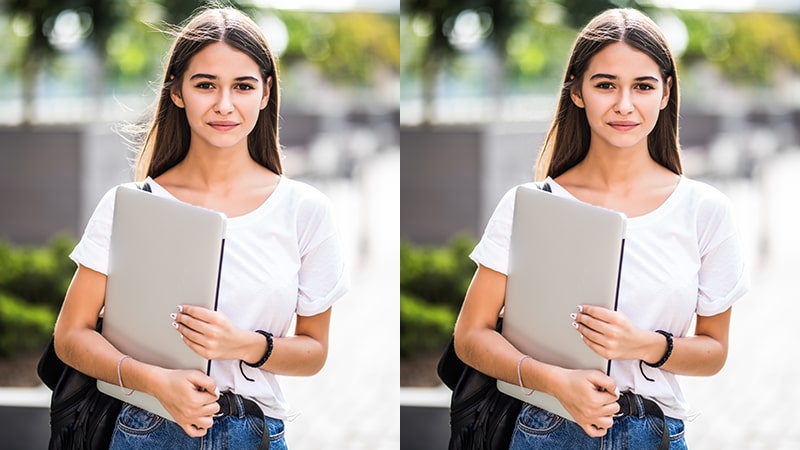
Correct Flyaway Hairs Using the Clone Stamp Tool
Flyaway hair can be a distracting portion of an image. And this time also, the clone stamp tool is the problem solver.
We also have an article on the tutorial: how to fix frizzy hair in Photoshop. You can check the tutorial too.
Read the below steps for a better understanding.
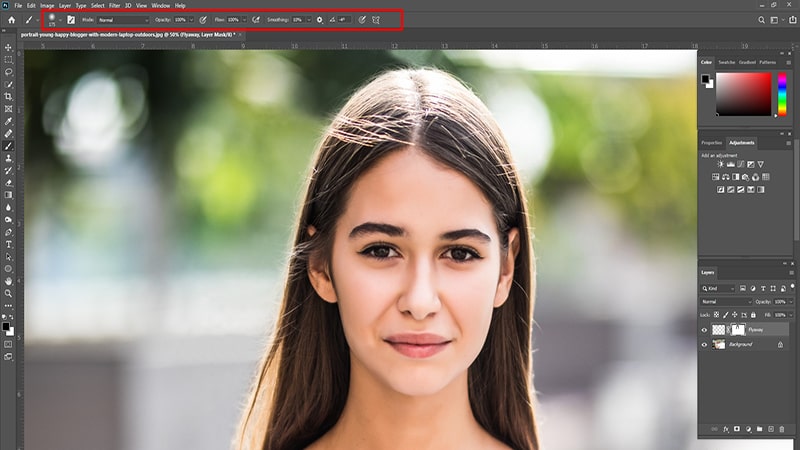
Open the Image and Follow the Settings
Your required image needs to be opened in Photoshop. Then select the clone stamp tool from the Menu bar and follow the below settings.
Mode: Normal
Opacity: 100%
Flow: 100%
Sample: Current & Below
Selecting the sourced Pixel
For Windows, press Alt; for Mac, press Option and hold it down to select the sourced pixel.
Then roughly paint the targeted area to remove the flyaway. At this moment, it doesn’t require perfection because, within the next few steps, we will go through to make the result perfect.
Adding Mask
Once you remove the flyaway hairs, the image will look unnatural. Add a mask to the layer to give the image a natural look.
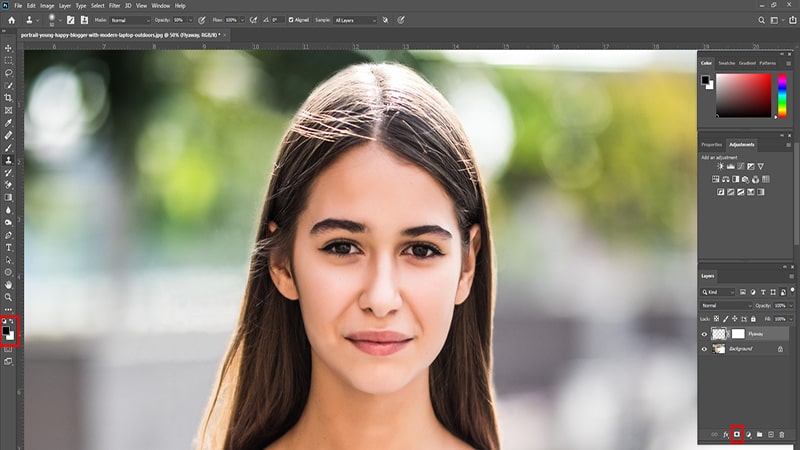
At the bottom of the layer palette, you will find a rectangular icon with a circle. Click on it. Make sure the Foreground color is selected as Black.
Applying the Brush Tool to Reveal a Few Hairs
This section resters some of the flyaway hairs we removed in the previous step. Select the brush tool and apply it to the mask so some removed hairs appear.

Adjust the Brush Settings
Follow the below directions.
Window > Brush Settings.
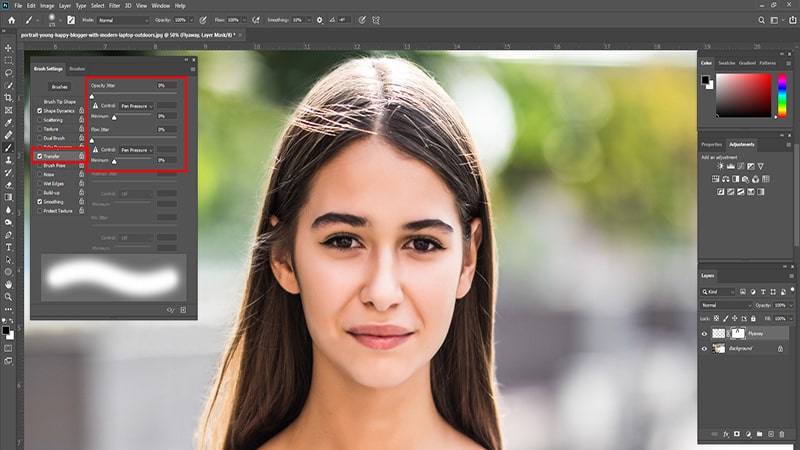
Once the menu appears, select “Transfer,” and the Control option should be changed to “Pen Pressure.”
Using the Foreground Color
Use the black foreground color to paint the mask. This way, some flyaway hairs will appear. When you use a white foreground color to paint over the mask, some flyaways will disappear.
Altering the foreground color between black and white can easily be performed by pressing “X” on the keyboard.
Checking the Result
Are you satisfied with the result? If yes, don’t proceed to any other process. If the answer is a big No, continue to the next step.

Zoom in For the Precise Result
Now zoom in on the image to work on more details. You can remove flyaway hairs more precisely with zoom-in.
Fine-tuning the Brush Settings
More flyaways and hair volume need to be removed to give a natural look to the image.
If the edge is too soft, don’t hesitate to adjust the brush settings.
The next step will show you how to adjust the brush settings of the clone stamp tool.
Play With the Brush to Get a Satisfactory Result
The flow setting is changed to 79%. Also, a hardened brush will ensure more definitions of the edges.
Continue playing with the brush until you receive a satisfactory look. Please don’t bother to do this because you can conveniently return to the previous step by undoing it.
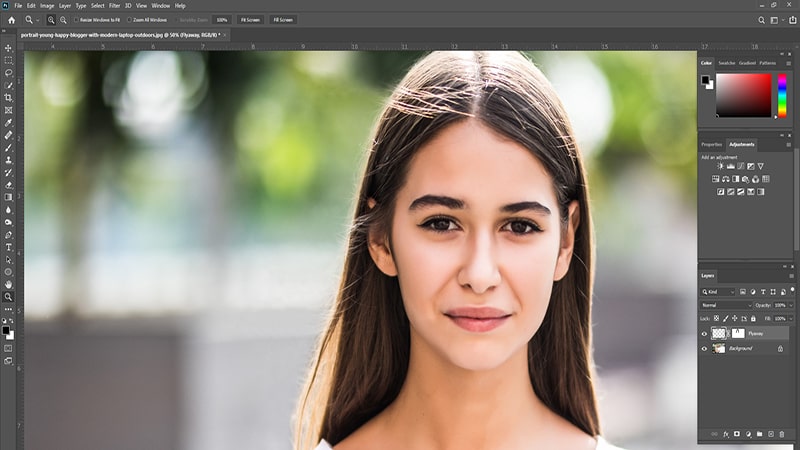
Final Image
This is the final image after doing a lot of processing. Undoubtedly, in this image, the hair receives a soft look.

Comparison of the Before and After Image
See the comparison below.
12 Tips and Tricks on Clone Stamp Tool
Follow the brilliant 12 tips and tricks on Clone Stamp Tool and become the master of removing dust and scratches.
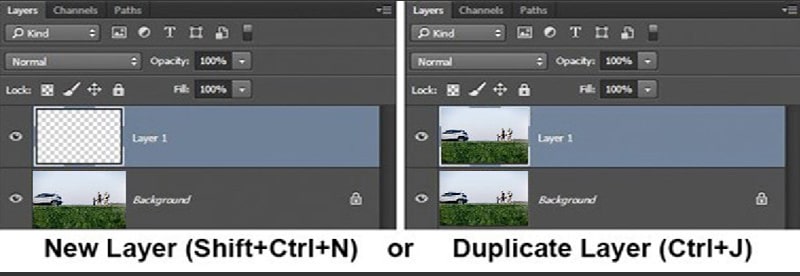
Always Create a New Layer
Before you start working with a clone stamp tool, make sure to create a new layer. You should work on the new layer and keep the original layer intact.
Make the original layer invisible if required by clicking on the EYE icon on the left side of the original layer. Once you finish working with the new layer, flatten the image.
Why is this necessary? Due to many reasons, it is needed.
First, this is a non-destructive process which means the underlying pixels are not getting changed in this process. Additionally, if you don’t like any changes made in the layer, you can delete them without hesitation.
Also, creating a mask is similarly beneficial if you can decide what changes you don’t require later.
In the end, you can only work with the targeted area in the new layer.
However, the new layer creation is a minor deal.
For Windows, press Ctrl+J, and for Mac, press Cmd + J to create a duplicate layer. One thing needs to be remembered when doing so, the “All Layers” option needs to be selected in the Clone Stamp Tool settings.
It would be best if you worked on the new layer.
Zoom In
Zoom-in is a mandatory thing that must be followed when working with the clone stamp tool. Looking at the tutorials, you will find that zoom-in is used in every tutorial. Even if zoom-in requires 100%, don’t hesitate to do it.
Zoom-in will allow you to work precisely. Moreover, to get a natural and indistinguishable look, zoom-in is necessary.
You can quickly zoom in on an area following the shortcut. Press the Alt key with one finger of your hand and use another hand’s finger to scroll the mouse wheel to zoom in and out.
Furthermore, pressing Ctrl (for Windows) and + key, Cmd (for Mac), and + key together will let you zoom in and out.
Right Brush Size Does the Trick
You will need to change the clone stamp tool’s brush size more frequently. You must do this often to ensure the brush size matches your change. However, changing the Brushes Panel’s size is tricky.
Using the shortcut keys is best to adjust the size of a brush. Follow the below procedure.
- Smaller brush size: Press [ left bracket
- Bigger brush size: Press ] right bracket
Following the above process will allow you to change the brush size without hassle.
Brush Hardness has to be Appropriate
You can set the clone stamp brush hardness as per your requirement. The hardness allows you to determine the cloning level at which it blended with the surrounding pixels.
Set the hardness level to 100% to get definite and hard edges. On the other hand, when you move the slider to 0%, the edge will blend with the surroundings.
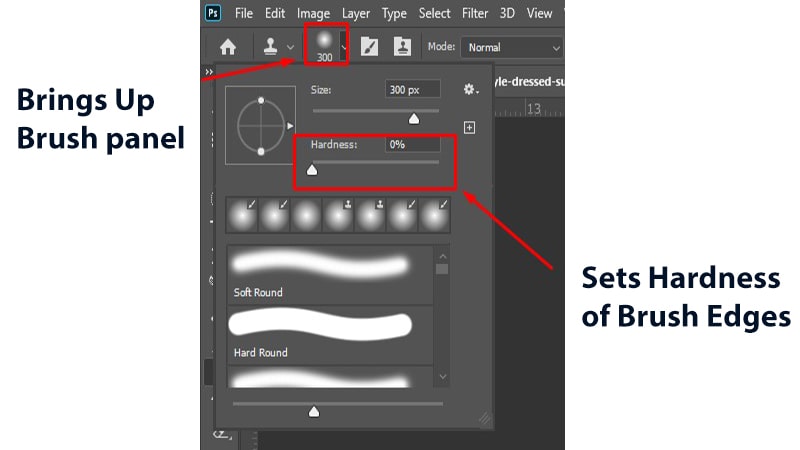
Generally, a 0% hardness level delivers the best result. Seamless blending is achievable with this brush hardness level. At the same time, if you want to achieve a nearly defined edge, choose to increase the hardness level.
Do Cloning Without Fine-Tuning
Remember to do the cloning before you make fine-tuning in contrast, color, or any other changes. After creating those layers, if you clone the stamp tool, you are permanently baking modifications to your image when cloning.

In a few cases, you have already changed an adjustment layer and need to decide whether those adjustments should be included in your cloning. Photoshop allows you to choose whether your cloning should come with those changes.
After selecting the clone stamp tool, you will find a circle with a line through it at your screen’s top row.
By default, Photoshop applies changes to adjustment layers when cloning. With the icon clicked, adjustment layers will be ignored by Photoshop when cloning.
Clone the Easy Objects First
In an image, it will be both comfortable and harder to clone things. It is advisable to start with the most relaxing things. Cloning out the easiest things will boost your confidence to clone the more challenging things.
Be Careful with the Patterns
Sometimes, patterns are inevitable in cloning. Selecting the sourced pixels will help if you look for ways in your image that match the targeted area. For instance, replace a building with the same colored building to get the expected result.
Ensure Following the Lines
When all the lines of an image get matched after using the clone stamp tool, only you can say that the image has received the required result. Otherwise, the image will receive an unnatural and fake look.
When cloning an image with many roofs or window lines, you must clone those areas carefully.
When cloning an image, start with the lines and then go with the other areas.
Don’t Select Pixels from Adjacent Areas
Hopefully, you have already understood that the clone stamp tool removes dust and sketches with the repetition process. So, while picking the pixels, you have to be careful enough.
Viewers can identify the repetition if you select pixels from an instantly adjacent area.
Creating a pattern unknowingly is an easy trick to read because instantly adjacent portions are generally the nearest to the colors and tones you want to replace.
Matching the colors and tones becomes more challenging when you move further away. If you work hard to find ways to use pixels from elsewhere in your image, dividends will be paid because a viewer will be unable to notice the repetition.
Accept the Muddle
By now, you have already started fixing the small areas and are ready to tackle the significant areas. Big areas might be full of lines, curves, people, cars, and many other things. Using the clone stamp tool in those areas is the scariest thing.
Refrain from facing the challenges. Try to fix only some of the problems at a time. You will never achieve a good result if you do so.
Below are 2 different ways to handle it.
Select big brushes first: Decide on a bigger brush than usual in the beginning. One fell swoop is enough to replace the whole area.
Go slowly:
- Pick a smaller brush to clean up the area and gradually paint over the targeted area.
- Continue the process without hesitation.
- Even if you can’t use the clone stamp ideally, continue working.
You can go over the same place again and again until you get the expected result.
The most important thing is to continue to process without stopping.
Using the Mirror Function is Beneficial
The clone source panel has a wide range of settings involved with the clone stamp tool. For example, changing the brush shape or replacing the pixel’s angle are 2 significant features.
The flip-horizontal option is another worth-mentioning feature of the clone source panel. It is positioned in the middle of the panel.
Clicking on this icon will allow you to replace it in the reverse horizontal direction as the source. This feature is very beneficial when handling symmetric subjects since you can now easily paint from the opposite side.
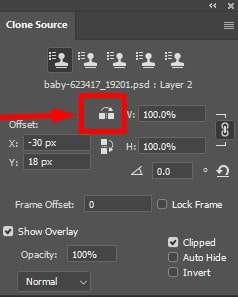
The below-shared image is a typical example of a flip-horizontal option. This option is one of the best clone stamp tool features when you have any symmetry in your photo.
12 The Cloned Area Needs to be Changed with Adjustment Layers
Sometimes you will find the difference between the cloned and surrounding areas. Either the cloned site will be too light dark, or off. The fixation process is also easy, and the surrounding area will not be affected.
Out of many different benefits, the most noticeable use of the adjustment layer is it affects only the cloned regions.
Advantages of the Clone Stamp Tool
Even when you use a quality camera to capture an image, you may be required to retouch it. This is because sometimes photo retouching gives the required result instead of the camera settings.
And in retouching an image, a clone stamp tool fulfills every requirement of a photographer.
Clone stamp tools can improve the quality and appearance of an image. Eye-catching image is essential because they can enhance the sales of a product. And with the help of the clone stamp tool, an image can get an attractive look through retouching.
The clone stamp tool can add value to an image by removing unwanted objects from a photo. Removing unwanted items from an image will not only improve the quality of an image but also create a brilliant impression on a potential customer.
FAQs
The clone stamp tool is placed in the toolbar. You can also use the shortcut key “S,” which is applicable for both Windows and Mac operating systems.
The clone stamp tool’s functionality is removing dust, scratches, or blemishes from an image.
After selecting the stamp tool, you will get a smaller stamp size when you move the “size” tab to the left. And stamp size will be bigger when the “size” tab is transferred to the right.
The key difference between these 2 tools is the sourced and targeted area. The clone stamp tool samples the pixel from an image and replaces it on another region of the same image.
Last Words
Working with the clone stamp tool can be tricky for beginners. You will be required to undo the changes or make a mistake selecting the wrong brush size.
Be patient and continue practicing. Undoubtedly, the clone stamp tool can save many images compared to other Photoshop tools. This tool will allow you to remove almost anything with the right process.
You may read:

Salim Ahmed is the CEO of Graphic Experts India, with over 25 years of expertise in photo editing, clipping path, image retouching, and eCommerce image editing services.