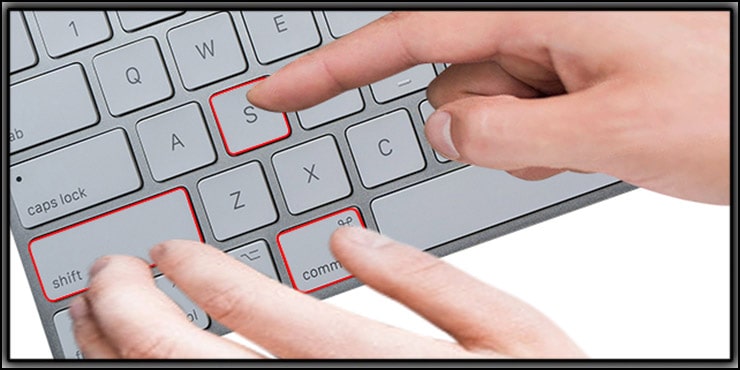
Photoshop Keyboard Shortcuts are essential for Editing Photos easily. The Adobe Photoshop software has become the go-to tool for photographers around the globe.
Whether you want to retouch or create new images from scratch, Photoshop is always at your disposal.
As the best image editing software, Photoshop allows users to work with many tools and toolbars. When it comes to photo editing, there is no better way to edit photos than using keyboard shortcuts.
With these shortcuts, you’ll be able to edit photos like a pro in no time.
In this tutorial, I’ll show you some of the keyboard shortcuts for working with layers and filters in Photoshop. These shortcuts will allow you to perform tasks faster and easier.
Using Photoshop Keyboard Shortcuts for editing photos will save time and assist you in completing the Photoshop Services. Furthermore, if your grip is better in these shortcuts, you will be one step ahead of others in editing images.
Importance of Using Photoshop Keyboard Shortcuts
Using shortcuts in these situations can save time and keep you concentrated on your work. Let’s take a quick look at some more important factors about how these Photoshop keyboard shortcuts can assist you:
- Learn how to use Photoshop keyboard shortcuts to speed up your workflow.
- Save time by using shortcut keys instead of mouse clicks.
- Use keyboard shortcuts to navigate through layers, adjust brush settings, crop images, etc.
- Create professional-looking designs faster than ever before.
- Master Photoshop’s tools and techniques quickly and easily.
- Improve your skills and become a better designer.
- You will be easily able to find out tools and select layers by using the shortcuts
- Manipulating images and layers from Photoshop becomes much more manageable with shortcuts
- It is also possible to make adjustments on the project canvas through the Photoshop shortcuts
- Product images edited through proper Photoshop shortcuts will look stunning to the customers, which will inspire them to purchase those products
Photoshop Keyboard Shortcuts for Editing Photos – You Can Try
If you are looking for some shortcuts to make your life easier then this article is going to be very helpful for you. We have listed all the keyboard shortcuts for Photoshop here. So if you want to learn more about these shortcuts then read below.
Not all the tools and methods are required for product image editing in Photoshop. But some tools, processes, and techniques are crucial to perform eCommerce photo editing. Shortcuts in those situations will take you to a new level of image editing fluency.
Let’s talk in detail about these crucial shortcut methods which can turn out blessings for you:
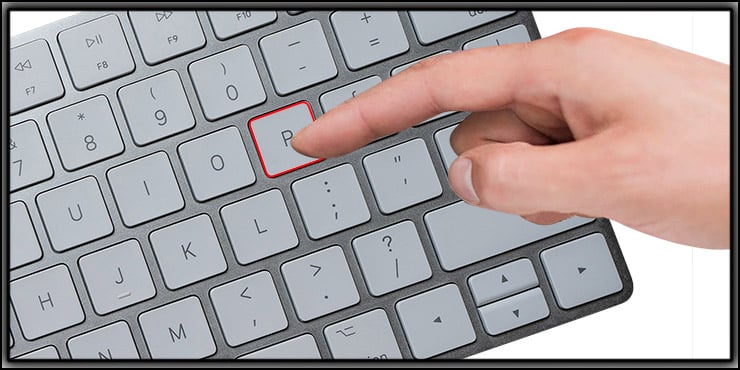
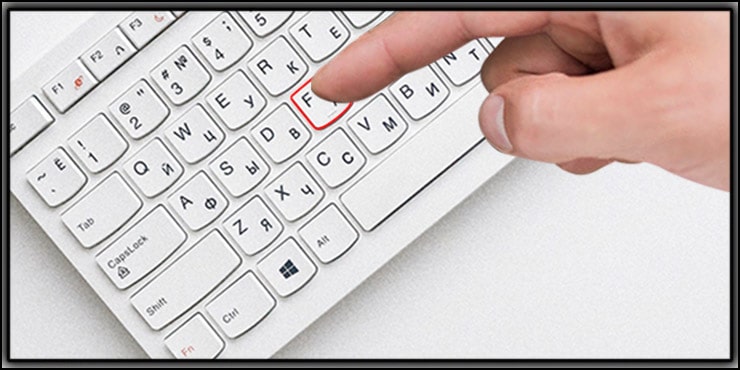
Pen Tool
The position of the “Pen Tool” is in the toolbar on the left portion of the Photoshop window. Accessing the tool manually from the toolbar takes a bit of time and is sometimes annoying. That’s why there is a shortcut to finding this tool quickly.
You must press “P” from your keyboard, which will direct you to the “Pen Tool.”
Pen Tool keyboard shortcut for Windows: P

Pen Tool keyboard shortcut for MAC : P
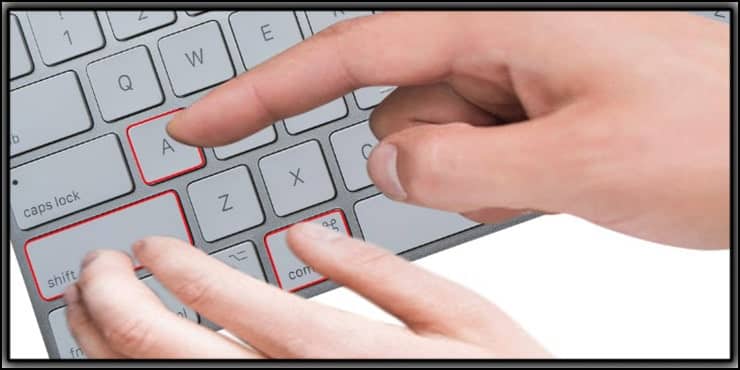
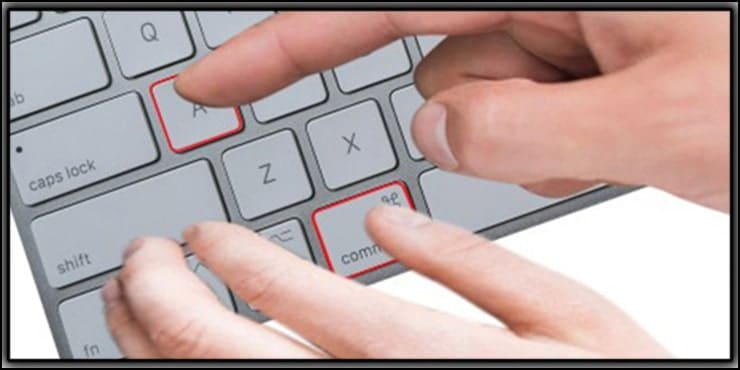
Direct Selection Tool
This tool is mainly for adjusting the points you create using the “Pen Tool.” This tool is also situated in the toolbar, which takes a bit longer to locate. As the shortcut, you will have to press “A” to select the “Direct Selection Tool” in a blink of an eye.
For Windows:

For MAC:

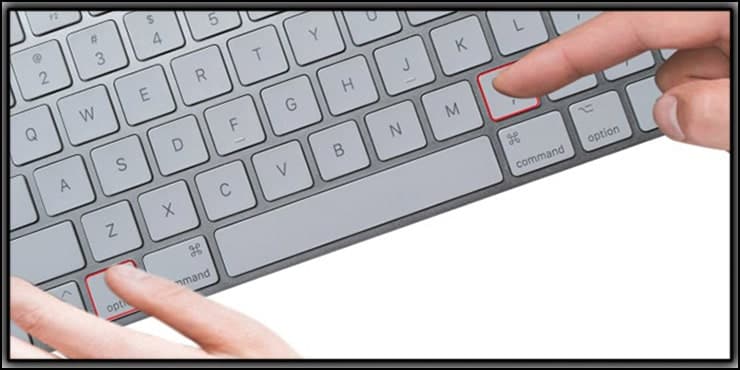
Hand Tool
This “Hand Tool” is another essential tool when editing a product image through a clipping path. You must press “H” from your computer’s keyboard to access this tool in the shortcut process. Then you will find the “Hand Tool” getting selected automatically.
For Windows:

For MAC:

A New Layer Creation
You can create a new layer from the “Layer’s Panel” in Photoshop while editing your product image. But it takes time, and when you need to create a bunch of layers, doing it manually will suck up a tremendous amount of time.
Performing the task in the shortcut method consumes way less time comparatively.
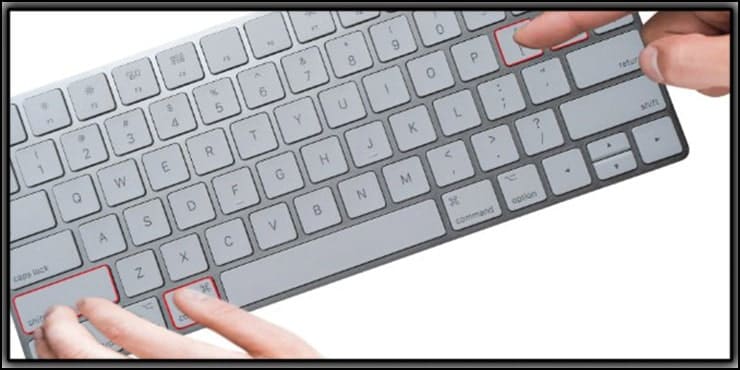
In this case, you will have to press “Shift + Ctrl + N,” and the new layer will be created instantly.
The process above is for Windows OS users, but you need to press “Shift + COMMAND + N” if you are a Mac user.
Layer Color Filling
A lot of time may have been consumed when you manually tried to layer color filling. But do you know you can complete layer color filling within less than 5 seconds?
You might wonder, but the reality is you will just have to press “Shift + F5” to get the job done in a jiffy.
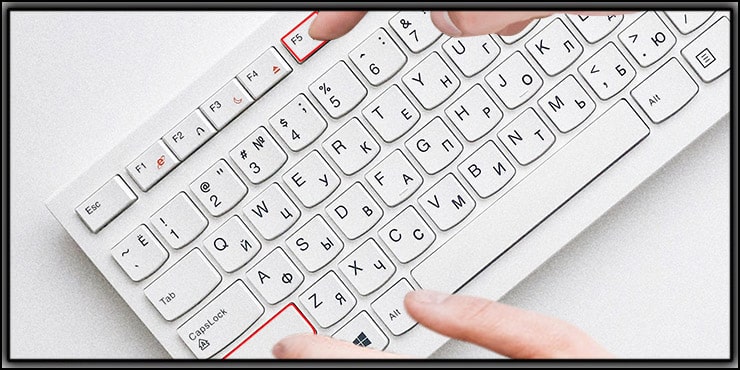
Same as the previous method, as a Mac laptop user, you need to press “FN + Shift + F5” to fill the layer with color.

Corner Point Creation
You will work with the “Pen Tool” to draw and create corner points. Doing it manually sucks up a humongous amount of time, which negatively impacts your product image editing.
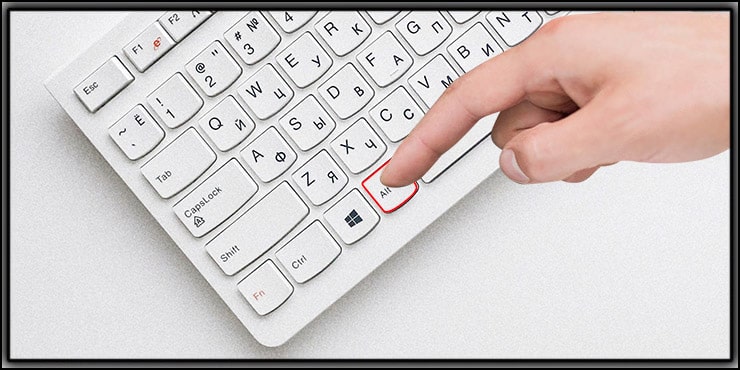
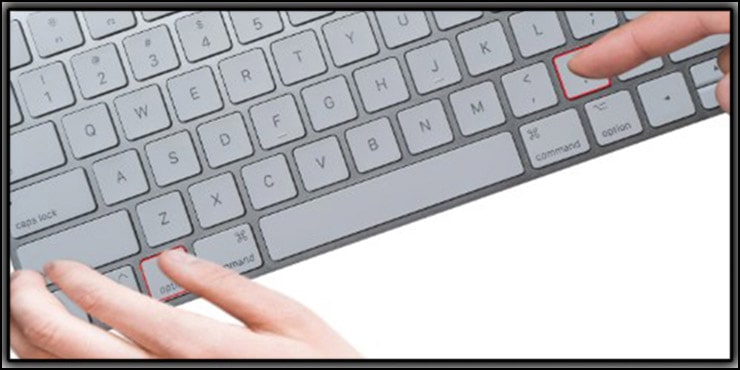
That’s why you should prefer the shortcut way by simply pressing “Alt + Click.”
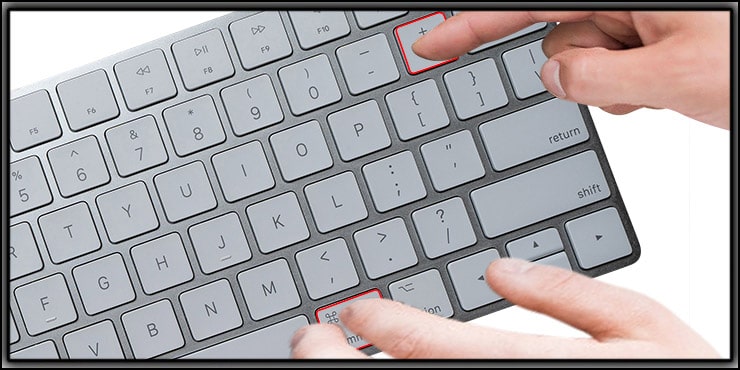
Zoom In and Out
Zooming in and out with the given slider is unsuitable when you are in a hurry to complete the task. To save editing time, you should press “Ctrl + =” to zoom in and “Ctrl + -” to zoom out.

But when you are editing the image on Mac, you need to press “COMMAND + =” to zoom in and “COMMAND + -” to zoom out.
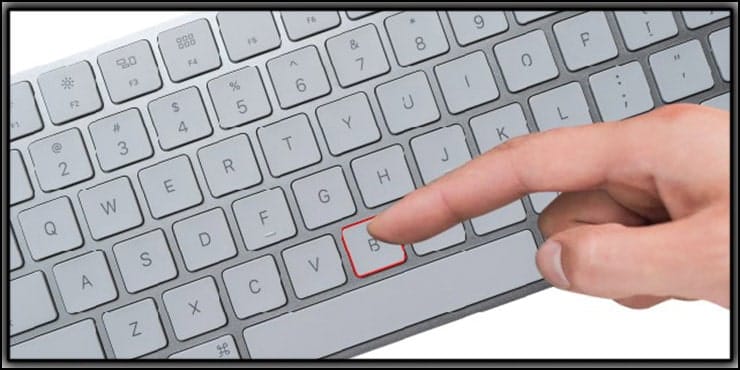
Brush Tool
The Brush Tool is one of the painting tools in Photoshop. It applies color utilizing strokes, just like a standard drawing tool. It may be found on the toolbar; however, you can also open this tool by using a keyboard shortcut:
Brush Tool keyboard shortcut for Windows: B

Brush Tool keyboard shortcut for MAC: B
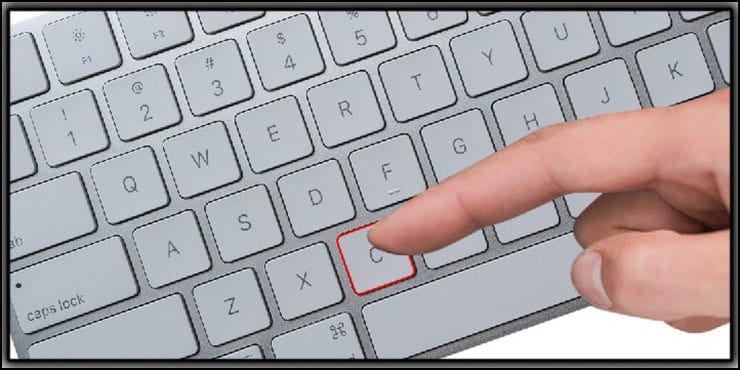
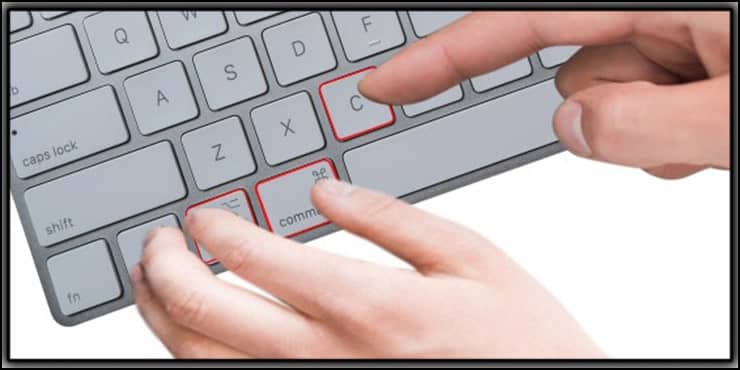
Crop Tool
The crop tool eliminates the area around the selection from the picture. Crop the image to eliminate distracting background components and draw attention to the target object. While this tool is available in the toolbar, you can also access it with a keyboard shortcut:
Crop Tool keyboard shortcut for Windows: C
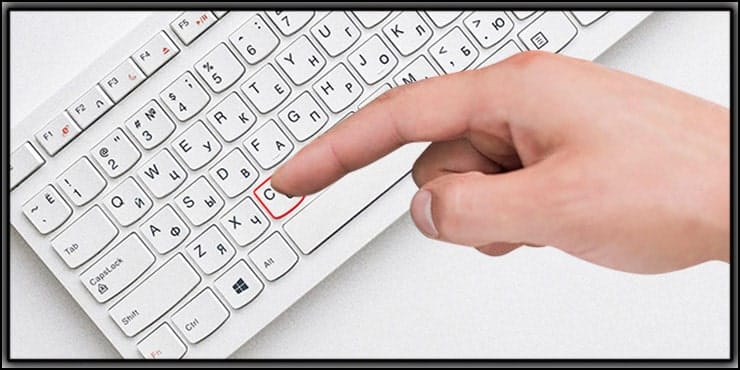
Crop Tool keyboard shortcut for MAC: C
Eraser Tool
The eraser tool is very helpful in removing unwanted objects or spots from your image. The keyboard shortcut for this tool is:
Eraser Tool keyboard shortcut for Windows: E

Eraser Tool keyboard shortcut for MAC: E

Spot Healing Brush Tool
You may eliminate blemishes or minute objects from any image using Adobe Photoshop’s Spot Healing Brush tool. Select the tool, then click the trouble spot. The keyboard shortcut for this tool:
Spot Healing Brush Tool shortcut for Windows: J
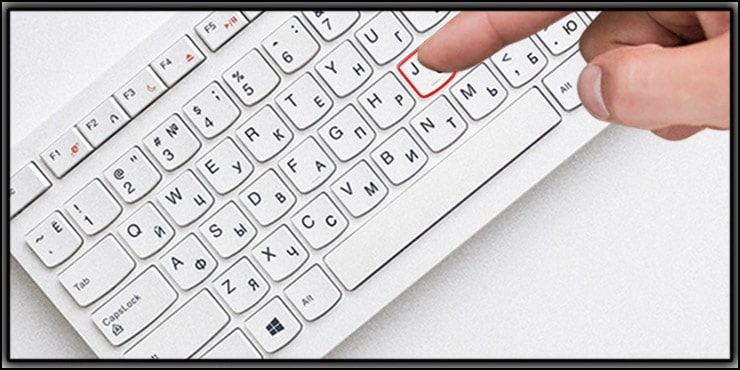
Spot Healing Brush Tool shortcut for MAC: J

Change Image Size
Photoshop photo editing software lets you change the image size. You can change the image size easily using a keyboard shortcut.
For Windows OS, press Ctrl + Alt + I

And for MAC OS, press Command + Option + I from the keyboard.
Change Canvas/Page Size
Changing the page or canvas size manually will take a relatively long time. However, you can use a keyboard shortcut to change the page or canvas size in photoshop.
For example, press Ctrl + Alt + C for windows OS.

And press Command + Option + C for MAC OS to change the canvas size.
Path Selection
The path Selection tool is essential for clipping paths or removing the background from images. A keyboard shortcut for Windows and MAC allows easy access to this tool.
For Windows: A

For MAC: A

Change Screen Layout
To modify the interface’s structure, pick one of the multiple screen modes after launching a project in Photoshop and choosing View > Screen Mode. However, you can Change Screen Mode using a keyboard shortcut.
For Windows: F
For MAC: F

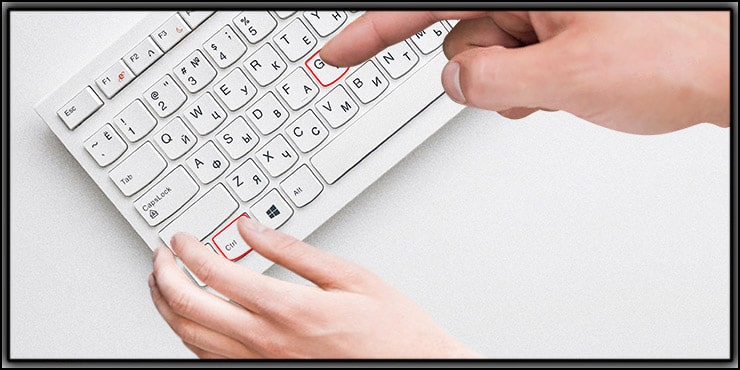
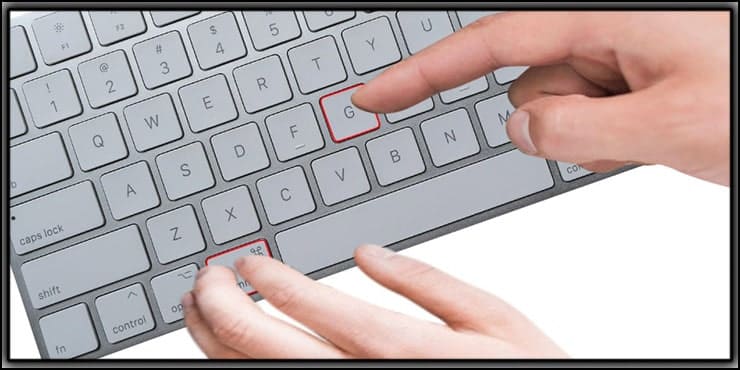
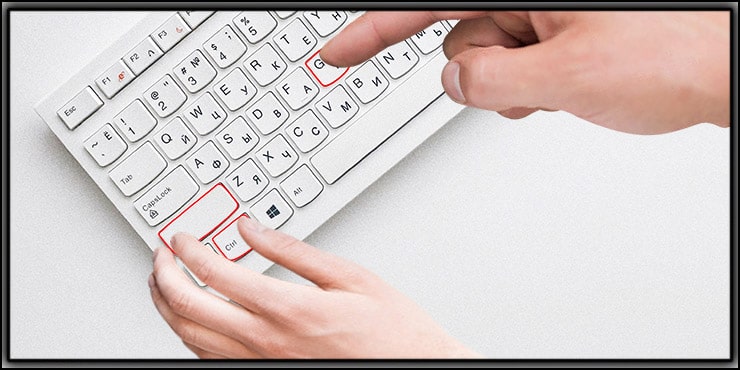
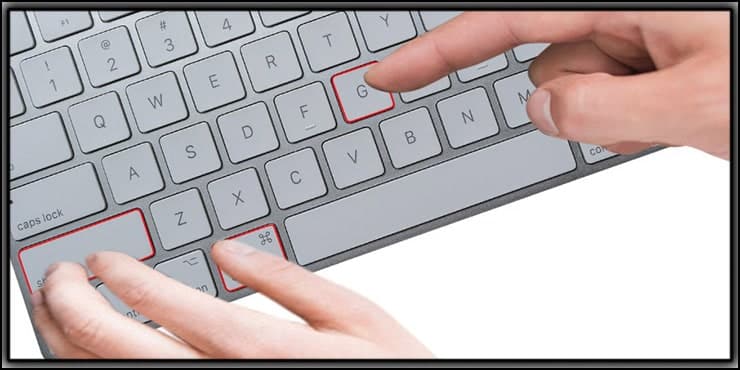
Gradient
The Gradient tool gradually combines different hues. To access this tool, press “g” from your keyboard for MAC and Windows OS.
For Windows: G
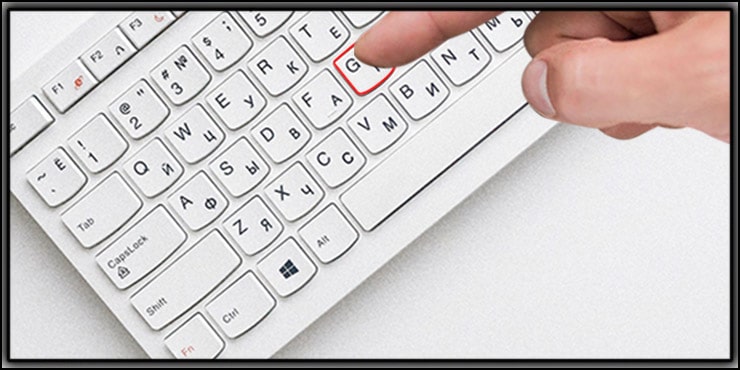
For MAC: G

Lasso Tool
Drawing freehand selections are possible with this fundamental selection tool. While finding and opening its tool from the toolbar is time-consuming, you can use a keyboard shortcut “L” for both MAC and Windows to access this lasso tool.
For Windows: L

For MAC: L

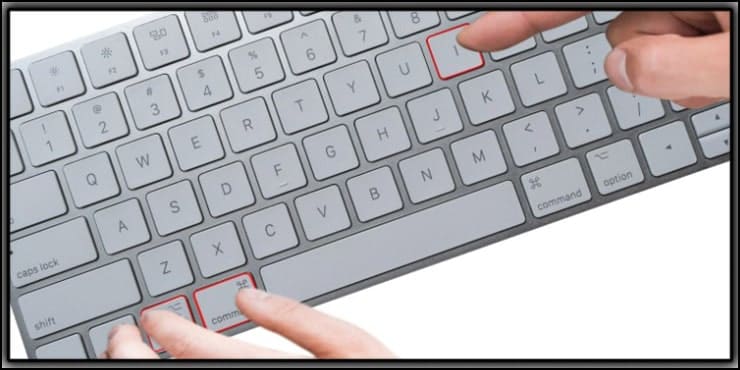
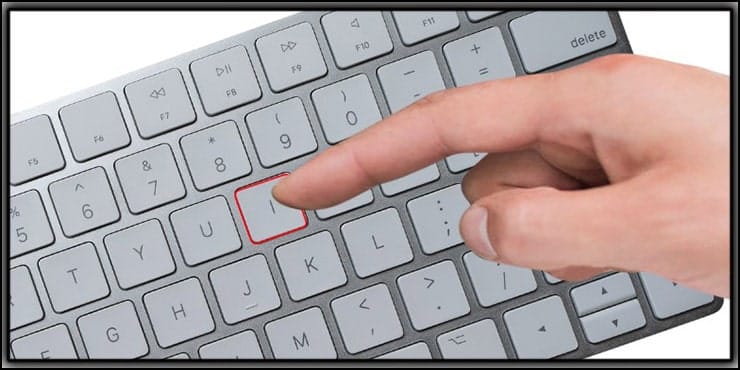
Eyedropper
The Eyedropper Tool allows you to capture colors from photos and add them to the Swatch window for later use. Press “I” from your keyboard to open this tool.
For Windows: I

For MAC: I
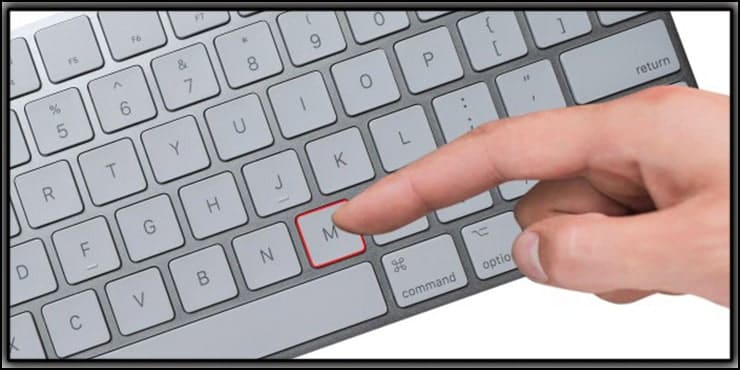
Marquee Tool
The Marquee tool is a fundamental selection tool that allows you to choose several shapes for any Photoshop layer, including rectangles, ellipses, squares, and circles. The keyboard shortcut for this tool is:
For Windows: M

For MAC: M
Quick Mask Tool
Quick Mask temporarily colors the area within the selections a semi-opaque red, making it easier to identify your selection. To access this tool, you can use the keyboard shortcut below.
For Windows: Q
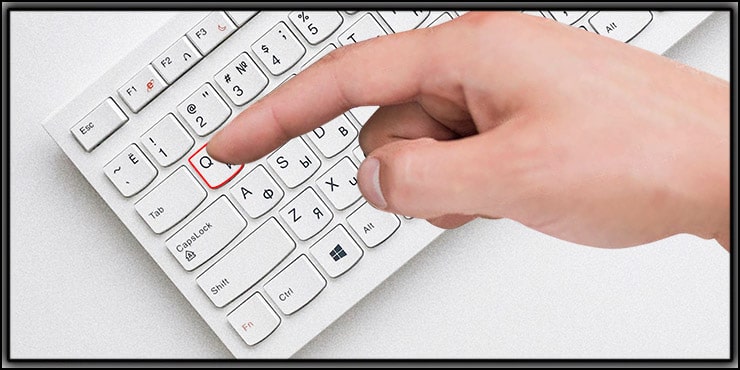
For MAC: Q

Pointer
Pointer works like a mover, and you can move objects using this tool in photoshop. You can easily access this tool by pressing V from your keyboard for both Windows and MAC OS.
For Windows: V
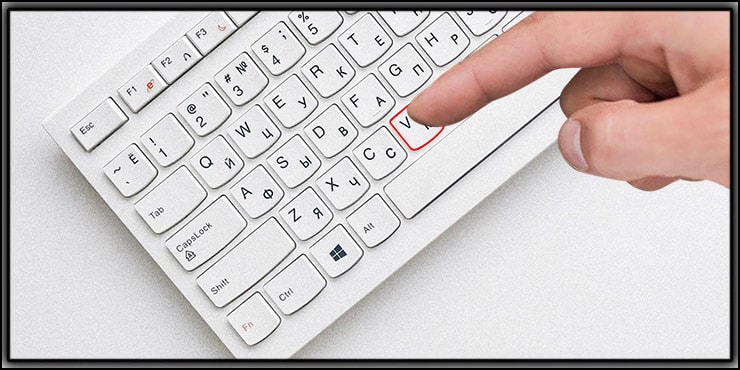
For MAC: Q

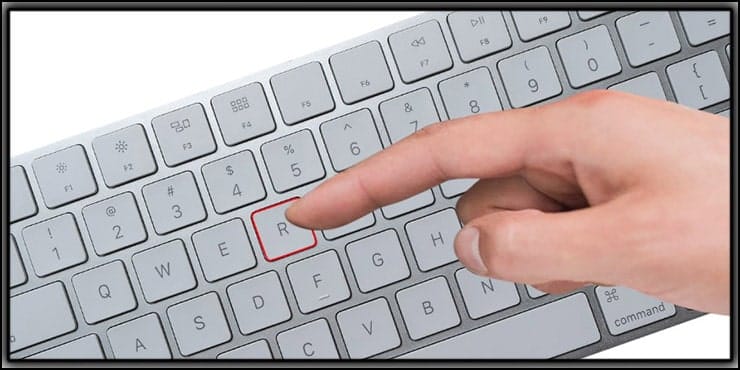
Rotate View
You may rotate any image and document with the Rotate View feature to make it easier to work with. Use the keyboard shortcut for Windows and MAC below to open this tool.
For Windows: R
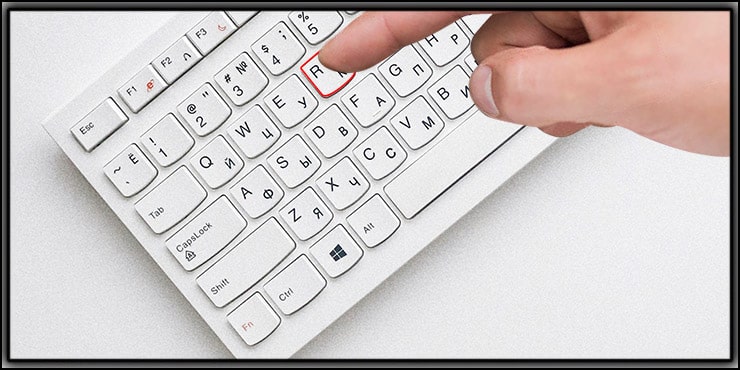
For MAC: R
Select All Layer
Suppose you want to select all layers from the layer box.
Press Ctrl + Shift + A for Windows.

Press Command + Shift + A for MAC Operating System.
Group layers
To create a group of layers, you have to select the targeted layer and then Right click on the mouse and select “Group From Layer.” However, you can do this task more easily using the shortcut below.
For Windows: Control + G
For MAC: Command + G
Ungroup layers
Ungrouping the grouped layers manually takes a bit of time since you have multiple clicks on the mouse. However, you can do this task simply through this keyboard shortcut:
Windows: Select the group and press Control + Shift + G
MAC: Select the group and press Command + Shift + G
Select Next Layer
For Windows: Alt + [ or ]

For MAC: Option + [ or ]
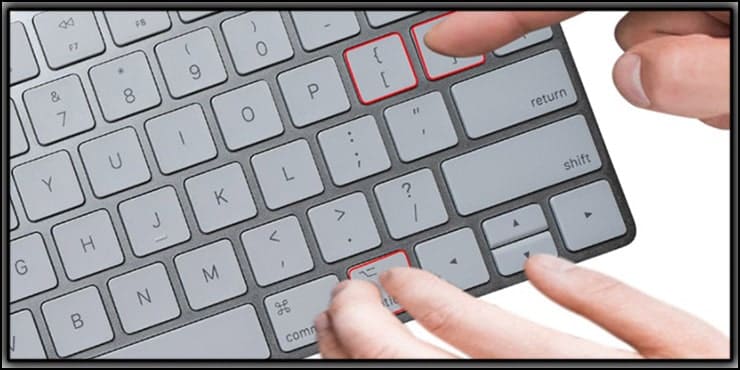
Move Target Layer
For Windows: Ctrl + [ or ]

For MAC: Command + [ or ]
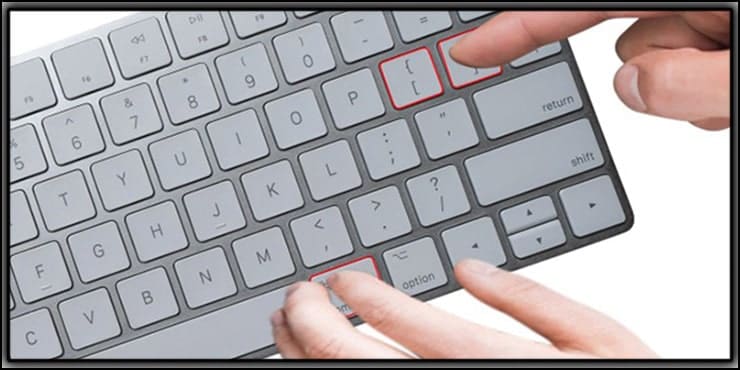
Move Layer
For Windows: Ctrl + Shift + [ or ]
For MAC: Command + Shift + [ or ]
Select Top Layer
For Windows: Alt +.
For MAC: Option +.
Select Bottom Layer
Windows: Alt +,
MAC: Option + ,
Magic Wand
The Magic Wand is another selection tool, but it aids in selecting sections and objects so that they may be edited more flexibly. The keyboard shortcut for this tool is:
For Windows: W

For MAC: W

Select and Deselect Objects
To select all the objects of your image, press
For Windows: Ctrl + A

For MAC: Command + A
To deselect all selected objects, press
Windows: Control + D

MAC: Command + D

Undo the last command
If you accidentally enter a command in Photoshop, you can easily undo it using keyboard shortcuts. So, follow the shortcut below:
Windows: Control + Z

MAC: Command + Z
Previous Or Next Brush
To access the Brush Tool, either through the toolbar or by using the keyboard shortcut, you must first open it. Then, you may choose the previous and the next brush using the instructions below.
Windows: , or .

MAC: , or .
Merge all layers
You can Merge all layers by pressing Control + Shift + E from Windows.

Command + Shift + E from a MAC-operated laptop or desktop keyboard.

Opening Project
You have to open a file or image to start your editing projects. However, there are two different options in Photoshop to open a file. They are Open and Open as. You can use the shortcuts below to access these options easily.
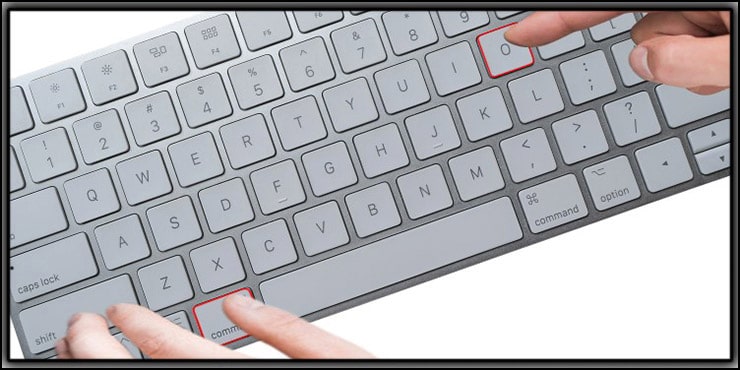
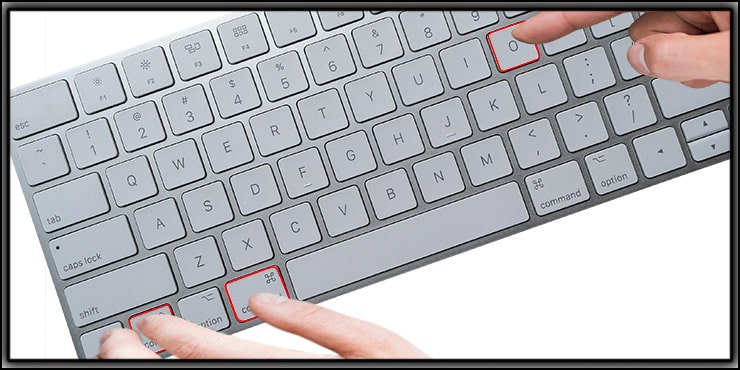
Open
Windows: Ctrl + O

MAC: Command+ O
Open as
Windows: Ctrl + Alt + O

MAC: Ctrl + Alt + O
Saving the Project
After completing your editing project successfully, you have to save it. Photoshop offers three different saving options, and both have keyboard shortcuts.
a. Save
Windows: Ctrl + S
MAC: Command + S
b. Save as
Windows: Ctrl + Shift + S

MAC: Command + Shift + S
c. Save for Web
Windows: Ctrl + Shift + Alt + S

MAC: Command + Shift + Alt + S

Creation of Crop Presets
Editing a raw image before showcasing it on any website is necessary. You may need to crop the image first to adjust it with the preferred website.
Based on the website requirement, you can create crop presets for the photos instead of trimming them manually every time.
It will save time along with keeping you concentrated on your editing work. The steps you need to follow to create a crop preset are as follows:
Step-1: Access the Crop Tool
Press “C” from your computer keyboard to easily access the “Crop Tool” and start the proceedings. After selecting this tool, you must click on the dropdown icon beside the options bar from the top of the Photoshop window.
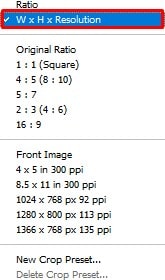
Step 2: Select the Ratio in the Dialogue Box
As you click on that icon, the options within it will come out serially in a dialogue box. The first option from the list will be named “W x H x Resolution,” and you must select it. This option stands for the image’s width, height, and resolution.
Step 3: Set the Image Resolution
You need to set the image resolution is 72 PPI which is proper for the images to be used in eCommerce websites. The height and weight of the image should be suitable for your desired website, which is not always the same.
You can either keep the dimension as 400px x 400px, 600px x 600px, or 800px x 800px as per your necessity.
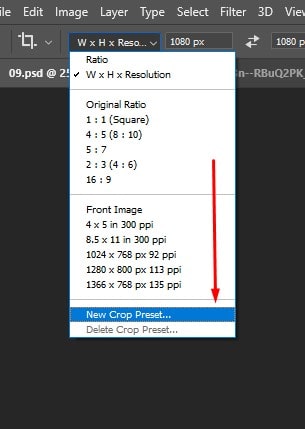
Step-4: New Crop Preset
You will have to set the grid type as “Rule of the Thirds” if it is not set by default. When you have made up your mind about the dimension, you need to click on that dropdown icon to bring out that options bar again.
This time, you will have to select the “New Crop Preset” option by setting the resolution and dimension. Don’t forget to provide a name for the preset to find it when you require it easily.
Then you can apply the preset on the product images you edit for further showcasing on eCommerce websites.
Layer Shortcuts
There are many layer shortcuts to work with instead of completing those tasks manually. The layer shortcuts you can perform are:
Select Contiguous and Non-contiguous Layers
To select the contiguous layers within no time from the layer’s panel, you will have to press “Ctrl + click layers.” If you are using a Mac, just hit the “COMMAND” button instead of “Ctrl,” and click the layers to get the job done.
On the other hand, when you need to select the non-contiguous layers, “Click a layer + Shift + Click another layer.”
Layer Opacity Changing
Manually, you can change the layer opacity by the slider in the Photoshop tab’s upper portion. But there is another shortcut way to perform this task by using the number pad keys.
Cycle down or up through blending modes: This task takes two or three steps to complete, which takes comparatively more time. But by simply pressing “Shift + Plus (+)” or “Shift + Minus (–),” you can complete it either way.
Shortcut Methods for Painting in Product Images
A painting photo is required to prepare the product image for offline showcasing. There are many methods and techniques available to perform painting, and shortcuts for those techniques are:
Different Types of Fill Selection
You can simply fill the background and foreground color with a simple click without any hassle. All you need to press for background fill selection is “Ctrl + Backspace,” which is “COMMAND + Backspace” for Mac.
To fill the selection with the foreground color, you will have to click “Alt + Backspace,” which is the same for all the Operating Systems.
In the foreground, you can also perform fill selection by using Lock Transparent Pixels, which has its own shortcut. In this case, press “Shift + Alt + Backspace” to complete the job.
Change Paint Opacity and Airbrush Flow
There can be two different situations for both paint opacity and airbrush flow. One is when the Airbrush is turned on, and the other situation is when the Airbrush is off. If the airbrush is on, you can change the paint opacity and airbrush flow using the Number Keys.
But when the airbrush is turned off, you will have to use “Shift + Number Keys” to complete the task in both cases.
Increase and Decrease Brush Size and Hardness
Manually trying to increase and decrease the brush size is possible, but it won’t be an efficient idea. Because you will have to access the tool location first and then reduce or increase it through the slider.
For the brush’s hardness, you will have to use a slider for hardness increasing and decreasing. But there is no reason to worry, as there are shortcuts for both brush size and hardness.
For example, to increase brush size, you need to press “],” and to decrease it, you will have to keep pressing “[” until you get your desired result.
Likewise, for increasing brush hardness, press “Shift + ],” and to decrease hardness, type “Shift + [.”
Showing and Hiding Panels
There are different panels for you in Photoshop to work with when editing a product image. Sometimes, you may need to show or hide other panels to improve editing. The shortcut methods for showing and hiding panels are given below in a chart:
| Task | Button |
| Open Adobe Bridge | Ctrl–Alt–O |
| Show/Hide the Panel of Actions | Alt–F9 |
| Brushes Panel Show/Hide | F5 |
| Show/Hide Layers Panel | F7 |
| Color Panel Show/Hide | F6 |
| Show/ Hide Info Panel | F8 |
FAQs
The shortcuts in Photoshop image editing are highly beneficial in eCommerce photo editing.
Your main focus while editing product images is to edit as many images as possible perfectly within the shortest period. Photoshop shortcuts will save time and help you finish editing comparatively quicker.
You will also be able to keep your proper concentration on image editing as you won’t have to repeat the longer procedure.
No matter for which website you edit and use those product images, 72 PPI resolution is perfect in every circumstance.
But the pixel size varies as per the necessities of different website requirements. You may keep the size 400px x 400px or 800px x 800px as per the desired website demands.
Duplicating layers easily through the shortcut method is easier than the manual process. Select the layer first from the Layers panel with a single click. Then press “Ctrl + J” from your keyboard (“COMMAND + J” for Mac users) to duplicate that desired layer in the same Photoshop artboard.
Final Thoughts
Photoshop is the most used image editing software, with countless varieties of tools, methods, and techniques. It has one of the easiest interfaces, making it easier to edit images for all users.
But the process becomes even easier when you start using the shortcut ways.
You can edit images perfectly without errors by using clipping paths and other Photoshop shortcuts for editing eCommerce photos.
When you use these shortcuts, it becomes easier to customize pictures per the websites’ requirements. Besides saving your precious time, it will assist you in staying fully concentrated on what you are doing.
You may read:

Salim Ahmed is the CEO of Graphic Experts India, with over 25 years of expertise in photo editing, clipping path, image retouching, and eCommerce image editing services.