Photoshop has a wide range of powerful features, and the Photoshop layers feature helps to streamline the photo-editing process. The Photoshop layers are responsible for delivering premium-quality images.
For beginners, working with Photoshop layers can be frustrating. Beginners can lose themselves because there are many Photoshop layers available.
We made this tutorial to give you a clear understanding of the Photoshop layers. After reading this tutorial, you will never look for any answer related to the Photoshop layer.
Note that this will be a long journey. Take advantage of one process because you may lose yourself again in the ocean of Photoshop layers. Intently read the article.
Photoshop Layers – What is it, Panel Overview
Photoshop Layers is a feature in Adobe Photoshop that allows users to manipulate, edit and create multiple images or elements separately within the same image.
Generally, the original image alters when adding new elements to a photo using Photoshop. But the original image is still the same when you do the same thing with Photoshop layers.
The Photoshop layer’s best thing is that it will allow you to add extra elements such as text, vector graphics, shapes, and many other things in the image.
Simultaneously, you can remove, adjust, or move these additional elements whenever necessary without affecting others.
Modifying any image using Photoshop layers is an effective process. It allows you to ensure the original image’s integrity. And you can make the changes until you are entirely satisfied with it.
Professional Photoshop Service Providers maintain an image’s layered version to edit later. Also, eCommerce sites require modified versions of the flattened image.
How do Photoshop Layers Work?
Layers are similar to transparent film sheets and are placed on top of one another. Upper-level objects will appear above lower-level objects.
Applying solid color to a layer will let the color stick to a block in the layers below.
Photoshop has a layer panel; when necessary, you can delete, adjust, create, or access any layer.
To make a successful tutorial, we will share details on the below topics.
What is the Layers Panel?
The Photoshop layer panel is default positioned at the Photoshop window’s right-hand side. To get access to the layer panel, click on the word Layers.

If you are a beginner, you may need help locating the Layer option. An alternative option is also available to choose the Photoshop Layer option.
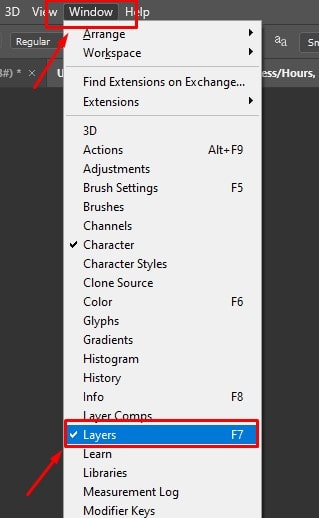
Click on the Window option located in the top menu. A drop-down menu will appear, and you will find the Layer option. The panel will pop up once you click on it.
After getting familiar with Photoshop Layer, below are a few tips and tricks to help you organize it effectively. Following and practicing all these tips and tricks can organize layers in Adobe Photoshop CC 2023.
How do you Add New Layers in Photoshop?
Creating a Photoshop layer can be done following several methods. For Windows users, press SHIFT + CTRL + N, and for Mac users, press SHIFT + COMMAND + N.
This command will let Photoshop create a new layer on top of the document’s current layer.
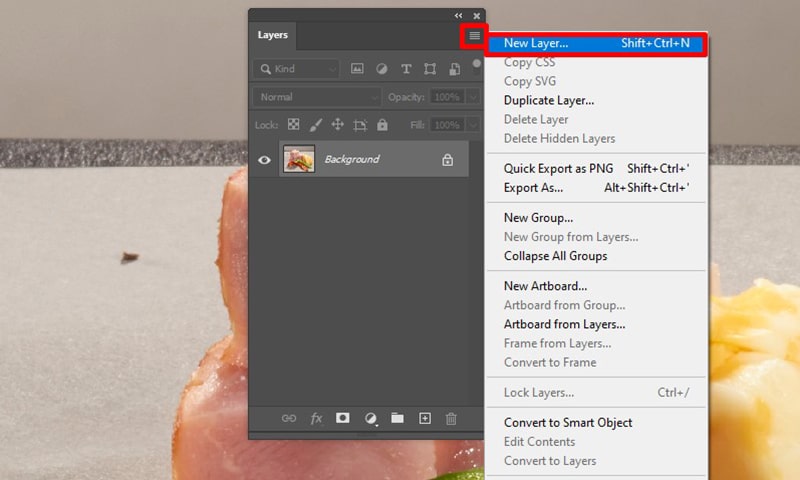
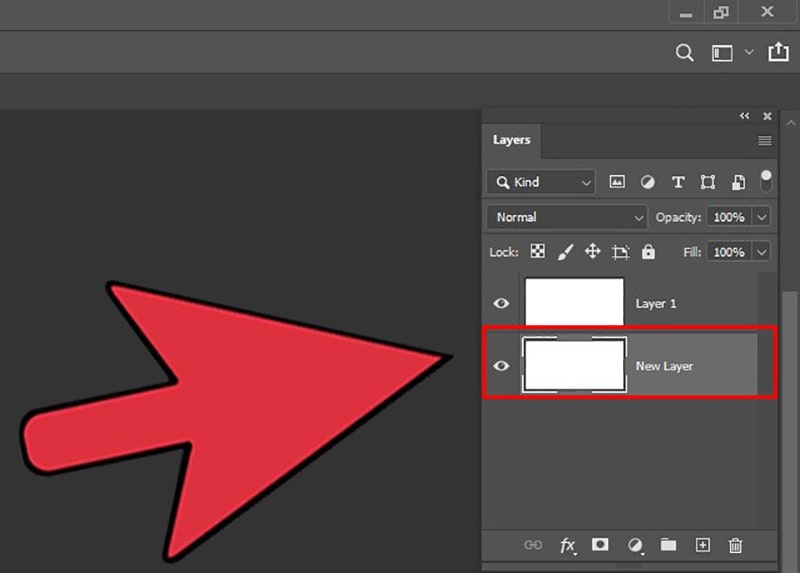
The Layers panel menu will allow you to create a new layer in Photoshop. On the panel’s top right-hand side, you will find 4 horizontal lines. Clicking on it, a menu will appear from where you can select New Layer.
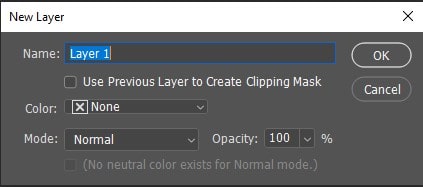
After clicking on the New Layer option, a pop-up window will appear named New Layer. Several options are available there; now, leave these options untouched since you can work with them later. So, click OK without adding any information.
You can add or draw an object in a new layer, and the background will not affect it. Learn more to Add an Image to an Existing Layer in Photoshop.
How to Select a Layer in Photoshop?
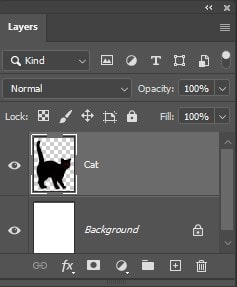
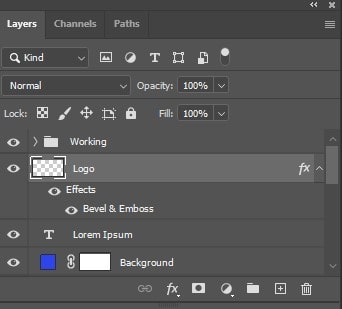
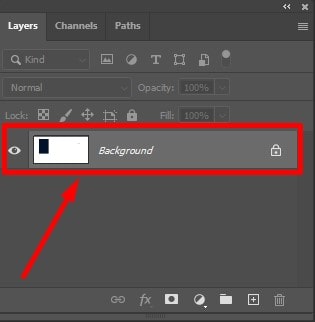
When you select a layer from the Layers Panel, it gets highlighted. Please hover your mouse on it that you want to select and click on it.
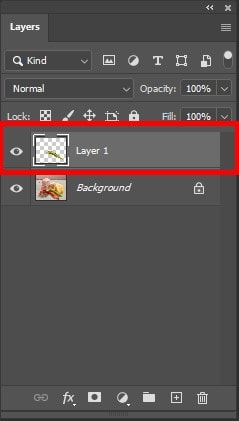
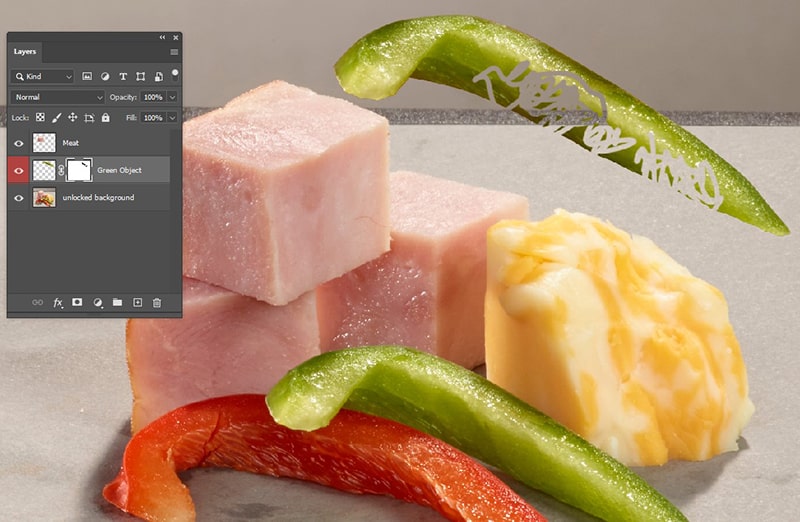
Below we shared the layer-selecting process for you. The highlighted layer is selected in the image below, while the background layer is deselected.
To edit and manipulate any layer in Photoshop, you must select the layer first. While working with many layers, you may often need to select one.
Step 1: Open an Image in Photoshop
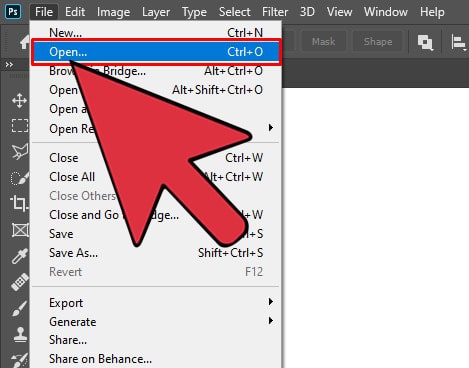
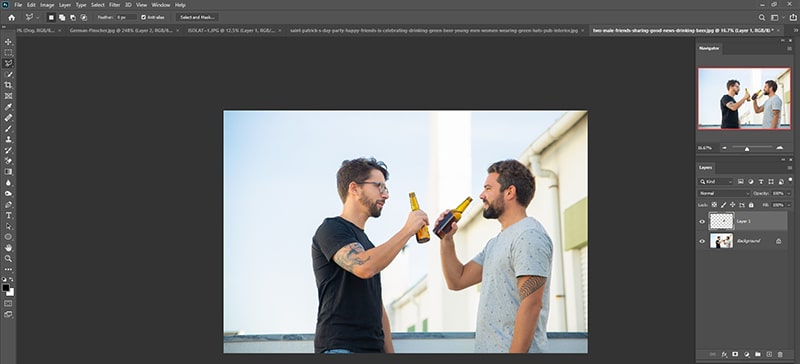
First, you have to open an image in Photoshop. For that, click on File, then click open and select the image from your directory to open it.
Step 2: Opening Layer Panel
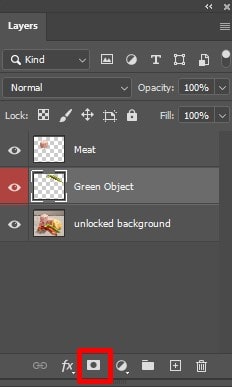
Click on the panel from the bottom right corner to see all your image layers.
Step 3: Selecting the Layer
Now click on the layer you want to select, which will be selected by seeing a darker shade. You can be certain that the layer is selected.
How to Select Multiple Layers in Photoshop
Selecting multiple layers in Photoshop is needed very often. To combine or merge layers, you must first select the layers.
Step 1: Open the Photo
First, open an image in Photoshop by pressing Ctrl+O. Or from the toolbar menu File then, click on open.
Step 2: Open the Layer Panel
Click on the windows tab from the toolbar menu, then open the layers. Or press F7 to open it.
Step 3: Selecting the Layers
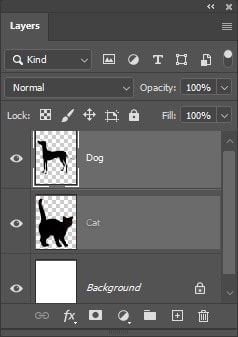
From the panel, you can select multiple tabs. For that, press and hold the ctrl/cmd key and click on the layers you want to select.
Or you can select it and then press Alt+[on windows or Option+[ On Mac. to select all the layers below the selected layers. Or press Alt/Option+] to select the layers above the selected layer.
How to Resize a Layer in Photoshop?
Editing photos layer by layer gives you total control over the image and resizes any layer. You can place or modify any object or element in the layer as you like it.
Step 1: Selecting the Layer to Resize

First, you have to select the layer you want to resize. For that, open the layer panel and select the layer you want to resize from the bottom right panel.
You can also resize multiple layers at once. To select all at a time, use the Shift key, and for selecting specific, use the CTRL OR Command key.
Step 2: Selecting the Tools
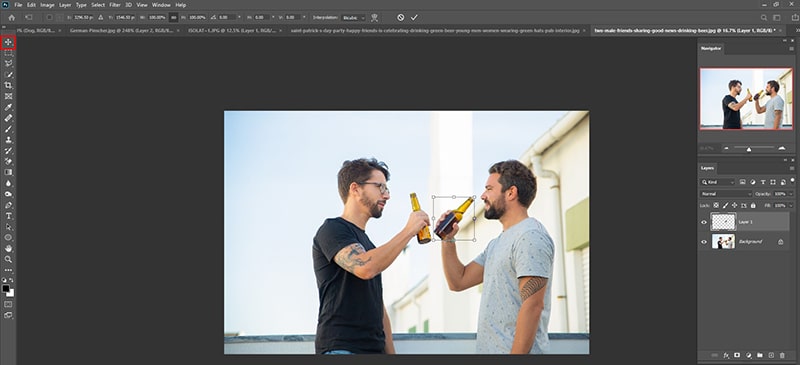
You can easily resize layers using the Free Transform and Move tool. These tools will create a square shape box area around your selected layer and give you the freedom of dragging and resizing.
Free Transform – Photoshop Layers
Using two different ways, the tool can be accessed.
- Press Ctrl + T on your keyboard to access the menu from Windows OS. Press Command + T on your keyboard to access the menu from Mac OS.
- Or you can click on the edit menu from the toolbar in the top left corner and find the Free transform option.
Moving Layer Elements With the Move tool
The move tool is generally for moving layers, but you can also use it to resize the layer. To access the tool-
- Press V on the keyboard
- Select the Move tool from the tool tray on the left of the window. The very top tool is the move tool.
Step 3: Resizing the Layer
You’ll see a square shape box on your selected layer area. To resize it as you want, the clock on any corner, drag it, and make it the shape you want. To retain the proportion of the layer, press the Shift key while dragging it from resizing.
Step 4: Saving the Changes
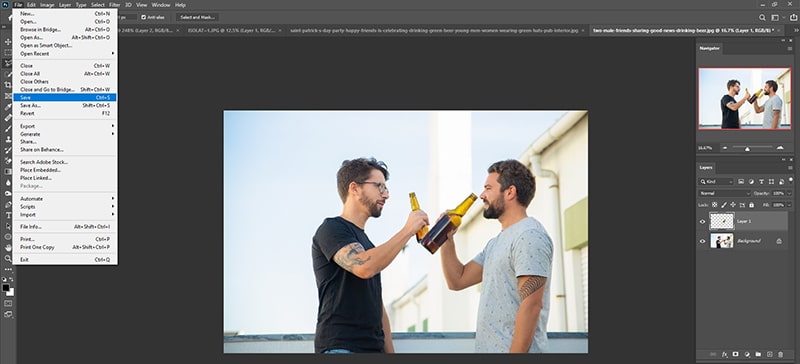
After resizing the layer, press the Enter key or Return key. Then go to the File menu from the top left toolbar and click on Save. Now you can continue editing the image with a resized layer.
How do Copy a Layer Element in Photoshop?
This task is similar to copying and pasting documents on our computers.
A new layer of an image will automatically appear after copying and pasting an image from one document to another.
Creating a copy of a layer, you can create a copy to use within the image for edit. Or you can also use it in another image to give it a new look.
Also, a copy layer can help you to keep the original one and let you edit a duplicate layer of that image. So you’ll have an edited image without losing the original.
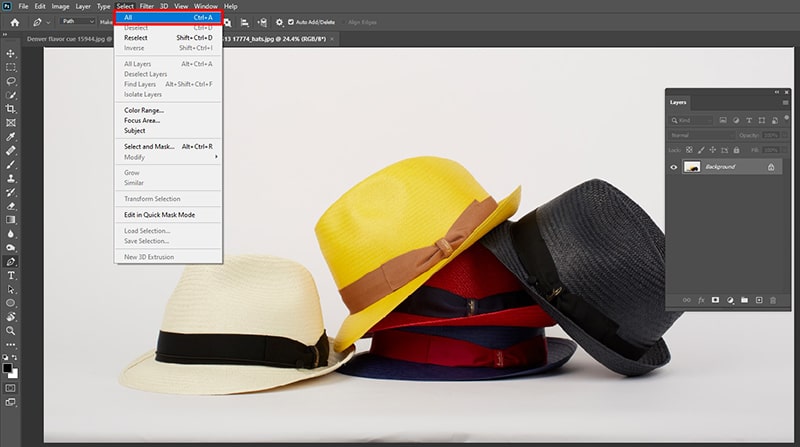
While pasting one photo to another, go to the copied image document. Selecting the layer containing the photo is essential.
Now go to the Select option from the Top Menu and click All. You also can follow CTRL + A for windows and COMMAND + A for Mac. This way, the entire image will get selected.
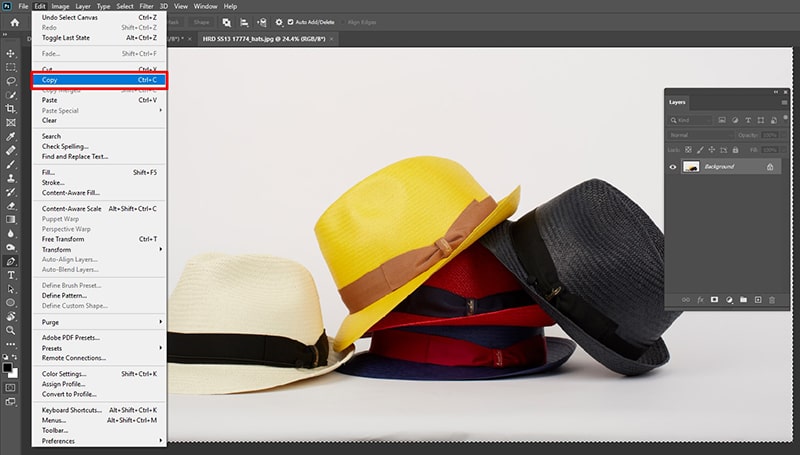
Next, you have to copy the image. Go to Edit and select Copy. Also, pressing CTRL + C for Windows and COMMAND + C for Mac will let you copy the images.
Then go to the document where the image will be pasted. Choose Edit and select Paste. You also can press CTRL + V for Windows and COMMAND + V for Mac.
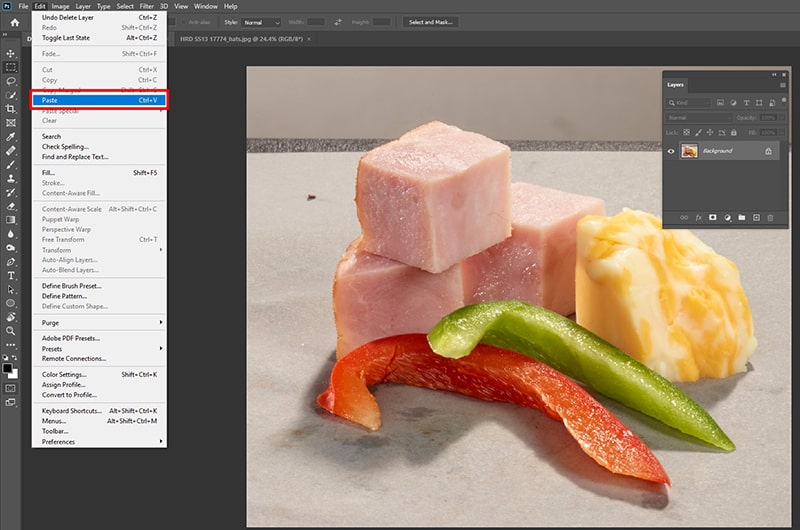
Finally, you will have an image as a new Layer in your Photoshop document.
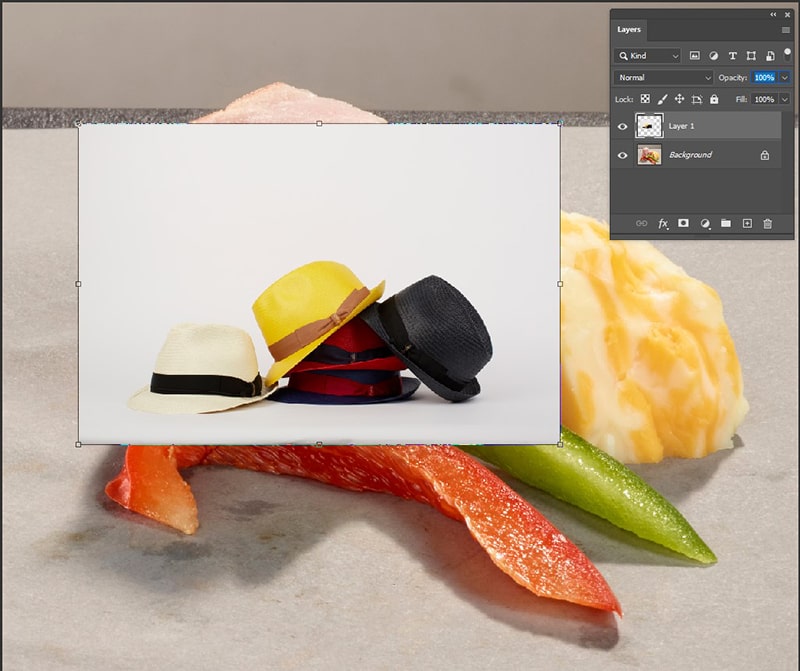
Pasting an image portion into a new layer is also straightforward. Picking any selection tools such as Lasso, Magic Wand, or Marquee tools will help you select an image portion.
Ensure from the Layers Panel, you have selected the Background Layer. Then click the right button of your mouse while keeping the cursor on the image. You will have a resulting menu from which you must select Layer via Copy.
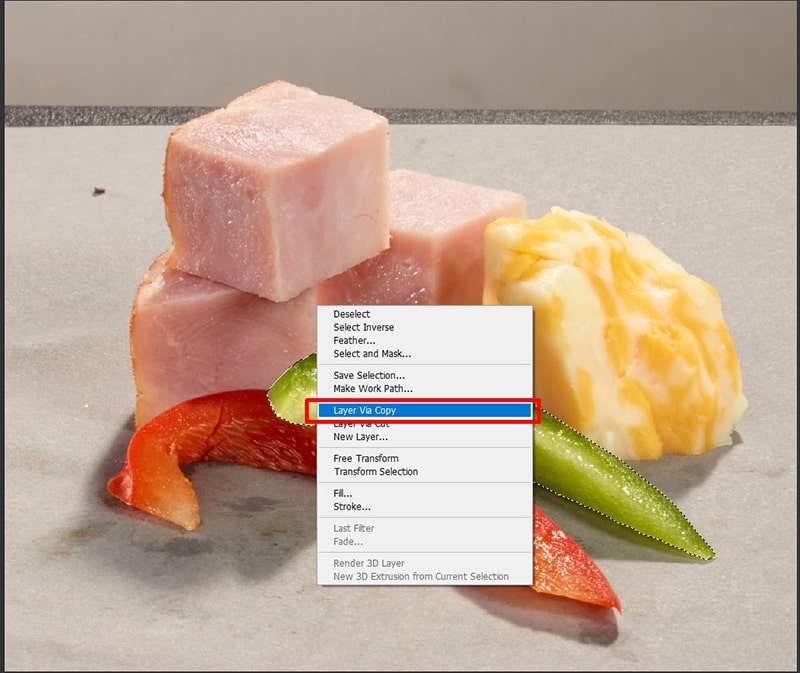
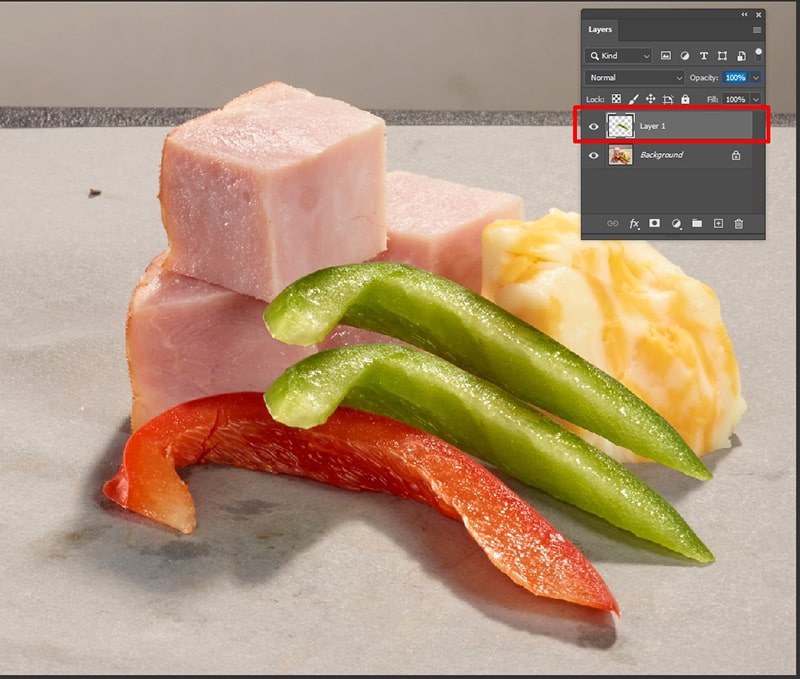
The selected layer will appear as a new document layer. The copied image can be modified or moved to any area and will not affect the background.
How to Copy a Layer in Photoshop?
How do you copy a layer in Photoshop? The following tutorial will reveal an easy step-by-step process to copy a layer in minutes successfully.
Step 1: Opening an Image File
Open Photoshop first, then on the toolbar of Photoshop, you’ll see the File menu. Click on that, then open it. Now open an image from your pc to edit. You can also open the image using the Ctrl+O shortcut.
Step 2: Open the Layer Panel
After opening the image, you must go to the panel to make a copy of the layer. To access the panel, click on the bottom right layer. Or you can go to windows and then click on layers. Or, by pressing F7, you can access the panel.
Step 3: Creating a Copy of the Layer
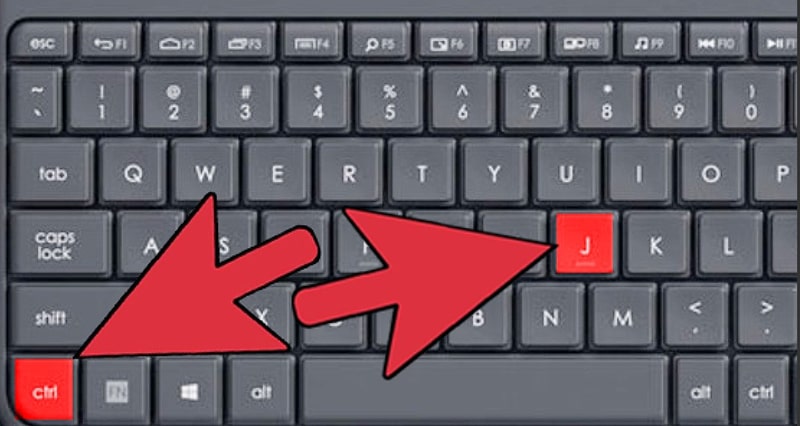
After accessing the layer panel, click on the layer you want to copy. Now press ctrl+j to make a copy of that layer. Now you’ll see a duplicate layer on the panel.
How to Delete the Photoshop Layer?
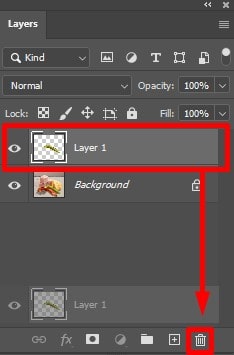
Click on the layer you want to delete, and don’t release the mouse button. In the lower right side corner, you will find trash. Drag the layer there; thus, the image will be removed from the Layers Panel.
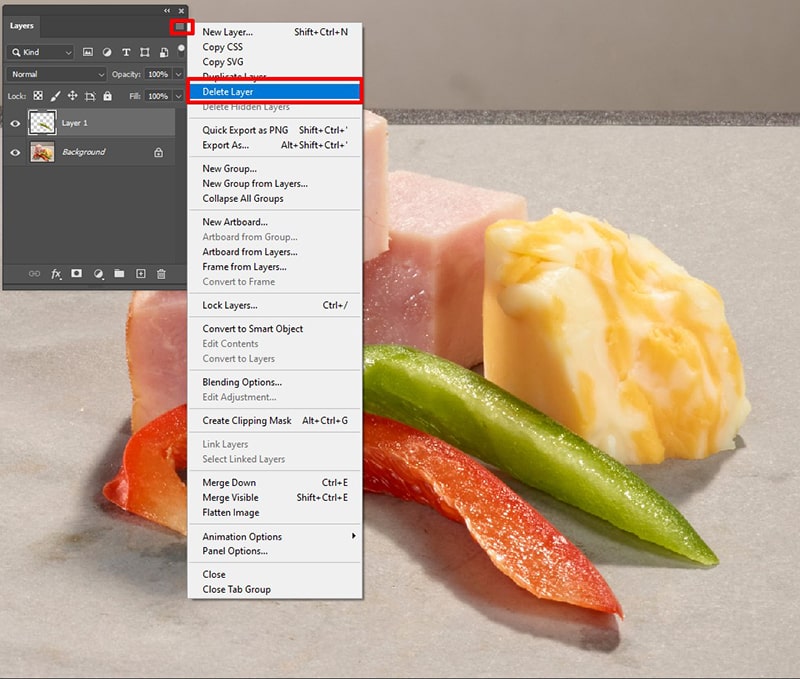
You also can follow an alternative process to delete a layer. Click on the Layers Panel Menu, and you will find the Delete Layer option below the Duplicate Layer option.
Click on it, and before deleting the layer, a dialog box will ask you if you are sure to delete it. Choose OK to finish the process.
How to Duplicate a Layer in Photoshop?
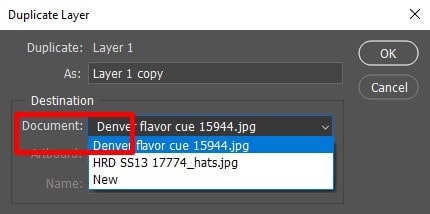
Often, you may need to duplicate a layer. For this, click on the Menu of the Layer Panel. Select Duplicate Layer.

You need to put the new layer’s name in the opened pop-up dialog box. The layer’s name will auto-generate with the actual layer name, followed by the word “copy.” However, as per your requirement, you can use a new name.
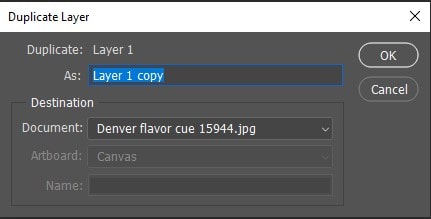
Moreover, you can duplicate the image to a specified layer by selecting the drop-down menu’s location in the Document section.
Creating a duplicate layer means you get a copy and can freely edit it as you want. The content and component of the original and duplicate layers will be the same.
Below are easy tips & tricks to duplicate a layer.
Step 1: Opening New Image in Photoshop
Click on File and open a new image from the toolbar.
Step 2: Opening the Layer Panel
From the bottom right corner, open the panel. Now click on the tab to select the image layer/background layer which you want to duplicate.
Step 3: Creating Duplicate Layer
After selecting the layer now, right-click on the layer and select Duplicate layer. Or you can press ctrl +J to do so.
How to Hide and Show Layers in Photoshop?
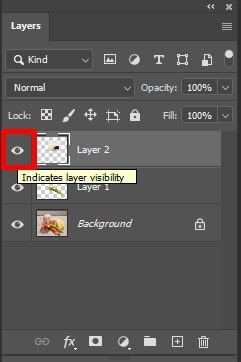
An eye icon is available next to the layer’s name in the panel. Clicking on the eye, you can play hide-and-seek games! It will show when the eye icon is visible. Another click on the eye icon will make the layer invisible.
How to Unlock a Layer in Photoshop?
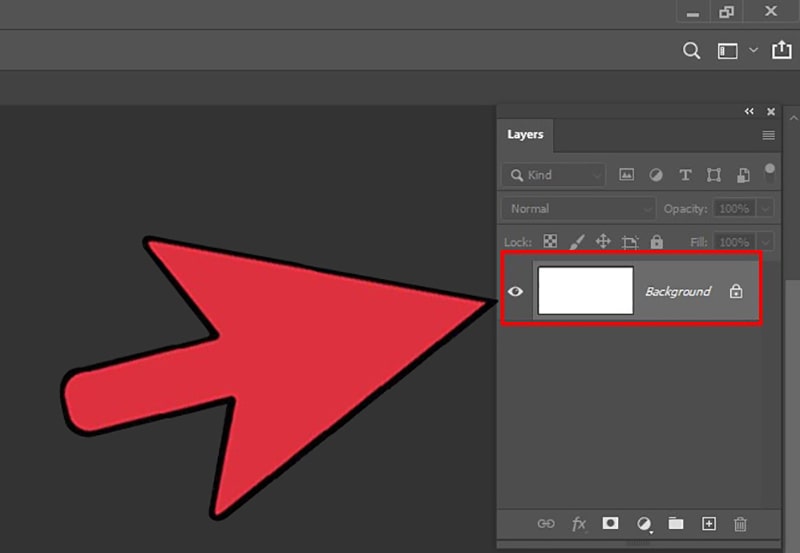
When you create a layer, it remains unlocked characteristically. And the background layer remains locked.
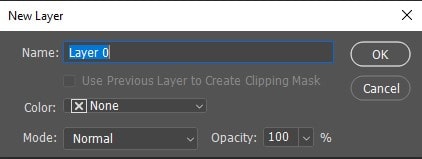
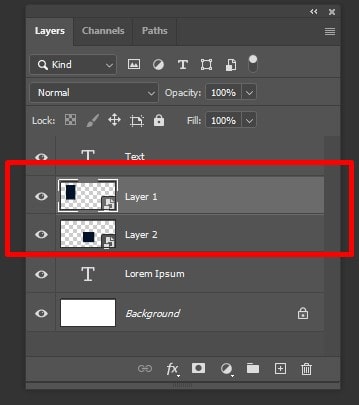
When the requirement is to unlock the background layer, hover your mouse over the Layer Panel’s layer and double-click the left button. You also have to put a new name on the newly generated panel this time. Named it Layer 0. Then click on OK.
Now you will have an unlocked background layer with the name Layer 0.
On the other hand, when you require to lock any layer, go to the layer panel and click on the layer to select. Above the list, locate the Padlock icon and click it.
Clicking on the padlock icon again will allow you to unlock the locked layer.
Let’s look at easy tips & tricks to Unlock a Layer.
Step 1: Opening New Image in Photoshop
Click on File. Then Open from the toolbar to open a new image.
Step 2: Opening the Layer Panel
From the bottom right corner, open the panel. And you’ll see a lock icon on the layer that is locked.
Step 3: Creating Duplicate Layer
To unlock the layer, you have to create a duplicate layer. For that, press Ctrl +J. Mac users press Cmnd + J. A new duplicate layer will be created, which is unlocked.
Step 4: Renaming the Layer
Double-click on the unlocked layer, rename it Layer 0, and save it.
Step 5: Replacing the layer
Click on “Layer” then “New Layer from Background” to create an unlocked replacement layer. After replacing it, you have unlocked the background layer to edit it as you want.
How to Rename Layers in Photoshop?
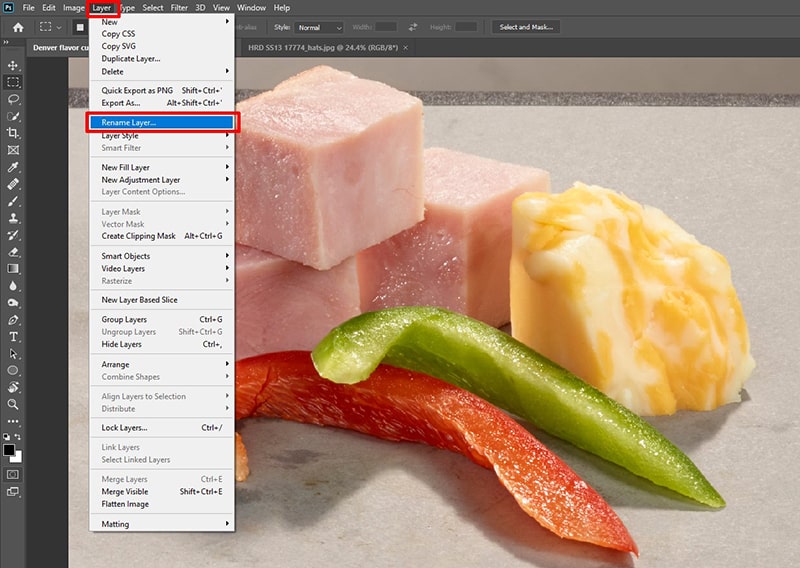
Giving a customized name or renaming a layer is straightforward. For this, click on the Layer option from the top menu. A drop-down menu will appear; from there, select the Rename Layer.
Besides, click on the current layer’s name in the layer’s panel. You can easily rename the layer to a new name when the text becomes editable.

How to Reorder Layers in Photoshop?
Reordering layers will help you to make your editing task easier.
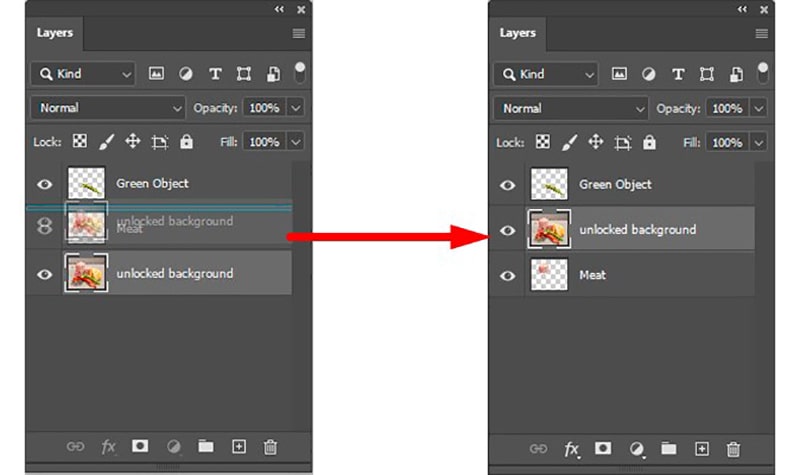
For this, click on the layer you want to reorder and drag it to the required destination. A blue box will appear, which will help you to locate the layer of the position effectively.
Once you are sure the layer is in the required position, release the mouse, and the layer will automatically take its place in the layer panel.
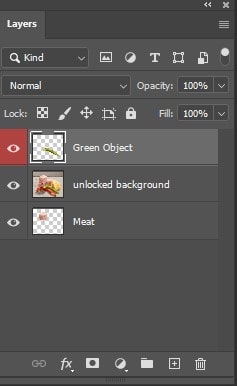
How to Use Color Code in Photoshop Layers?
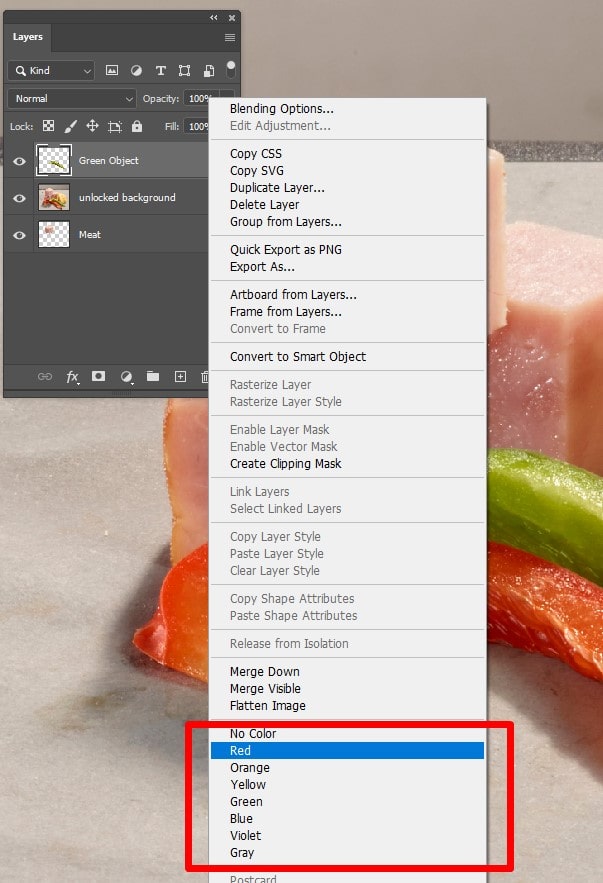
If you have many layers in the layer panel, you can use the color-coding option to identify them comfortably. Apply color to the layers, select your tagged layer, and click the right button.
You will be directed to a drop-down menu, and you will find color options at the bottom. Get this Drop Down Menu by pressing CTRL + click on the Mac.
Please choose your required color for a specific layer and click on it.
Note that using color code to a layer will not make any visible changes to the image. You will see only a new color added in the square next to the layer panel icon.
Know more:
- Change Color of Image in Photoshop CC –07 Different Ways
- Photo to Color Pencil Sketch with Photoshop CC
How to Link Layers in Photoshop?
Characteristically, every layer is unique, and when working on one layer, no changes come to another layer.
However, you can create a link between layers. As a result, when converting or moving one layer’s item, the linked layer will also follow and move or convert itself similarly.
Let me share an example. If an image comes with the image and shadows in 2 separate layers, you can link them up together to make sure as soon as you move or scale the image to your document. The shadow will also move with the image.
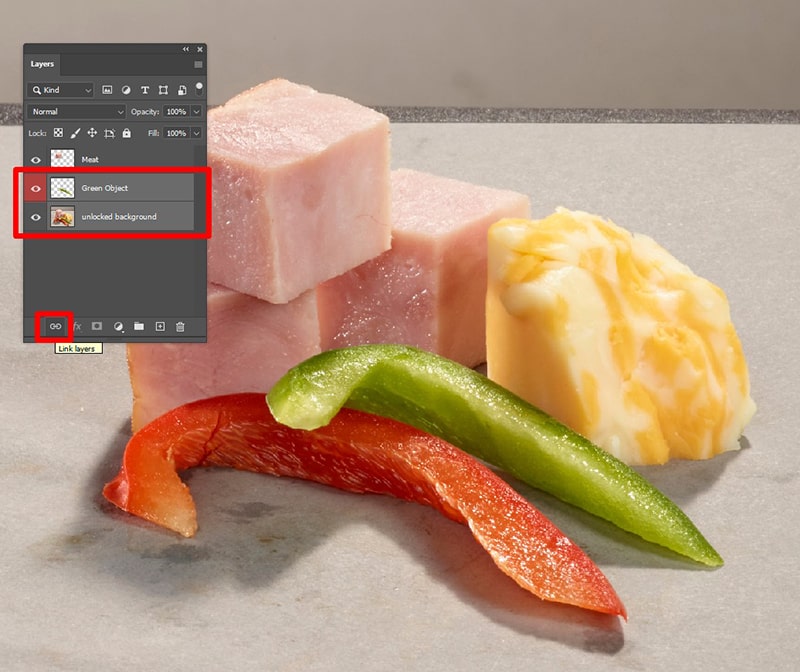
For this, you must select all the layers you want to create a link. When the layers are next, you can easily link them up. Press the SHIFT key and don’t release it to select several layers together.
But what if the linked layers are positioned in different positions? Well, at this point, the first layer needs to be selected. Then press CTRL + click, or Mac, COMMAND + Mac on the next layer for Windows.
After selecting the layers, at the layer panels’ bottom area, you will have an icon named Link; click it.
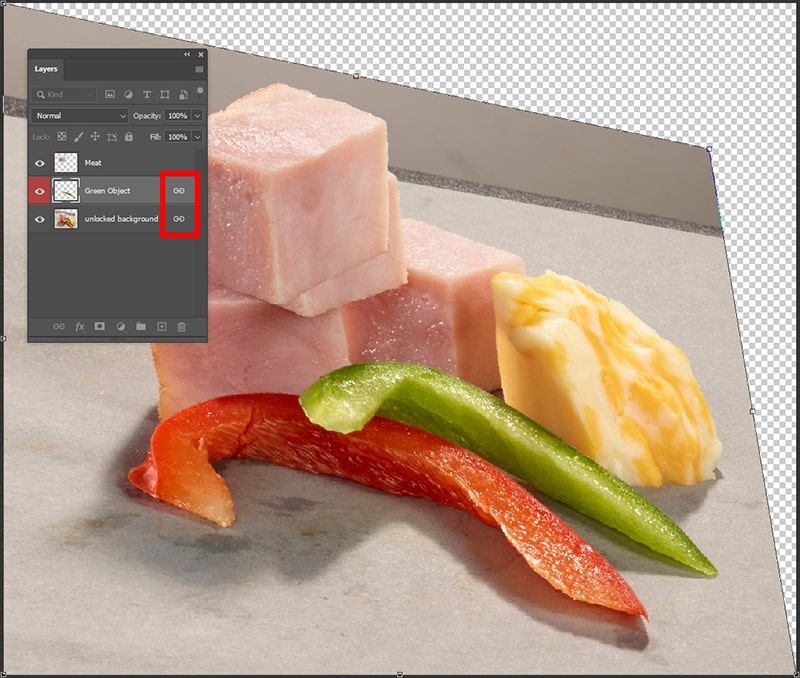
You will find the layer icon on the right side of the linked layers.
This way, similar modifications or changes will happen in the linked layers when you move or transform any portion within the linked layers.
And when you want to unlink any layer, select any linked layer and click on the link icon positioned in the layer panel’s bottom.
How to Group Layers in Photoshop?
While we have to move many layers in Photoshop, we can group them and move and resize them. Also, layer editing is great for editing images layer by layer for the most convenient experience.
With these tricks, you can categorize and organize the layers quite comfortably.
And the best thing about this trick is, within the group, you can lock, link, or make the layers visible and invisible, which affects all the layers within it.
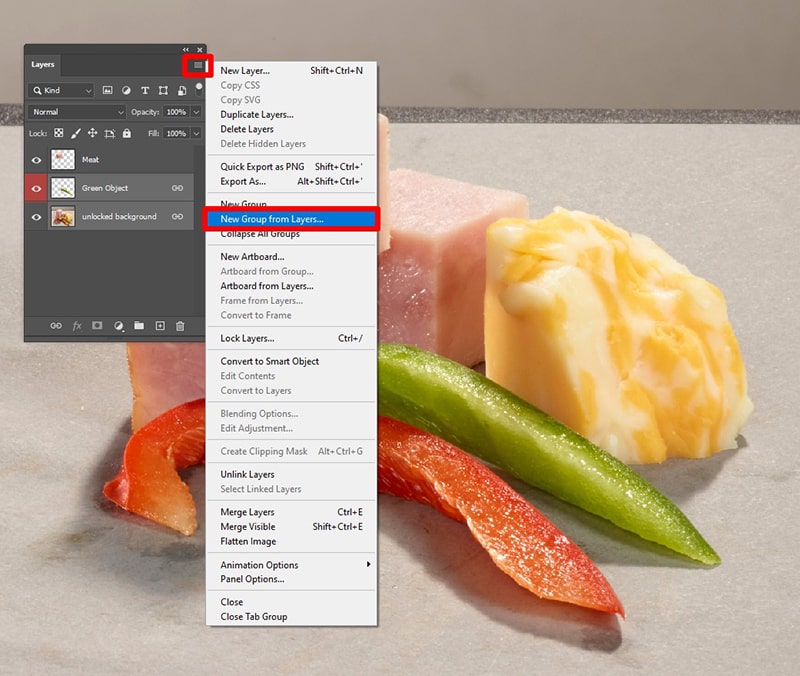
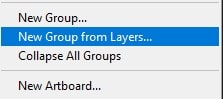
Creating a new group is not a challenging task. Go to the Layer Panel Menu and select New Group from Layers.
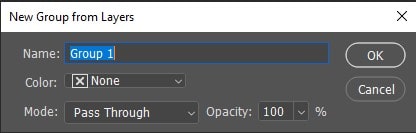
A dialog box will allow you to put the new Group’s name, or you can keep the same name as it appears in the New Group dialog box. Then select OK.
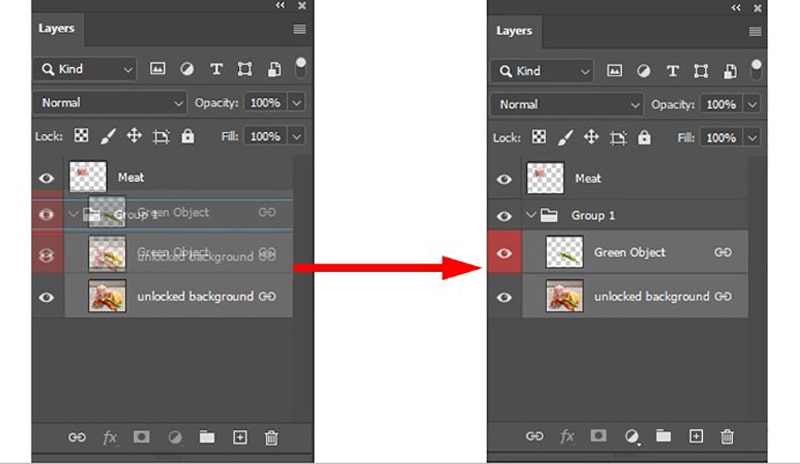
When adding current layers to the new group, Click and Drag the selected layers into the new group using your mouse.
When you find that a blue box appears around the group, you are trying to move, which means you are moving them correctly.
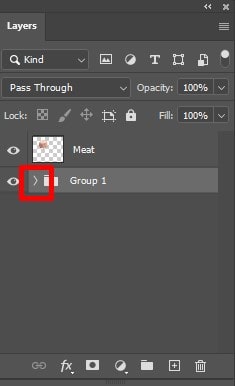
An arrow icon located left side of the Group name will let you collapse or expand the group.
You can do that if you require to place a layer into the new group automatically.
Go to the Layers Panel Menu > New Group from Layers > Click OK on the New Group Dialog Box, and the newly opened will automatically place in the New Group.

Easy tips & tricks for Group Layers in Photoshop
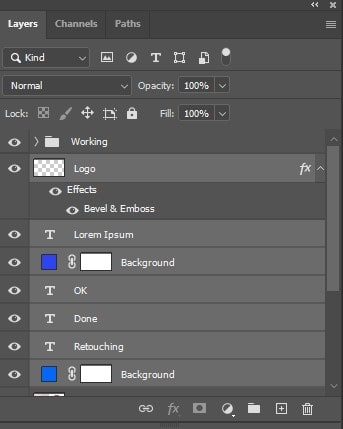
Step 1: Selecting the Layers
Go to the layer panel by pressing F7 and select the layers you want to group. Press and hold the Shift key and click on the layers you want to select.
Or you can select a layer and then press Alt+[on windows or Option+[ On Mac. to select all the layers below the selected layers. Or press Alt/Option+] to select the layers above the selected layer.
Step 2: Creating a New Group
After selecting the layers, you want to group, click on the Layer panel menu from the top right and select a new group from the layers.

Step 3: Naming the Group
After clicking on that, you’ll see a pop-up menu. On that menu, name it as you want and then click OK.

To see all the layers inside the group, click on the triangle icon, and you can see them.
How to Move a Layer in Photoshop
Many people need to learn how to copy a layer in Photoshop. Moreover, Photoshopers struggle with moving and manipulating layers within their projects.
To help you out, we will provide a step-by-step tutorial on moving a layer in Adobe Photoshop.
Step 1: Selecting the Layer to Move
First, you have to select the layer you want to move. For that, open the layer panel and select the layer you want to move from the bottom right panel. To select all at a time, use the Shift key, and for selecting specific, use CTRL OR Command key.
Step 2: Selecting the Tool

You can easily move layers using the Move tool. The tool will create a square shape box area around your selected layer and give you the freedom of dragging and moving.
Move tool
Move tool generally is for moving layers, but you can also use it for resizing the layer as well. to access the tool-
- Press V on the keyboard
- Select the Move tool from the tool tray on the left of the window. The very top tool is the move tool.
Step 3: Moving the Layer

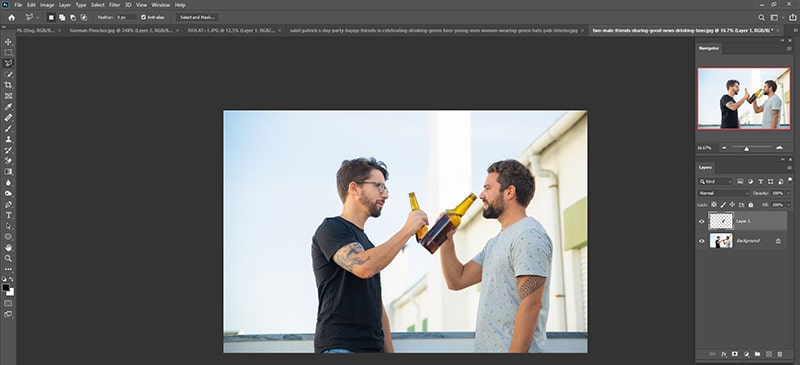
You’ll see a square shape box on your selected layer area. To move as you want, the clock on any corner, drag it and make it the shape you want, and move it to the place you want it to be.
Step 4: Saving the Changes

After moving the layer, press the Enter key or Return key. Then go to the File menu from the top left toolbar and click on Save. Now you can continue editing the image.
How to Flatten Layers in Photoshop?
Suppose you need to be made aware of Layer’s Flattening. No worries. We will cover all the required tips and tricks of Photoshop Tutorials.
Editing photos in layers is simple and easy to do. But only some images format allows you to edit images in layers. Only PSD format allows it, and JPG and PNG do not.
While editing photos in Photoshop, the image layers will be merged automatically after saving them in Png or Jpg format. But there are also ways to do it manually.
Converting all individual layers into one layer is known as layer flattening in Photoshop.
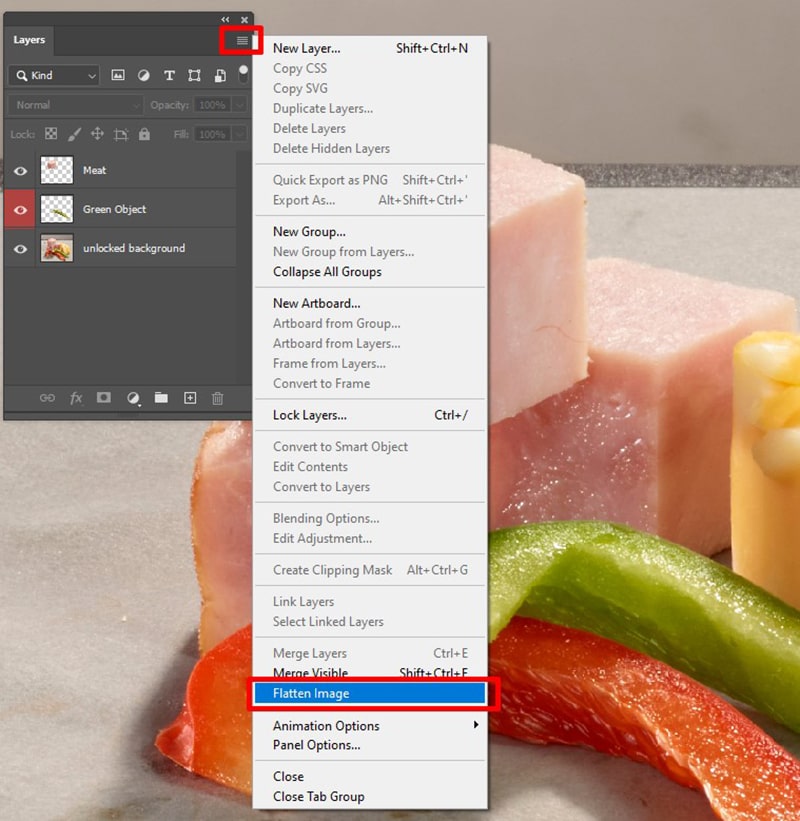
The flattening image option is located in the Layers Panel Menu.
This way, all individual layers will be replaced with the Background layer.
Step 1: Opening the Layer Panel
To open the panel, you can press F7 on your keyboard, click on Windows from the top right toolbar, and then click on layers.

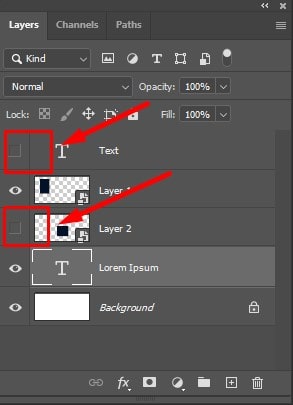
Step 2: Making the Layers Visible
If you do not want to ignore or remove any layers, you have to ensure all the image layers are visible. To make the hidden layers visible, press on the square box there, and then it will be visible. And there will be an eye icon next to those layers.
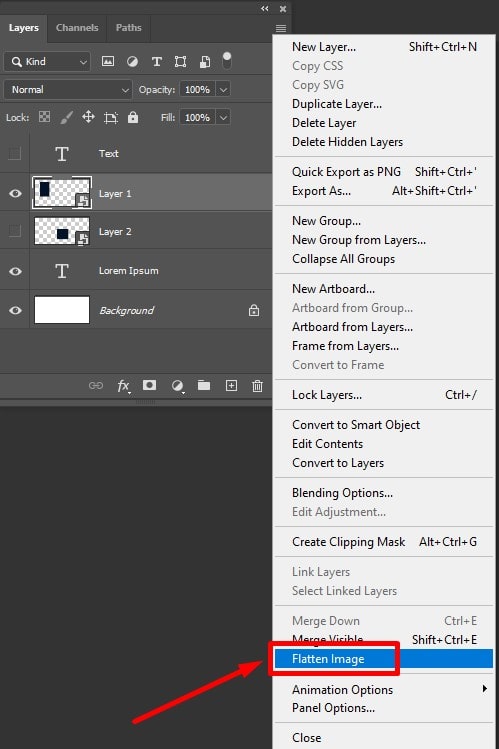
Step 3: Flattening the Layers
After making the layers visible, point your mouse on any layer, and right-click on it. You’ll see a new pop-up menu from there. Click on the Flatten image option.
If there are any hidden layers, you’ll see a discard warning.
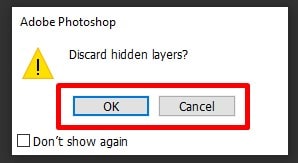
After clicking OK, the layer will be merged, and you will no longer be able to edit the individual layer.
How to Merge Layers in Photoshop?
Using several ways, layers in Photoshop can be merged. This process will merge all the layers you have selected and affect the composition of the layers.
Merging layers flatten a layer that defines a layer; the other layer remains intact. When merging several layers into 1 layer, click on the layers that require to be merged.
As stated earlier, to select Layers next to each other, press Shift + Click. Ctrl + Click for Windows or COMMAND + Click for Mac will allow you to select the layers which are not positioned next to each other.
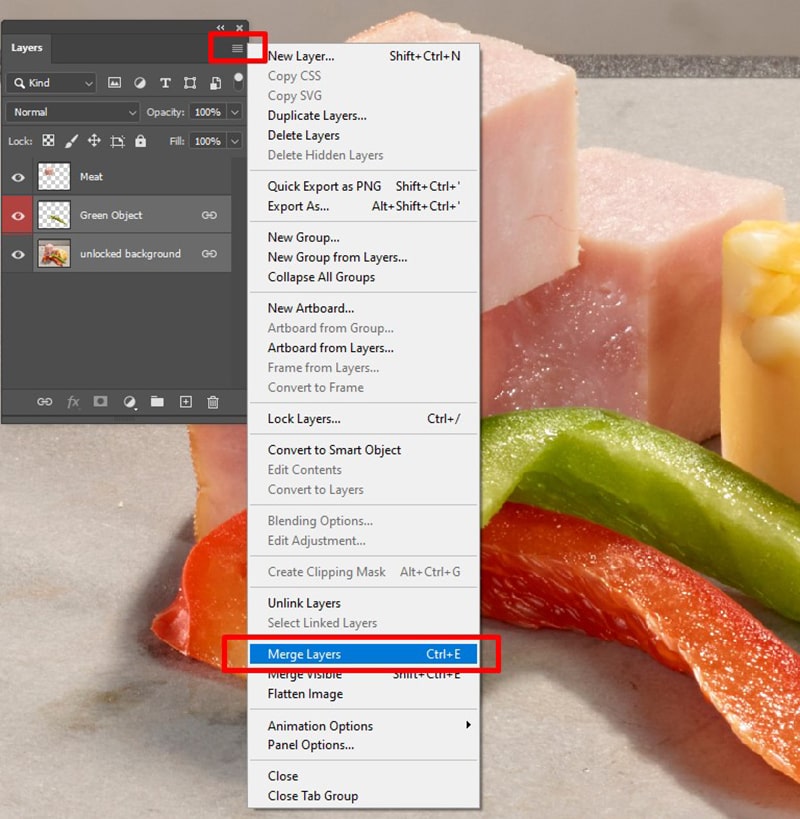
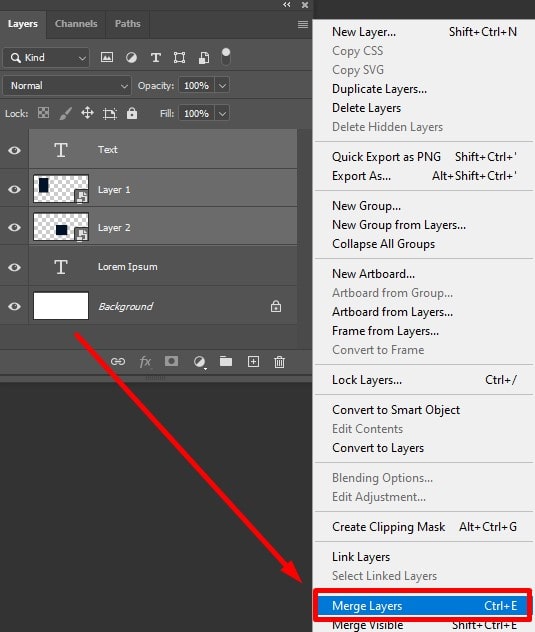
Then from Layers Panel Menu, select Merge Layers, or for windows, press Ctrl + E or Mac, and press Command + E.
The Visible merge option can also be selected from this Menu. All visible layers will combine, and invisible layers will remain intact when choosing this option.
Tips & Tricks for Merging Layers in Photoshop
Step 1: Opening the Layer Panel
To open the layer panel, press F7 on your keyboard. Or go to windows from the toolbar and select layers.
Step 2: Selecting the Layers
From the layer panel, select the layers you want to merge. To select the layer, press and hold the Ctrl key and click on the layers you want to merge.
Step 3: Merging Layers
After selecting the layers right, click on that, and a new pop menu will open. On that menu, you’ll find Merge Layers or Merge Shapes. Click on that. Or you can simply press Ctrl + E on the keyboard to merge the selected layers.
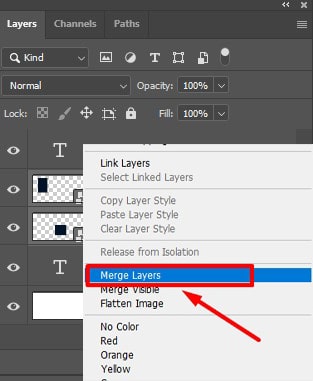
Sometimes right-clicking will only give you this option if there is a text box on the layers. You’ll not see the options menu, then. For that situation, you have to click on the Layers panel options menu in the top right corner.
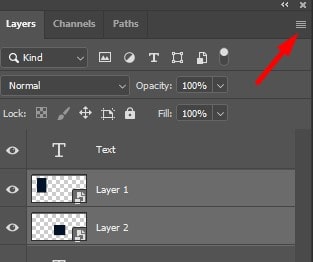
From there, click on “Merge Layers” or “Merge Shapes” to merge your selected layers.
How to Unmerge Layers in Photoshop?
Sometimes we need to unmerge layers in Photoshop after merging them. There are two ways to do so. The first one-
Process-1:
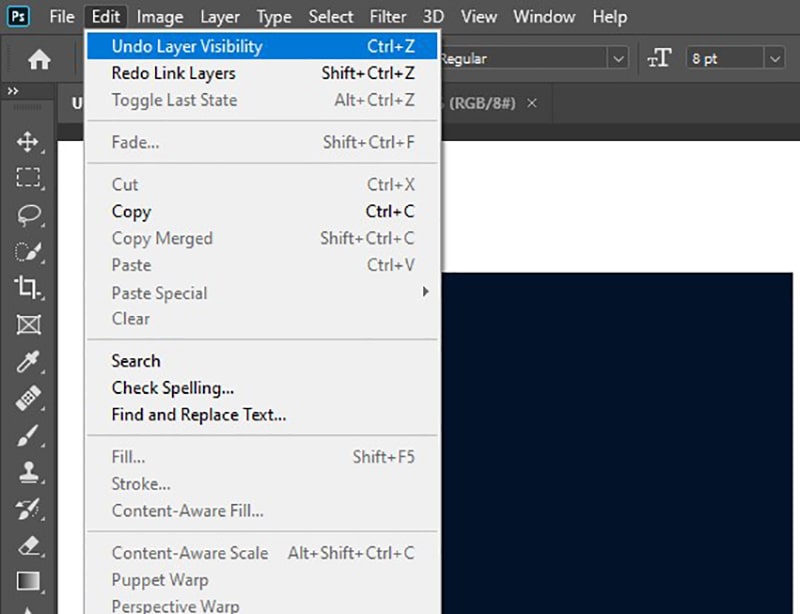
if you haven’t saved anything after merging the layers in Photoshop, you can undo the process by clicking Ctrl + Z. this shortcut will undo one step at a time.
So if you have several steps after merging the layer, keep pressing those keys, check the layers, and see if they are unmerged.
Process-2:
If you have saved the merged layer, and you faced a problem, and now you have to unmerge it, then you cannot do it using the undo key. To do so, you can use the History panel. To access the history panel, you can press Ctrl+z.
Or go to windows from the toolbar and select history. There you’ll find the undo Merge option. Click on it, and your merged layer will be unmerged.
How to Use Layers Stamping Option in Photoshop?
You can create a copy of selected layers with a layers stamping option combined into a single layer. No effect will happen to the originally selected layers.

First, select the layer that requires a stamp. Then press Ctrl + A + E for Windows and COMMAND + OPTION + E for Mac. Above the selected layer
Above the selected layer, you will find a new layer with the merged content.
A stamped layer can also be created using all visible layers. While doing so, ensure all required stamped layers are visible.
Then press SHIFT + CTRL + A + E for Windows and SHIFT + COMMAND + OPTION + E for Mac. With all visible content, a new stamped layer will appear.
How to Adjust Layer Opacity?
By changing the opacity value in the Layers panel’s upper right corner, you can adjust how transparent a layer’s content looks.
You will find this option beneficial when the image requires focusing on the subject and wanting to captivate the background.
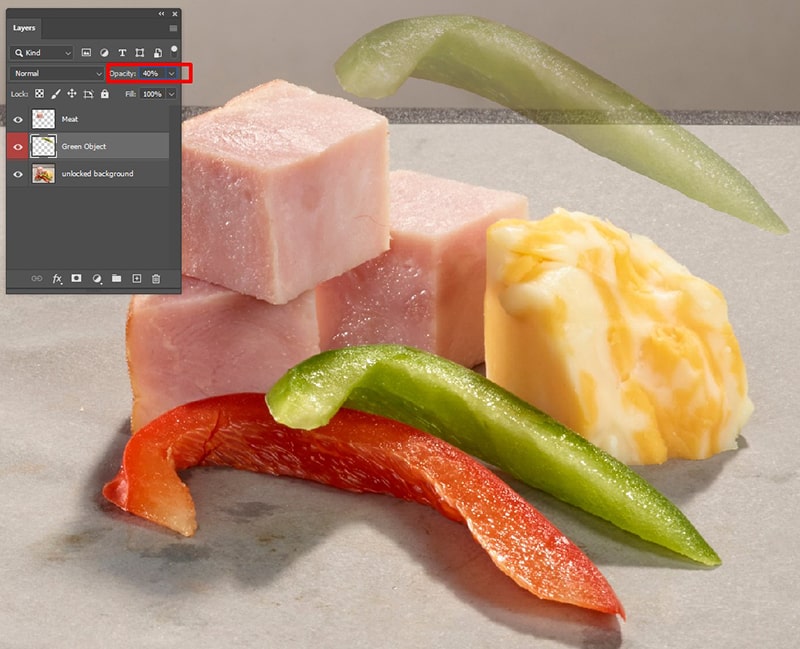
Choose a layer and change the opacity value as per requirement. The preset value is also available in the drop-down menu; you can choose from there too.
Changing the opacity level of a group is also possible with this option. For this, select the groups and change the opacity level following the above process.
Below the Opacity level, another option is available as Layer Fill. Opacity and Layers Filling are somewhat different; the Layer’s content transparency is affected by Layer Fill, and no changes happen in the Layer Styles Opacity.
Adjusting a layer’s opacity and fill will deliver the same result when you don’t apply any layer styles.
How to Blend Layers in Photoshop?
Learn how to blend layers in Photoshop, which can open up opportunities for images that catch your viewer’s attention. This tutorial will guide you through mastering layer blending techniques to easily create stunning edits.
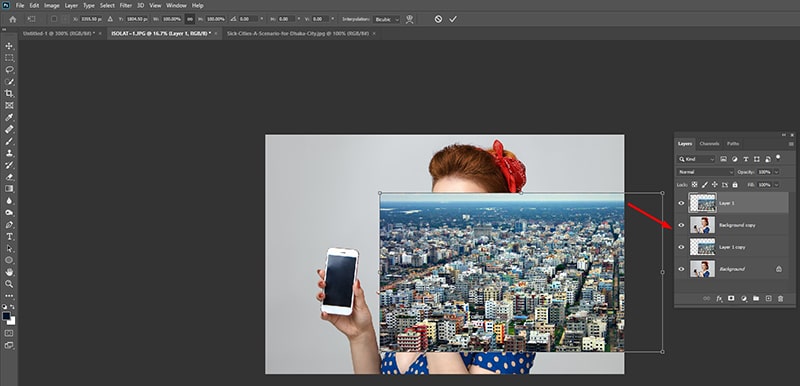
Step 1: Open Images and Make Duplicate of Them
To blend images, you have to open two different images. Open two images in two different layers. Then make duplicates of each layer and lock the original layers.
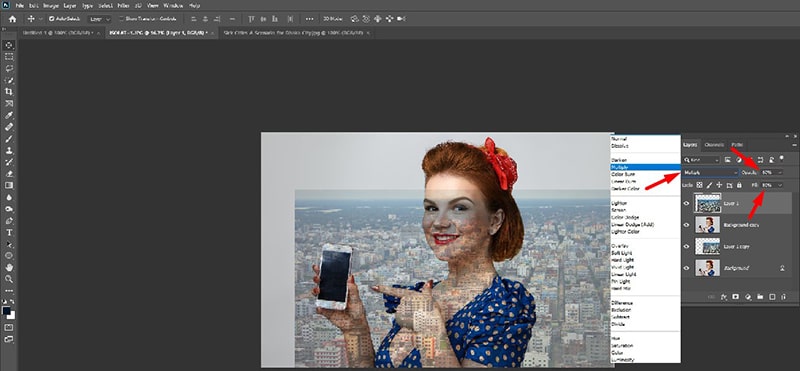
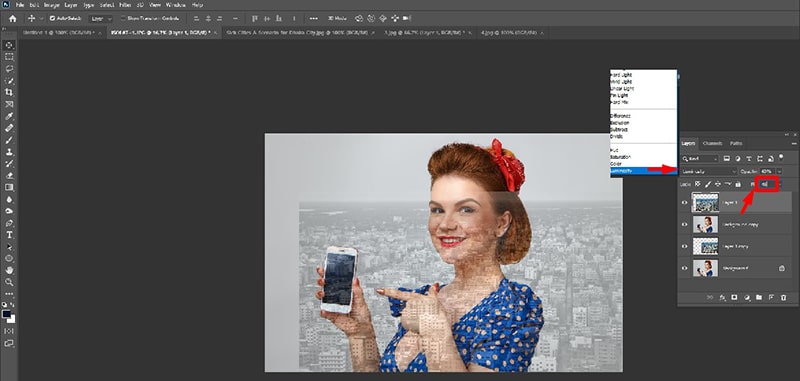
Step 2: Apply the Multiply Blend Mode
Now click on the top layer image, then apply the multiple blend modes from the menu. Ensure the image capacity is 60% and the fill is 80%. You’ll get a nice darker look without washing out the effect.
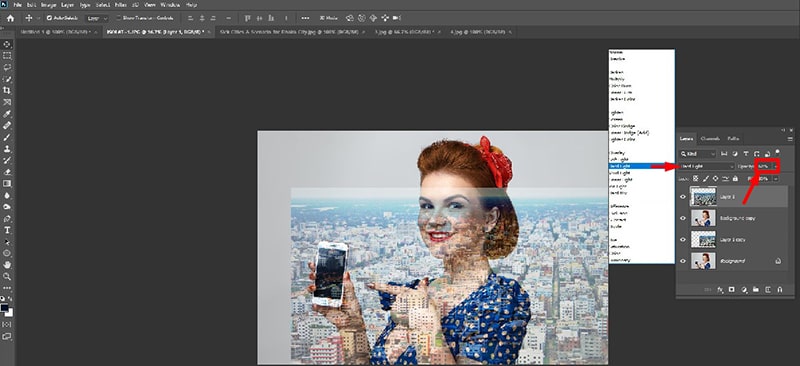
Step 3: Apply the Hard Light Blend Mode
If you do not like the last blend mode and add more contrast to the image, you can try the hard Light mode of blending for the perfect effect. Keep the capacity at 60%.
Step 4: Apply the Luminosity Blend
The Luminosity mode of blending is great for blending light images. You can also try this for an emotional effect. This time set the fill around 45%.
Step 5: Finish Up and Export
For a more stunning and eye-catching effect, use different layers for each blending mode. And make sure you have a copy of the original to return to if something goes wrong.
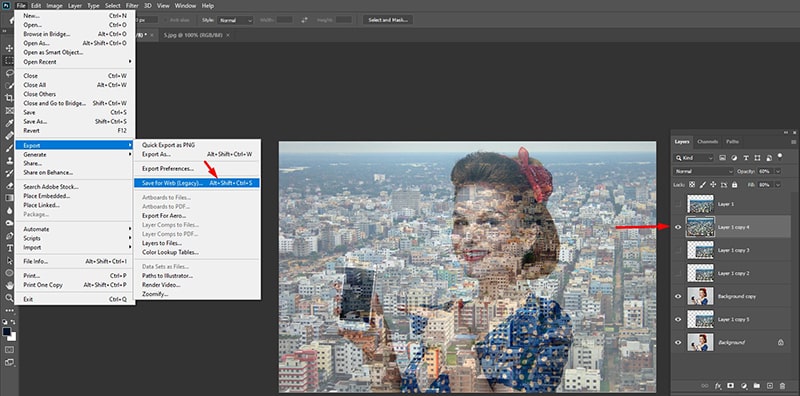
Use the duplicate to edit the images and hide others by clicking on the eye icon next to the layers. After selecting the blend mode, it is time to save the image. For that, go to File > Export > Save for Web.
Or press Option+Shift+Command+Son your keyboard.
How to Change Layer Blending Mode in Photoshop?
The modes of layer blend affect how they interact with the layer’s bottom layer. Normal is the default blend mode. You can select the blend modes from 26 different available options.
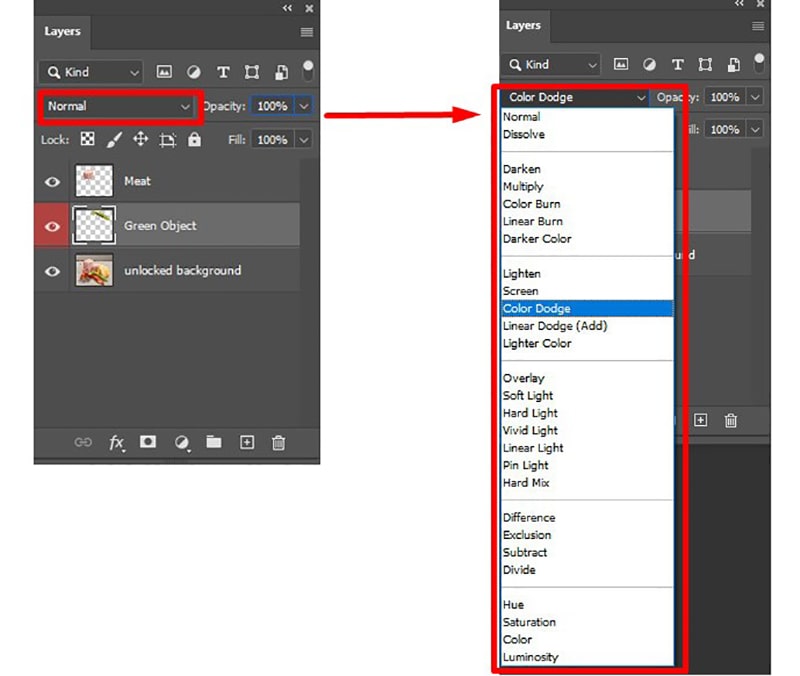
When changing the blend modes of a layer, select a layer and click on the drop-down menu at the opacity’s left side, where the Normal option is automatically selected.
26 different blend options will appear in the drop-down menu; you can select the blend mode per your requirement.
How to Apply Layer Style?
The layers’ style option is available in the Layers Panel Menu. Look for the fx icon at the bottom of the Layers panel. The layer effect option will reveal once you click on this icon.
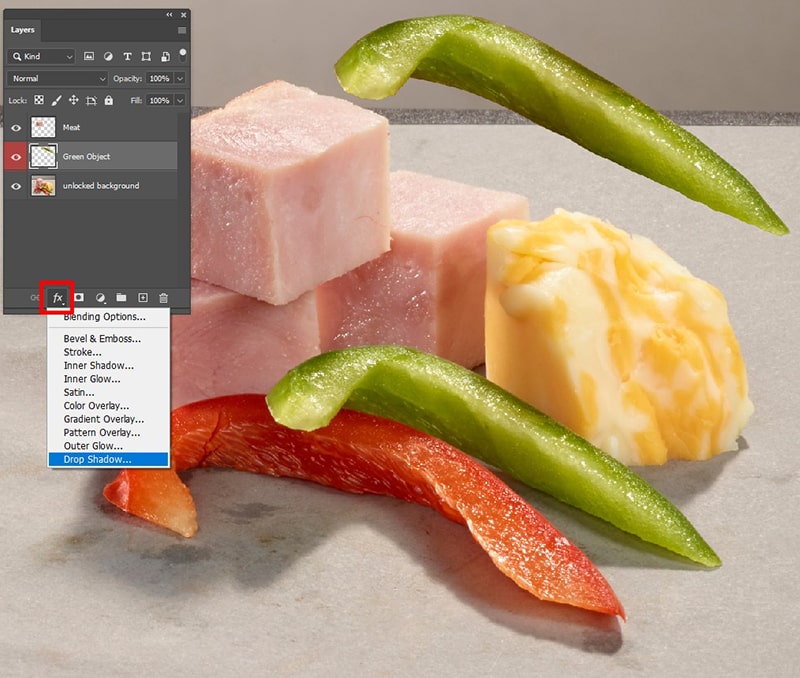
After selecting the layer effect from the drop-down menu, you will be directed to a dialog box where you will get options to fine-tune Layer’s style before it is applied.
The dialog box will allow you to change the blend options and other effects. Remember to have a look at the preview option.
You also can see the adjustment by checking the PREVIEW option. This will give you an idea of the adjustment that you made.
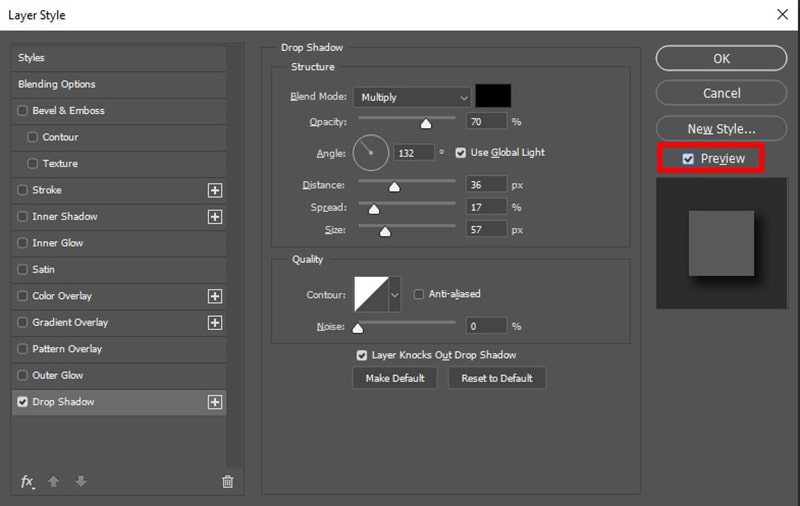
Then select OK when you are all OK with the adjustment.
Double-click on the layer effect name positioned in the Layers panel at the bottom of the layer name will allow you to modify the layer’s effects.
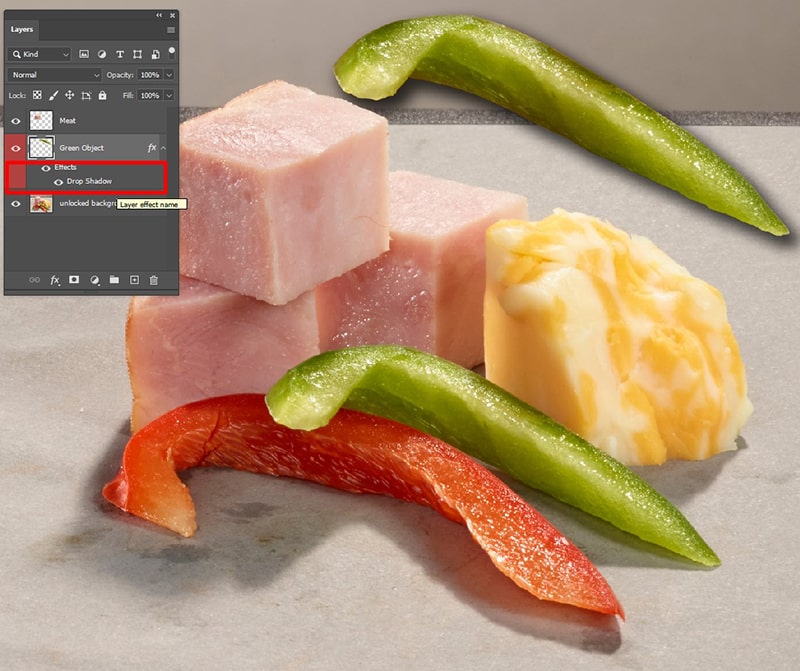
Again a dialog box will appear, and you have to adjust or modify or add an effect and select OK.
What are the Types of Layers in Photoshop?
Hopefully, by now, you have a clearer idea about Photoshop Layers.
In this section, we will discuss the Layers types in Photoshop. Three types of Photoshop Layers there, which are:
- Fill layers
- Adjustment layers
- Layer masks
Fill Layers
The responsibility of the fill layer is to add a new layer in the Layers Panel. And the unique thing is that this is filled with either a solid color, a pre-programmed pattern, or a gradient.
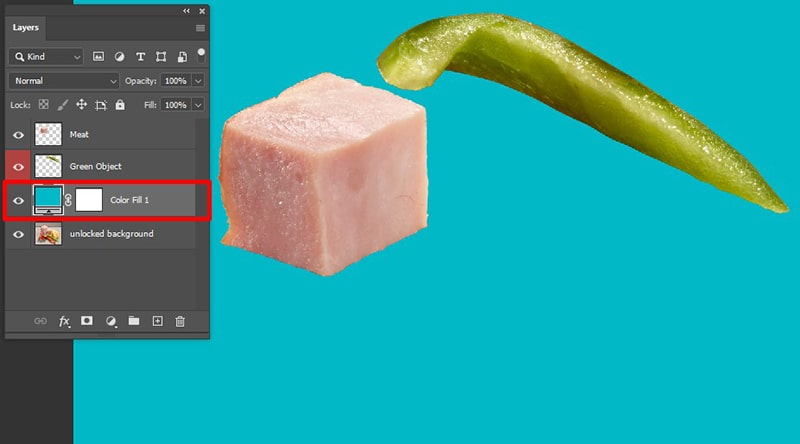
Existing layers’ content gets altered temporarily with fill layers—double-click on their icon when you need to adjust them after creating them.
Adjustment Layers
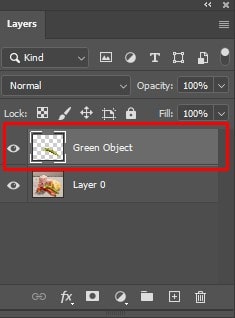
Image adjustments like adjusting Exposure or Hue/Saturation can easily be made with the Adjustment layer. Look at the below image. Here, below the first layer, the Hue/Saturation adjustment layer is placed.
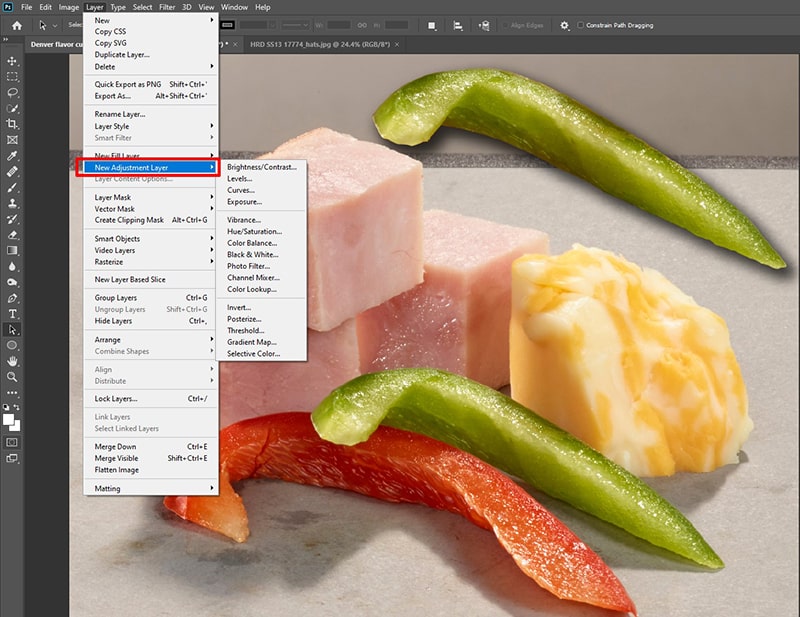
Creating an adjustment layer is so simple. Hover your mouse over the Layer option on the top menu, click on the New Adjustment Layer from the drop-down menu, and then choose the effect as per your need.
Layer Masks
With the help of a layer mask, you can selectively remove a layer’s portion’s visibility. This feature doesn’t make any changes to another layer while doing so.
A portion of the 2nd layer is removed using a layer mask in the below image.
FAQs
A layer’s transparent area will allow you to see the layers below. Layers are much beneficial when composing several images, adding letters or numbers on a photo, and vector graphic shapes can also be added using layers. Adding special effects like glow or shadow can easily be done with layer styles.
Layers are a useful and commonly used technique in photo editing services. A layer is similar to transparency in which you can add or remove anything over or bottom of an image.
If you cannot locate your layers, all you need to do is, take your cursor on the Window Menu. All the displayed Panels are ticked and marked. Clicking on the Layers will help you to reveal the Layer panel.
Final Words
It was a long journey! Many thanks for reading this article entirely. This article gives you a brief introduction to Photoshop Layers. Once you start practicing with the Layers, you will start revealing new strategies.
Editing images in Photoshop is enjoyable. If unsatisfied, you may know more about Photoshop Layers or Photoshop Tools & Toolbar.
Be a master in Photoshop by practicing it.
Learn more:
- How to Resize Image for Amazon in Photoshop
- Replace the Sky in a Photo Using Photoshop
- A Guide to Remove White Background Using Photoshop Tools

Salim Ahmed is the CEO of Graphic Experts India, with over 25 years of expertise in photo editing, clipping path, image retouching, and eCommerce image editing services.