

Editing a car photo in Photoshop means running the image through a fixed sequence: import the RAW file, straighten and crop the frame, clean or replace the background. Add a contact shadow, correct color and exposure, then export a web-sized file.
Each step has a specific job, and the order is key. For instance, do color correction first. If you replace the car background first, it can mess up the white balance again. This guide shows the workflow a dealership or automotive photographer uses.
It covers turning a raw lot shot into a listing-ready image. You’ll also find links to more detailed guides for specific steps.
The stakes are concrete. Dealer.com, a Cox Automotive brand, reports that used and certified vehicle listings with actual photos are 40% more likely to generate leads than those without photos (Casey Corcoran & Jeffrey Pierce, Dealer.com, updated March 2026).
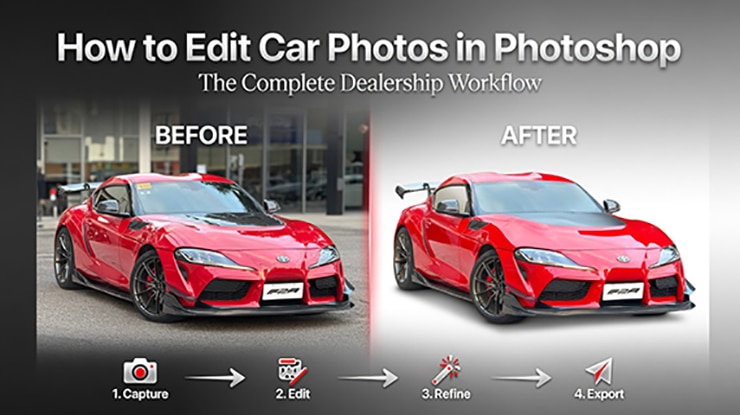
Shoppers who interact with a listing’s photos are 16% more likely to submit an inquiry. Editing is what makes those photos worth interacting with.
If you would rather hand the editing to a team that does it at inventory volume, our car image editing service processes full dealership batches. The workflow below is the same one a skilled editor follows by hand.
Key takeaways
- Car photo editing runs in a fixed six-step order: RAW processing, straighten/crop, background, shadow, color, export.
- The order is not arbitrary — color correction before background replacement wastes work when the new background shifts the white balance again.
- Always edit from the RAW file, not the camera JPEG, so exposure and color stay non-destructive.
- Car cutouts are the hard step: transparent windows, spoked wheels, and thin antennas defeat automatic selection.
- A cut-out car needs a built contact shadow, or it looks pasted onto the background.
- At inventory volume, standardize the crop, background, and export preset — then delegate the repetitive cutout work.
What “editing a car photo” actually involves
Car photo editing involves adjusting vehicle images. This makes them accurate, consistent, and ready for listings. It is not a single action. It is a pipeline of six discrete operations, each correcting a different defect in the raw capture.
| Step | Operation | What it fixes |
| 1 | RAW processing | Exposure, white balance, lens distortion |
| 2 | Straighten & crop | Tilted horizons, wasted frame, inconsistent aspect ratio |
| 3 | Background cleanup or replacement | Cluttered lots, distracting reflections, brand inconsistency |
| 4 | Shadow & reflection | Floating-car look, lost realism after a cutout |
| 5 | Color & exposure correction | Wrong paint color, dull or blown-out areas |
| 6 | Export & batch output | Oversized files, mismatched dimensions across inventory |
The central principle: edit destructively as little as possible, and keep the sequence fixed so the output stays consistent across an entire inventory. Buyers compare listings side by side, and a dealership whose photos vary in crop, color, and background looks less trustworthy than one whose images match.
Step 1 — Start with the RAW file
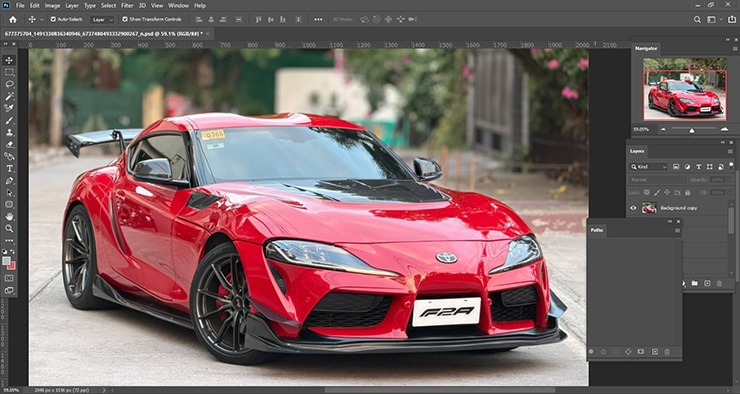
Always edit from the RAW file, not the camera JPEG. A RAW file preserves the full exposure and color data the sensor captured, which means white balance, highlight recovery, and shadow lift are non-destructive in Adobe Camera Raw or Lightroom.
A JPEG has already discarded that data, so the same corrections degrade the image.
Open the RAW file in Adobe Camera Raw and correct three things first. Set the white balance using a neutral surface in the frame, such as grey asphalt or a window pillar, so the paint color reads true. Recover blown highlights on chrome and glass with the Highlights slider.
Apply the lens-correction profile to remove the barrel distortion that makes a car’s panels bulge.
These corrections happen before anything else because every later step depends on accurate color and geometry. Replacing a background or matching a paint color on a distorted, mis-white-balanced file means redoing the work later.
Step 2 — Straighten and crop for the listing
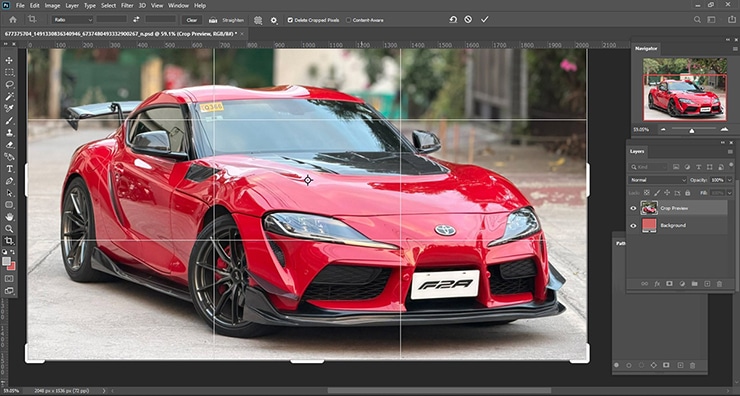
Straighten the horizon and crop to a fixed aspect ratio before touching the subject. A tilted car signals a careless listing, and most third-party marketplaces and dealership websites display thumbnails at a fixed ratio, so an un-cropped image gets cropped automatically — usually badly.
Use the ruler tool on a known-horizontal line, such as the bottom sill of the car or the horizon behind it, to level the frame. Crop to the ratio your platform uses; many dealership content management systems expect a 4:3 or 16:9 frame.
Leave consistent margin around the vehicle so the car occupies the same proportion of the frame in every shot.
Consistency here is the differentiator. When every image in an inventory uses the same crop ratio and the same subject margin, the listing gallery looks engineered rather than improvised.
Step 3 — The background decision splits into two paths:
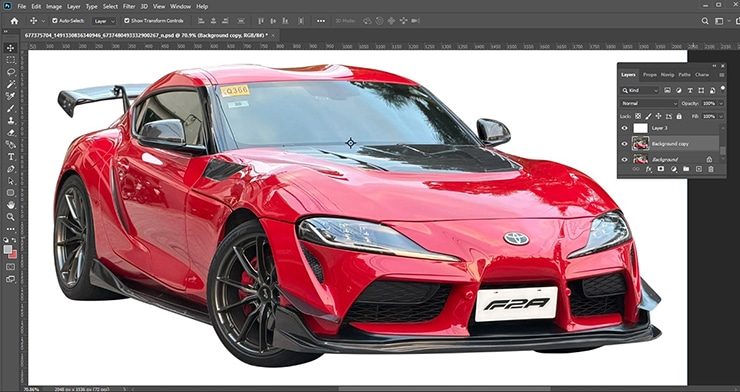
Clean the existing one, or replace it entirely. Clean the background when the lot looks good but has clutter. Remove things like a stray cone, a competitor’s sign, or a window reflection. Change the background entirely for a uniform studio or branded look across all vehicles.
This is standard for franchise dealers who want every car to appear on the same white or showroom floor.
Replacement needs a precise cutout. Car edges are tricky. Transparent windows, spoked wheels, antennas, and side mirrors can confuse the “Select Subject” tool. The best method is using the Pen tool for a manual clipping path.
That’s why background work is the most outsourced car-editing task. It’s often offered as a specific background removal service. The full technique — including how to handle transparent glass and reflections — is covered in our guide to removing the background from a car photo.
Step 4 — Add a contact shadow
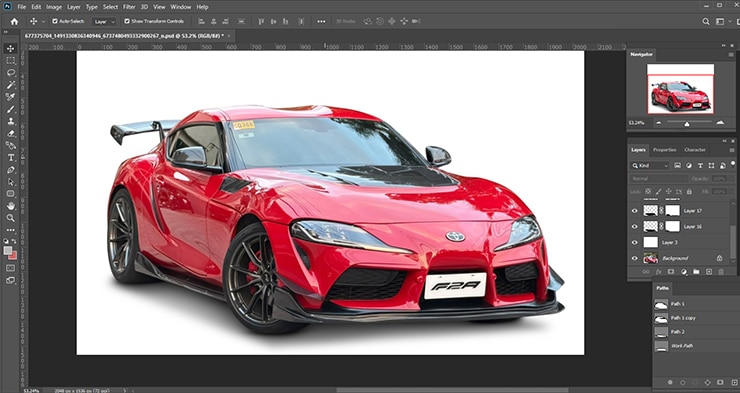
A cutout car with no shadow looks pasted onto the background, so add a contact shadow wherever the tires meet the ground. The shadow re-anchors the vehicle to the surface and restores the realism the cutout removed.
Without it, the eye reads the image as fake, which undercuts the trust the photo is supposed to build.
Build the shadow on a separate layer beneath the car — the same approach GEI’s shadow creation service uses at scale. Sample the original ground shadow’s direction and softness so the new one matches the light in the scene. Keep it tight and dark directly under the tires, fading outward — a soft, even grey blob reads as artificial.
Step 5 — Correct color and exposure
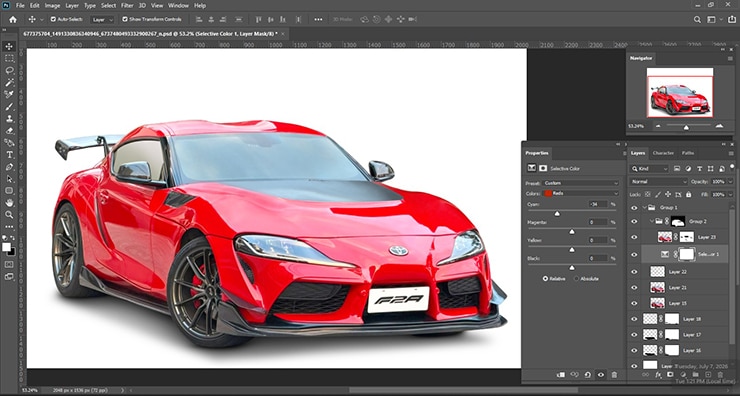
Match the paint color to reality, because color accuracy is a trust and returns issue, not an aesthetic one. A buyer who drives in expecting “midnight blue” and finds a different shade leaves, and a marketplace listing whose color misrepresents the car invites complaints.
Correct exposure so the panels show detail without blown highlights on the chrome or crushed blacks in the wheel wells.
Use Curves or Levels adjustment layers, not destructive brightness edits, so the corrections stay editable; matching paint to a reference is the core of any color correction service.
Check the paint against a known reference for that model and trim — manufacturer color names are specific, and the edit should land within the real range of that color, not an exaggerated, oversaturated version.
Step 6 — Export and batch the output
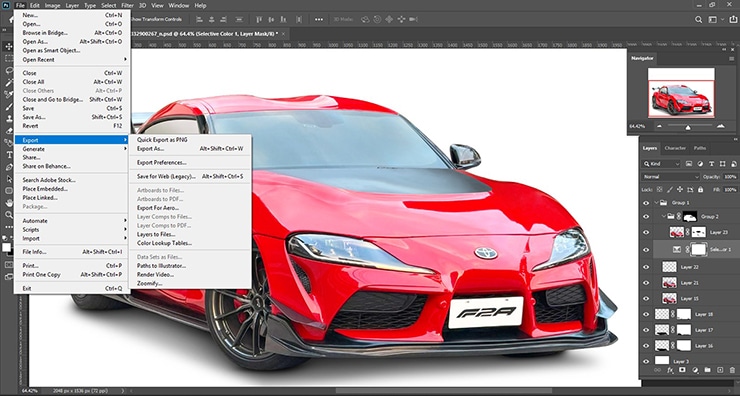
Export to a web-optimized file sized for the listing platform, then apply the same settings across the whole batch. A 24-megapixel master file is far larger than any listing needs; oversized images slow the vehicle detail page, and page speed affects both search ranking and buyer patience.
Export as JPEG at the dimensions your platform specifies, typically between 1024 and 2048 pixels on the long edge, at quality 80–90.
Use Photoshop’s batch processing or an export preset so every image in the inventory comes out at identical dimensions and compression. The result is a gallery that loads fast and looks uniform.
Shoot to make editing faster
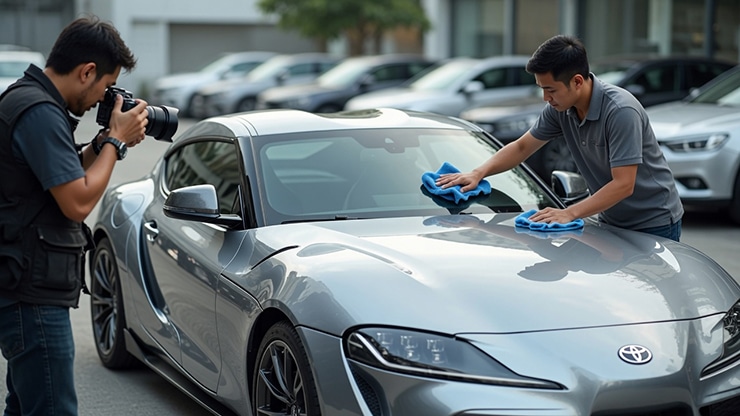
The fastest way to cut editing time is to fix problems at capture, not in Photoshop. Every defect you prevent on the lot is a step you skip at the desk, and across an inventory the saved minutes compound.
Shoot in RAW so step 1 has full data to work with. Park the car at a consistent angle and distance for every vehicle, which makes the crop in step 2 identical across the inventory and removes guesswork.
Shoot in even, diffused light — an overcast day or open shade — because hard midday sun creates blown highlights on the paint and harsh reflections in the glass that take the longest to correct. Wipe down the body and glass before shooting, since removing dust and water spots in Photoshop is slower than wiping them off in ten seconds.
Position the car to control reflections in the windows and paint. A reflection of a cluttered lot or the photographer is a manual clone-out later; a clean surrounding means clean glass straight out of the camera. These habits do not replace editing, but they shrink the per-image edit from a 20-minute job toward a 5-minute one.
New vs used inventory: different editing priorities
New and used vehicles need different editing focus. Buyers look for different things in each. A new-car listing needs strong presentation and brand consistency. So, focus on a uniform background, matched lighting, and the same crop for each model.
The gallery should resemble a catalog. Color accuracy is key. Buyers pick trims based on paint names, so the photo should match.
A used-car listing relies on trust and transparency. So, the focus is on honest, complete coverage. The edit should tidy up and fix issues without hiding anything. Straighten and color-correct each angle, but don’t erase signs of wear that a buyer should see.
Dealer.com found that used and certified listings with real photos get leads 40% more often than those without. (Corcoran & Pierce, Dealer.com, 2026).
This boost relies on the photos being credible. Over-editing a used car by removing every scuff can cause problems at the showroom. It also damages the trust that the listing relies on.
Editing car photos at inventory volume
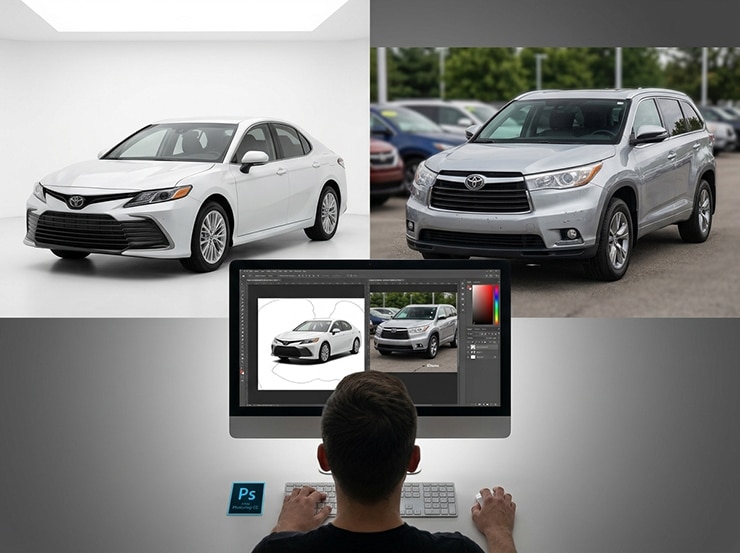
A single car is a 20-minute edit; a 200-vehicle lot is a production problem. The workflow above scales only if it is standardized — fixed crop ratio, fixed background, fixed export preset. Even then, the per-image hand-work in steps 3 and 4 is what consumes a team’s time.
This is the point where most dealerships either build an in-house editing desk or outsource.
The economics are straightforward. A photographer should concentrate on capturing the next vehicle. Doing Pen-tool cutouts can wait. The cutout and shadow steps are the same for every car, so it’s best to delegate those tasks.
Our car image editing team takes care of this step. You shoot the lot, send us the raw files, and then get back listing-ready images that meet our consistent standard.
Frequently asked questions
Lightroom efficiently manages steps 1, 2, 5, and 6. It handles RAW processing, cropping, color adjustments, and export in batches. It can’t do precise background replacement or contact shadows. These need Photoshop’s layers and Pen tool. Most editors use both tools. They use Lightroom for batch corrections and Photoshop for cutout work.
A clean lot shot needing only color and crop takes about 5 minutes. A full edit with a manual background cutout and a built shadow takes 15–25 minutes per image, depending on the complexity of the wheels and glass. Standardized presets and outsourced cutouts cut the per-image time substantially.
A new background gives every vehicle in the inventory a clean, uniform look. This makes the listing gallery appear consistent and professional. Dealer.com reports that 90% of shoppers want real, high-quality vehicle photos. They prefer these over stock images. The goal is to use clear, authentic photos instead of generic stock scenes.
Export JPEGs at 1024–2048 pixels on the long edge at quality 80–90. This keeps the vehicle detail page fast without visible compression artifacts. Oversized master files slow page load, which hurts both search ranking and buyer patience.
Ethical editing corrects capture defects — white balance, distortion, clutter — so the photo matches what the buyer will see in person. It does not hide damage or alter the vehicle’s true condition. Accurate color correction reduces complaints and wasted showroom visits.
Ready to hand off your inventory editing? Start a free trial — send a few images and see the output first.

Salim Ahmed is the CEO of Graphic Experts India, with over 25 years of expertise in photo editing, clipping path, image retouching, and eCommerce image editing services.