

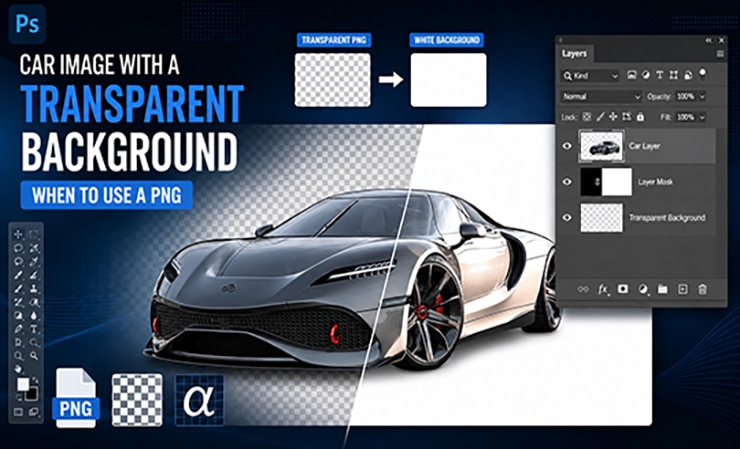
A car image with a transparent background is a cut-out vehicle saved with no background at all, so it can sit on any color, page, or design behind it. The transparent area is stored in the file’s alpha channel, and only a few formats keep it — PNG is the standard, alongside WebP and TIFF.
The transparent PNG is the right output when the car needs to drop onto changing backgrounds: a website with colored sections, a banner, a configurator, or a template. It is the wrong output for a marketplace listing that wants a solid white photo.
This guide explains when to choose transparent over white, and how to export it correctly so the edges stay clean.
The choice of output format is a presentation decision that affects how professional a listing looks, and presentation drives engagement. Dealer.com (a Cox Automotive brand) reports that 90% of shoppers prefer real, high-quality vehicle photos over stock images, and that used or certified listings using actual photos are 40% more likely to generate a lead (Corcoran & Pierce, Dealer.com, updated March 2026). A clean transparent cut-out lets one real photo be reused across every design without re-shooting.
Producing transparent cut-outs at inventory scale is what GEI’s background removal service delivers. This guide is about which output to ask for and why — for the cut-out technique itself, see the deep-dive linked below.
Key takeaways
- A transparent background means no background at all — the car sits on the file’s alpha channel.
- Only certain formats keep transparency: PNG is standard; JPEG cannot hold it and fills transparent areas white.
- Choose transparent when the car must sit on changing colors, layouts, or a configurator.
- Choose white when the destination is a marketplace listing that expects a solid photo.
- The transparency is only as clean as the cut-out — glass, wheels, and edges decide the result.
- Export at full resolution and check the edges on a colored layer before delivering.
Transparent vs white: which output do you need?
The transparent-versus-white decision comes down to one question: will the background behind the car change? A transparent PNG earns its place when the answer is yes, and a solid white photo is better when the answer is no.
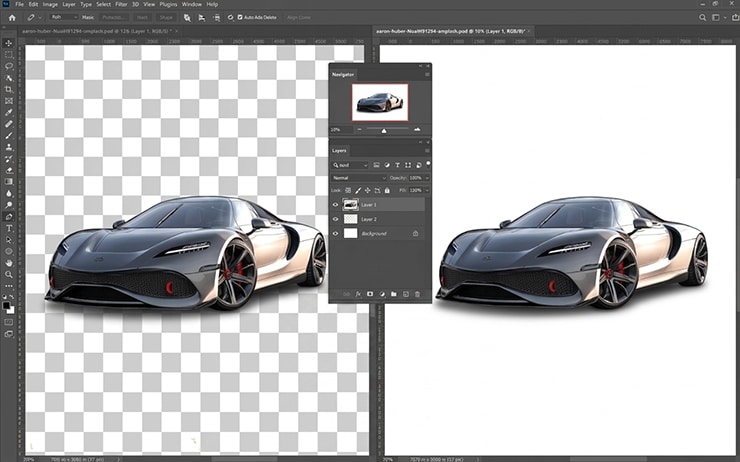
Choose a transparent PNG when the car will be placed over different colors or designs — a website with dark and light sections, a promotional banner, an email template, a build-your-own-car configurator, or a slide. Because there is no background, the car sits naturally on whatever is behind it.
Choose a white background when the destination is a third-party marketplace or an inventory gallery that expects a uniform solid photo, where a transparent file would simply be shown on the platform’s own white and gain nothing.
The white-background listing case is covered in the guide to white background car photos for listings.
The two are not rivals; they are two exports of the same cut-out. A good workflow produces both from one clean selection.
Why the format matters: alpha channels
Transparency lives in a file’s alpha channel, and only formats that support it can hold a transparent background. The alpha channel is an extra layer of data that records, pixel by pixel, how opaque or transparent that pixel is.
A car sits at full opacity; the removed background sits at full transparency; the anti-aliased edge sits somewhere between, which is what keeps the outline smooth.
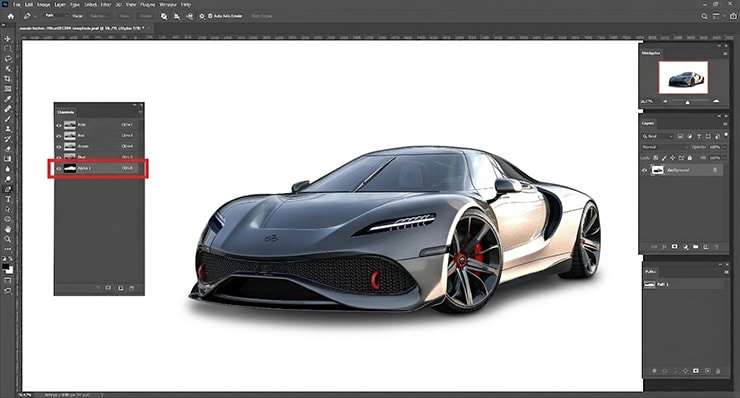
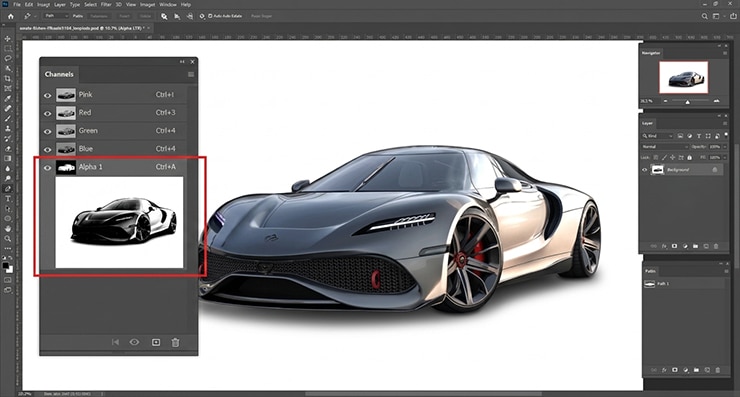
This is why the export format is not a detail. PNG supports the alpha channel and is the default for transparent car images. WebP also supports it and produces smaller files for web use.
TIFF supports it for print and archival work. JPEG does not support transparency at all — save a cut-out as JPEG and the transparent area fills with solid white, silently undoing the work. Choosing the wrong format is the most common way a transparent export goes wrong.
The transparency is only as good as the cut-out
A transparent background exposes every flaw in the cut-out, because there is no background to hide against. On a white export, a slightly rough edge blends into the white. On a transparent PNG placed over a dark page, that same rough edge shows as a pale halo, and every stray pixel becomes visible.
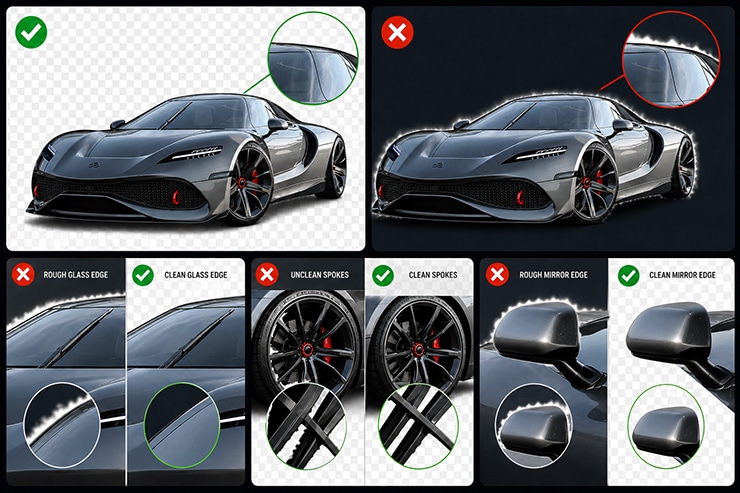
This raises the bar on the three hard areas of any car cut-out: the transparent glass, the gaps between wheel spokes, and thin edges like antennas and mirrors. Each must be genuinely clean, because the transparent output will be viewed against colors that reveal them.
The precise cut-out this depends on is the subject of the guide to removing the background from a car photo, and hair-fine edge work is what an image masking service exists to handle. If you already have a white-background image and need the transparent version, GEI’s tutorial on converting a white background to transparent walks through it.
How to export a transparent car PNG correctly
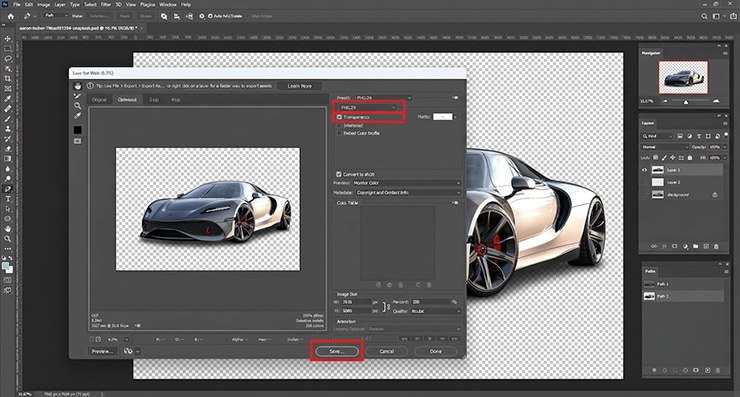
Exporting a clean transparent PNG is straightforward once the cut-out is done, but a few settings decide whether the edges survive. Follow these in order.
Confirm the background layer is fully removed or hidden, so the canvas shows the checkerboard that indicates transparency.
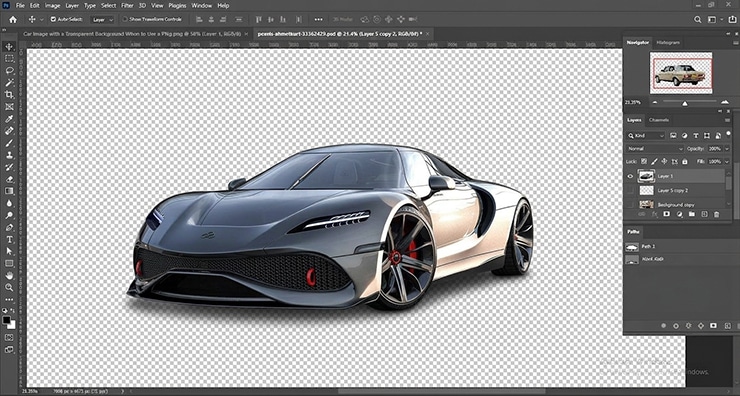
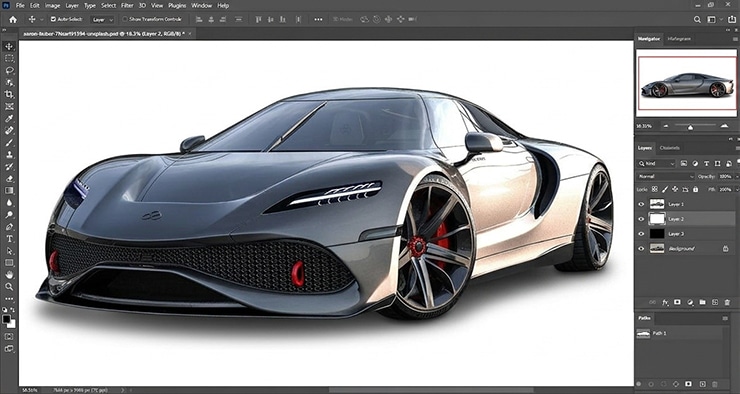
Check the edges against contrast: add a temporary black layer beneath the car, then a white one, and inspect the outline on both. Halos and stray pixels only show against one or the other.
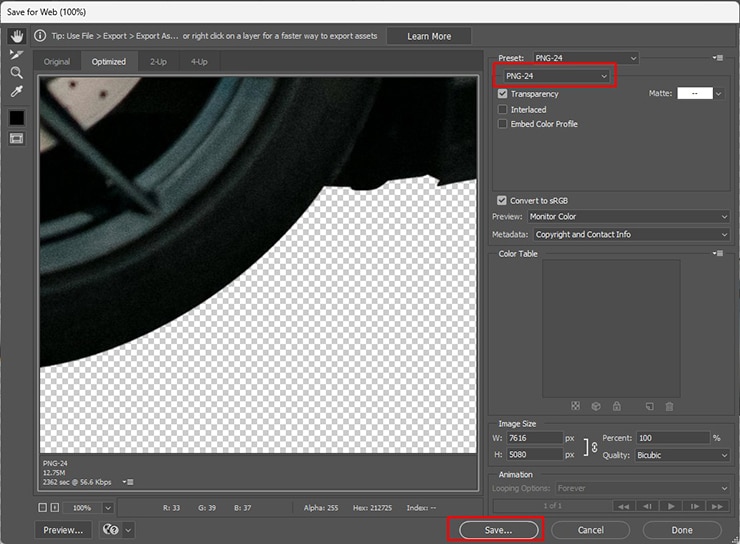
Export as PNG-24, not PNG-8. PNG-24 preserves smooth, anti-aliased edges; PNG-8 can produce a jagged or fringed outline.
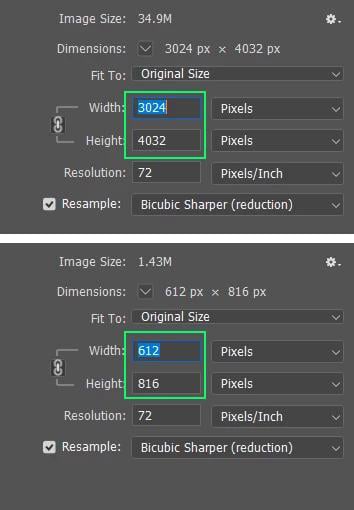
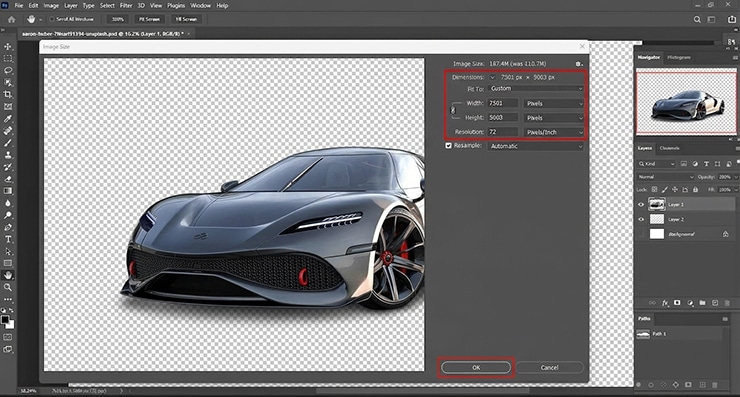
Keep the full resolution for the master file, then size down per use. Transparent masters are reusable, so archive the high-resolution version.
Handling glass is the one judgment call. For a fully transparent look, keep the windows clear so the background behind the page shows through.
For a consistent product look, add a subtle tint so the glass does not read as an empty hole. Both are valid; the destination decides.
Common mistakes
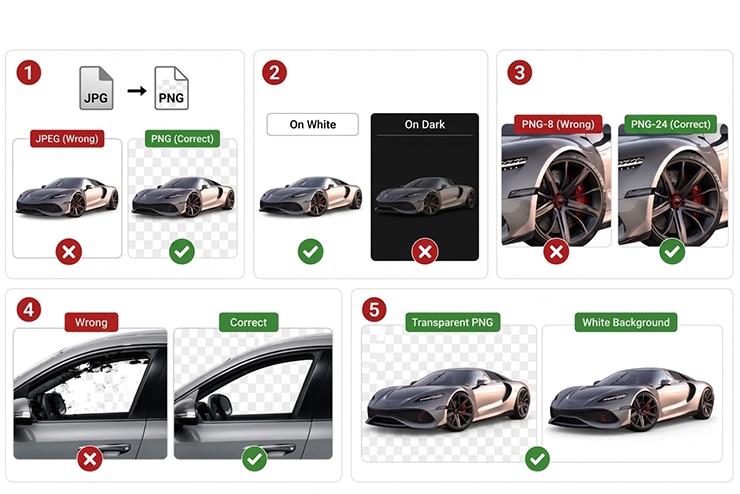
- Saving as JPEG, which discards transparency and fills it white. Use PNG-24, WebP, or TIFF.
- Checking edges only on white, so halos that show on dark backgrounds go unnoticed. Inspect on both.
- Using PNG-8 for a photographic car, which fringes the edges. Use PNG-24.
- Leaving old background inside windows or spokes, which shows the moment the PNG sits on a new color.
- Delivering only the transparent file when the client also needs a white version. Produce both from one cut-out.
Frequently asked questions
PNG is the standard, because it supports the alpha channel that stores transparency. WebP also supports it and makes smaller web files, and TIFF supports it for print. JPEG does not support transparency — it fills the transparent area with solid white, so never save a cut-out as JPEG when you need it transparent.
Use transparent when the car will sit on changing backgrounds — a website with colored sections, a banner, a configurator, or a template. Use white when the destination is a marketplace listing that expects a solid photo. They are two exports of the same cut-out, and many workflows deliver both.
A pale halo usually means the cut-out edge included some of the old white background, or the file was saved as PNG-8 instead of PNG-24. Inspect the outline against both black and white layers to find the halo, refine the edge, and re-export as PNG-24 for smooth anti-aliasing.
Yes. You select and remove the white background, then export as a transparent PNG. The edges need care because the original white may have blended into the car’s outline. GEI’s tutorial on converting a white background to transparent covers the exact steps.
The cut-out is the same, but a transparent output is less forgiving because there is no background to hide a rough edge against. Glass, wheel spokes, and thin edges must be genuinely clean, since the PNG will be viewed on colors that reveal every flaw.
Need clean transparent cut-outs across your inventory? See GEI’s background removal service or start a free trial.

Salim Ahmed is the CEO of Graphic Experts India, with over 25 years of expertise in photo editing, clipping path, image retouching, and eCommerce image editing services.