

To add a realistic shadow to a car photo, build the shadow on its own layer beneath the vehicle, anchor it tight and dark where the tires meet the ground, then fade it outward in the direction the light dictates.
The shadow’s job is to reconnect a cut-out car to the surface it sits on, so the two variables that make it believable are placement — directly under the contact points — and softness that matches the scene’s light.
A missing or wrong shadow is the single clearest sign of an amateur cutout, because the eye reads a floating car as fake immediately. This guide covers the three shadow types, how to build each, and how to match the light.
A believable shadow is part of what makes a listing photo look professional, and professional photos convert. Dealer.com (a Cox Automotive brand) reports that shoppers who interact with a listing’s photos are 16% more likely to submit an inquiry, and that used or certified listings using real photos are 40% more likely to generate a lead (Corcoran & Pierce, Dealer.com, updated March 2026). A clean cutout with a natural shadow is what earns that interaction.
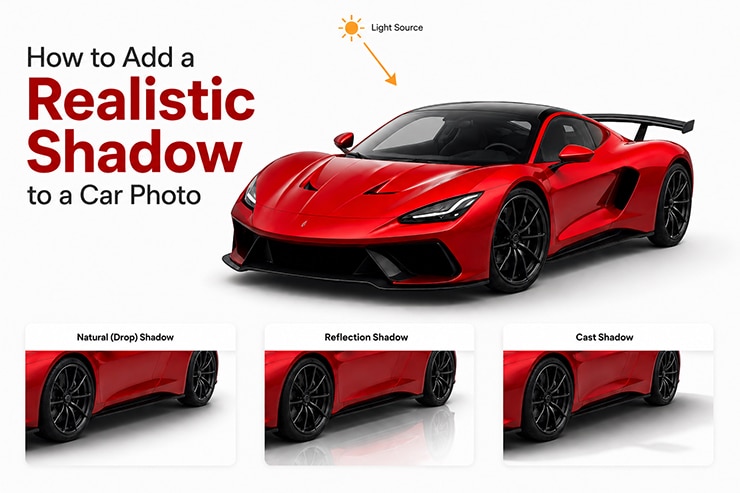
Shadow work is a standalone step for a reason — GEI offers it as a dedicated shadow creation service precisely because it is fiddly and repetitive across an inventory. The method below is how it is done by hand.
Key takeaways
- A shadow reconnects a cut-out car to the ground; without it the vehicle looks pasted on.
- Build the shadow on a separate layer beneath the car, never on the car layer itself.
- Keep it tight and dark directly under the tires, fading softer and lighter outward.
- Three types cover most needs: natural (drop) shadow, reflection shadow, and cast shadow.
- Match the shadow’s direction and softness to the light in the scene, or the composite breaks.
- A soft, even grey blob under the whole car reads as fake — real contact shadows are darkest at the tires.
Why a car needs a shadow after a cutout
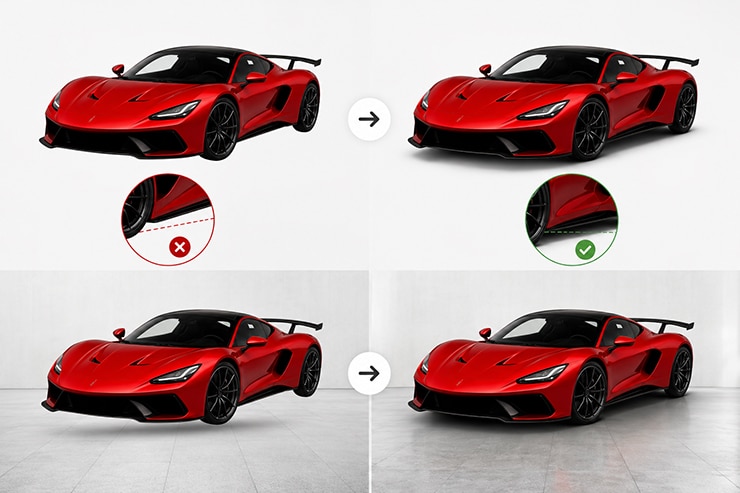
Removing the background also removes the car’s original contact with the ground, which is why a raw cutout floats. In the original photo, the shadow under the car told the eye where the vehicle met the surface. Delete the background and that cue is gone, so the car appears to hover above whatever you place behind it.
The floating effect destroys the realism the rest of the edit worked for. This is why shadow-building follows almost every background replacement — the cutout and the shadow are two halves of one job. For the cutout half that comes first, see the guide to removing the background from a car photo.
The three shadow types
Car photos use three shadow types, and the right one depends on the surface and the look. Each solves a different presentation need.
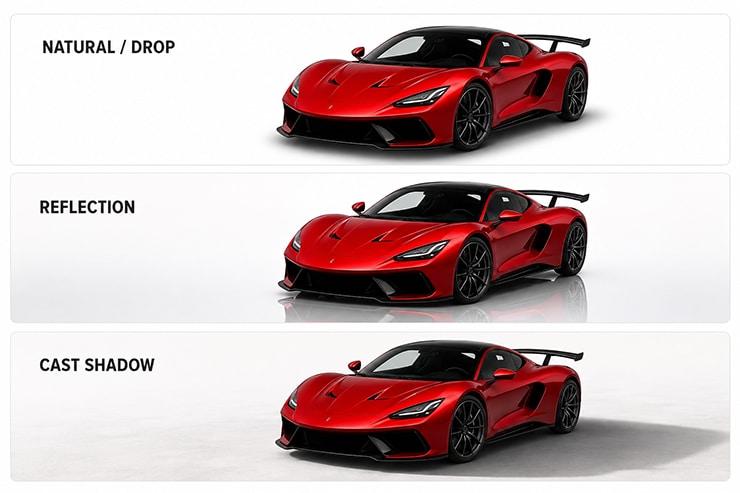
- Natural (drop) shadow sits directly beneath the car on the ground plane, mimicking overhead light. It is the default for a clean studio or white-background listing.
- Reflection shadow adds a soft mirror of the car below it, as if the vehicle sits on a polished showroom floor. It suits premium and franchise-dealer presentations.
- Cast shadow stretches the shadow to one side at an angle, matching low, directional light such as late-afternoon sun. It suits outdoor and lifestyle composites.
The decision rule is the surface you are placing the car on. A white marketplace background wants a natural drop shadow; a showroom composite wants a reflection; an outdoor scene wants a cast shadow angled to the scene’s sun.
How to build a natural drop shadow
The natural drop shadow is the workhorse for listings, so master it first. It goes on a dedicated layer below the car and above the background.
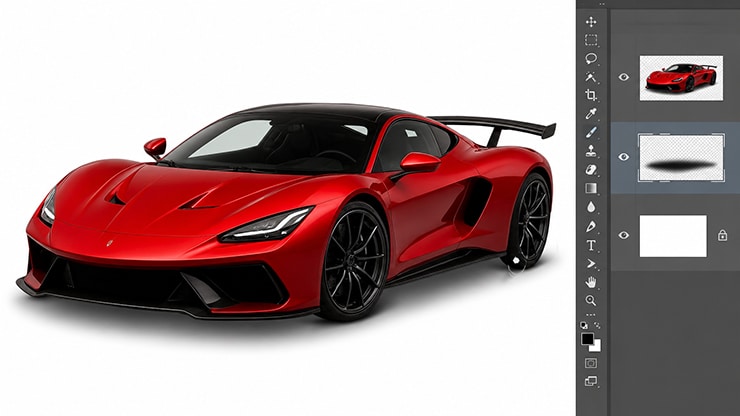
Create a new layer beneath the car layer. Everything below happens here, so the car stays untouched.
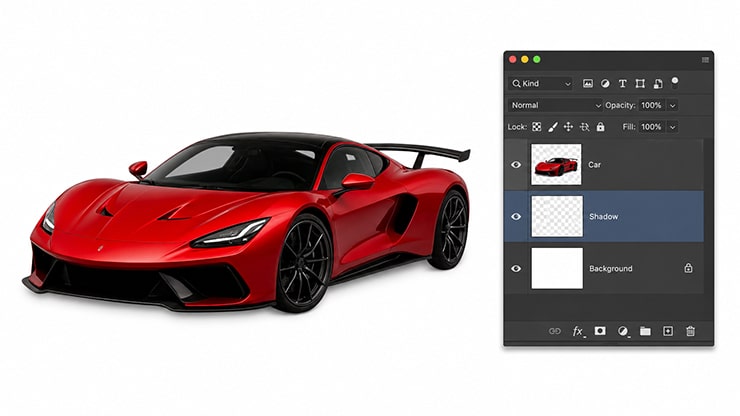
Paint or fill a shadow shape under the car with a soft round brush at low flow, following the footprint of the tires and the underbody.
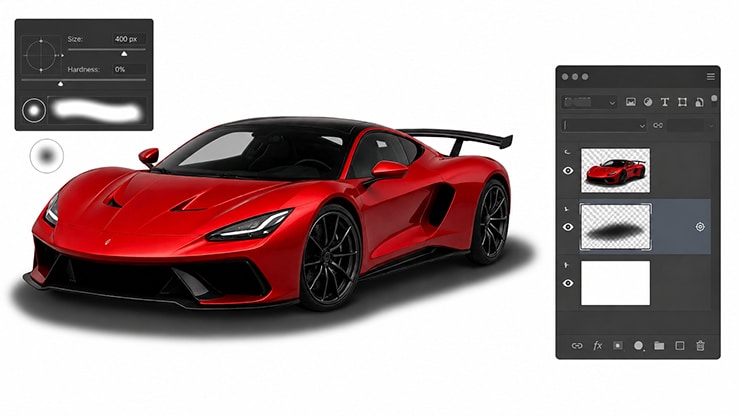
Keep the shadow darkest and sharpest directly under the tires, where the car contacts the ground. This contact point sells the realism.
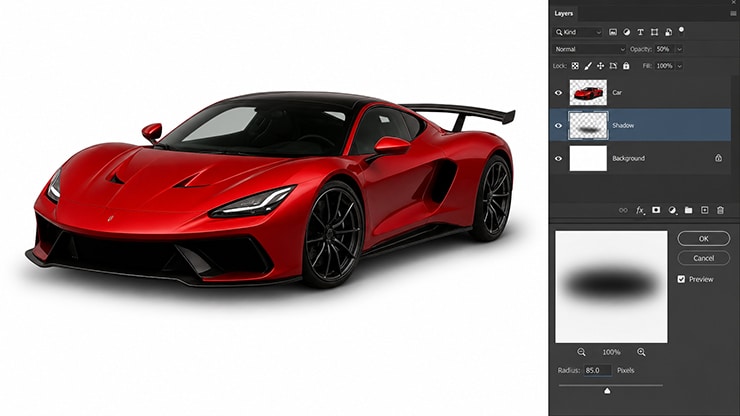
Fade the shadow lighter and softer as it moves outward, using a Gaussian Blur and reduced layer opacity so the edges dissolve rather than end in a hard line.
The most common failure is a uniform grey oval under the whole car. Real shadows are not even — they are dense at the contact points and diffuse everywhere else. Building that density gradient is exactly the hand-work a shadow creation service standardizes across hundreds of vehicles.
How to add a reflection shadow
A reflection shadow makes the car look like it rests on a glossy floor, which reads as premium. It is a softened, flipped echo of the vehicle rather than a cast shape.
Duplicate the car layer, flip it vertically, and align the wheels of the reflection to the wheels of the car so they meet at the contact line.
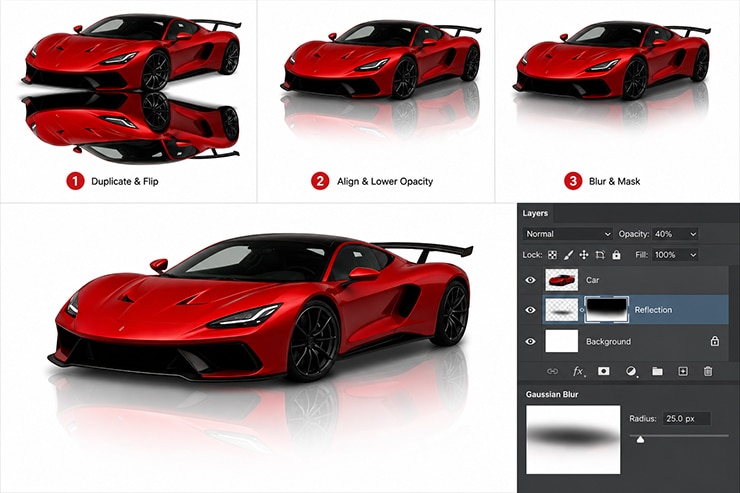
Then reduce the reflection’s opacity, add a Gaussian Blur so it fades with distance, and mask it so it dissolves toward the bottom.
The result should be subtle — a hint of the car in the floor, not a mirror-sharp copy. Reflection work like this is common in showroom composites, and pairs with the compositing covered in the guide to merging images with a background.
Matching the shadow to the scene’s light
A shadow only works if its direction and softness agree with the light in the background, so read the scene before you build. Every believable shadow follows the same three rules as the light around it.
A. Match the direction: the shadow falls opposite the light source, so a sun on the left throws the shadow to the right.
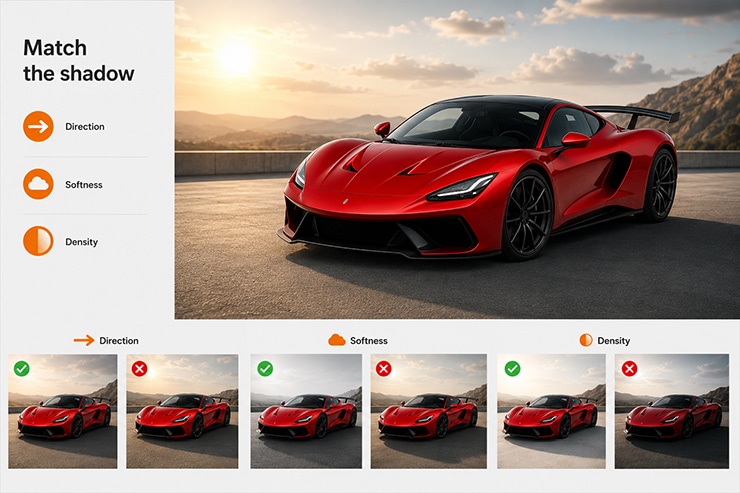
B. Match the softness: hard, sharp-edged shadows mean direct sun, while soft, diffuse shadows mean overcast light — and the shadow you build must agree with the highlights on the car.
C. Match the density: a bright, high-key scene has lighter shadows than a moody, low-key one. When the shadow’s direction contradicts the light in the composite, the brain registers the fake even when it cannot name why. This lighting match is central to any convincing car image editing.
Common mistakes
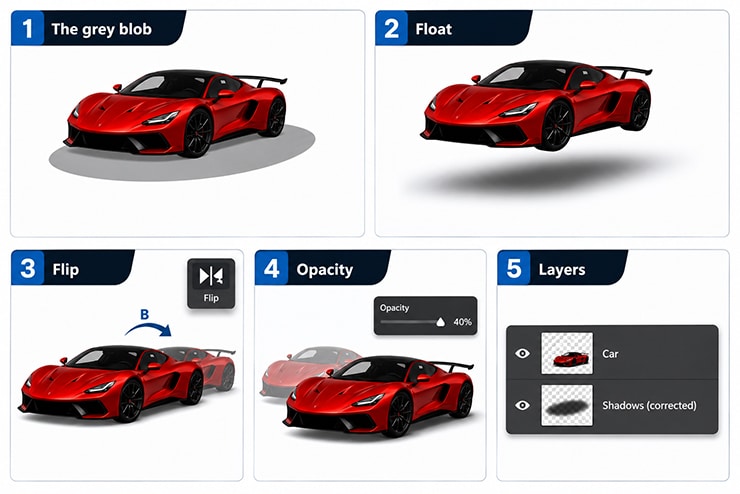
- The grey blob: a single even oval under the car. Fix by concentrating density under the tires and fading outward.
- No contact point: a shadow that floats with the car instead of anchoring at the tires. Sharpen and darken the contact line.
- Wrong direction: a shadow that disagrees with the scene’s light. Flip it to fall opposite the light source.
- Too opaque: a jet-black shadow that looks painted. Drop the opacity and blur the edges.
- Shadow on the car layer: editing the vehicle by accident. Always build on a separate layer beneath.
Frequently asked questions
Build the shadow on a separate layer beneath the car, keep it darkest and sharpest directly under the tires, then fade it softer and lighter outward with a Gaussian Blur and reduced opacity. Match its direction to the scene’s light. The contact point under the tires is what makes it read as real.
The cutout removed the car’s original ground contact, and no shadow replaced it. Add a contact shadow anchored tightly under the tires so the eye sees where the car meets the surface. A shadow that is too soft or sits too far from the tires leaves the floating look in place.
A drop shadow sits on the ground beneath the car, mimicking overhead light, and suits clean white-background listings. A reflection shadow is a softened, flipped echo of the car below it, as if on a polished floor, and suits premium showroom presentation. The surface you place the car on decides which to use.
Dark and sharp directly under the tires, fading to light and soft at the edges — never a uniform tone. The exact density depends on the scene: a bright, high-key background wants a lighter shadow, while a moody scene wants a denser one. A jet-black, hard-edged shadow across the whole car looks painted.
Yes, and it commonly is. The density gradient and light-matching are repetitive across every vehicle, which makes shadow creation a standard outsourced step alongside background removal. A dedicated team keeps the shadow style consistent across an entire inventory.
Need natural shadows across your whole inventory? See GEI’s shadow creation service or start a free trial.

Salim Ahmed is the CEO of Graphic Experts India, with over 25 years of expertise in photo editing, clipping path, image retouching, and eCommerce image editing services.