360-degree photos are getting popular in commercial spaces. However, when you will use it for commercial purposes, photo editing and fixing are a must. Besides, when you are doing heavy editing like this, Adobe Photoshop is a great option.
You can save valuable time by doing this 360-degree editing by using Adobe Photoshop cc 2020. This is also a piece of good news. And it provides good service to photo editors and graphic designers.

So in this tutorial, I am sharing with you how to edit 360 photos in photoshop.
Open the Image in Adobe Photoshop CC For Universal Edits
For universal editing, you need to make several changes to a picture. But the changes aren’t accessible if the picture is put into a 360 file. For that, you can just scroll around the picture.
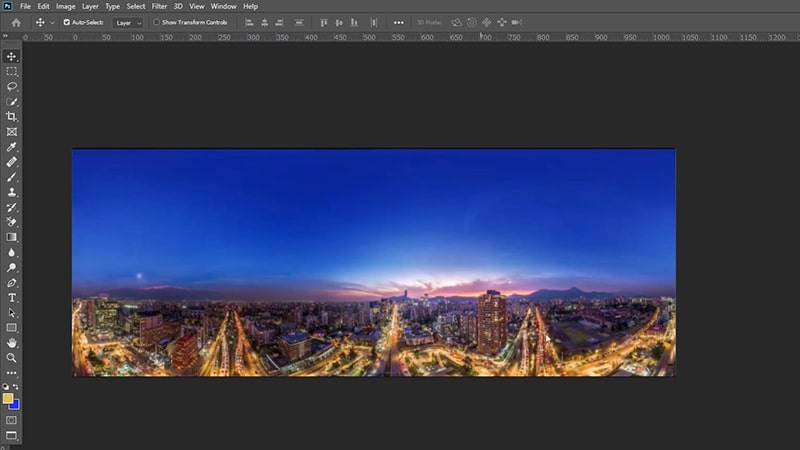
- Hence, first, you need to open a photo in Photoshop by clicking ctrl/cmd + o
- Afterward, you have to make any changes by doing some adjustments.
- For doing adjustments (like saturation, exposure, white and black conversion), you need to get in the Filters Menu.
- And the Filter’s menu is located at the top of the menu bar on your screen.
Once you convert the photo to the next step then you can’t use layers. Thus, the adjustments require adding text, using an adjustment layer.
You need to use layers for making changes to the picture. After completing all of the adjustments you can enter the 360 workspaces easily.
Render the Photo As a 360 Layer
- Now you can work in 360 formats, for that you can stroll around the view easily. Doing this view makes it easier to apply the other adjustments and also maintaining the 3d format after exporting.
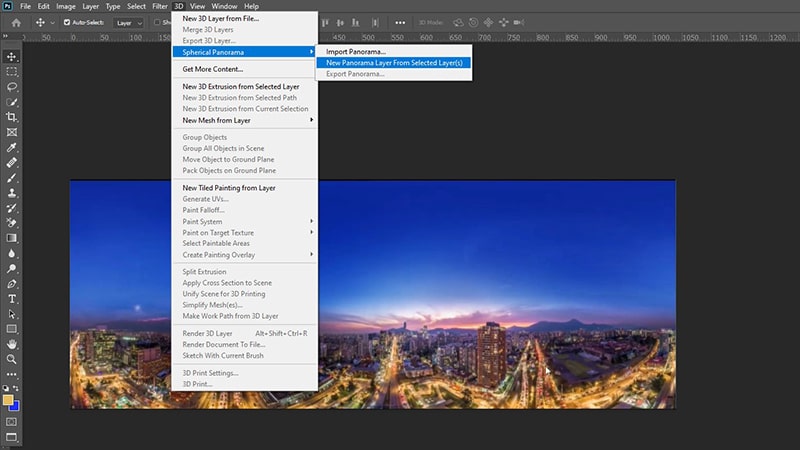
- Next, put the original photo in the 360 layer which is on the layers panel. After that, go to the top of the menu bar on your screen and select 3D Option. In the 3D option, select the Spherical panorama and then select the New Panorama from Selected Layer (S) over the Spherical panorama.
- After selecting the layer, you will get a pop-up Dialog box. In the pop-up dialog, you can change the window size. To do that you can scroll around the photo as well as other options. With the transitional aspect ratio, you can crop the 360 images. Hence, you need to keep in mind that you use the larger size of the picture where you can see the entire view.
- Furthermore, if you think that you need to make universal adjustments. Then hit the 3D option which is on top of the menu bar. In the 3D option, click on the Spherical panorama and again select the Import panorama for getting in the 360 workspaces.
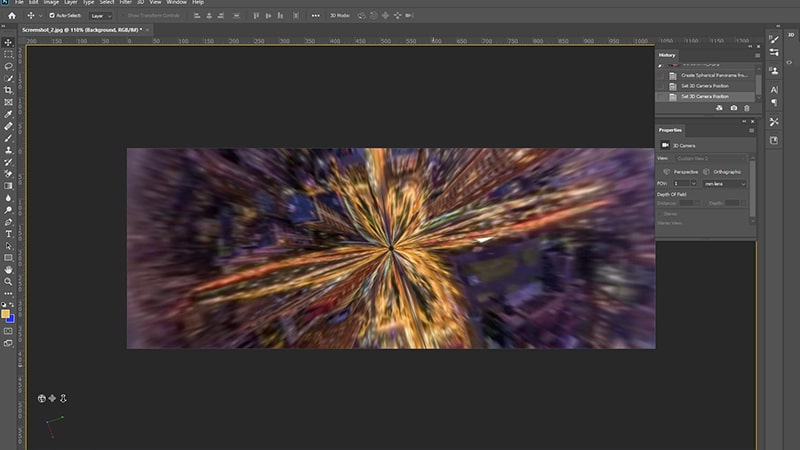
Choose the 3D Workspace
If you want to move the window to the 3d workspace then here are some special tools for 3D. The 3D workspace shows you the right tools to edit 360-degree photos. And it removes such tools as healing brush, dodge, and burn.
Workspace is essentially a matter of personal choice and accessible tools, so that doesn’t make any mistakes.
However, you can easily switch among workspaces often through Window > Workspace.
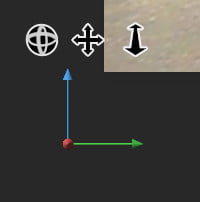
You can easily navigate the photos as you would on Facebook. Look at the picture, you can use the pan, orbit, and dolly controls to look around the photo to find that place where you would like to edit.
Furthermore, you can use the hand tool to change the place as well. And select the 360 photos from the layers panel.
For Making the Local Adjustments Use the Toolbox
First, you need to transform the picture in 3d panorama. And if you find any problem in there, use Photoshop tools to make the local adjustments.
For instance, In Photoshop you can use the healing brush and clone for removing the pieces of the tripod on which the camera was mounted.
And you will get some accessible tools that you can try out for the 360 shots. Such tools are:
Healing Brush
This is the new version of the clone tool. For that, you can blend the pictures adjustment perfectly. This tool is slower than the other tools. Thus with the clone tool first, you can easily remove the area where you want. Then you need to smooth the edges by switching the healing brush.
Clone Tool
You can use this tool to copy the photos section. After that, you need to paint over the other object to erase it from the picture. Click on the control option to select the area which you want to copy.
Dodge and Burn
This tool works for the lightened area of the image. And burn tools work for the dark area of the image. With these two tools, you can regulate the exposure of a specific area.
360 photo editing is an intense task. Before editing the photo you need to close all of the programs which you run on your pc. So that your computer won’t slow down when you edit.
Export the Image

- Normally you can’t open the 360 pictures for maintaining the 360 nesses.
- And you won’t use the “Usual Save As” Option. After completing the edits, you don’t need to save the picture.
- Go to the top menu bar and click on the 3D option.
- Then click on the spherical panorama option. You can see the Export panorama option in there and click on it.
- If you want, you can save this file in PSD format to edit the image later.
- After that, you just use the export option for completing the edit.
Conclusion on Edit 360 Degree Photos in Adobe Photoshop CC
To sum up, Adobe Photoshop is capable to edit 360-degree photos properly. It helps you to remove the distracting power lines and adjust the small exposure mistakes.
You need to take two-three steps to export, navigate around and import the picture. Comment below if you have any questions about this tutorial or any problem in learning how to edit 360 photos in photoshop.
FAQs
Yes, Photoshop CC handles 360-degree photo editing quite well. It lets you navigate around the full panoramic view, make both universal and localized adjustments, and export the finished file while keeping the 360 format fully intact. It’s a solid choice for commercial 360 work.
Universal edits are changes that affect the entire image — things like exposure, saturation, or black-and-white conversion. These need to be done before converting to a 360 layer. Local adjustments, on the other hand, target specific areas of the photo, like removing a tripod from the bottom of the shot, and are done after you’ve entered the 3D workspace.
Converting to a 360 layer is what allows you to scroll around the image in a spherical view and work on it in actual 3D space. Without this step, you’re just looking at a flat panoramic file, which makes targeted edits far more difficult and means your changes won’t export correctly in 360 format.
Three tools come up most often — the Healing Brush, the Clone Tool, and Dodge and Burn. The Clone Tool is useful for quickly copying and painting over unwanted objects. The Healing Brush then blends those edits more naturally into the surrounding area. Dodge lightens specific zones while Burn darkens them, giving you fine control over exposure in targeted spots.
It works similarly to how you’d explore a 360 photo on social media. You can use the pan, orbit, and dolly controls to move through the scene, or simply use the hand tool to shift your view around. From there, select the area you want to work on and apply your edits directly.
360 editing is resource-heavy, so close every other program running on your computer before you start. The fewer things competing for memory and processing power, the smoother your Photoshop session will run. It’s a simple step but makes a noticeable difference.
Don’t use the standard Save As option — that won’t preserve the 360 format. Instead, go to the 3D menu at the top, select Spherical Panorama, and then choose Export Panorama. If you want to come back and make further changes later, save a copy in PSD format before exporting the final version.
Yes, and it’s easy to do. Go to Window and then select Workspace to toggle between different setups. The 3D workspace is recommended for 360 editing since it surfaces the most relevant tools and hides ones that aren’t applicable. That said, workspace choice ultimately comes down to personal preference and what feels comfortable to work in.
You may also read: