Apparel business owners or e-commerce dealers always face difficulty in how to Ghost Mannequin Photography perfectly that can attract the customer. Moreover, customers need to visualize the outlook on how they look after wearing the clothing.
That is the key parameter of buying your garments or apparel products. So, your target is displaying the clothing in such a shape that helps the clients visualize the real view after they are worn.
Here, in this article, we will discuss taking clothes photographs using ghost mannequin photography tips. Which will create a perfect 3D hollow image after using ghost mannequin removal services?
What is Ghost Mannequin Photography?
The best way for an e-commerce product shoot is Ghost Mannequin Photography. Ghost mannequin for photography provides the human shape outlook of your clothing with the inner & detailed view of your product. But the most juggling part is here the mannequin is invisible. That brings a real look at your product.
This type of 3D view always attracts the customers & they can easily visualize the outlook. That makes the customers hungry to buy your clothing.
At first, by seeing the expected outlook of the ghost mannequin effect you may get afraid. It looks hard, especially for the beginner. But it is attainable if you follow each step properly.
Follow my strategy of Invisible Ghost Mannequin Photography. You can learn post-production image editing & how to create the perfect ghost mannequin effect photography. I cover all the steps & easy tricks to understand invisible mannequin photography.
Understanding Ghost Mannequin Photography
Invisible Ghost Mannequin Photography is the pack of multiple photos that are oriented as a composite photo. The first snap you should take on the body part. The second flat or inner view of your garments is taken by using the mannequin. You need to capture more pictures to display any special angle or highlight any features like the company logo or stickers.
Ghost mannequin photos are two images but you added more photos that are necessary to make your product photo-worthy. It totally depends on the clothing shape, feature & angle covered by your photograph.
Some products do not need mannequin-like watches, bracelets but they need to combine multiple photos to display the actual look of the product. That is not a Ghost mannequin process but a very similar one.
The ghost mannequin photography is the best solution for apparel owner to display their products. It removes distractions from your image & solves all your problems by attracting more clients & increasing your sale.
If you hire a model that is expensive but the ghost mannequin photography gives the same result at the lowest price. You just need a one-time investment to buy a mannequin.
Basically, a ghost mannequin is like an invisible mannequin or 3D view, etc. To create this effect you need to combine two or three of your product photos & remove the mannequin in post-processing steps. That brings a realistic, live product photo that attracts more customers. This process helps to bring focus on your clothing & highlight the product.
Still, have any confusion about how to do ghost mannequin photography?
How to do Ghost Mannequin Photography?
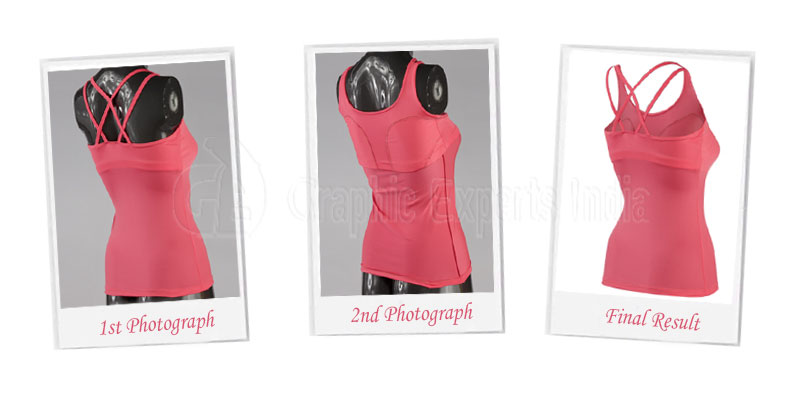
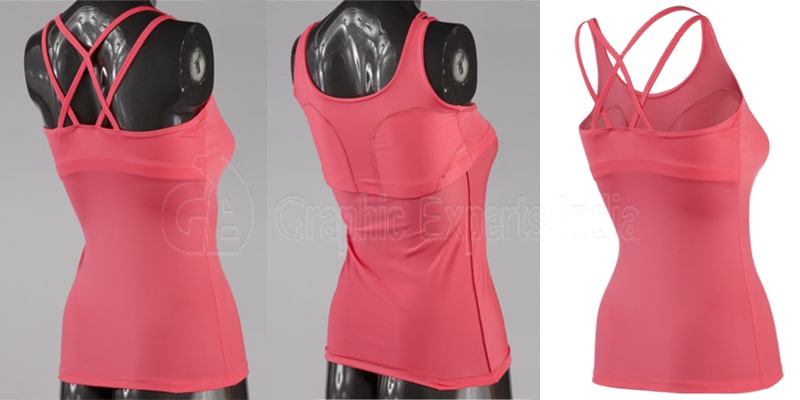
Let watch the below invisible mannequin clothing photos & see the step. Here the first one is covering the body & front view, the second one is an interior view. The final effects are in the third picture, the two images in one place in a human shape without a mannequin.
This amazing transformation is Ghost Mannequin Photography.
Here you simply capture the two different photos & the ghost mannequin effect is generated by image post-production. If you want to avoid the post-production steps or hassle you can take professional ghost mannequin services. They can provide you with a similar high-quality photo.
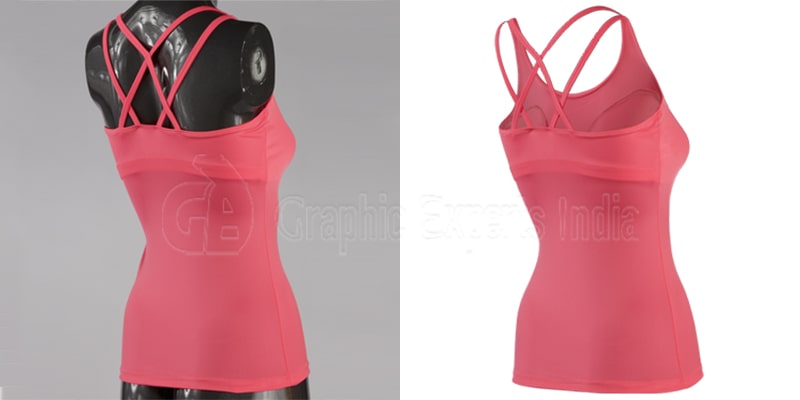
Clothing photography ghost mannequin is an easy way to show a detailed view of your garments product. This is the opportunity to represent the 3D view that also allows showing the backside of the clothing. Look at the below images & realize how easily customers can visualize your product & that increase traffic to your site.

Now the question is how to develop your photographic skill to capture the mannequin photo & what is the plan & strategy you need to follow. Read through the article to get the best idea & necessary guidelines for Ghost Mannequin Photography. Though the task is time-consuming the success totally depends on practice regularly in the right way.
Design Your Cloth Photography Plan
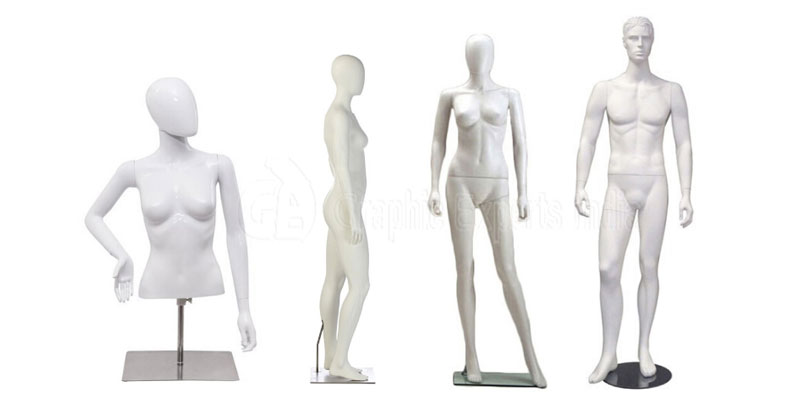
The first step of invisible mannequin photography is to photograph your product efficiently. For that, you need a mannequin & wear your mannequin clothing or apparel items. You must use a female mannequin for female fashion clothing that makes your female ghost mannequin photography marvelous. If it is a male item like a shirt use a male mannequin.
Now start capturing the front, back, neck joint & inner view to create the invisible ghost effects. The feature you want to highlight must be covered in your shoots. The detailed view of your clothing makes your post-production image editing steps smoother.
You can avoid reflection if you choose a white or single color mannequin that makes your editing part simpler. Besides, as the background color is also white, it is easier to cut out the mannequin. A static mannequin is best for ghost mannequin photos. You should frame the mannequin as if the faces are out of the frame in case of full sleeves clothing that makes your photo more realistic.
You should be careful about the product size. Before starting photography check the size fits on the mannequin otherwise pick the right size or alter the clothing from tailors. Fit garments can display the exact beauty of your product. Give attention to positioning the full sleeves so that the client can see them properly.
The studio setting is a pre-condition of the Ghost mannequin process to derive a high-quality product photo. Obviously, there is an alternative. If you want to avoid studio settings you can simply outsource Clipping Path Services & Background Removal that can fix all the studio problems & attach necessary adjustments to make your photo appealing.
Starting Ghost Mannequin Photoshoot
A low-quality product photo is risky for your business. To derive good quality photo lighting, camera setting is also important. These all are depending on the specific product you are capturing. For example, you are capturing tops then you need to place the camera direct to the chest, in case of the bottom shoot place the camera to the heaping side. You should avoid shooting the product photo at too low or too high that can cause an improper outlook of your apparel.
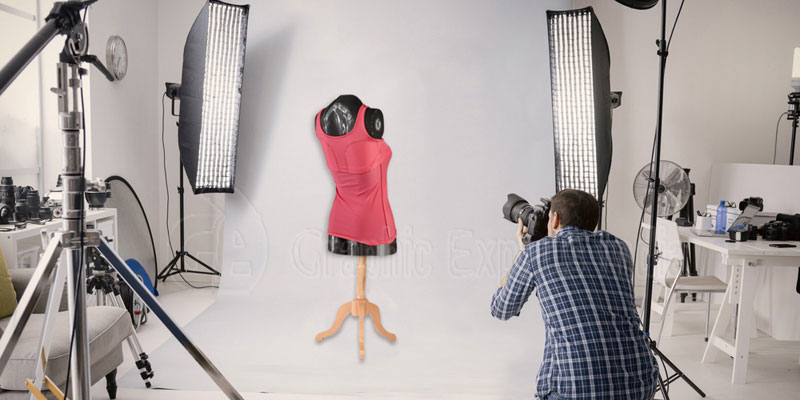
Studio and Camera Setup Tips and Ideas
In the common studio outfits, you need a white fabric background prop or white cardboard behind the mannequin. The background props also place both sides of the mannequin.
Here I attach an example shot of a top photograph on a mannequin. The camera was set at chest height & this gives an outstanding view of the clothing.
To avoid distortion you can pick a telephoto zoom lens. It also gives the flexibility to go closer to smaller garments & in case of the large clothing allow go far away. The place where you do product photography is called the studio room. That must be large enough to set your camera & tripod. Also, two lights & an umbrella must be accommodated beside the mannequin.
Start Photoshooting
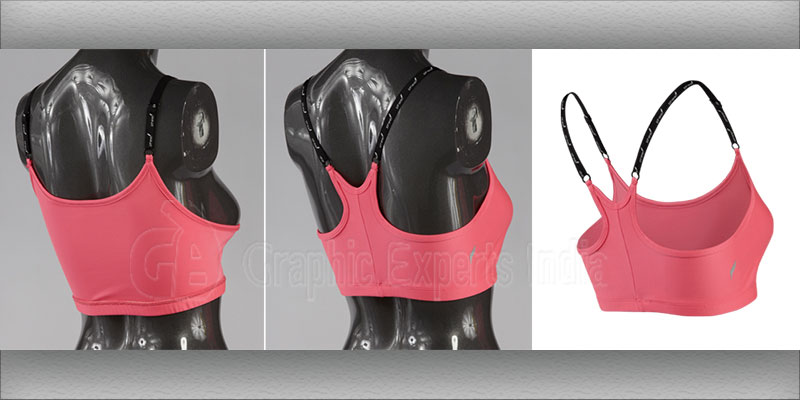
After setting the studio to make 3d effect with the ghost mannequin process first you need to capture a front & back view of your clothing that is worn by the mannequin. Secondly, you need white cardboard to place your garments on it.
Now capture the front & back view again. The advantage of these shoots allows you to capture the inner view of your clothing.
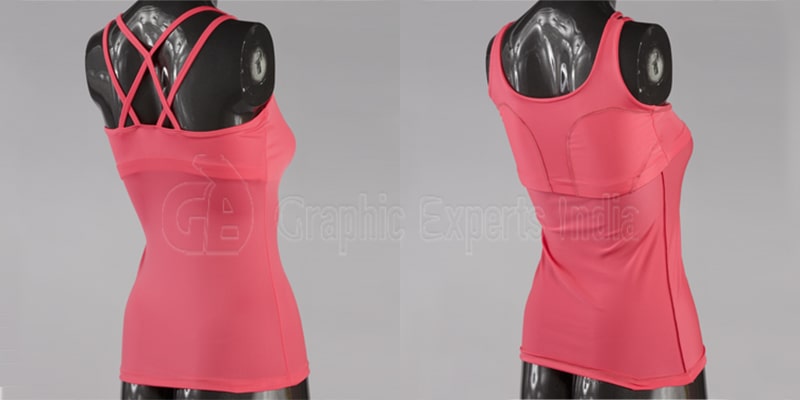
When you combine these multiple shoots at post-production or using ghost mannequin services that result like the below images.
The inner shots are depended on the product. For various garments, you need to capture one or two shots to display the interior correctly. In the case of shirts, Panjabi or similar clothing make sure the top is open to display the internal view properly.
When you are shooting with the same garments be careful about lighting so that all the time you are using the same lighting environment. My tips are to position the cardboard at the same place where the mannequin is placed.
In post-production when you attach multiple shots in one image that gives an invisible mannequin effect without the cost of hiring a model.
Post-Processing Images: A Step-by-Step Guide
Now you are done with capturing the garments. The next step is quite easy if you practice properly & follow my steps. I give the guideline that you can post-production your own photo or outsource professional ghost mannequin services to get your work done within a day which is easier & money-worthy.
Outsourcing the right service provider saves your time & removes your worries by making your product photo a highly professional eye-grabbing one.
In addition, if you don’t organize the studio properly there are issues that arise like distracting background & dust. You can fix it by outsourcing a Clipping Path Services & Background removing that makes your editing experience easier at a cheap price.
However, when you have a budget problem there is no alternative to editing your photo by yourself. If you follow my easy given steps & tricks you can create your ghost mannequin effect in Adobe Photoshop.
Open Files in Photoshop & Make Layers
The first step is to open Photoshop. From the menu open the mannequin image & the cardboard image. Now choose your mannequin photo & make a new background layer.
The new layer should be engulfed with white color that will be your final background color when you completed your task. To make your work organize you should label your layers.
Pick Selection Tool
At this step, you need to select the apparel in your mannequin image. Now zoom the photo as much as you need to select the edges perfectly. Then choose any selection tool like quick, lasso, or magic wand that you are comfortable with & select the clothing.
You can achieve the target selection using these three tools. Your target is to remove the mannequin, the white background makes the task simpler because of the color difference between your garments & the background.
Refine & Place Mask
Now you have completely selected the clothing, refine the mask to make it fixed & beautiful. That vanish the background & mannequin.
From the “Select” “Menu” choose the “Refine Edge” tool to do this task. Now enter Ok in the Refine Edge Panel & position a mask on your clothing. At this step, your clothing is floating on a solid white background.
To polish the outlook or tidy the look refine the mask again or clothing edges repeatedly.
Repeat Steps with Cardboard Image
Now Select the cardboard image & repeat steps 1, 2, 3 on this image. This type of photo can look strange at first but this interior view is very helpful to create the ghost mannequin effects. At the end of your work, you find it as valuable shots.
Now, make a new layer, choose the apparel & make the mask & if necessary refine the mask edges properly.
Combine the Photos
Now both images have a clear mask. You need to stretch out the mask from the cardboard photo over the mannequin photo. Position the layer as like as the cardboard remains lower than the mannequin photo.
Now do necessary adjustments to the cardboard layer that ensures the fitness behind the mannequin layer.
Remove Baseless Parts
At this step, it’s better to veil the mannequin layer because you deal with the cardboard layer only. Pick a brush tool & remove the baseless parts from the cardboard layer.
The target is to place the neckline shape between the shoulders so other baseless parts must be deleted.
Once you have completed the task make sure the layers are fair & the neck joint & shoulder area in right place.
Make Shadow & Save
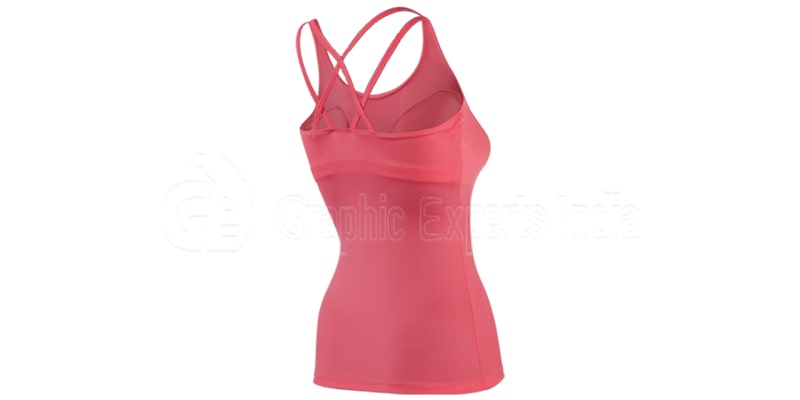
To give your product a dynamic, alive look add a soft shadow between the two layers. For your editing safety, you can save the file in Photoshop.
After saving the File merge all the layers simultaneously & save the photo again as a new file. This idea will make your photo a high-quality & professional one.
In the end, you should apply a juggling 3D effect that develops your invisible mannequin photography skill & help your company to grow commercially.
FAQs
It’s a product photography technique where clothing is shot on a mannequin, and the mannequin is later removed in post-processing. The result is a clean, three-dimensional image of the garment that looks like an invisible person is wearing it. It gives customers a realistic sense of how the clothing actually fits and looks when worn.
Hiring models for every product shoot gets expensive quickly. A mannequin is a one-time investment that consistently delivers similar results — a shaped, lifelike presentation of your garments at a fraction of the ongoing cost. It also keeps the focus entirely on the product rather than the person wearing it.
At minimum, two — a front/back view of the garment on the mannequin, and an interior or flat view taken with the garment laid on white cardboard. Some products with special details like logos or unique stitching may need additional shots to capture everything properly. The final composite is built from all of these images combined.
A static mannequin in a solid white or single color is the ideal choice. The plain color makes it much easier to cut out during editing, especially against a white background. Always match the mannequin to the garment — female mannequins for women’s clothing, male for men’s — and make sure the sizing fits properly before shooting.
Position the camera at chest height for tops and hip height for bottoms to get the most natural proportions. Use a telephoto zoom lens to avoid distortion, and set up your studio with a white fabric or cardboard background. Two lights with an umbrella diffuser on either side of the mannequin will give you even, shadow-free lighting across the garment.
Open both your mannequin shot and cardboard shot as separate layers in Photoshop. Use a selection tool — quick select, lasso, or magic wand — to isolate the garment, then refine the mask to clean up the edges. Repeat the same process on the cardboard image, then combine the two layers so the interior view fills in where the mannequin was. Remove any unnecessary parts with the brush tool, align the neckline and shoulders, and add a subtle shadow to finish the look.
Imperfections like distracting backgrounds, dust, or uneven lighting can all be corrected in post-processing. Clipping path and background removal services are a practical option if you’d rather not deal with studio issues yourself. The cleaner your original shots are though, the less editing time you’ll need later.
Absolutely, and for many businesses it makes more sense to do so. Professional ghost mannequin editing services can turn around polished, commercial-quality images quickly, often within a day. It saves time, removes the learning curve, and ensures consistent results across your entire product catalog — which matters a lot when you’re managing a large inventory.
Conclusion:
If you follow the above guidelines you can easily create your professional apparel product photo with an invisible ghost technique.
This effect makes your product photo more attractive & exclusive than making your website a highly standard & professional one. That impresses the customers & helps you to create your own brand. The amazing photo will stand you out from the competitive online market.
Do hard labor today in practicing my guideline on ghost mannequin photography that definitely makes you proud tomorrow. The only way to reach your destination is to be optimistic about your goal & try hard until you touch success. Your confidence is the best company to improve your photography skills.
You may more:

Salim Ahmed is the CEO of Graphic Experts India, with over 25 years of expertise in photo editing, clipping path, image retouching, and eCommerce image editing services.