If you want to make your photographs look stunning, you will need to master the art of photo color correction. In this tutorial, we will show you, how to color correct in Photoshop.
We will also explain what each tool does and how to use it effectively. With these tips, you can create accurate and consistent color corrections for your photos and become a color corrector.
Photoshop is a powerful image editor that allows you to change colors and adjust brightness, contrast, exposure, and other aspects of your photos.
In this article, I will show you how to color correct in Photoshop CC using standard methods such as color balance and gradient tools.
So, let’s started.
What is Color Correct in Photoshop?
Color correct in Photoshop is a common term in photography.
Restoring an image’s original color in Photoshop is known as color correct in Photoshop. It is the process of restoring an image’s original color. Photoshop color correction is a functionality that helps to restore a photo’s original color.
Maintaining photos with” the same color is impossible all the time. For example, if you are taking photos for a whole day, you won’t get the same color for every photo as lighting conditions will change from time to time.
In this case, color correcting in Photoshop comes into play. It helps restore the photo’s original color so that every photo looks like it was taken simultaneously.
Color correction in Photoshop involves not only fixing object colors but also human skin tones and color.
How to Color Correct in Photoshop – Using Gradient Tool
The gradient tool is excellent for fixing photo’s different and affected parts. The gradient tool allows the gradual transition of two or more colors.
You can add, remove, and rearrange colors with the gradient tool. Also, you can add transparency.
Gradient needs to transition from one hue to another. If you properly understand gradient tools, you can easily control the looks of gradients, different parts of the photo, and the photo’s specific affected area.
Here is a step-by-step guide on how to color correct in Photoshop using gradient tools.
Use the Shape Selection Tool in Photoshop to Select a Shape
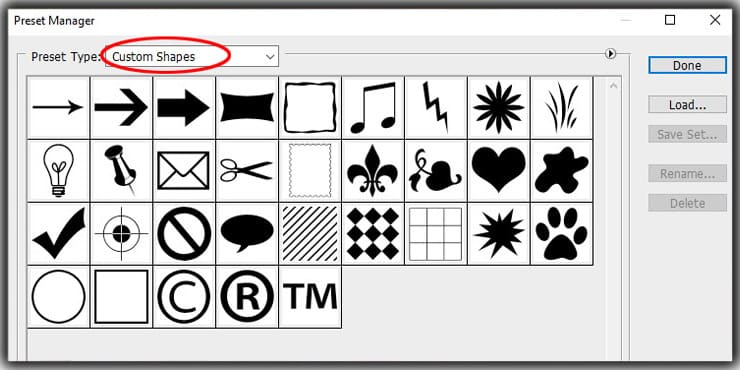
The first thing you will need to do is open the Photoshop software. From the left-hand side margin of your interface, select the “Shape tool” from the drop-down menu > “Custom Shapes.”
Make a shape based on your preference, such as a square. You can create other shapes by clicking the shape tool and holding it down for a while.
Fill the Gradient Shape
Move your cursor over the “Fill” option at the top of your screen and click on it. Using the drop-down menu, select a gradient option that you would like to use.
Gradient Tool Settings
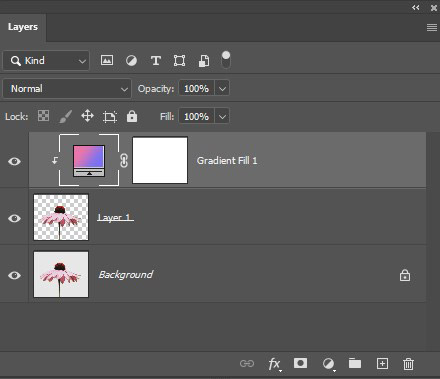
The next thing you need to do is click on the “Layers” option on the right-hand side of your screen – double-click on the layer’s thumbnail for the shape you want to edit.
The gradient settings box will appear on the screen, and a wide range of functionalities will be displayed in the box.
Choose Gradient Colors to Create Your Gradient.
Select a gradient color by double-clicking on “Gradient.” You can get additional colors by double-clicking the bottom handle. You will be able to choose a color from a new window.

Click the “Import” button to use your downloaded gradient colors. Hit the “OK” button once you are satisfied with your color selection.
Choose a Gradient Style that Suits Your Needs
Click on the style option in the gradient fill. You’ll see menu options (radial, angle, reflected, and diamond). Pick a color for graduation by clicking on both circles on both sides of the gradient.
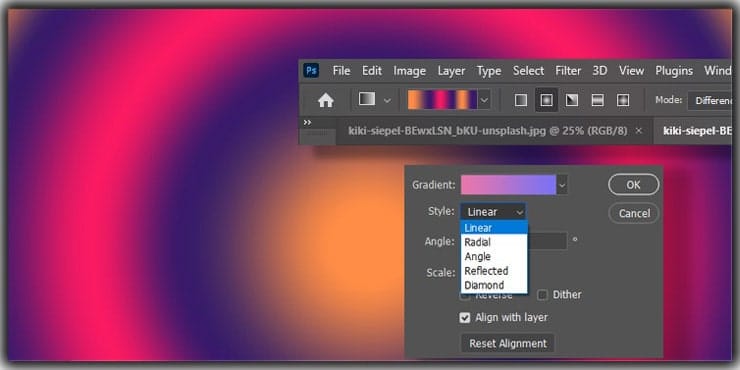
Click within the shapes to apply the gradient. Once you’re done, click “OK.”. This is how you can use the gradient tool for color correction in photoshop.
How to Color Correct in Photoshop – Using Color Balance
Color balance is another excellent way to do color correction in Photoshop. However, to correct color in Photoshop using color balance, you need to understand the basics of color.
In this tutorial, I will use complementary colors. Here is the list of complementary colors;
- Cyan – Red
- Magenta – Green
- Yellow – Blue
If an image has a specific color cast (It means this image has a specific color excessively), we will adjust the opposite color.
Let’s say an image has a red color cast, which means this image has excessive red color. As we know already, Cyan is the opposite color of red, so we will adjust the Cyan color.
Here is how to do it.
Open the Photo
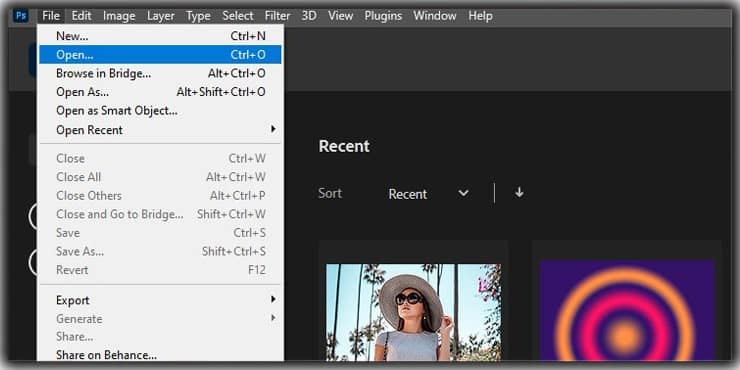
Navigate to the top menu, select ‘File,’ and then select ‘Open’ to open the file you wish to work on.
Add a Duplicate Layer to the Image
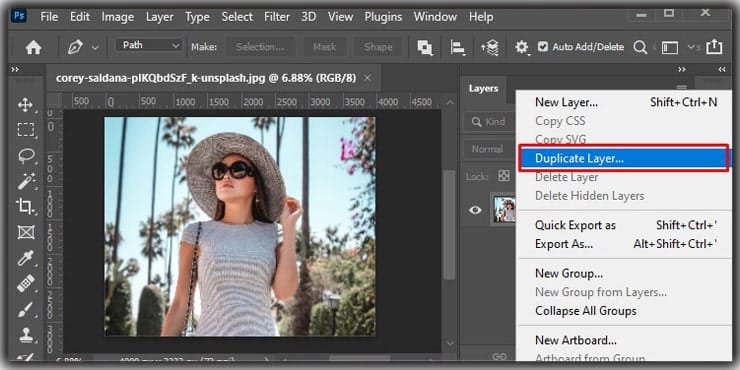
You can duplicate it by right-clicking the Background Layer and selecting the Duplicate Layer option.
Creating a Harmonious Color Scheme
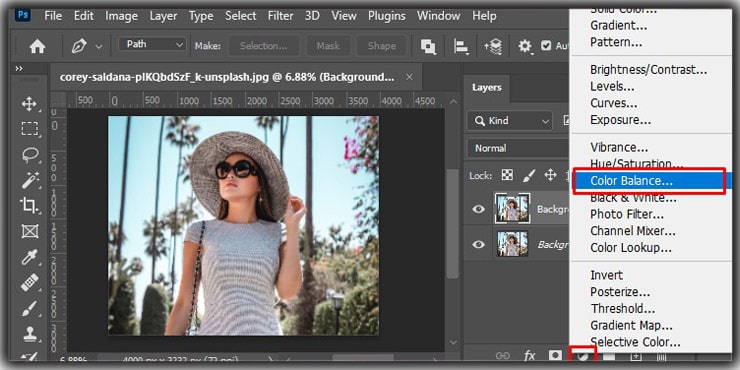
The color balance adjustment layer can be selected from the Adjustment Layer menu.
Make Sure the Slider is Balanced
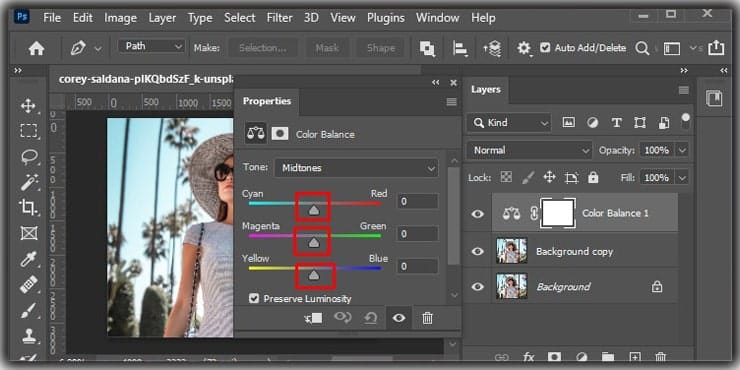
In this step, you will balance the color.
Look at your image carefully; if it casts a red shadow, then adust the Cyan color.
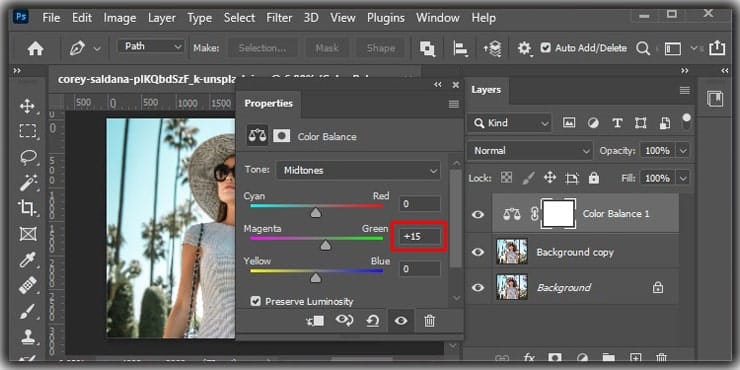
Moreover, if the image casts a magenta shadow, increase the green color and adjust it.
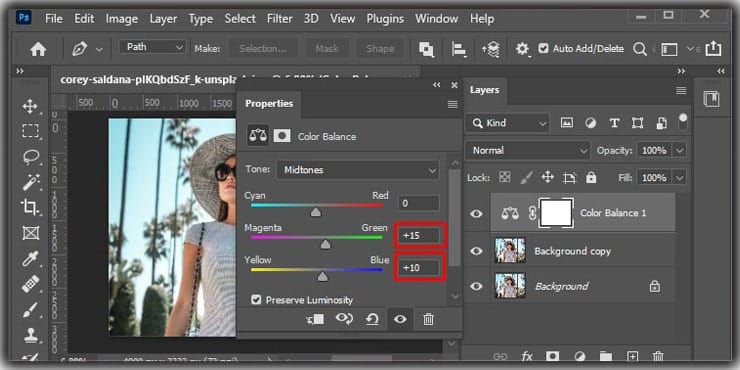
Furthermore, if the image casts a blue shadow, increase the yellow color and adjust it.
Make Sure the Image’s Light is Modified.
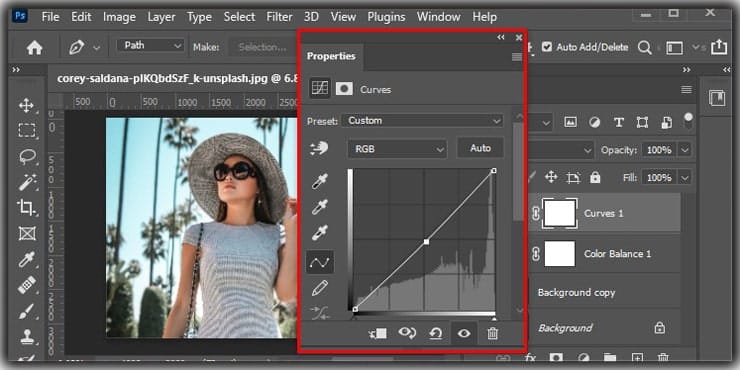
To change the illumination of the image, you can use the curves tool.
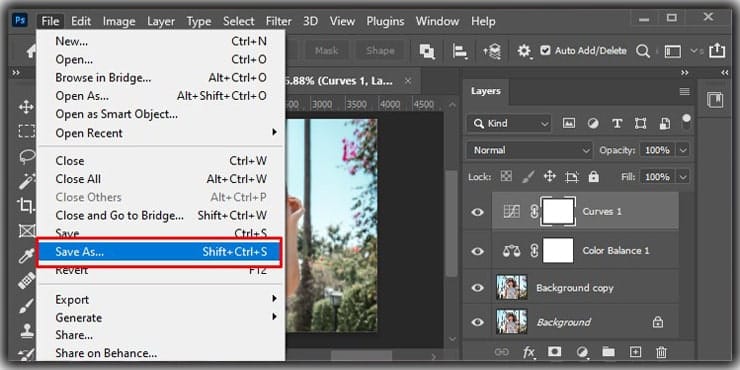
Save the File
To save the picture, you must go to File and choose Save As.
You can correct the color of your photo using photoshop’s color balance feature.
FAQs
Color correcting and color grading are not the same though both are used for post-production.
A color correction process is used to balance the colors of the footage. On the other hand, color grading is the process of changing and stylizing colors.
Color grading is much more advanced than color correction.
You can color-correct an area of a photo using the gradient tool. Also, you can use the gradient tool for correcting different parts and affected parts of a photo.
Color correction is important because it lets you get the most out of the digital image and video. You can’t take the most accurate Image or video all the time. It doesn’t matter what your camera quality or photography skill is. Color correction helps to overcome these factors.
Moreover, color correction adds more value to your digital image and video.
Furthermore, color correction helps to make your digital photo and video more engaging.
In mixed lighting applications, color correction filters correct inconsistent mixes of shades caused by multiple light sources. Colour correction can control illumination and properly light objects and scenes.
Final Words
Hope, now it is clear to you, how to color correct in Photoshop and you can correct color easily.
Color correction is an excellent aid for photography. It helps make your photography look stunning regardless of your camera quality and skill.
You can make any fancy image looks stunning using color correction techniques. You can use Photoshop’s color balance feature to correct a whole image color.
Moreover, the gradient tool helps to color-correct affected parts or any parts of a photo.
So, start using photo correction techniques to give your photos real color.
You may read:

Salim Ahmed is the CEO of Graphic Experts India, with over 25 years of expertise in photo editing, clipping path, image retouching, and eCommerce image editing services.