Do you think, Jewelry Product Photography is an easy task to perform? I know you will remain silent because you never realized this fact. Terrific hard work is needed to achieve a breathtakingly beautiful photograph.
A persuasive photograph enhances a customer’s thirst to buy it. A good photograph enhances product selling too. Simply give one impressive shot of your product, many people will start buzzing about your product and admire to buy it.
As said, professional jewelry photography is quite difficult as well as a challenge too. I.E. Taking a perfect photo, find product photography clients The primary is to get In this article, I am sharing a complete guideline to shoot a glorious photo of your jewelry product, no matter whether you are using your phone or a professional DSLR camera.
Importance of Jewelry Product Photography
We already learned product photography plays a significant value in selling the product. But how much impact it is creating? We all love to look at numbers. Let me give a brief on this all alone
- Think about yourself. When you go to an eCommerce site where do you look first? Surely, it is in the image. And if you like the product image then you go through other details. A recent survey done by Weebly shows, 75% of people decide to buy the product only by looking at the product image. It is sure, you said “wow” about the statistics result.
- Do you want to make your customers unhappy? Even, who wants to lose his/her customer? The same statistics show, 22% of customers experienced that, “product is not the same as it looks like in the photograph” and they return the product. Thus, you lose your face and people will start declining to visit your website. Make sure product characteristics are highlighted especially in the photograph so that it looks loveable.
- Did you ever look at the background of a product image? It is white and 80% of the product image background is white. It is one of the major jewelry photography ideas. You should have a room where light colors support the presentation of your jewelry in splendor and a marvelous setting. A white background gives a creative look and special features are highlighted perfectly. White is an unavoidable color to sell products on eCommerce.
- On social media, which content gets more viral? A description or a description with an image? For sure, the second one. A content which contains photograph is more than 50 times go viral through social media. People are more emotional to visual content and react fast. Even, if a customer loves a product image, he/she never looks at each information while making their decision to purchase.
As we already realized how a good photograph boosts up your eCommerce business. To sum up, you should take a photo to make your customers buy a product.
The Most Types of Jewelry Photography
Now, I will let you understand what image type is required for which eCommerce business. There are six types of product images to showcase your website as wonderful and tempting to your customer.
Have a look at the below:
Product Photo:
The main photograph of your jewelry. This can be only one image or a group of images. Make sure to keep the background, White. Product Photo is the base of your eCommerce website and is perfect for any eCommerce website.
Lifestyle Photo:
These prototypes are to show how a customer can your product. The goal of this photo is to let your customers know why your product is special and to create an “ah-ha” moment with your customers. This image type is suitable for wearable products like clothing, jewelry, even cosmetics, perfumes, and so on.
Hero Photo:
This photo style shows your product in an energetic way. It is larger than your product and lifestyle photos. It is perfect for sales and other marketing events.
360-Degree Photo:
A new technique of professional jewelry photography. In this type of image, you have to take photographs from each side of the product and during visualization, you need to spin your mouse to have a look at the product from different angles. A 360-degree photograph is appropriate for home appliances like furniture, and outfits that have a unique design.
GIF or Video Creation:
GIFs or videos are significant ways to showcase any product in action. If your product attracts customers due to an exact reason, that you cannot show it immediately. A customer gets quick clarification of a product via a GIF or a video. It is good for tools, a product that provides specific characteristics.
Now, decide for yourself, what types of product photos you would like to use for your eCommerce site.
Essential Jewelry Photography Equipments

Jewelry product photography is the most different type of photography process. To achieve the goal of this photo shooting, a jewelry photography kit plays a vital role. These kits help to get the job done smoothly. I prepared a list of important kits to give you an answer on how to photograph jewelry at home.
Camera:
There are no rules regarding the characteristics of the camera. You can go with either an entry-level DSLR or a Pro level or your phone camera. Even good jewelry photography props cannot help you if your product image is dull. So, whatever camera you use that is not the factor, the image should be crystal clear.
Lens:
Macro or non-macro, this is the confusion, right? Choose a macro lens because a macro lens works best to capture a big photo of a little product. Every lens shows the macro focus range and minimal focus distance engraved on its body. Start with an 85-100 mm lens. It means the lens zooms between85mmand;100mm.
Tripods:
Jewelry is an unmoved item and this is the reason you need to focus on one specific point. At this point, a tripod is needed. You can take a snap from several angles and camera settings and positions do not require a big change.
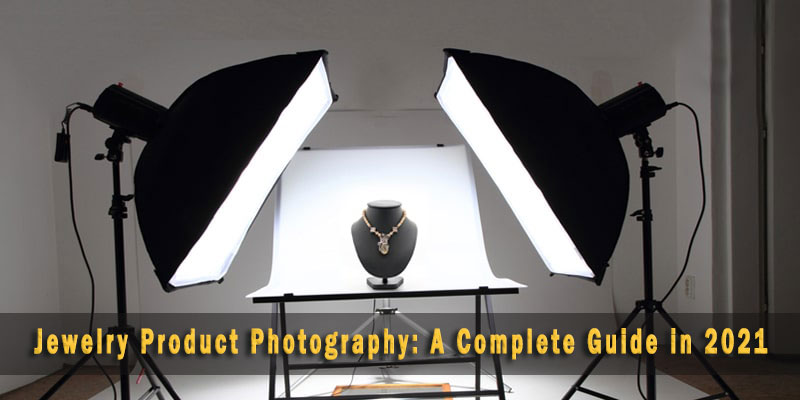
Lighting:
Light setting is significantly vital for jewelry product photography. You can utilize daylight or choose lightbulbs or traditional bulbs. But on a cloudy day, you need to balance the color. A fine sunny day is required if you choose to take a snapshot at daylight. It will be best if you choose a room that does not exist a window to avoid any unusual effects on the jewelry.
Lightbox:
Do you want a portable lighting studio? A lightbox is helpful to provide a quick fixation of your camera light and helps to control it as per your requirement.
Except for the above major products, other jewelry photography props are a white reflector, dust blower, cotton gloves for hands to avoid any kinds of finger spots on the jewelry, clip, white acrylic tiles, cool temperature glue gun, holders for earring, bracelet holder, Necklace form, etc.
Many types of equipment are available in the market as well as on the website. Choose the one that is required for your photography. Also, do not forget to give a retouch of your snaps to give a perfect shiny look to your jewelry product.
Tips to Avoid Common Jewelry Photography Mistakes
We all learn from our mistakes. There is a proverb “Failure is the Key to Success”. If you don’t make mistakes, you cannot learn. Learning may require time, but you will learn what to do, how to do it. And slowly you will learn how to photography jewelry at home
Messy Preparation:
Jewelry requires shiny, clear, clean, and polished looks. As a DSLR camera takes every detail clearly and you have a proper lighting setup to capture jewelry photo so whenever you are touching your jewelry, wear cotton gloves and touch it. It will shorten your shoot time and reduce reshoots.
Uneven Photo shooting:
An inconsistent product image will lead your customer to a gloomy situation. Your customer will not feel interested to buy your jewelry if you do not follow a guideline. Do not change the image too often. It leads you to poor professionalism.
Prepare a guideline to crop and size your photo and follow it for every photograph to let your customer feel to buy the product at any cost.
Odd Background:
Do not try to be different, to show yourself unique from others, and throw away the white background. Few retailers are there who want to do this, but it is one of the biggest mistakes. The white background provides a timeless finish to your photo.
So, it is important to give a clean and clear look at the background and learn how to photograph jewelry on a white background. Black or Light Grey background is also preferable but some marketplace does not allow it except white.
Unusual Props:
Sometimes props, mannequins or model distracts your customer because your customers view distract due to these items. These products indulge the clear and proficient look you should be going for in your product photos. Better is to lay the jewelry flat keeping a white background. Keep everything simple and clear.
Reflections:
Just imagine, you choose a piece of jewelry from online but unfortunately, the reflection of the cameraman is seen on the product, would you buy it? You will make “eeeh” sound like your customer. To avoid a reflective image, place your jewelry on a table or a block. You can diffuse lights by using an umbrella.
Besides, hang and sweep a roll of solid white paper behind the product. And fasten the paper to the bottom of your camera lens. Thus reflection will not come from the foreground.
Imbalance White:
Imbalance white will give your photo a different look even if you have some background and the same product. Your product color will change automatically in different lighting conditions. Set your camera to “automatic white balance mode”. Thus your camera will recognize the light source and seizure colors as adjacent to how they truly look in physical condition as possible.
Poor Focus:
Don’t take an image that does not give a clear view of your full product. Set your camera to a high aperture and the focus point has to be perfect. A customer requires every detail of a product. Soft focus is not allowed in jewelry photography camera settings.
Shaky Photograph: Just imagine, white balance, the background is perfect, reflections are not there, everything is perfect but while pressing the button, your camera shake and make the image a waste. To avoid this kind of unpleasant situation, use tripods. Tripods are less expensive, worthy products to give you quality and evenness.
Contrasted Light:
Avoid harsh lighting when performing jewelry product photography. Harsh lighting is the reason behind reflections, adding unusual shadows, making product imperfection, and other annoyances. It is advisable to capture your jewelry photo in soft light.
Also, a recommendation is, learn photography in manual mode, make yourself capable of knowing how much or how little light your camera captures to give you a shiny picture.
A little number of Images:
Customers look for several numbers of images of your product on the category page. It is quite irritating if a few images are available. Capture more photos from different angles, provide more details to your customer, don’t stop taking more images. A good image not only increases sales but also creates buyer’s attraction and builds brand value.
Photo Editing and Retouching
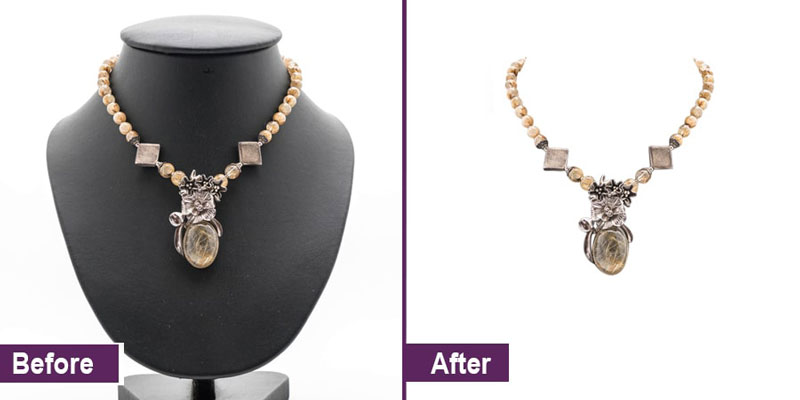
A poorly retouched photo kills the trust level of a customer. A customer will feel like you are cheating on him/her. If you cannot do it all alone, hire a Photoshop professional who can do the work for you. Hence, Online Jewelry photo editing and retouching services are cost-efficient.
FAQs
The numbers make a compelling case on their own. Research shows that roughly 75% of online shoppers base their buying decision primarily on product images. Jewelry is a tactile product that people can’t touch or try on when shopping online, which means the photograph has to do all the convincing.
White is the standard for a reason — it’s clean, distraction-free, and lets the product’s color, texture, and detail take center stage. Around 80% of eCommerce product images use a white background, and most major marketplaces actually require it.
Not necessarily. Entry-level DSLRs, mirrorless cameras, and even modern smartphone cameras can produce excellent jewelry photos when paired with proper lighting and a steady setup. The camera body matters less than the technique. A well-lit, sharply focused shot taken on a mid-range phone will always outperform a blurry, poorly lit shot taken on a top-tier camera.
Jewelry pieces are small and detail-rich — intricate settings, gemstone facets, hallmark engravings — and a macro lens is specifically designed to capture close subjects with exceptional clarity.
Reflections are one of the most common and frustrating challenges in jewelry photography because shiny metal and gemstones pick up everything around them. Diffusing your light source using an umbrella or softbox helps significantly.
Several consistently show up. Touching jewelry with bare hands leaves fingerprints that read clearly under studio lighting — cotton gloves fix this immediately. Using harsh direct lighting creates unwanted shadows and hot spots.
A lightbox functions as a compact, portable lighting studio. It encloses the product and diffuses light evenly from multiple sides, reducing harsh shadows and reflections in one setup.
Final Verdict on Jewelry Product Photography:
Now I hope, you already know how to capture jewelry product photos. Dodge the above mistakes! To capture smooth and beautiful jewelry product photography. By following the above tips and techniques you can minimize the time.
Don’t forget, “Practice Makes a Man Perfect”. If you are a novice, practice more and more to remove your imperfections. Be patient, practice, and achieve your goal.
Do read:
- 18 Beautiful Jewelry Photography Tips
- 10 Professional Headshot Photography Tips to Take Perfect Head Shot
- A Guide to Remove White Background Using Photoshop Tools
- How to Start A Drone Photography Business
- Outdoor Product Photography Ideas to Boost Sales in Ecommerce

Salim Ahmed is the CEO of Graphic Experts India, with over 25 years of expertise in photo editing, clipping path, image retouching, and eCommerce image editing services.