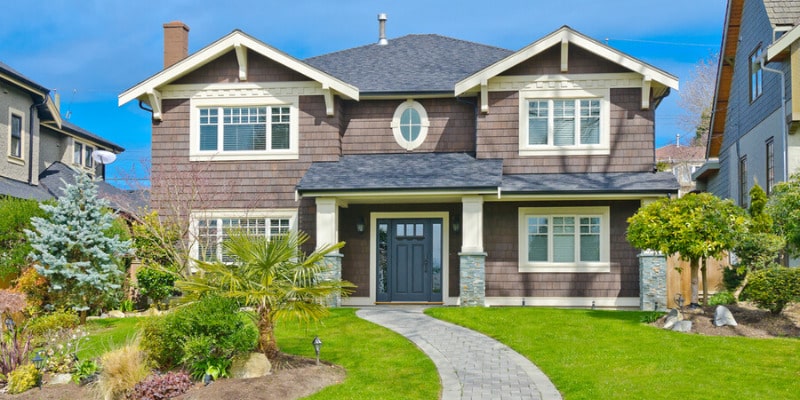
Real estate photography is the most popular platform in the photography world. The essential part is to buy high-quality equipment. If you have high-quality equipment but that’s not enough. For this, you have to know the techniques about how you’ll take pictures.
So, You need to research real estate photography techniques. After that, while you’ll visit your client’s house, then talk to him about photography. Likewise, What types of photography a client is looking for? Types of the property? Then make a plan and do research.
If you are an amateur in this field, then in this tutorial, I will demonstrate to you real estate photography tips.
Planning for Real Estate Photo Shoot
Planning is the most essential part of any photo shoot. Especially, when you are a beginner creating a plan is somewhat troublesome.
Besides, the process to plan is straightforward. Here, I have divided the whole planning procedure into different parts. Let’s explore property photography tips and techniques…
Select the right time
For a real estate photographer, time management is an essential thing. You need to select the right moment to do that. If you get the chance, then make a plan for shooting in the daytime, which is the best way to shoot a great photo. As a result, you will get the natural light and saturated color in your picture.
But keep in mind that, Don’t shoot real estate photos, When the sky is cloudy because you won’t get better quality pictures at that time. So it will be better to select another time.
Most real estate photographers like to take real estate pictures before the sunset. Doubtlessly, at this season of the day, you can get a lovely picture.
Analyze the property in advance
When you visit your clients’ house, it is important to notice every detail of their house. Whatever it’s interiors or exteriors. Also, you need to learn every distinction of the house.
Before the photo session, You need to walk around the house and backyard of the house with proper analysis. Additionally, Take some shots of every room. And don’t forget to take shots of the backyard as well.

Then you should look very carefully at these shots to recognize things that should be addressed when taking professional real estate photographs. This approach allows photographers to see those distinctions, which at first glance seem invisible but which have great importance.
Furthermore, You need to make sure that the house is ready for shooting. Perhaps you might need some time to fix any deficiencies.
Open Blinds/Windows
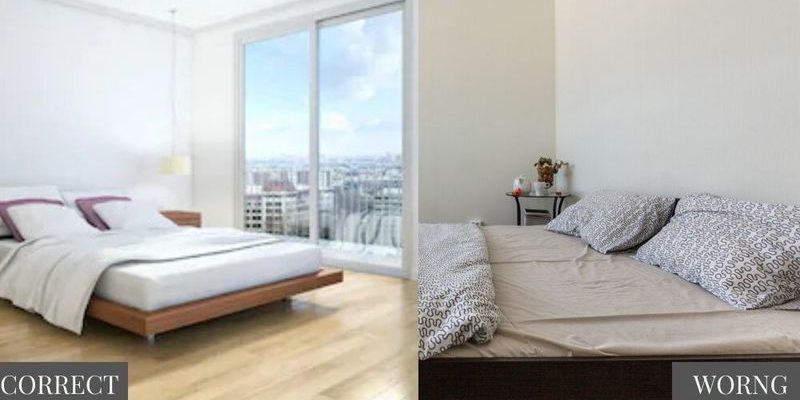
You need to keep in mind that natural light is a better option for taking a good-quality picture. Because artificial light can’t replace sunlight.
So you need to figure out the conventional way to take pictures. Throughout this way, You can only get lovely, saturated shadows. Improve the impact of natural daylight with reflectors and LED panels. We will help you explain important details like furniture components of metal, wood, or textile.
Moreover, Natural light also allows the pictures to be created as naturally as possible so buyers can see how the house looks.
Turn On All the Lights
For real estate photography, this is helpful and one of the basic tips. If you want to achieve various kinds of impact on your photo, then turn the light on and off. It is all based on your priorities.
For instance, the extra light will provide your pictures with a bit of warmth and coziness.
However, you should notice that during subsequent real estate photo editing, these pictures need light temperature correction.
It will offer you a comfortable temperature to operate with the lights off, but such pictures will look very cold.
Real Estate Photography Equipment
The useful real estate photography equipment are…
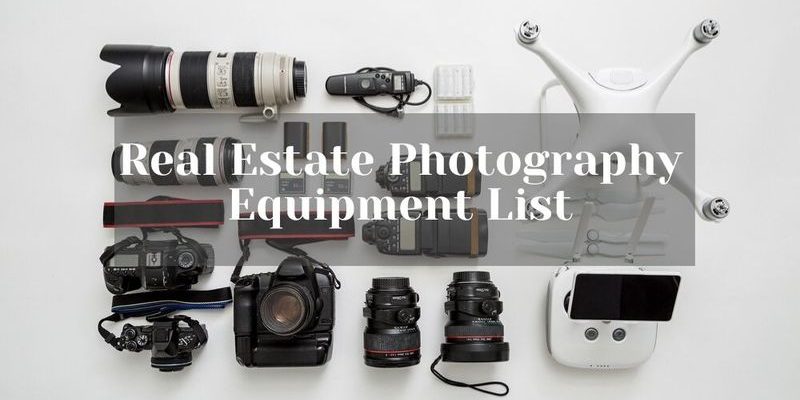
Use Full Frame Camera
A full-frame camera will be perfect for taking a good shot. The full-frame camera will be helpful for real estate photographers. The truth is that a cropped sensor camera is not able to handle this function perfectly with a lot of light and full-frame cameras.
Then choose any camera with interchangeable lenses if you have no opportunity to buy such a tool. It allows you to make everything, even the easiest and more professional camera body.
You can’t use a cheap camera for real estate photography. If you want to use a cheap camera, then you can’t get the best pictures. Real estate photography requires an expensive camera, but the Nikon D750 is much less costly than any other image camera.
It is an affordable and cheap camera for real estate photography. This camera’s budget for real estate photography is less than 1500$ dollars now.
Use Wide Angle lens:
You must use a wide-angle lens for real estate photography that is not set to take photographs of pro-level real estate. Quite often, they play a significant role that is even greater than a camera itself.
So a real estate photographer’s main task is to move quickly around the subject and cover the optimum area. That’s why the lens was chosen at wide angles. It will help you expand the space visually and make a feel which is more relaxed and engaging.
Flashes:
With the residential imaging toolkit, you could add external flashes. The regular flashes are usually too small. It’s not enough to take only lighting professional photos. I prefer using an external light. So, you can connect it to your camera to enhance the particular lighting and demonstration.
Using a tripod in low light:
When you want to take a picture in the nighttime, then you can realize that you can’t get a better picture. I mean, you’ll get a blurry image. Because of the poor condition of lights. For this reason, you can use a tripod. As a result, It will help you to get a better picture from before.
Polarizing Filters:
You need to verify that your special lens receives a filter that is the right size. The other side keeps in mind that it needs to be a circular polarizing filter.
I can say that you do not think about removing the filter or eliminating the filter blocks approximately 50 to 75% of your light.
Even though I love the filters of Hoya as the colors seem to be much more loyal. Because before buying HOYA filters, I researched them. That filters by BNH are enjoyable as well.
Brackets Umbrella
Keep in mind, The more you put on the umbrella, the less light it touches. Notice the shadow of a bounce. It may have a lining that can be silver or gold. The best choice is to use a white lining.
By adjusting an umbrella’s location, you can affect the flash’s power.
Real Estate Photography Techniques
Using technology, can bring comfort, save potential time and money. Now, I am going to describe some techniques to ease your real estate photography.
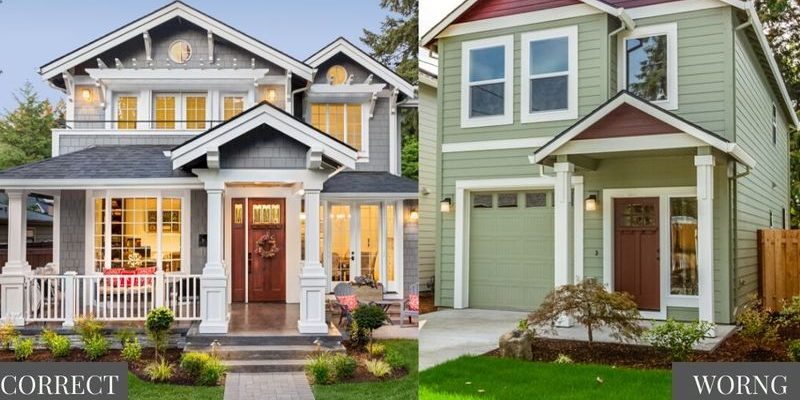
Step 1: Find Creative Angels of Shooting
Keep in mind that do not take pictures of the room’s interior from the door. These pictures look rather insignificant. Look to find exceptional, more interesting angles. In the real estate photography business, this is very necessary
For instance, from such a doorway, you can shoot a room. Therefore you can grab the full amount of space and view the entire room. So make sure you do not lose the details.
When you see distracting objects such as photographs or some pieces of furniture, eliminate them to create a clear image from the picture.
Step 2: Use Props
Place in a flower bouquet and fruit bowl. Without the bank cracking, the prop brings life and style.
Choose one leaf, every green apple, or every red rose.
Remove any kind of unwanted elements for the best possible performance.
Clear all kitchen appliances from the tops of the table. Mixers, Toasters, spices, and shakers should be withdrawn. The cuisine will look best if it is cluttered and free.
Step 3: Set Proper Camera Settings
Photography for residential use requires proper lighting. You should use these camera settings to ensure the high quality of your images if you don’t have any special lighting equipment or know how to use it.
You need to use aperture ethics from f/7.1 to f/9. Nonetheless, you can seek a shallow depth of field when highlighting some objects.
The shutter speed should be 1/60 to 1/2 a second. The amount of light in the room depends on this value.
Step 4: Take Care of ISO Settings
Increasing the ISO value at higher shutter speeds. Remember that extra high ISO will make your images more visual noise. Try setting ISO under 400. Try to learn about your camera, experiment, and find the right value that will not impact your photos’ quality.
Step 5: Fix The Color Temperature
It’s not just about the skills and equipment that the outcomes will be based on. Usually, image quality depends on several factors. For instance, bad weather, incorrect shadows, illumination, or unnecessary confusion might be affected.
It is necessary to change the temperature of the light. You can get rid of a massive amount of problems with this skill.
For instance, artificial lighting can sometimes offer an undesirable yellow tint in the bathroom.
Now, in order to remove this deficiency, the yellow slider only needs to be moved until the yellow shade becomes a clear white light.
By the way, such an issue also happens when you combine light with LED, CFL, and halogen lamps. For instance, by using different light sources at once.
Step 6: Lighting for exterior
In real estate photography, you can experiment with various lighting on location and take a mixed lighting image. But you have to ensure that your outer side of the house images is filled with daylight. When you edit your pictures, then don’t extract all shadows. Try to change curtains for images to correct the contrast.
Knowing the location of the property on google maps and seeing what the house faces are, it’s easy to find its location. This gives you an overview of when a photo session is better. Don’t take a picture in bright windows; then, the camera is cut on display.
Step 7: Lighting for interiors
If you want to remove the blurry images, then you need to shoot photos only from a standing position. Focus on every detail in interiors like flowers, tables, animals, and bookshelf, etc. And also fix the light.
You need to take two lenses when you shoot the interior side of the client’s residence. Two types of lenses are – A wide-angle lens, which is 24mm, and the other one is a 50mm lens for specific aspects in the room.
LED panels and some other reflectors can create natural light that looks magical. But you can also use additional lights, a flash, a strobe, and an HDR effect.
Additionally, If you want to get a bootylicious look, then I can recommend you to use a small (f/5.6- f/11)aperture.
Step 8: Correct Lens Distortion
Distortion is a common issue in real estate photography. So, wide-angle lenses are used to do this. Two types of distortions are:
Perspective distortions: It’s a wide-angle lens feature. The truth is that the view looks distorted as it varies from the general understanding of the human eyes and the brain.
Barrel distortion: While you use the ultra-wide zoom, then this deficiency will happen. As a result, Instead of straight lines, the photographer has curved lines at the edge of the image.
To remove these defects, you need to use photo editing tools properly.
Average Real Estate Photography Price:
A real estate photography job is a very profitable job in the market, according to the “United States Department of Labor Report.” So if you are interested in doing these types of jobs, then you can make good money.
Every year The fresher real estate photographers can earn $40,000, and high-quality real estate photographers make between $40,000-$90,000. If you want to obtain more, you can give lectures and materials on real estate photography, such as online or printed books. You can make 3d tours and real estate video also and it brings me around $6000 per month.
FAQs
Daytime is generally the sweet spot — natural light brings out saturated colors and makes spaces feel open and inviting. Many photographers also love shooting just before sunset for that warm, golden tone. One thing to avoid is shooting on overcast days, since cloudy skies tend to flatten the image and dull the overall quality.
Absolutely. Walking through the property beforehand lets you spot problem areas, plan your angles, and figure out what needs to be cleaned up or rearranged. Take a few test shots of each room during your walkthrough — details that seem minor in person can become distracting once you’re looking at them on a screen.
A full-frame camera is the preferred choice because it handles varied lighting conditions much better than a cropped sensor. The Nikon D750 is a solid, relatively affordable option at under $1,500. Pair it with a wide-angle lens to capture the full sense of space in each room — this matters more than the camera body itself in many cases.
Set your aperture between f/7.1 and f/9 for sharp, well-defined images. Keep your shutter speed somewhere between 1/60 and 1/2 a second depending on available light. For ISO, stay under 400 whenever possible — pushing it higher introduces unwanted grain and makes images look less polished.
Turn them on. Lights add warmth and make a space feel lived-in and cozy, which is exactly what buyers respond to. Just keep in mind that mixed light sources — LED, halogen, CFL all running at once — can create color temperature issues that you’ll need to correct during editing.
Wide-angle lenses, while essential for capturing space, come with two common distortion problems — perspective distortion and barrel distortion. The good news is both can be fixed in post-processing using photo editing software. It’s a standard part of the real estate editing workflow rather than something to stress over during the shoot itself.
Keep it simple. A fruit bowl, a small flower arrangement, or a single green plant can make a room feel fresh without looking staged. More importantly, clear away kitchen appliances, personal items, and clutter — clean surfaces photograph far better than busy ones.
Conclusion:
There are some styles and techniques that can be used for real estate photography, and you have to master all of them. Additionally, For doing real estate photography, you need to keep in mind a few things.
And the thing is: Don’t think you are photographing for yourself because you are working for your real estate photography clients; And you don’t need to take all of your gears, just take only one gear; You need to be more creative for doing photography. And remember that the angles, composition, and perspective.
Moreover, You have to be technical about exposure, color matching, HDR effect, and exposure blending; Also You need to be aware of real estate photo post-processing techniques.
You may read:
10 Best Real Estate Photo Editing Services Company
Wedding Photography Tips for Photographers 2021

Salim Ahmed is the CEO of Graphic Experts India, with over 25 years of expertise in photo editing, clipping path, image retouching, and eCommerce image editing services.