Adobe Photoshop, a premier graphic editing software, constantly innovates to improve user experience. Among their recent groundbreaking additions is the Photoshop AI Generative Fill.
Image editors will agree for sure that photo editing is a time-consuming task. Due to the rise of AI, image editing has become an effortless job. Photoshop AI is a tool that will help you save valuable time by modifying any images within a few minutes.
You won’t have to sweat using Photoshop AI. Using a tool like Generative Fill is a simple process. Type a prompt in the specified box and click Generate. The AI will create the image for you with excellent accuracy.
Photoshop AI lets you create a new image and edit or modify unappealing photos as per your needs.
Let’s dive deep to learn the challenges and opportunities of the Photoshop AI photo manipulation tool.
What is Photoshop AI Generative Fill?
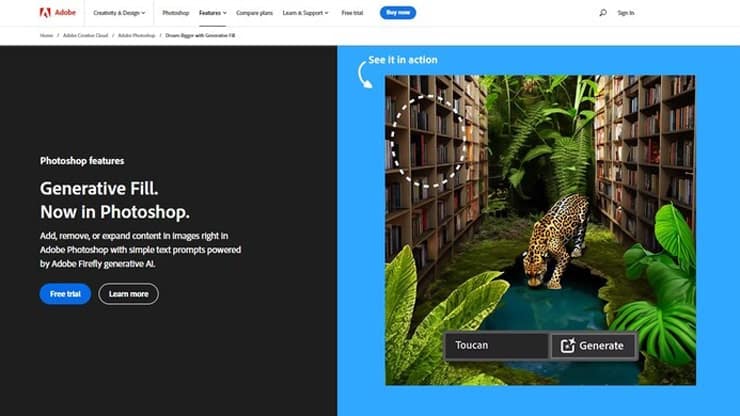
Generative Fill in Photoshop is a feature powered by Firefly, the artificial intelligence technology developed by Adobe. It allows easily making additions, deletions, or expansions to your images with straightforward text commands.
For instance, if an image has an unwanted object or part, users can select and remove that part, and the AI tool will recreate the missing area seamlessly.
One of the powerful features of Photoshop is AI Generative fill. Machine learning AI powers it. This feature enables you to do the below actions with just a few clicks
- Fill image elements
- Edit photos
- Remove unnecessary elements from an image
- Creates a part of an image
- Composite photos
You must be wondering how accurate Generative Fill is. Well, here is the most crucial part.
The AI features analyze every pixel of a photo and deliver a realistic result. You will be astonished by the accuracy of the generative AI image’s shadows, colors, perspective, and lighting.
What if the outcome doesn’t satisfy you? You can easily revert if any changes don’t meet your requirements. Each generated element will be organized into layers and completed using a layer mask.
Thus, enhancing or modifying an AI-generated image using other tools of Photoshop will be effortless.
For example, you can modify the photo by using filter effects or blending modes. More importantly, the AI works with the Photoshop keyboard shortcuts without trouble.
Can’t wait to experience the art of Artificial intelligence tools? Photoshop released the beta version of the tool. You can only use it by downloading it from Adobe Creative Cloud.
To access it, you’ll need an Adobe Creative Cloud subscription or the Adobe Firefly web app.
The pricing varies based on your tool preferences,- Photoshop as a standalone product is approximately $21 per month. If you’d like to explore capabilities before committing, they provide a 7-day free trial.
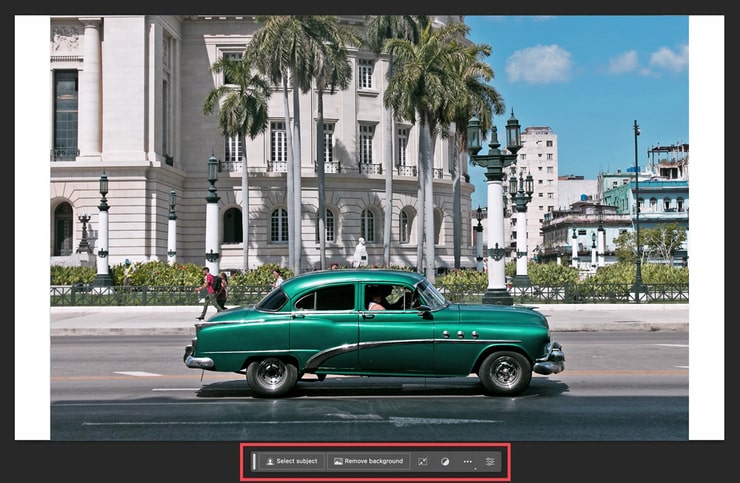
After installing the beta version of Photoshop, you can start generating an image. First, import an image or create a new document. Then, you will find the taskbar at the bottom of the image area.
The taskbar has several settings. Let’s explore the breakdown of Adobe’s generative fill feature.
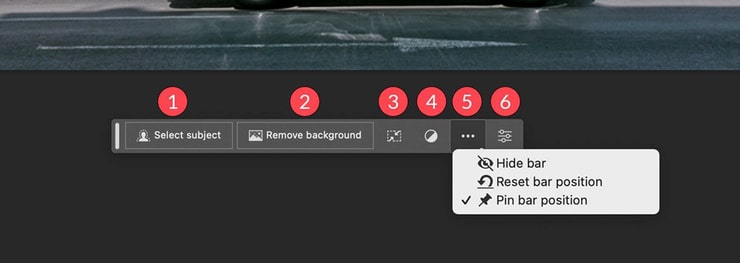
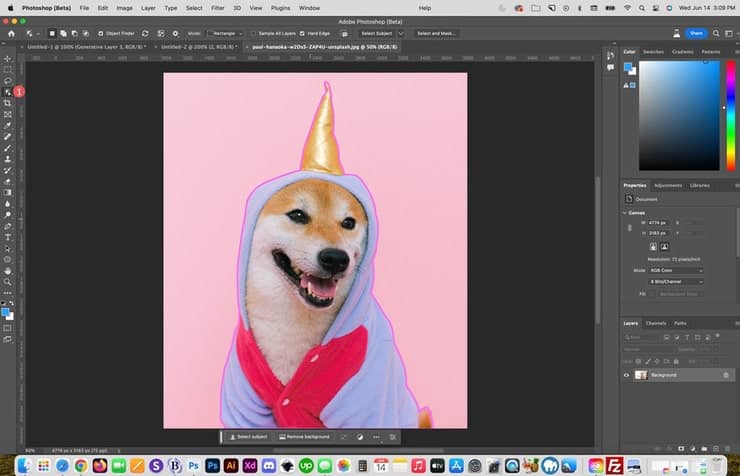
Select Subject
You can select the subject of an image using this button. It allows you to select a subject like an animal, a cat, or a person. Also, if you need to remove the background of a photo, this button comes in handy.
Background Removal
Ai Background removal is not a new concept. AI is smart enough to detect the subject of an image. Then, it deletes the background around the subject.
Image Transformation
Want to flip your photo vertically or horizontally? Transforming Images will be beneficial to flip images.
Add an Adjustment Layer
This setting has several adjustment presets. If you prefer altering the tone and color of a photo, it lets you do so. Moreover, this tool allows you to generate your adjustment layer.
Taskbar Appearance
Don’t want to show the taskbar to its current location? Happily, you can hide, how, unpin, or pin the taskbar according to your preference with the Taskbar Appearance feature.
Properties Panel
The properties panel for all generative fill layers and your image can be shown or hidden as per your preference.
If you want to select a subject in your image, use the below tools
- Subject tool
- Lasso or Marquee tool
- Magic wand tool
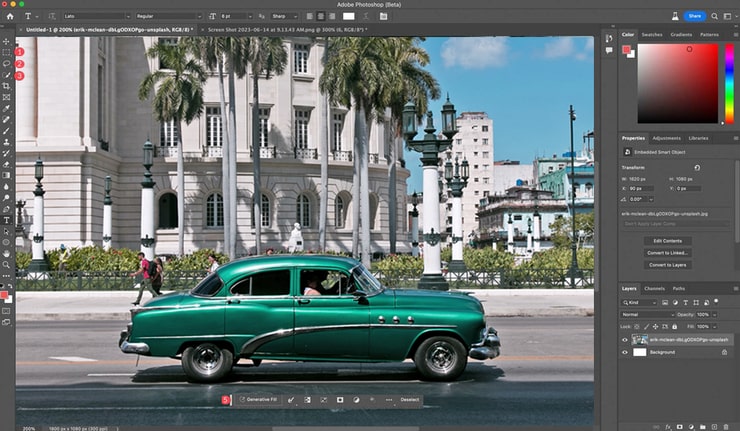
Once a subject or other elements are selected, the tools below will be available
- Generative Fill: Text prompts must be added here to create an image.
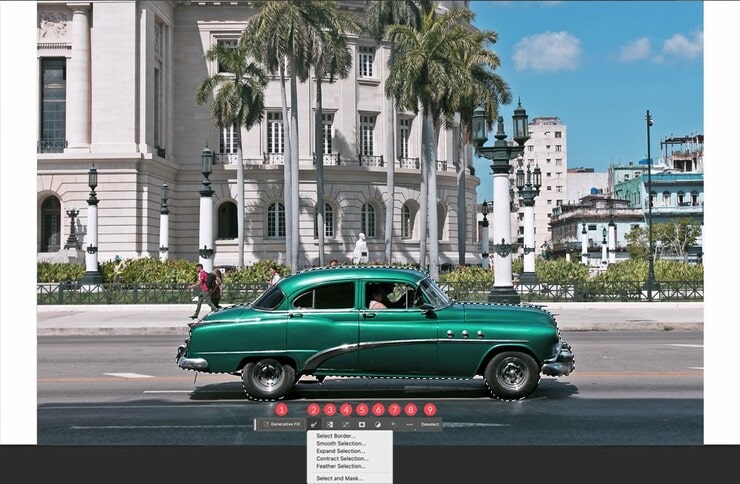
- Selection Tool: It enables you to get a better result by smoothening, feathering, contracting, expanding, or bordering.
- Invert Selection: This feature selects the outside pixels of a subject instead of the inside.
- Deselect selection
- Toolbar positioning settings
- Fill the selection with gradient or color
- Mask selection
- Transform selection
- Create a new adjustment layer
Learn How to Use Adobe Photoshop AI Generative Tools
You can use Photoshop’s AI tool generative fill in multiple ways. This feature is good enough to create a fantastic image from scratch.
Whether removing the background, extending the canvas size of your existing image, or creating a realistic object in the photo, this feature will let you do all.
Designers can save valuable time editing unattractive and low-quality images with the help of Photoshop AI.
Follow the below steps to use this incredible feature.
01: Launch the Photoshop Beta app.
02: Select the area of your photo that you want to modify.
03: Choose and click Generative Fill.
04: Now, here is the central part.
Type a description of what you want generated in the chosen area. Let’s say you want to see a cityscape. So, type “a cityscape.”
Remember, you can type whatever you want, and AI will give you a polished result every time.
05: Photoshop will share many options for you. Choose the one that meets your requirements.
The best thing about generative fill is its customizable settings. It means the features help you get optimal performance.
Now, let’s look at some examples.
How to Extend Image Using Generative AI in Photoshop i
We will use the earlier photo to fill out the canvas’s white area. Here is the step-by-step process of generative fill and generative expand.
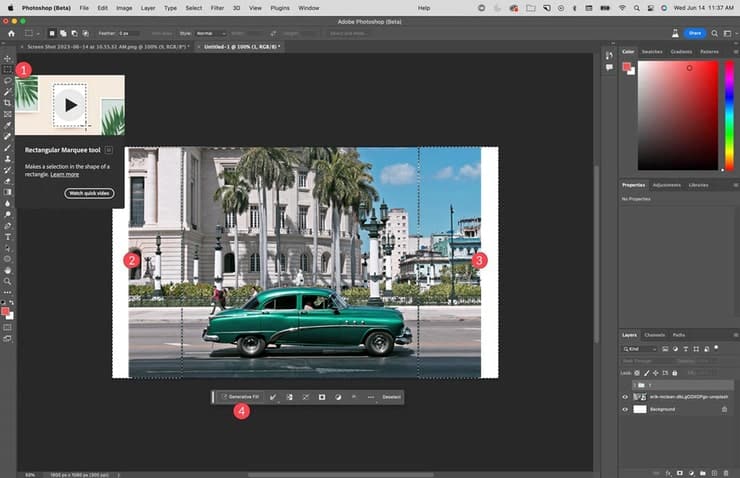
01: Form a selection around our canvas’s corners by selecting the rectangular marquee tool.
02: Make multiple selections by holding the Shift key.
03: Now, slowly drag the selection over the white areas of the photo.
04: Ensure you include a few pixels of the actual photo to extend the selection.
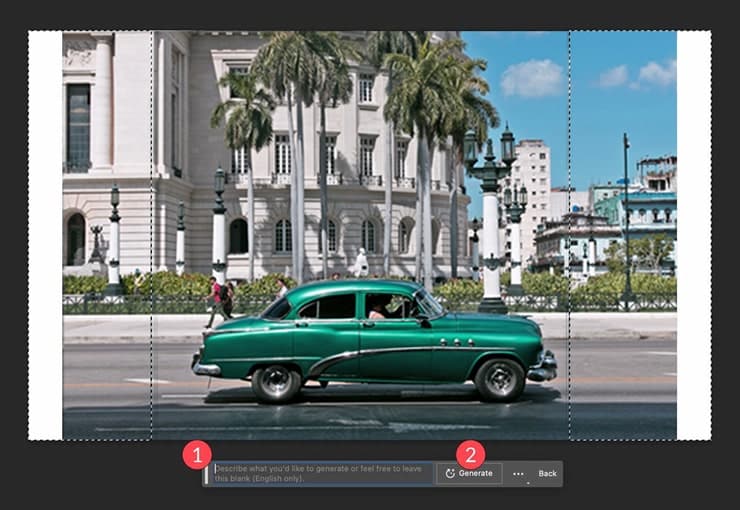
05: Right-click the Generative fill button.
06: A text prompt input box will appear at the bottom of the image. For now, avoid entering any text in the box. The image pixel will be examined by the AI and extended throughout the chosen area. After that, click the Generate button.
The original image will be changed to below. The AI will fill the blank areas of our canvas.
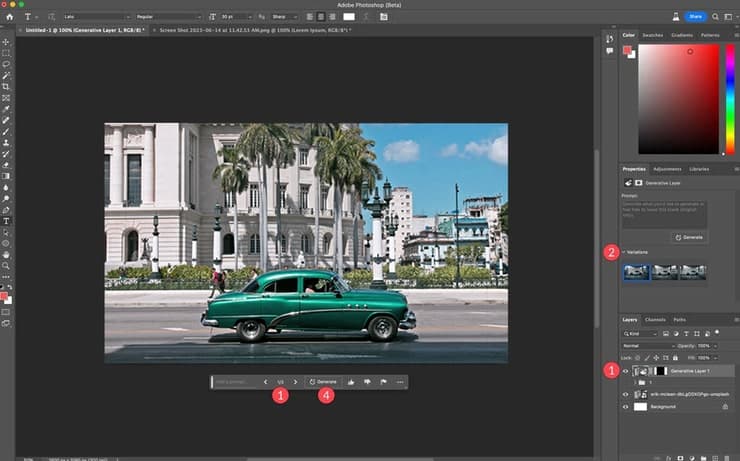
Generative Fill will give 3 versions of the generated image. You will find it in the Generative layer properties.
As stated, Photoshop creates a new layer and doesn’t change anything from the original image. So, if the outcome doesn’t satisfy you, select the generate button, and you will get 3 new versions.
Additionally, repeating the process is also easy. If you want to delete any versions, delete it. Such an act will also help you lower the file size.
How to Generate Background Using Generative Fill in Photoshop
So, we will be using the AI Generative Fill to create a background.
For this, the AI will remove the background and add a new one. We will use an inverted selection tool for the process.
Follow the below steps.
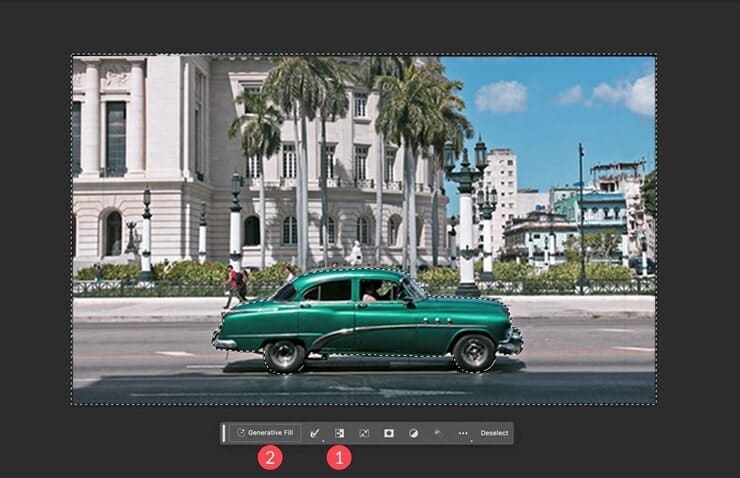
Step 01: First, select the subject and choose the invert selection tool. Then, click the Fill button.
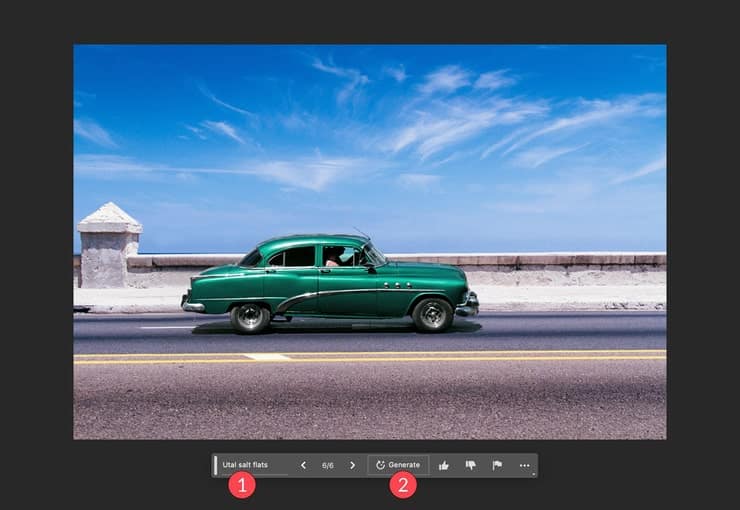
Step 02: Now, start typing the prompts in the Fill area. You can type whatever you want. For example, type Utah Salt Flats. Then, choose the Generative button.
You will get the below result.
How to Generate Realistic Elements Using Generative AI
Want to add a vibe to the image?
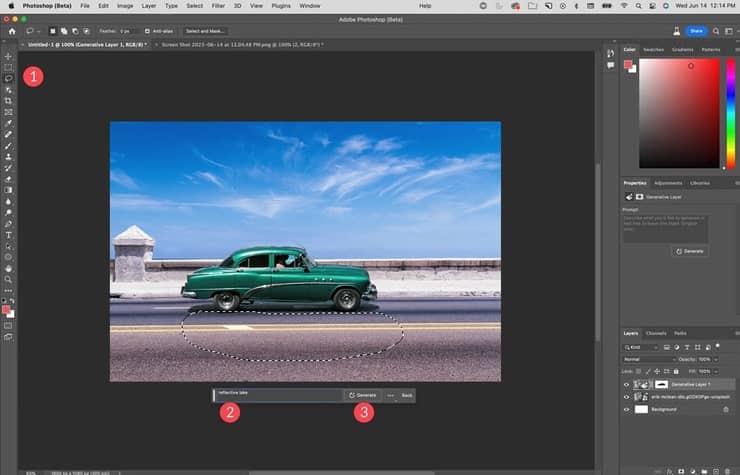
Well, let’s add a lake to the image. We will use the Lasso tool in this process.
Step 01: Draw a selection under the car with the help of the Lasso tool. While doing so, avoid selecting any section of the car. Otherwise, Photoshop will override any chosen pixels while following the prompt written in the box.
Step 02: Now, type “reflective lake” in the prompt box. Next, select “Generate.”
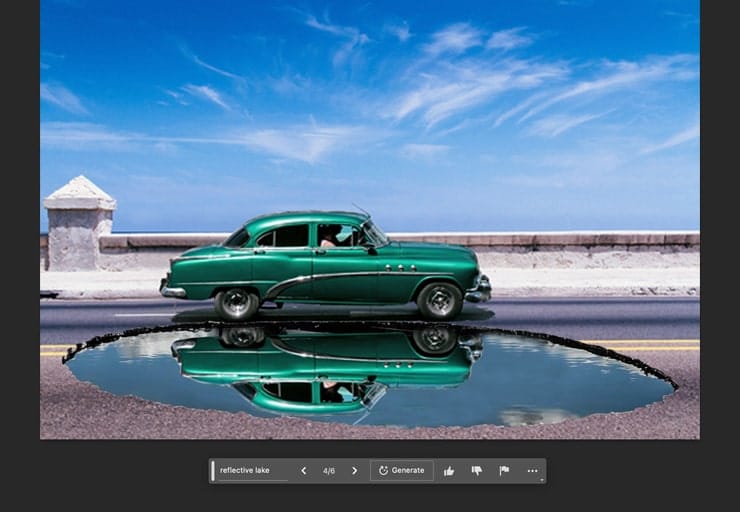
Step 03: It will generate a lake beneath the car. Also, there will be a reflection of the car in the lake.
How to Remove Elements with Photoshop Generative Fill
Sometimes, we have unwanted elements in an image. Earlier, designers tended to use several hours to remove those elements and give an appealing look to the photo.
Happily, Photoshop’s AI makes the task easier and saves time.
Are you thinking about the pixels surrounding the deleted elements?
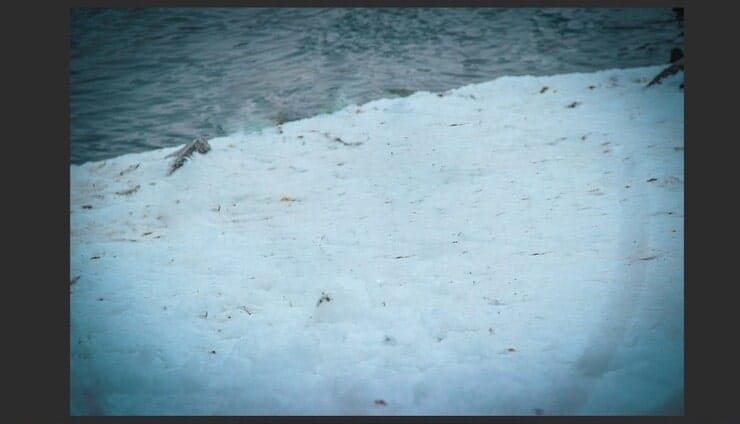
As said, AI matches the pixel of the entire image accurately. Thus, you get an astonishing image all the time. More importantly, the generated image becomes so seamless that you can barely tell the difference.
In this process, we will use an image of a bird.
Let’s see how we can do this.
Step 01: Create a selection around the bird using the Lasso tool.
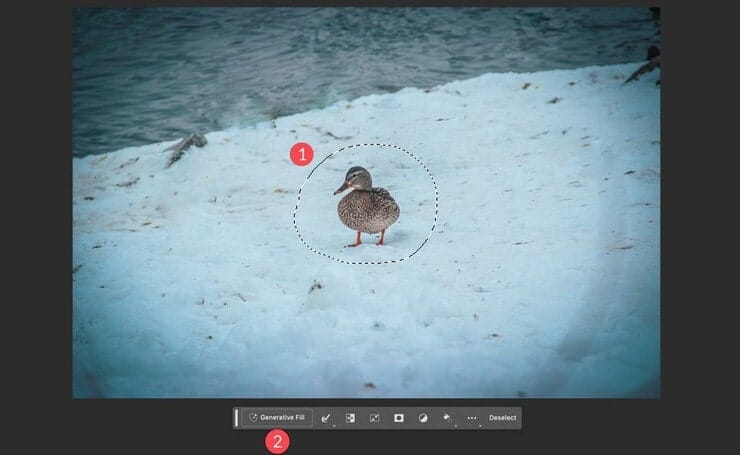
Step 02: Next, choose Generative Fill. After that, select Generate. It will replace what is in the selected areas using the surrounding pixels of the photo.
Make sure the text prompt box is empty. However, type the prompt in the box if you want to add something in the image instead of a bird. It will amazingly replace the bird and leave an outstanding result.
How to Generate Unique Composite Photo Using AI Tool
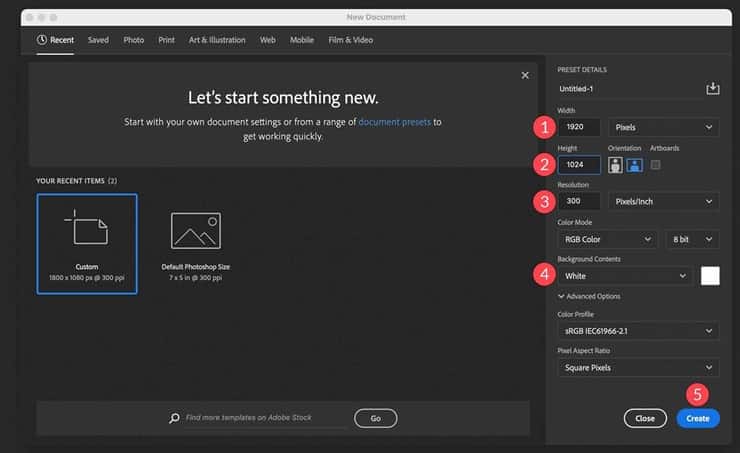
You will love to know that Generative Fill can also generate a new image. While creating a new photo, one thing to keep in mind is AI is a master at generating an image lesser than 1024 pixels (w X h).
So, the canvas must be no larger than the recommended pixels.
Let’s start by following the below steps.
Step 01: Begin with a blank canvas of wide: 1920 pixels and tall: 1024 pixels. Then, set the resolution to 300 pixels. The color mode should be RGB; choose white as the background color.
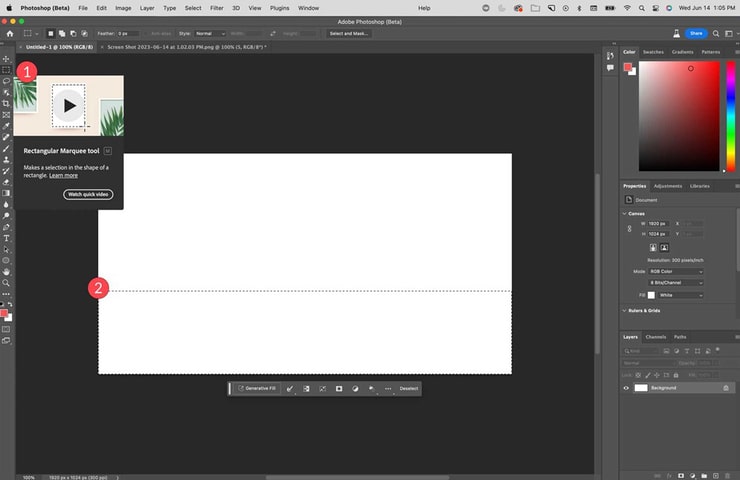
Step 02: Select the rectangular marquee tool. Make a rectangular selection around 1/3 of the photo using the tool.
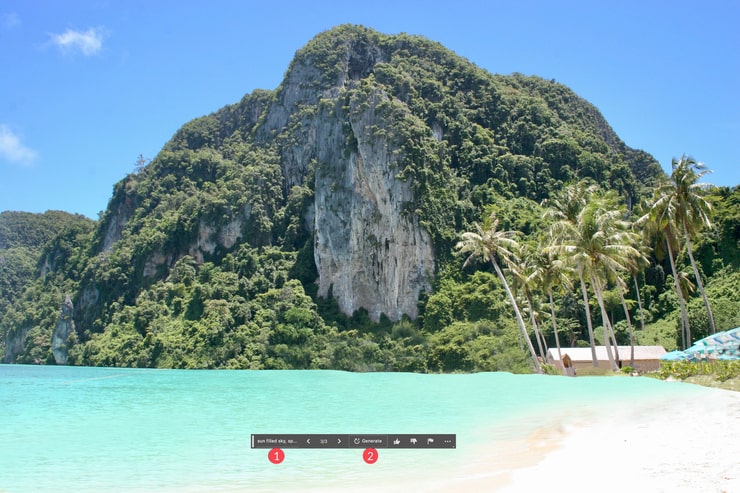
Step 03: Now, use the Generative Fill and type “Blue Sea Beach.” Next, click Generate.

Step 04: Again, make a selection around the image’s upper areas. Select Generative Fill and type “sunny hill with coconut trees.” After that, select Generate to create the section.
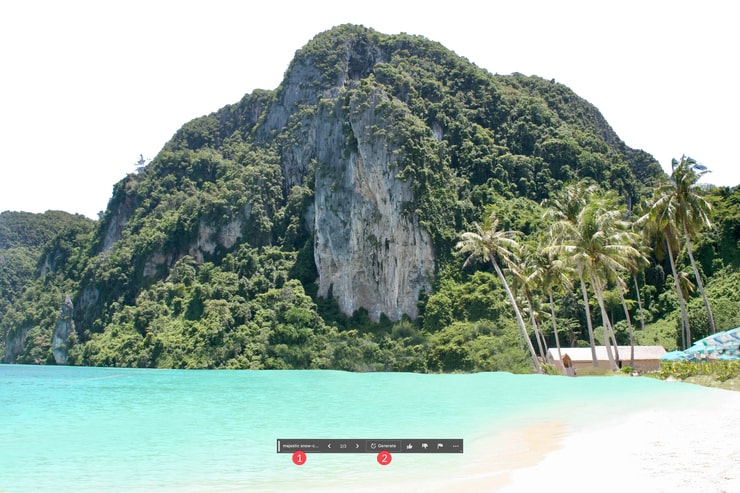
Step 05: Next, select around the image’s upper areas. Then, select Generate to create the section.
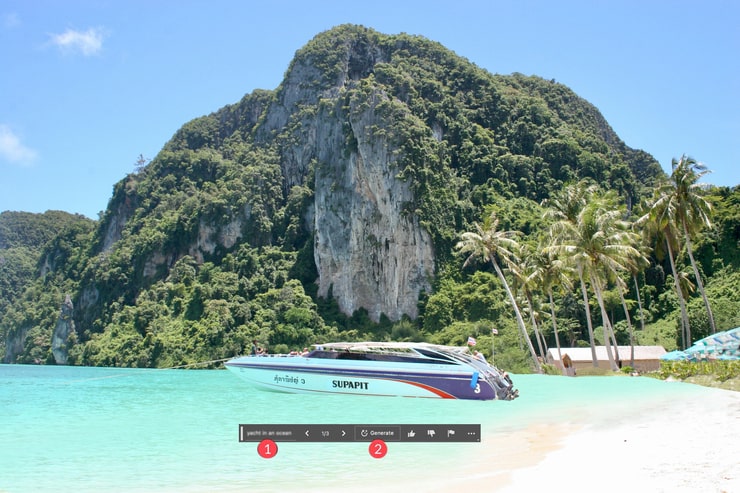
Step 06: We already created a background using AI. Now, let’s add some vibe to the image. Use the Lasso Tool and make a selection on the water. Then select the Generative Tool, write” a boat on the lake,” and choose Generate.
Step 07. Finally, we will add a man resting on the camping chair. We will use the Marquee tool in this section. Make a selection over the seashore and type “men and women in the beach walking” on the prompt box. Click Generate.

Tips & Tricks to Access Generative AI in Photoshop Tools
You can get better results every time by following a few tips and tricks. Remember the below point when generating images or removing backgrounds with new generative AI.
- Keep the prompt box empty if you want similar looks around the selection. This way, AI will know that you don’t want to add or remove anything.

- Be creative when making the selection. For example, select a smaller part if you want to add a small object while a bigger part for the bigger object.
- A better result is confirmed with descriptive nouns and adjectives. The text prompts shouldn’t contain words like make, alter, or create.
- Photoshop object selection tool will be beneficial to use.
Does Generative Fill Feature Have Limitations?
Although you can create or edit many images with generative AI fill, it has a few limitations.
- The tool is still in beta. It means you may get different polished results than other AI image-generating tools.
- The tool has a learning curve. You will need a few days to familiarize yourself with the tool’s functionality. However, practice will help you hone your skills in using Photoshop’s generative fill.
FAQs
The AI Generative Fill is a new feature in the Photoshop app that uses artificial intelligence to fill in a picture with new generative content automatically. Adobe Firefly Generative AI powers it.
To access the Generative Fill in Photoshop, you need to have the latest version of Photoshop installed. It is available in the Adobe Firefly AI.
Yes, you need a Photoshop subscription or Firefly to access the Generative Fill. It is not available on the web or in other free versions.
No, Generative Fill is only available in the Beta app within Photoshop. The older version may not support the generative AI tool.
Yes, Generative AI is efficient enough to create complex images. An updated AI algorithm is used in this tool. So, analyzing and creating a complex photo will be a simple task. However, the outcome depends on the prompt.
Yes, Generative AI will surely meet the requirements of commercial projects.
You can try new AI features for free for 7 days. You must pay a monthly fee if you want to use Generative Fill regularly after a 7-day trial.
You can use the content created with this AI tool for commercial purposes. However, please check the licensing terms and conditions of Photoshop for more information.
Final Words
So, now you know how to access and manipulate images with Adobe Photoshop ai Generative Fill. You can now create impressive images and edit photos as per your requirements with the help of creative generative AI models.
Even in its beta stage, Photoshop AI stands as an impressive tool. Through its remarkable AI-powered generative fill feature, images can be transformed in ways limited only by your imagination.
While it effectively adds elements and erases backgrounds, it still has room for growth. Notably, there are constraints such as a maximum image size of 1024px, restrictions on commercial image usage, etc. Undoubtedly, as technology progresses, Adobe will continue refining the software.
You may read:

Salim Ahmed is the CEO of Graphic Experts India, with over 25 years of expertise in photo editing, clipping path, image retouching, and eCommerce image editing services.