T-shirt photography has evolved along with state of the art in technology. They boast sophisticated tools that produce sharp photos ideal for business owners in the e-commerce sector. Viewers must understand the photographs.
T-shirt photography may seem easy, but getting a good shot requires practice and skill. High-quality images are essential to many buyers. They often end up deciding between two similar products. It’s necessary to be familiar with the fundamentals of this kind of shoot.
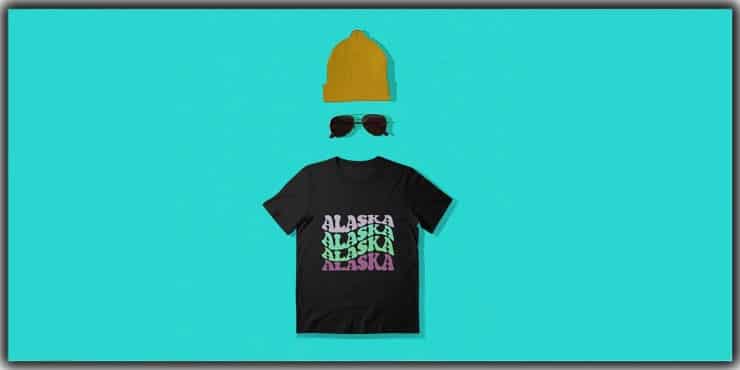
It’s time to put your best flat lay photo, thus foot forward and show off your clothing. Follow these incredible T-Shirt Photography Ideas to boost your creativity.
Best T-Shirt Photography Ideas and Tips
T-Shirt Photography Ideas and Tips are essential to a photography shirt, tee, or any clothing. And you should carry out the necessary steps correctly. It would help if you didn’t worry about dropping a fortune on this.
Very easy to understand and implement. To achieve your desired outcomes, you must master every T-Shirt Photography Tips.
If you want to take photographs of clothing in natural light, you can use the guidelines provided here to make stunning Photography t-shirt or t-shirt designs.
Conceptualize the Photo Shoot
Conceptualizing the picture shoot is a vital phase in apparel photography. The first step is to figure out why you must document the ensemble with photographs. Is this photoshoot for a lifestyle blog, a social media feed, or an online store?
You can refine your needs after you know the target of the shoot. As an example, a white tee background is mandatory for online shopping. Images for social media or a personal blog may benefit from props.
Next, plan out how the garments will be shot. When choosing props or a backdrop, please consider their design, color, and texture. Write down your thoughts if you need to draw them out.
Select a Background
Background depends on where you wish to display the photographs. Lifestyle images typically benefit from a more natural backdrop, whereas e-commerce photos need a basic background.
When it comes to online shopping, a white background is typically the norm. The primary advantage is that it makes all the listings from various vendors look the same. However, its simple form draws less attention, allowing the clothes to take center stage.
No need to stress if your studio doesn’t have a white background. DIY photography backgrounds are plentiful, including using a wall or even a sheet.
You can obtain a seamless paper backdrop if that’s what you want. Craft stores typically sell them for under $10. Then you can tape it to a wall as a photo background.
The background matters less when it comes to lifestyle. You can take flay lay by standing on the floor or a table. Any choice you make should complement the rest of your ensemble.
Avoid choosing a stone wall that is too rustic if you wear trendy clothing.
It’s also essential that your background colors don’t compete with the garments. Look for possibilities on a color palette that suits the shades of the clothing.
Prepare the T-shirt
In product photography, it is crucial to focus on the finer points. Make sure everyone is wearing their best possible ensembles before snapping photos. Normal wear and tear on clothing include creases.
It can’t be avoided; proper caring can conceal. The last thing anyone doesn’t want to see is a rumpled T-shirt.
Examine the fabric thoroughly from top to bottom to find any creases or other imperfections. Initiate steaming at the sleeve ends, neckline, and label. Start from the back and work to the front, ironing out the creases until none are left.
A photography T-shirt is not some mystical art. If you want the finest outcomes, you must put in some effort. Some photographers mistakenly believe that post-processing may fix the streaming issue. You may find that editing is more complicated than you expected.
T-shirt Family Portrait

One way to make a family portrait more interesting is to have everyone wear the same color T-shirt. That could mean everyone is wearing shirts of the same hue, or it could mean they’re all wearing shirts with the same pattern or style.
The space should be a cozy studio with high ceilings, hardwood floors, and lots of light. Everything you need to realize your biggest T-shirt photography dreams is here, from decorations to lighting to professional cameras.
T-shirt Photoshoot with Green Screen
There are no limits to the possible backgrounds when using a green screen. If you use a green screen, you won’t have to settle on just one setting. The alternative is to have some different settings for your photographs.
The model may wear several T-shirts if that’s what you’re after. Photos taken using a green screen allow you to choose the background to match the design of the T-shirt after the fact.
Choose a Casual Outfit for Model
Choose a modest, understated outfit for the model with the T-shirt so it doesn’t get lost among all the other elements.
Just like T-shirts, the other items of clothing you provide your model should be relaxed and easygoing. For instance, a pair of jeans would be perfect.
Natural Makeup for the Model
Since you don’t want the model’s makeup to compete with the focus on the product, keep it natural and subtle.
Put the T-Shirt on Mannequin or Model
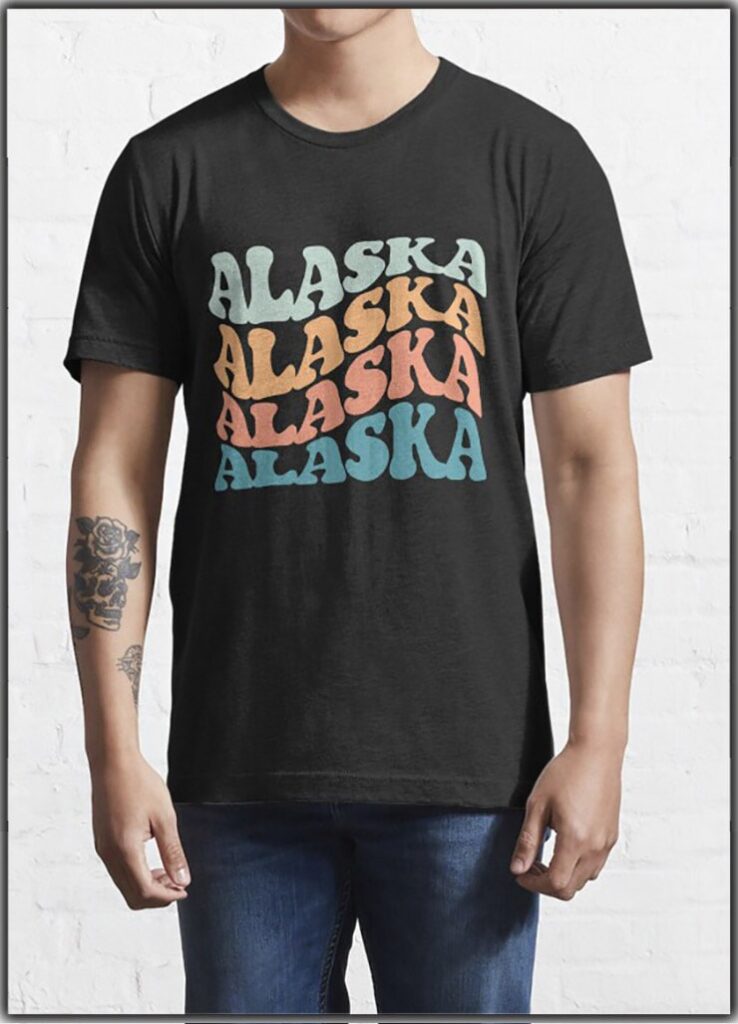
After ironing out the creases, you should give the product a full styling for a memorable presentation. Appealing to the senses is essential if you want to attract the attention of potential buyers.
Mannequins and “ghost mannequin” photographic techniques are useful alternatives to real models. They don’t cost much and are easy to deal with.
If you can afford to employ a model, you should. They can strike various positions, so you have many options.
In addition, you will have access to high-quality samples of lifestyle shooting of your apparel products for use on social media and your e-commerce site.
3D Shoot
The consumer can get an accurate sense of the garment’s fit and quality for 3D imaging. Images in this 3D format are more accurate representations of the product’s actual size, shape, and configuration.
This may appear impossible, but with the right tools, it’s pretty doable. Picking the right size is important, whether using it to hold a real person or a dummy.
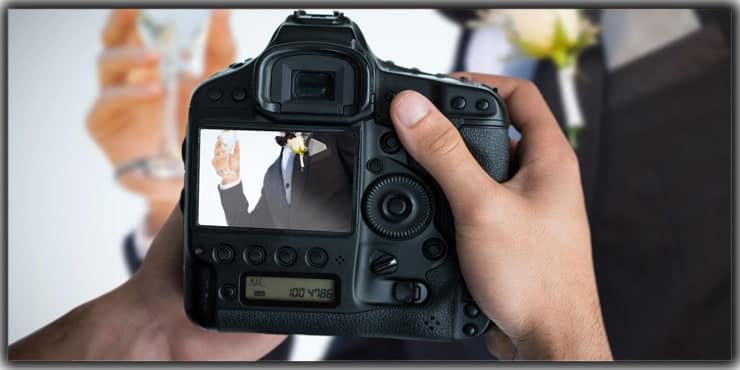
Time for The Camera
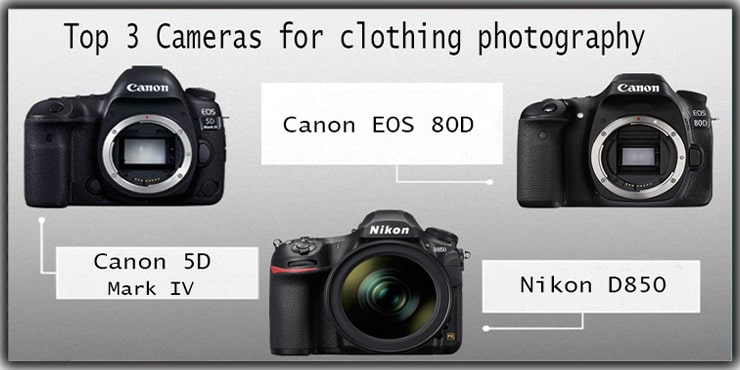
The camera is a crucial kit for taking pictures of your products. One of the most damaging myths is that you need the most advanced camera to capture good clothing shots.
The use of the highest-quality camera equipment is optional. Suitable lenses and equipment are necessary for producing professional-quality photographs.
Using the wrong camera will make your fashion photos look amateurish. Due to the interconnectivity of DSLRs with lighting, it is much easier to take amazing photos of apparel.
Use Lenses
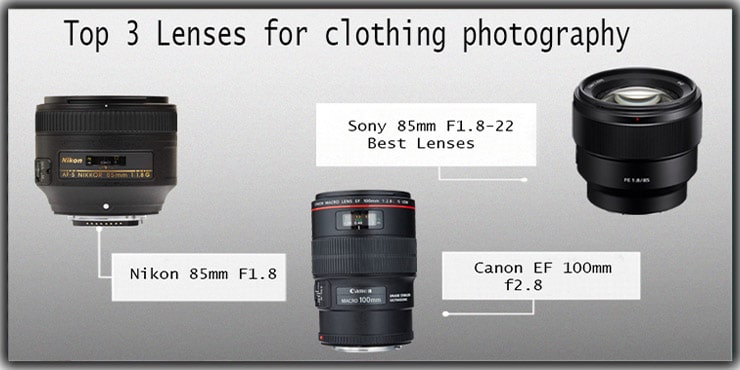
You can change the image’s perspective by using different lenses. Avoid shooting with lens lengths under 35mm to avoid the distortion effect. It gives the impression that the clothing is roomier than it is.
Focus on lenses having a focal length of more than 50mm. Don’t use a lens with a wide field of view. With this method, you can more accurately record the size of your goods. Extend the zoom to its maximum length of 55 millimeters.
You might have to back up to get everything in the picture, but the garments won’t be stretched out of shape.
It’s also possible to purchase a specialized portrait lens, like an 85mm or 135mm. In addition to correcting for distortion, they lend an air of slenderness to one’s attire.
Adjust the Settings of the Camera
You need to follow these steps to push your photography to the next level.
It would help if you always photographed in manual mode to ensure optimal camera settings. You’ll have complete command over your camera’s settings with this.
Our first step is the aperture. To ensure that the background and the clothing are crisp, use a small f-stop, such as f/8 or f/11. Decide on a small number for your aperture, say f/4 or f/5.6. Achieving an aperture of f/1.8 or f/2 may cause some blurring of the clothing.
Whenever possible, use the raw file format instead of JPEG. If you shoot in raw format, you’ll have more leeway to restore lost highlights and lighten up shadows in post-production.
Last but not least, to minimize the noise in your photographs, always shoot at ISO 100. The grain in a shot becomes more evident as the ISO value increases. Changing the shutter speed is the best option when there is insufficient light.
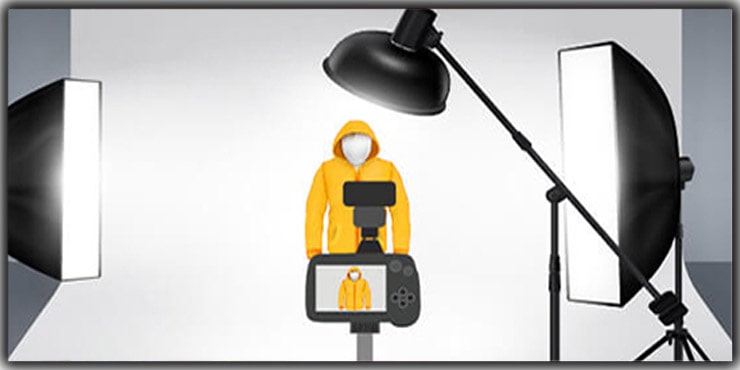
Ensure Sufficient Lighting
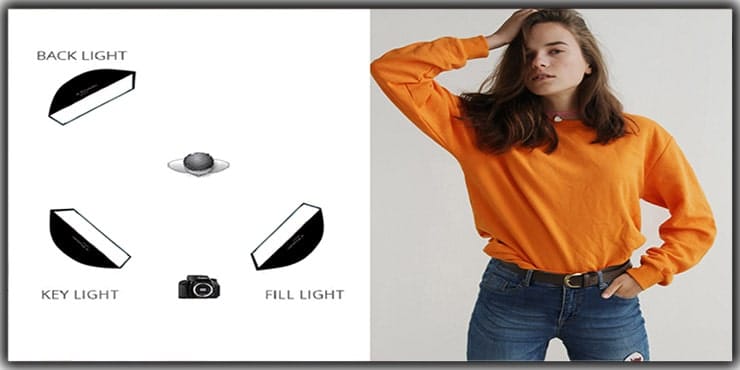
It’s crucial to shoot only the highest quality photographs when advertising products. You can use both natural window light and artificial lighting in a studio. However, this will depend on the space’s orientation.
To soften the intensity of the work light, hang a white sheet about a meter from where you’ll be doing the work. Hold your do-it-yourself apparatus at a 45-degree angle to the T-shirt to get uniform lighting.
Consider purchasing a little softbox if you find yourself with a little bit of extra cash. You may expect to pay at least USD 50 for one. It’s not inexpensive, but it’s well worth the cost. Mainly if fashion photography is something, you intend to pursue.
Tripod
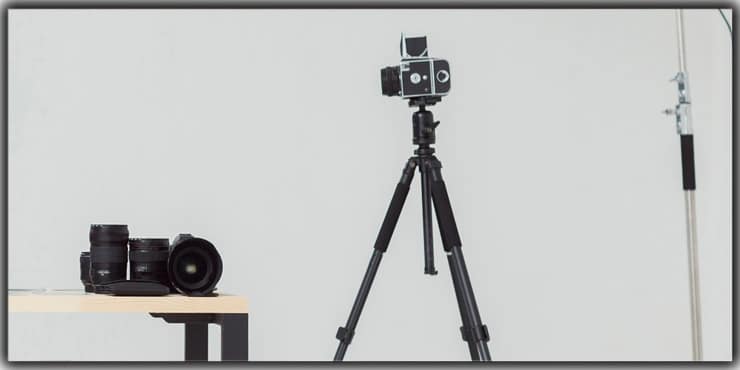
The quality of your T-shirt photographs will immediately improve by using a tripod. In terms of fashion photography, it ensures uniformity.
Unfortunately, hand-held camera shots rarely turn out sharp. Get the most excellent tripod you can afford and get shooting.
Go for the Shoot!
Your camera, background, and lighting should be appropriately set, and now you can begin arranging the apparel. Outfit shots can be taken in a variety of ways.
Think about the angle from which you’ll be shooting. The camera must be in a chest area to get the best shot of a t-shirt.
People are looking for anything that will strike their eye while they shop for clothes online. Pictures with a complex or novel element attract more attention than others.
The job of a fashion photographer is to highlight these kinds of unusual and intricate elements. They need to make them appear seamless and organic.
You can snap pictures with the clothes folded or spread out. You may make your shot look more realistic by including some objects. Once everything is in place, turn the camera to point 90 degrees downward.
You should take pictures from various perspectives to best display the garment’s finer points. Snap some shots from all angles.
A ghost mannequin is an alternative form. The key difference is that it gives the illusion that a human is wearing a t-shirt. Take a picture of someone modeling the t-shirt first. Step two involves flipping the shirt inside out, so the collar faces out for a photo.
Next, you open Photoshop and import the files. The wearer’s limbs should be removed using the pen tool in the first picture. Paste the image of the back of the garment behind the front, and you’re done!
Final Editing
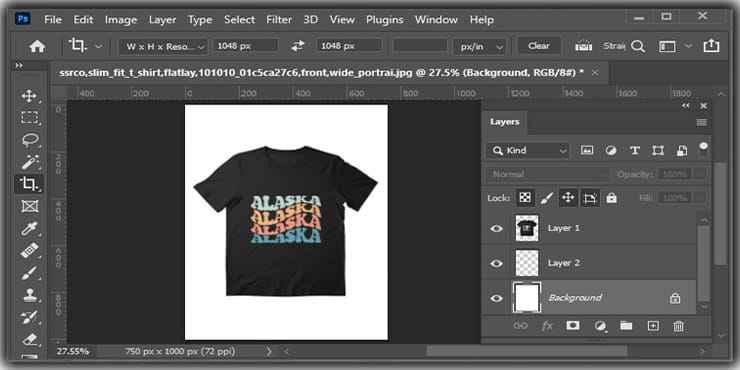
Remember to do post-shoot editing on your photos. You’ll need to do a lot of post-processing work, such as adjusting the colors, adjusting the white balance, ghost mannequin, and enhancing the backdrop.
Avoid the hassle of learning how to utilize photo editing software. Better you hire a professional service. If you want to do it yourself, you can. There are many things you have to fix.
Background removal, retouching, shadow creation, etc. If you are familiar with this, then do it yourself. But if you are not, then take the help of the experts.
FAQs
Try to click high-quality photos and focus on the details. Proper camera setup and lighting are vital to get the best result on T-Shirts.
Both types of formats can be used. But the PNG file is preferable to JPEG.
Try to keep the resolution high. The ideal mark is 300 ppi.
You can easily customize your T-Shirt by designing. If you can illustrate your thoughts, then you can easily print them. You need to spend some money on that.
Final Word
Now is the time to rummage through your clothes and put your newfound knowledge into practice. You’ll be able to tell the difference in the caliber of your photographs once you get the swing of it.
Clothing photography requires a high level of experience despite its apparent simplicity at first glance. Your main goal should be to follow the procedure precisely and produce high-quality pictures.
So, explore and experiment with these T-shirt photography ideas in your next shoot as funny photography.
You may read:
- 52 Best Couple Poses for Portrait Photography
- Difference Between Glamour and Fashion Photography
- 15 Types of Lighting Photography
- Mastering Amazon Photo Editing – Tips & Tricks for Beginners

Salim Ahmed is the CEO of Graphic Experts India, with over 25 years of expertise in photo editing, clipping path, image retouching, and eCommerce image editing services.