Photoshop’s Content Aware Fill is a remarkable tool for enhancing photos. It is similar to the spot healing brush tool, clone stamp tool, move tool, or patch tool. But they have differences.
While Spot Healing tackles minor blemishes, Content-Aware Fill excels at removing substantial objects. Unlike Patch Tool’s pixel replacement, Content-Aware Fill offers precision with AI.
You can use Content-Aware Fill for different scenarios, such as in photos with loved ones where people are standing in the sunset or wildlife photos.
In this comprehensive tutorial, I will guide you on how to use Content Aware Fill Photoshop. Make these photo-ruining subjects disappear, just like magic!
What is Content-Aware Fill?
Whether removing or moving an object, Adobe Photoshop features many tools to let you do so.
All you need to do is use the content-aware fill tool. You can use it to move or remove unwanted objects from your image and give an appealing look. Moreover, the pixels around the object remain the same after editing. As a result, the edited image looks original.
Content-Aware Fill Photoshop uses an advanced algorithm. Moreover, the algorithm becomes more powerful with every Photoshop version.
Remember, some tools are available only in the newest versions of Photoshop. So, updating your Photoshop whenever the newest version is available is crucial.
When to Use Content-Aware Fill Tool in Photoshop
Moving unwanted objects is effortless with several Photoshop tools and techniques. However, there is a condition.
You have to learn how the tools and techniques work.
For example, removing small objects or spots is easier with Spot Healing Brush. However, learning the technique is time-consuming.
On the other hand, the Content-Aware tool helps you save time by removing unwanted things from your image. At the same time, Photoshop replaces pixels efficiently when textures and colors are constant.
The Photoshop Content-Aware Fill tool is designed with a high level of control. Thus, you will have flexibility when replacing pixels.
Also, moving an object to a different area or adding a new object to your image is convenient with Content-Aware Fill.
How to Use Content Aware Fill in Photoshop
Let’s locate the Content Aware Fill tool, and then we will look into the different uses of it.
Locating Content-Aware Fill Tools
You will find the Content-Aware Fill panel in the left-hand toolbar.
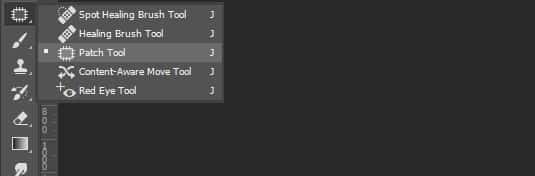
The patch tool icon is a rectangular box with lines bisecting each edge. The content-aware tool is a pair of crossed arrows in an “X” shape.
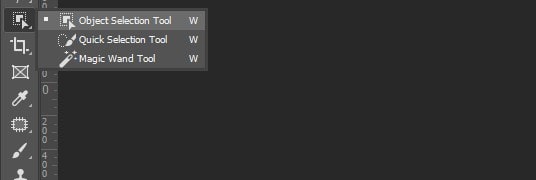
If you see a mouse pointer over a square, be sure it is the Object Selection Tool. You will also notice the Magic Wand Tools and Quick Selection Tool with it.
Don’t find the toolbar in your Photoshop version?
No worries!
Go to the Windows Dropdown Menu and place a tick mark next to Tools. Now, go to Edit > Toolbar.
Then, move hidden tools from the right column to the left column. Make sure to arrange them in a way so that you can find them easily.
Be mindful that when selecting the Patch Tool, go to the Options bar and choose Content Aware Tool.
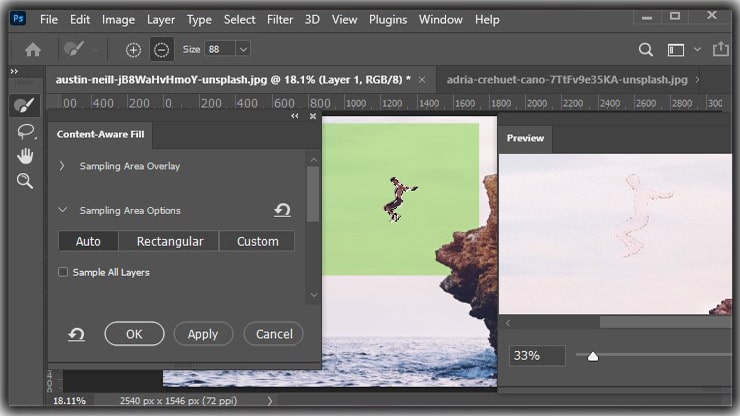
You will see the “structure” and “color” settings in the Content-Aware Fill workspace in Photoshop.

Wanna open the Content Aware Fill workspace?
Make a selection around the object. Next, choose Edit > Content-Aware Fill.
Are you seeing a grayed-out Content Aware Fill?
Nothing to worry about! Highlight the content by using the Lasso Tool. Thus, the command section will be activated.
(Method 01)
Remove Objects With Content-Aware Fill Workspace
Now, here are the steps for removing an object from an image.
Step 01: Selection
Make a copy of the photo in a new layer. Remember to make a new layer for each change you make. It is a good habit, as you can always return to the original image whenever required.
Never created a duplicate layer before?
Go to Layer > Duplicate Layer
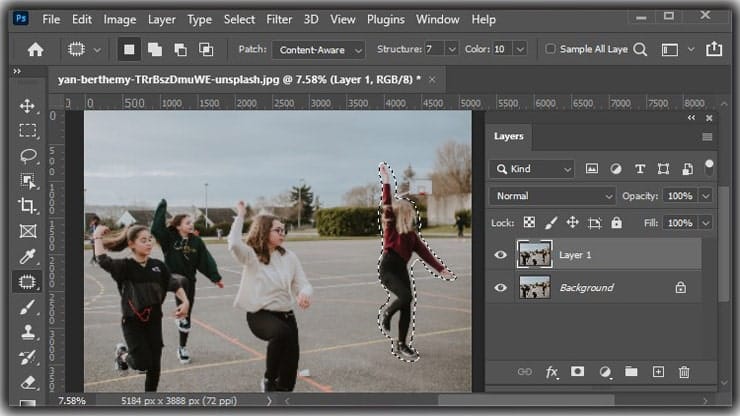
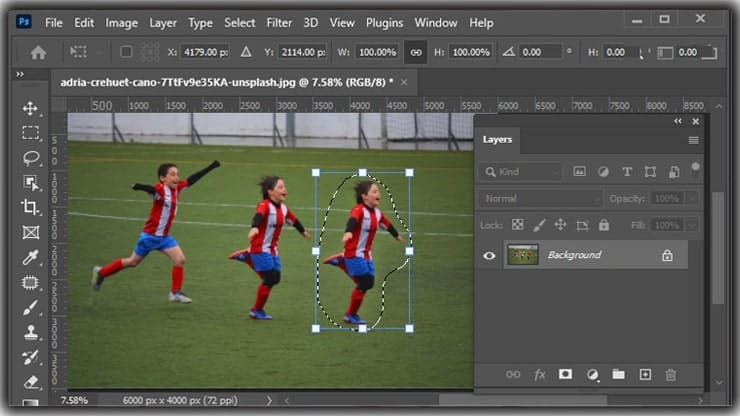
Now, we will be working on the new layer. Now select the Patch Tool. Then, draw a loose Lasso around the thing you want to remove.
While doing so, select the Content-Aware option from the Options Bar.
Step 02: Search Pixels by Dragging
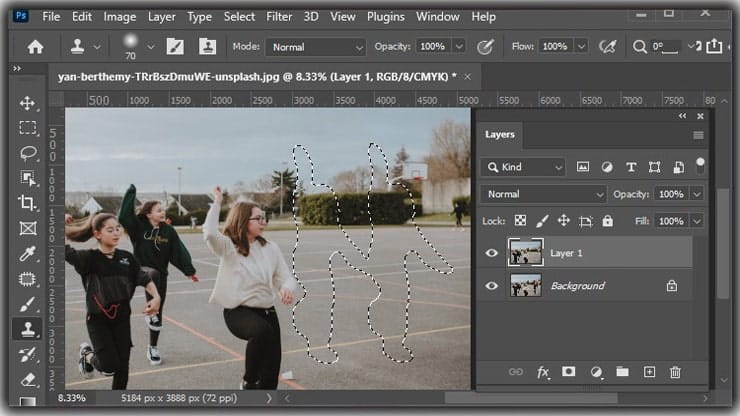
The selected area needs to be grabbed and dragged to the sampling area. Try to match the lines as much as possible.
Content Aware Fill option uses this suggestion once the cursor is released. Then, the feature matches the new pixels according to the image.
If the result dissatisfied you, undo the edit. For this,
Choose Edit > Undo Patch Selection or Edit > Ctrl + Z or Command + Z. Next, drag the patch to a different place.
You can also use 2 other settings: structure and color.
What is the purpose of these settings?
Let me make it clear.
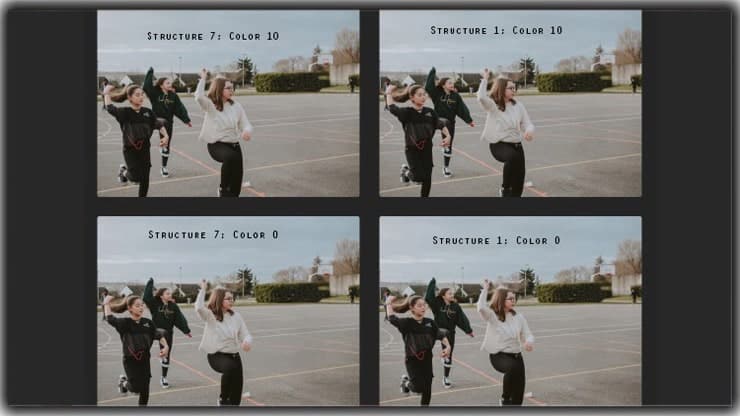
Structure settings help Photoshop closely adhere to the new content’s shapes. The more the structure settings are, the more the shape will be true to the original form. The lesser the structure settings, the more the shape will lose its defined size.
Color settings are for color blending. If you want maximum color blending, choose 10. On the other hand, if you want minimal color blending, choose 0.
See the image below to understand the different combinations of Color and Structure settings.
Keep in mind if you have a less detailed image, the Patch tool works best. It means you should use this tool for smaller sections of your image.
(Method 02)
Use Content-Aware Fill in Photoshop to Remove Object
Content-Aware Fill is much more efficient in removing and moving objects. So, let’s learn how to use Content-Aware Fill Photoshop for removing and moving things.
Step 01: Selection
As stated, create a layer of the original image by pressing Ctrl + J or Command + J.
Once the layer is created, go to the Options Bar and select the Content-Aware Fill Photoshop. Then, use the Patch Tool to draw a loose Lasso around the thing you want to remove.
Step 02: Move Pixels by Dragging
Grab the area you want to move and drag it to your preferred location. Once done, release the object. You will notice a transform box appears around the selected object. If required, the box lets you rotate the object for a better fit in the new area.
Then, choose the checkmark from the top menu bar. Thus, the changes will be accepted. Photoshop automatically selects the pixels into the space and matches the original.
Next, use the structure and color settings to control the shapes and color blending of the new content.
(Method 03)
Select and Move Stand-out Object within a Second
Want to select and move stand-out objects within a few seconds? Here are the steps to follow.
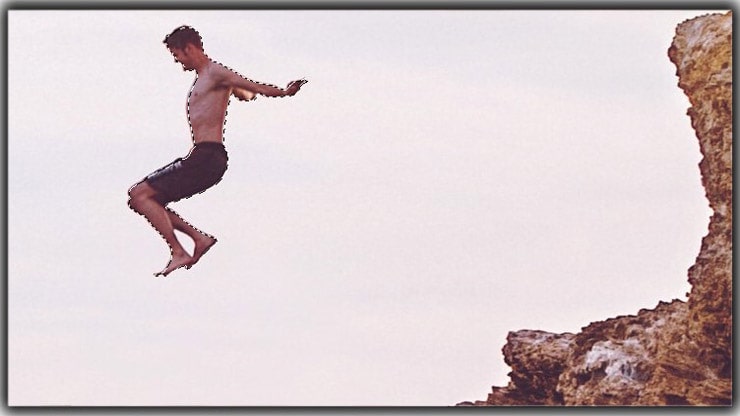
Step 01: Selection
Similar to earlier methods, make a layer of the original photo.
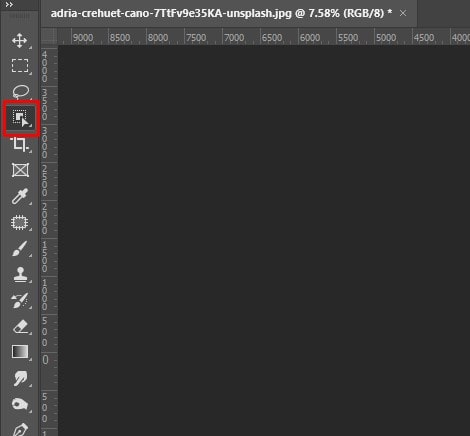
Next, locate the Object Selection Tool. You will find it in the same location where the Magic Wand and Quick Selection tools are available.
Unfortunately, if you don’t find the tool, hold down your cursor on these tools, and the Object selection tool will appear.
Simultaneously, select the Object Finder from the top toolbar.
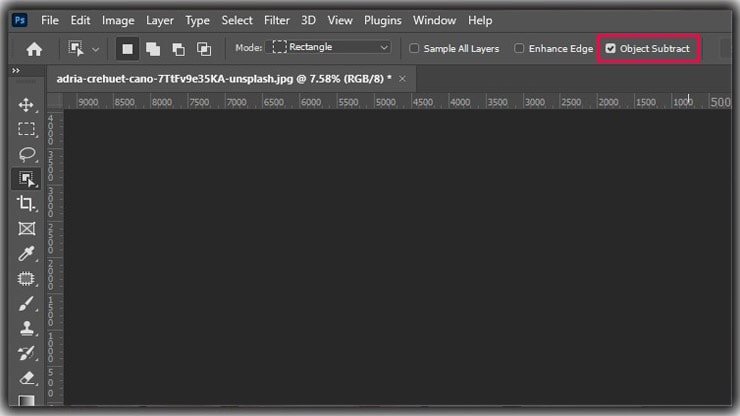
Now, test the Object Finder. Hover your cursor over different objects to see whether the tool selects them.
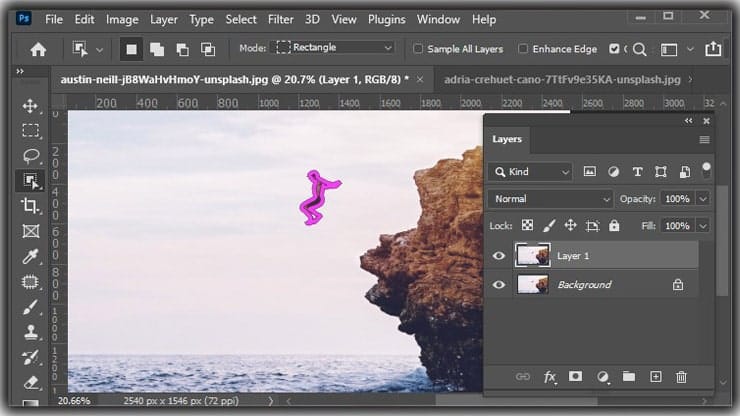
How to know if the tool selects an object.
Well, the object will be highlighted with PINK when selected. Note that the object will not be selected if blended into the background. For this, you have to follow any of the processes mentioned above.
Next, click on the object, and it will turn pink.
Step 02: Use the Content-Aware Fill
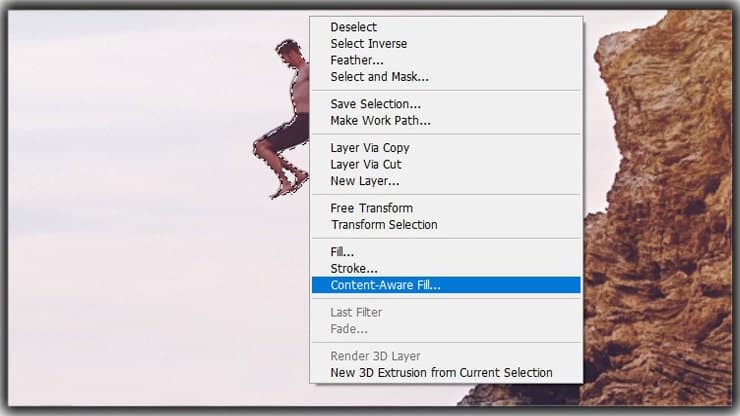
Now, Right click on the subject and choose Delete > Fill selection.
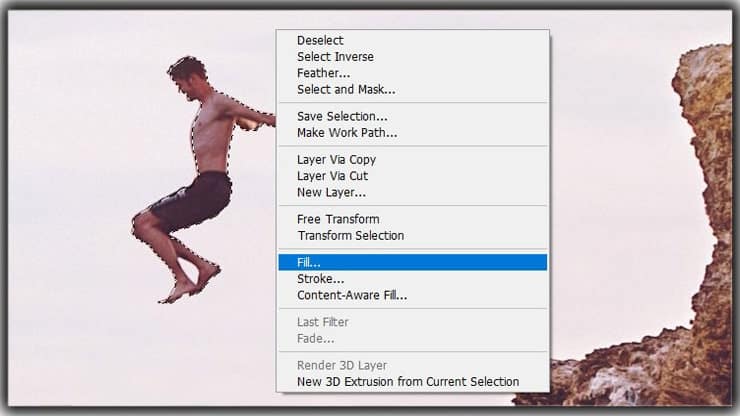
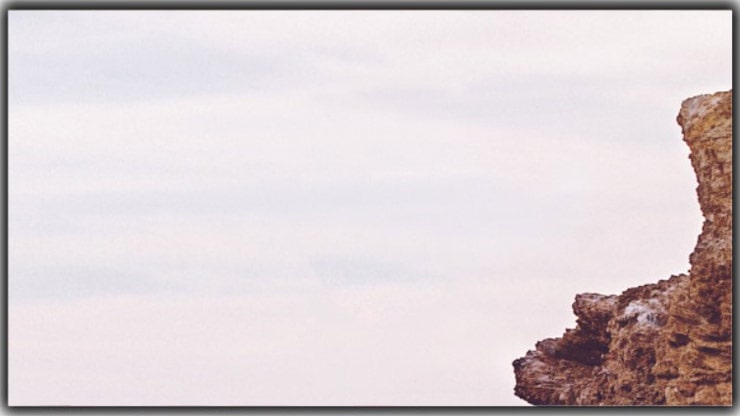
This will give you quick results. This feature works best If the background is neutral without a different texture.
The image below shows the quick and easy process that can be done within a few seconds.
Do you need more control over the selection?
Use Content-Aware Fill and follow the earlier-mentioned processes.
FAQs
To access Content Aware Fill, make a selection around the area you want to edit, then go to the Edit menu and choose Content-Aware Fill.
Content Aware Fill works best on images with precise textures and patterns. It may need to provide ideal results on more complex or irregular backgrounds.
Yes, you can customize Content-Aware Fill settings to refine the results. You can adjust parameters like sampling area, color adaptation, and more.
Summing Up
Hopefully, now you know how to use Photoshop Content Aware Fill. I tried to simplify the techniques as much as possible. The tips will help you create outstanding images for your portfolio and clients.
Use this powerful tool to streamline your image editing tasks, whether erasing undesirable elements or replenishing missing portions in a photo.
Master these procedures and explore various configurations to enhance your proficiency in harnessing the capabilities of Content-Aware Fill.
You may read:

Salim Ahmed is the CEO of Graphic Experts India, with over 25 years of expertise in photo editing, clipping path, image retouching, and eCommerce image editing services.