Double Exposure in Photoshop is a technique that helps to combine two photos to tell a story. A double exposure photo is the combination of two different photographs, one portrait, and one landscape photo.
Generally, Double Exposure in Photoshop tells a story that cannot be said using a single image. This effect can simply be gained by a DSLR camera, enabling multiple exposures and shooting two different pictures manually.
However, it is also possible to combine two separate photos and make it a double exposure photo using Photoshop. In the guide article, we will discuss how to do double exposure in Photoshop.
Tutorial assets
For creating a double exposure photograph, you’ll need two different images.
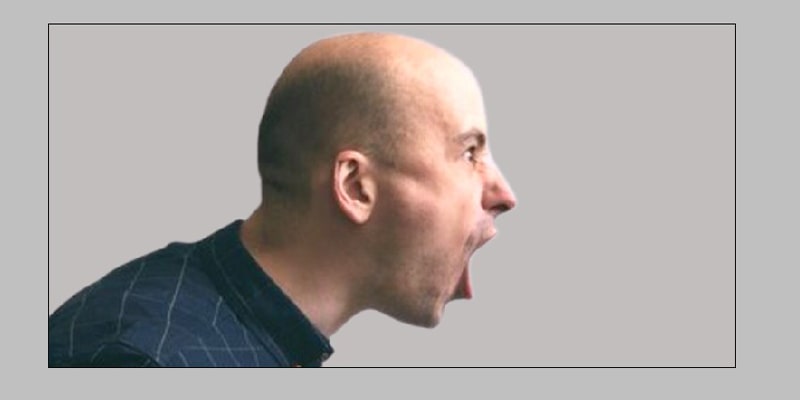
- A picture of a person or an animal. This picture should be a portrait picture.
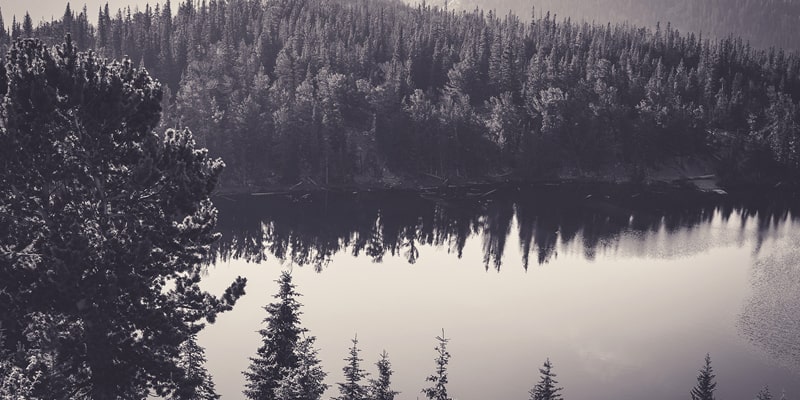
- Picture of a background. Only a landscape picture.
Process of Creating a Double Exposure Photo
Multiple Exposure is one of the common terms in Real Estate Photo Editing. However, this type of editing can be used in any type of photography.
Here, in this article, I have chosen a simple image (Headshot Photograph), so that anyone can learn to do double exposure in Photoshop.
1. Preparing The Main Photograph
Step-1: Open Both off Those Images in Photoshop and Crop It
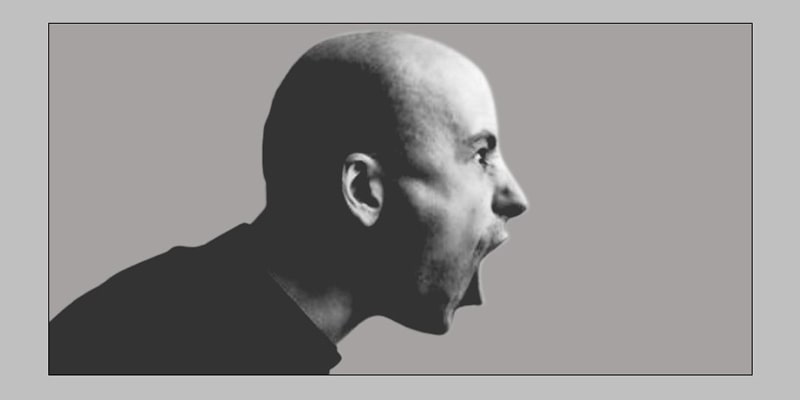
First, you need to select an image. You can use any image you like. It is better to use a portrait image as your base image.
And choose an image that has a solid background. If you select an image that has a noisy background, then it will become hard to work with the image.
So try to stick with a picture that has a natural background.
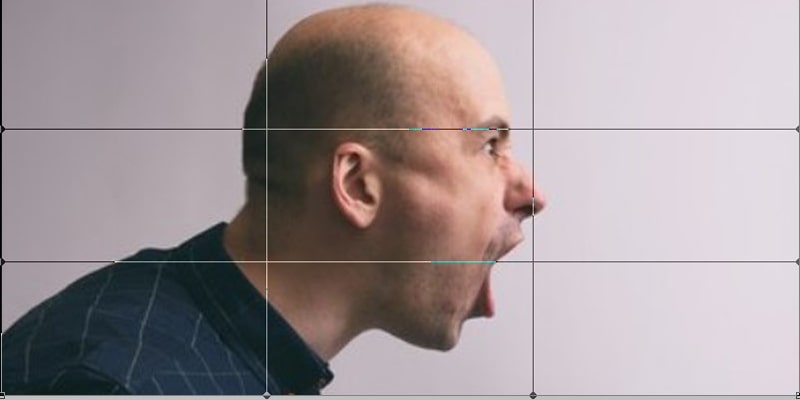
- Open your selected image in Photoshop;
- Then, you need to crop the image and lose the wide part.
- Make the image less wide using the crop tool.
- For that, press C and crop the side of the image and make it a bit less wide.
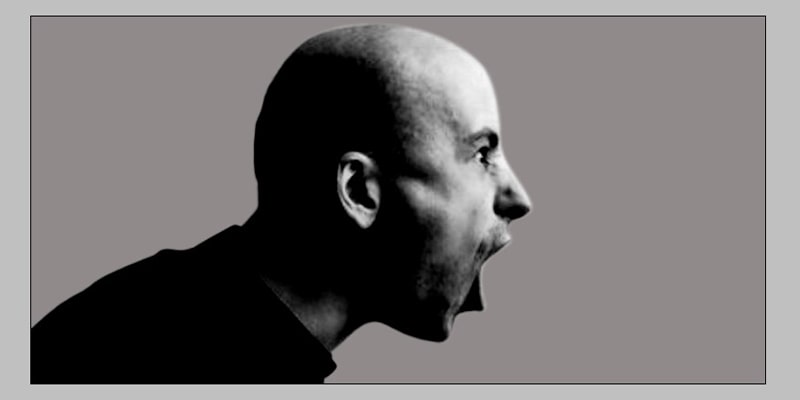
Step-2: Add Contrast
In this step, you need to make your base photo bright and also need to add contrast. For doing so, you need to use the level menu.
- Navigate to Image, then click on Adjustment then Levels, or you can just simply access the level menu by pressing Ctrl + L on your keyboard.
- To make the image bright slide the top right level to the left.
- And to add a contrast slide, the top left level to the right.
- Or you can simply put fixed values in boxes to make the photo bright and add contrast.
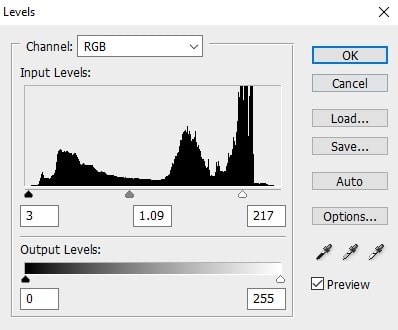
Black-7
Gray-1.15
White-197
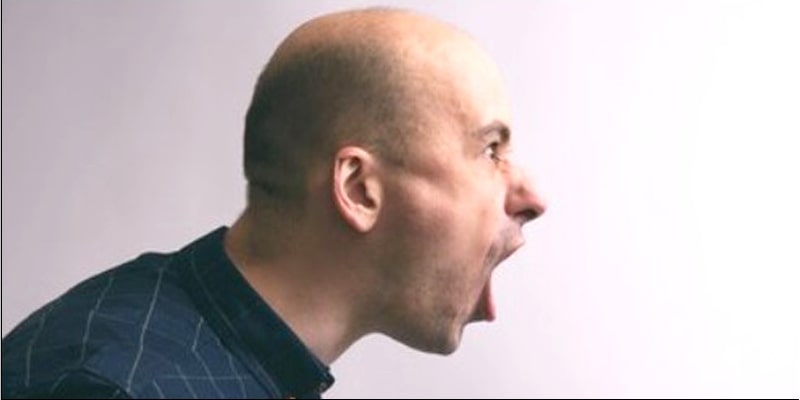
Put these values and press Ok. Now see the image; you should have an image that is bright and has more contrast on it than before.
Step-3|(Optional): Removing Unwanted Objects.
If on your image there is some object that you don’t want, then you need to remove that in this step. Though this is an optional stage, however, for professional Photo editing works this is an essential part.
You need to use the Spot healing tool to remove an unwanted object. Press I on your keyboard to use this tool. This process is straightforward.
You just need to move the mouse to that unwanted area and draw above that area to remove that part.
If there are any flaws in the picture, then just remove it from the photo using the Spot healing tool.
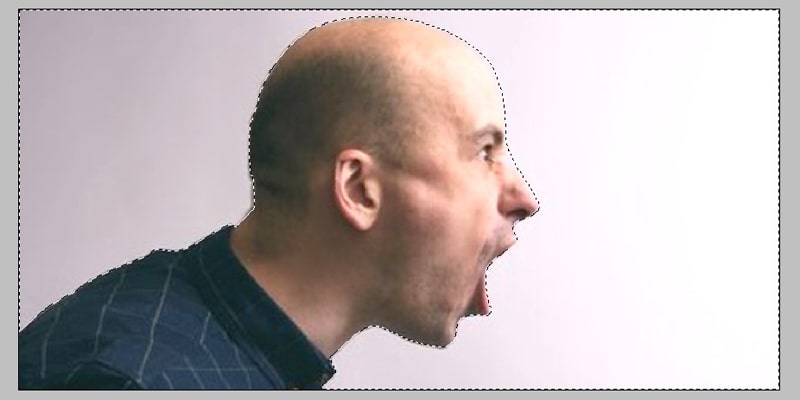
Step-4: Separate The Subject From The Background
Now, it is time to separate the subject from the background. This is also a straightforward process to follow.
If you are using a decent background photo, then it will become effortless for you. Select the magic wand tool or press W and click anywhere on the background of the photo. Then click on select, then inverse, and you’ll see that the man in that photo will be selected.
You can also read:
- A Guide to Remove White Background Using Photoshop Tools
- How to Make Background Transparent in Photoshop
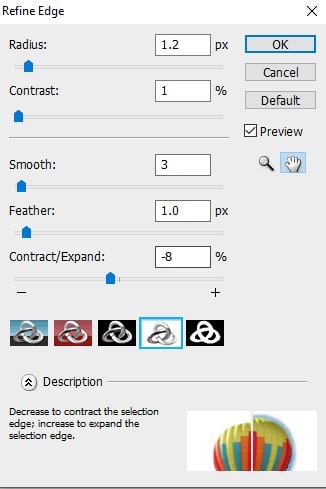
Step-5: Refine Edge
On the top of the screen, you’ll see the control panel of the Magic wand tool. Select the Refine Edge option from there. A new window will open. From here, you can see your base photo in different types of backgrounds. This feature helps a lot with editing conveniently.
To make the edges of the image more perfect, set the radius in between 1-3. If you have a complex background or messy hair, then you need to fix it higher for the ideal result.
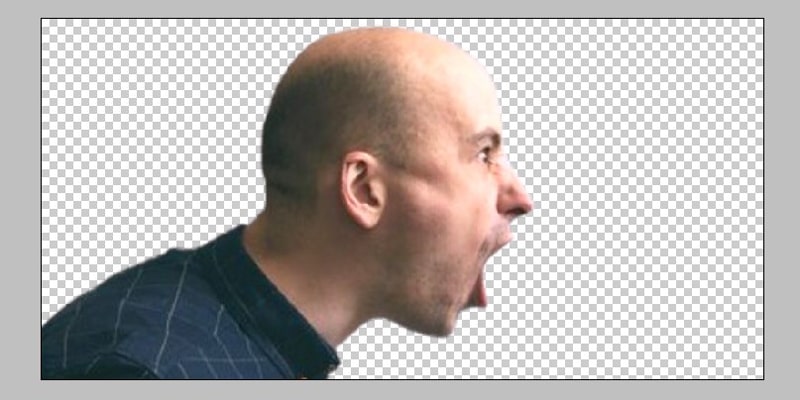
In our photo, 1.5 will do good. Make sure that the output option is selected as New Layer with Layer Mask. This is very important, and it will create a new image of your photo where the background is hidden. Now click Ok and see the result.
If this is the first time, you are using the refine edge tools in Photoshop. You may find out it expedient. There’s a lot of exciting tools in Photoshop. An interesting fact is we have published A Beginner’s Guide to Photoshop CC 2020 | Photoshop Tools & Toolbar.
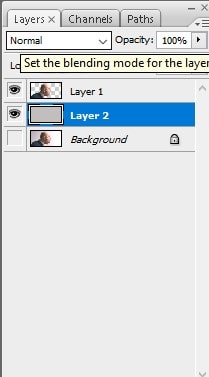
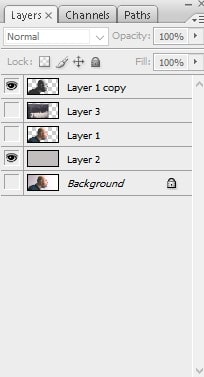
Step-6: Take a Background Layer and Fill it.
Open the Layers panel and create a new layer below the layer of the cut-out image. Use the paint tool to fill the layer with a greyish color—Press G to access paint.
2. Create the Double Exposure Effect by Combining Two Images
Now, here’s where the fun part starts. Here, we will use the Double Exposure Effect to combine two images.
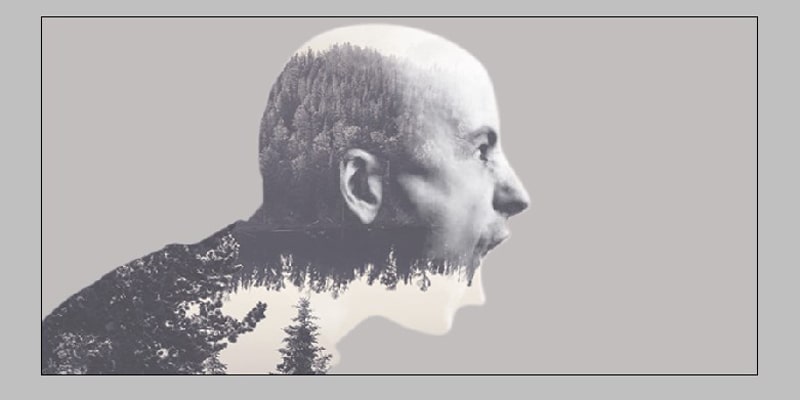
Step-1: Preparing The Land Escape Image.
Now, you need to prepare the second image. Use a charming landscape of city lights or flowers or something like that as your second image.
The nature scene is also the right choice as the second image. We are using a beautiful nature image as our secondary image. You can use anything you like.
Step-2: Place The Second Image Above Your Base Image.
Now select the second image layer and then press Ctrl on your keyboard and click on the original base image layer. You’ll see a selection cut-out of the base image on the secondary image.
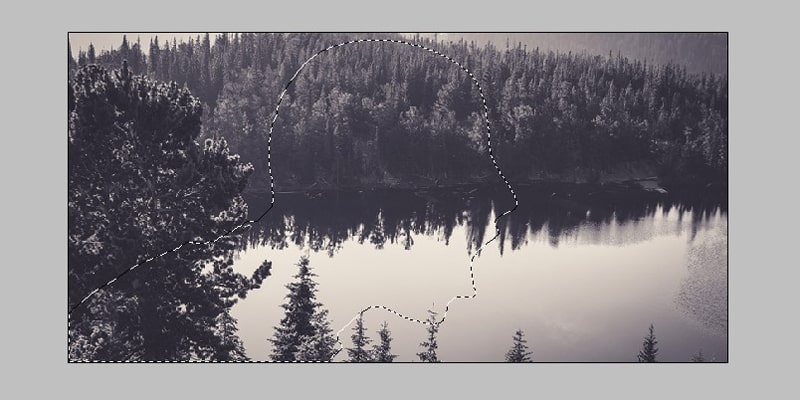
Step-3: Applying Vector Mask
Now, on the bottom of the Layers, you’ll see an option named Add Vector mask. Click on that option, and you’ll have a photograph that has no unwanted parts of the secondary image. Sometimes we need to do some basic editing like rotating or moving one image in the picture.
For that, click on the chain icon, which is located between the image and mask thumbnail. It will unlock the two-part, and you can rotate or move any of the images.

Step-4: Adjust the layer Position
Now select the image which has the cut-out portrait. Create a copy of the layer by pressing Ctrl + J and placing the layer above the secondary image layer.
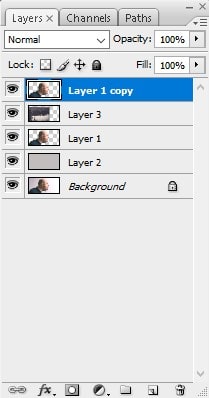
Make the base image color monochromatic so that it fits the color of the secondary image—press Shift + Ctrl + U to convert the image in grayscale.
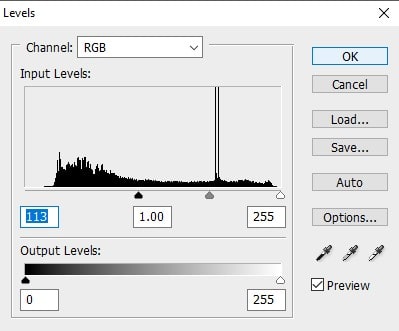
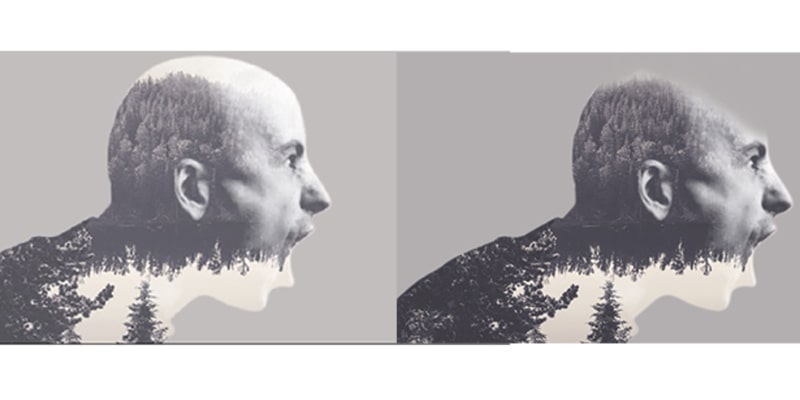
Step-5: Adjust the Levels to Make the Image Darker (Important!)
You need to make the image a bit darker now. Open the Layers section by pressing Ctrl + J then put these values of the top left box to 117. Click on Ok and save the changes.
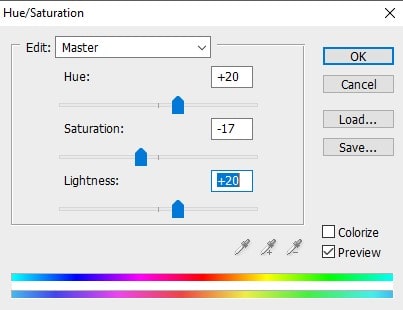
Now navigate to Images then Adjustments then Hue/ saturation. Now tick the colorize box on the right corner of the dialog box. Set these values-
Hue-212
Saturation-10
Click on Ok to apply the changes you just made.
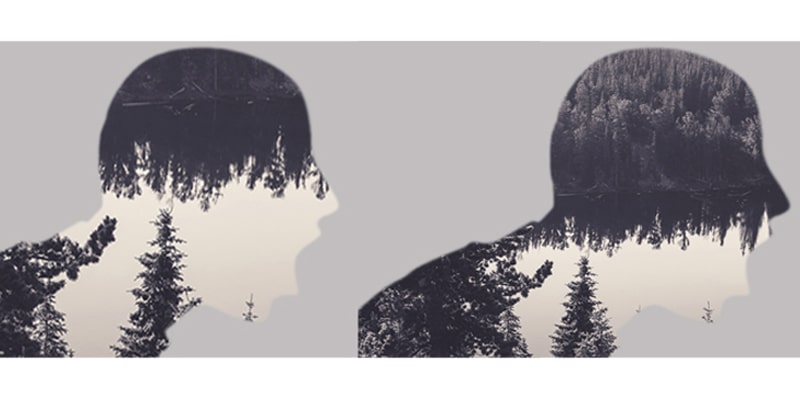
Step-6: Apply Blending Mode
Now right-click on the base photos and then click on blending mode select multiple/ screen. You’ll see the double exposure effect on your image now.
Step-7: Retouch Up
Now, you need to perform image retouching and make the picture look perfect. If it seems to you that some part of the photo is looking odd, then you should brush the Fill color to color these parts and make the photo look perfect.
Select by Brush Tool pressing B then select Airbrush Soft Round 17. Fill it with the background color and paint it softly around the unwanted areas. Now you’ll have an outstanding double exposure photo with an extraordinary tale.
Step-8: Finishing Up
If any area left or seems not corrected exposed, then you need to print the field using the brush tool. Such an area in our image is the neck area.
Select the brush tool, then fill the brush with dark blue color and paint it over the wanted area, and you’ll have a perfect double-exposed photo.
FAQs
Yes, Photoshop CC handles 360-degree photo editing quite well. It lets you navigate around the full panoramic view, make both universal and localized adjustments, and export the finished file while keeping the 360 format fully intact. It’s a solid choice for commercial 360 work.
Universal edits are changes that affect the entire image — things like exposure, saturation, or black-and-white conversion. These need to be done before converting to a 360 layer. Local adjustments, on the other hand, target specific areas of the photo, like removing a tripod from the bottom of the shot, and are done after you’ve entered the 3D workspace.
Converting to a 360 layer is what allows you to scroll around the image in a spherical view and work on it in actual 3D space. Without this step, you’re just looking at a flat panoramic file, which makes targeted edits far more difficult and means your changes won’t export correctly in 360 format.
Three tools come up most often — the Healing Brush, the Clone Tool, and Dodge and Burn. The Clone Tool is useful for quickly copying and painting over unwanted objects. The Healing Brush then blends those edits more naturally into the surrounding area. Dodge lightens specific zones while Burn darkens them, giving you fine control over exposure in targeted spots.
It works similarly to how you’d explore a 360 photo on social media. You can use the pan, orbit, and dolly controls to move through the scene, or simply use the hand tool to shift your view around. From there, select the area you want to work on and apply your edits directly.
360 editing is resource-heavy, so close every other program running on your computer before you start. The fewer things competing for memory and processing power, the smoother your Photoshop session will run. It’s a simple step but makes a noticeable difference.
Don’t use the standard Save As option — that won’t preserve the 360 format. Instead, go to the 3D menu at the top, select Spherical Panorama, and then choose Export Panorama. If you want to come back and make further changes later, save a copy in PSD format before exporting the final version.
Yes, and it’s easy to do. Go to Window and then select Workspace to toggle between different setups. The 3D workspace is recommended for 360 editing since it surfaces the most relevant tools and hides ones that aren’t applicable. That said, workspace choice ultimately comes down to personal preference and what feels comfortable to work in.
The Final Verdict on Double Exposure in Photoshop
Nowadays, double-exposed pictures are quite famous and trending. In this article, we have guided you about how to do double exposure in Photoshop. The effect is very eye-catchy to look at and also very easy to do. Following the steps mentioned above, one can easily create a beautiful double exposure photo.
Double exposure is a very creative way to express pictures. You’ll have all guides related to how to do double exposure in Photoshop in this article.
You may read:

Salim Ahmed is the CEO of Graphic Experts India, with over 25 years of expertise in photo editing, clipping path, image retouching, and eCommerce image editing services.