Shoe photography is a creative thing. But, we don’t always take pictures of the greatest stuff. Otherside, Photography in quality shoes is a significant factor in the sales of driving footwear. The shoe is product photography.
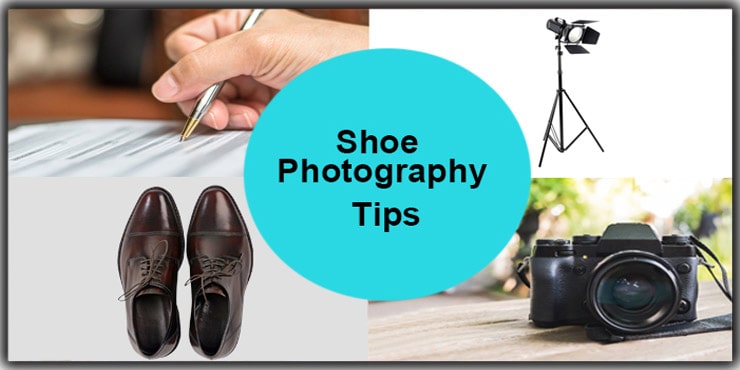
Shoe Photography Tips to Get Ideal Soes Image
In the E-commerce business, product photography plays a vital role. So You need to perfectly display your shoe when you publish on eCommerce, amazon, and other social sites.
If you are fresher in this field, you will face some difficulties when doing product photography. However, before you take a shot in your product, there is some prerequisite thing you have to keep in mind, which I will tell you in this tutorial as a product photographer.
Tips for Creating a Plan to Get Ideal Soes Image
Good product photographers always do plan and research. When I went for shooting before that, I talked with my clients.
I asked them some questions like what sorts of photos they looked for? And how many pairs are they going to shoot for?
And then I made a plan for his/her’s photos. So you have to follow the same thing. When you go for shooting, you need to plan and research first because everything will mess up if you don’t do any planning. So you need to figure out the plan and do well research when you take a shot.
All the gear must be monitored and ready before taking pictures of the shoes. Perhaps you know this shoe photographing method very well, but still recall that you must schedule it before taking your Photography.
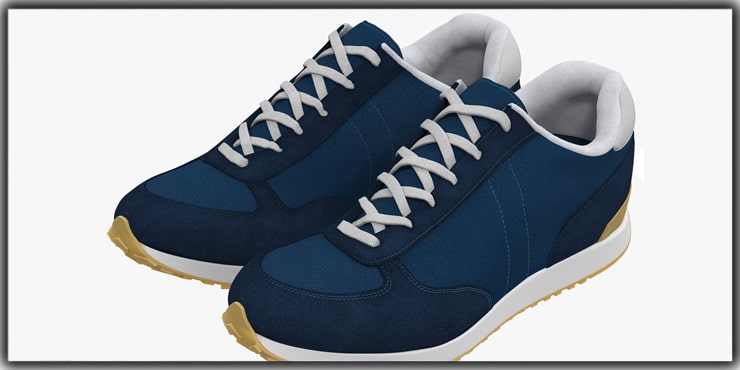
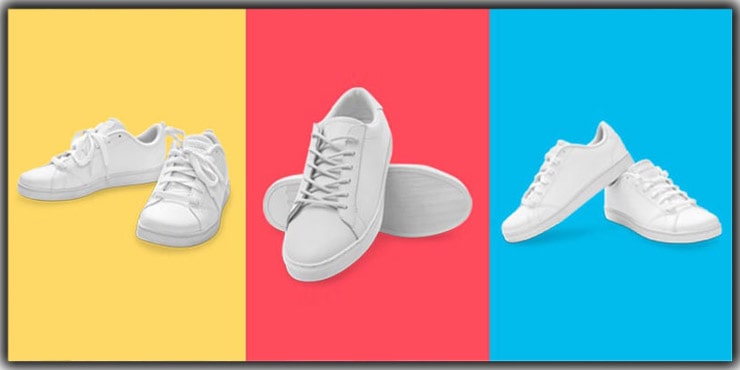
Tips 1: Select a Suitable Shoe / White Background
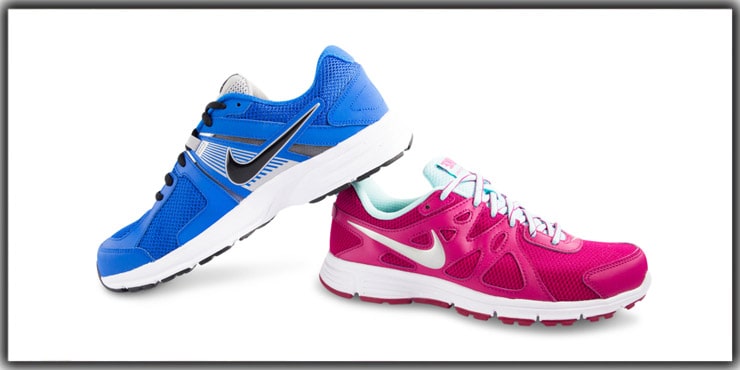
For product photography, background plays a significant role. Because if you can’t use a good background on your product photos, you can’t easily sell that product in the e-commerce business.
Which of the most effective shoe photography strategies would I like you to learn? The shooting of shoes is quite challenging. You must keep everything precise, specifically the background since the shoes are delicate.
So, in shoe photography, I want to prefer to use a white background. Why?
- In the white background, your shoe looks sleek and funky.
- Remember that don’t use the color background in shoe photography because it will rob the color of the shoes.
- Pick up a sweeping paper. Cause sweeps get dusty often, and you can isolate the dirty part. That’s why I love this sweeping paper in product photography.
- Don’t let your package be hit by extreme sunlight; it’s intense, and the products look bad.
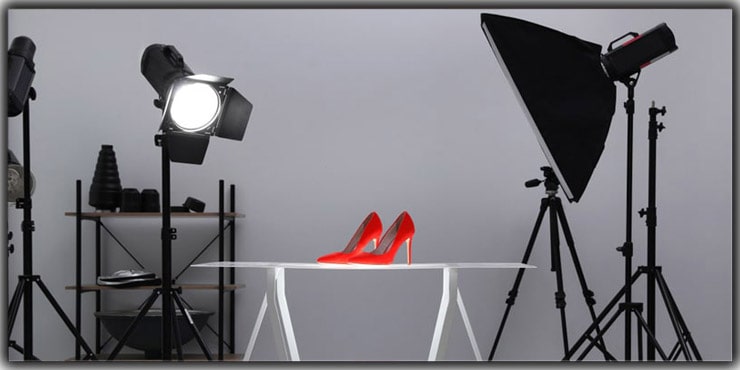
- When you take a shot of your shoes that time, you need to use three bright lights if you don’t have a lightbox. You just set your light on three sides of your shoes. You can set your light top side, left, and right side.
- Replace the shoe with paper or tissue, or use dental floss to protect the shoe frame.
One more thing is while you choose white background color, you have to ensure that shoes look their best, creating the illusion that someone owns them.
Furthermore, This approach authorizes you to focus on shoes without separating from the background environment, design, and other factors. Ensure the proper lighting and shadows.
Tips 2: Using Models For Shoe Photography
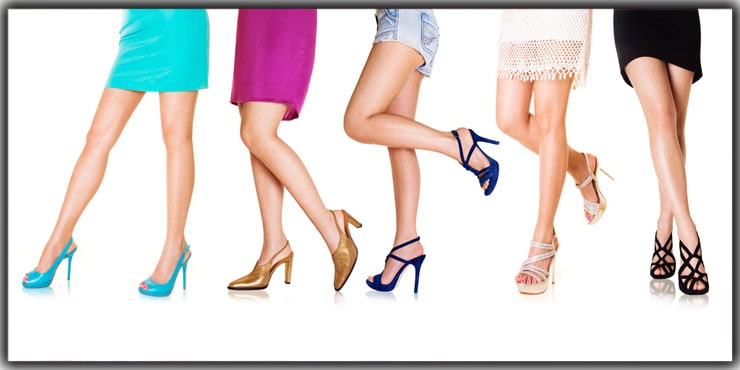
If budget and time scale allows, A model’s presence makes it more applicable and attention-giving in a shoe photograph. Instead of being blank and inert, the ability to shoot the shoe on someone’s foot will improve your bid and add context.
If you can do both, your eCommerce shop will do well with a mix of white backgrounds and shoes on a model. It appears that there is no blackness in focus. The model tries to make various poses to represent the shoes as profitable. Customers always want to see how their feet look like shoes.
- You need to choose the size of the shoe.
- Only shoot the legs of the model but mind it, don’t need to shoot the whole body of the model.
- For the photos, you need to choose thin legs models.
- Shoot photos with various movements like walking, jumping, dancing, etc
- The outfit of the model will suit the color set of the shoes.
(Learn: Remove White Background Using Photoshop Tools)
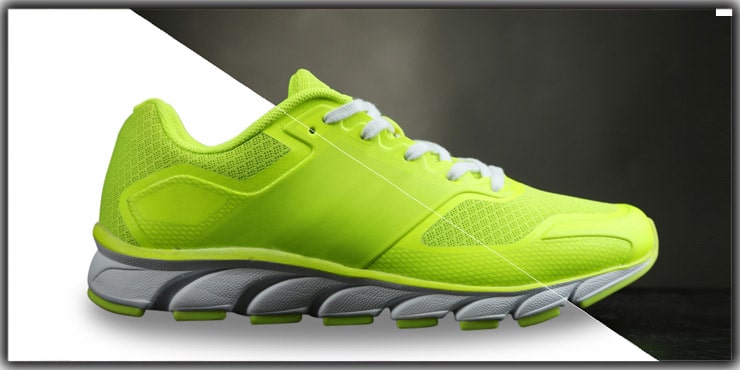
Tips 3: Angles For Shoe Photography
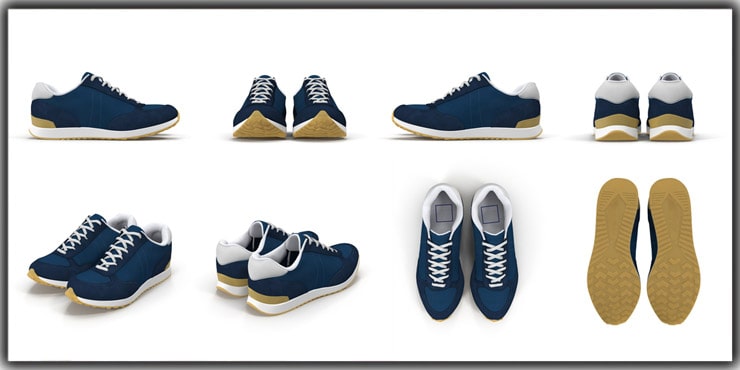
When you take a shoe picture, try to hook it from every possible angle. Otherwise, the clients can’t decide if they buy this product or not. So, don’t try to capture only one angel. You need to take a side view of your shoes’ top view, and at least you need to take pictures from every side of your shoes. In a nutshell, Your picture needs to be perfect and detailed also.
So, If you show shoes for sale in the catalog or on online shopping sites, everyone can see the light, feet, height of a heel or a platform, various decorations, and ornaments. Then the clients will be fascinated by seeing these things and want to buy a pair of shoes easily.
Make sure that the product can be seen from more angles in a shorter time frame.
Details shot
After taking the shot on every side of the angle, you need to take a shot in detail of the shoes. Like, check the shoe’s belts and laces, and test the shoe whether or not it’s dry. Also, make sure it has no dust that the photo might look poor.
You think you want to buy a pair of shoes like a customer. So, when you visit the market and choose a pair of shoes, you want to find out the details of the shoes and whether everything is fine or not. So at the same time, other customers do, even you or I do. So, Product detail plays a vital role in the e-commerce business.
As a photographer, only common aspects of each photographer should not be addressed.
Tips 4: Footwear retouching in photoshop
Every product photos need some editing before uploading on an e-Commerce. Thus, footwear needs a different kind of editing. Thus, we have a complete service to edit any e-commerce product images.
We have done this lesson to demonstrate how to cut out a product and retouch the product. Then you took on a poor background in your home. Finally, you will understand how to tweak to invent a more professional appearance.
- Adjust the background to pure white through the clipping path.
- Attach the boundaries.
- Furnish natural shadows.
- Cropping & demonstrate the photos from various angles and drawing lines defining the shoes’ tops and heads’ while the objects can be transferred to one another accurately.
- Recolor the features if they were adjusted due to poor lighting.
- Don’t do too much image retouching. The shoes should seem as genuine as they are.
Tips 5: Shooting 360
- It may look “wobble” if your product is not in the center of the turntable, so center your product.
- When you take shoe pictures that are “360,” then You need to shoot 25 frames. As a result, you will get better-quality pictures.
- Remember, Don’t shoot the starting frame twice, which you need to ensure.
- Ensure that every angle is spaced evenly.
- You have to shoot the product from the front side.
For shoe photography, 360 shooting is beneficial, and it is a new advancement. However, In these techniques, you can’t find any blank space in which pictures you take. This allows you to see your pictures from all angles.
Additionally, If your company is directly tied to this kind of imagery, purchase those 360 devices to make the job easier.
Tips 6: Flat Lay of Shoe Photography
This shoe photography method is well-known between Instagram sellers and bloggers who put shoes beside other items and take an image from the above.
The main thing here is the usual lighting and color selection.
- Place the essential components on an invisible 3×3 grid on the grid lines of the third rule.
- Vertical shots are perfect for flat-lay images.
- Select 2-3 colors to match. This leads to a consistent theme for your image.
- Choose a pleasant background, like an appropriate white one, a wood floor, a desk, or a table, based on your subject.
- Make your painting more interesting and use white space.
- Avoid using an elevated-performance lamp to enhance the image.
Tips 7: Context
Perhaps it’s hard to believe that ordinary shoes can also tell a story. However, many Instagram sites that sell shoes are, of the point of fact, a tale of a couple of shoes. It can be done with a factual background, model position, lighting, or other factors.
However, If you want your customers to grab attention to your photos, then context is also very essential.
- Attempt to use lifestyle images on white background only to attach to the original studio pictures.
- Just make sure the shoes represent the season while shooting outside.
- Never use your shoe color as a background.
- You can use simple paper backdrops and acrylic for a polished look for a classic effect.
Tips 8: Floating Shoe Photography
Floating shoe photography looks like magic. Inventive advertising constantly evokes people’s attention and makes them wonder what lies underneath. Therefore, the impact of such publicity is immense.
- Make sure you use a higher aperture on your DSLR lens to focus on all aspects of your shoes.
- After that, use various sets up for conflicting purposes.
- You don’t need to use blurry and smooth focus.
- Use high transparency to remain focused also.
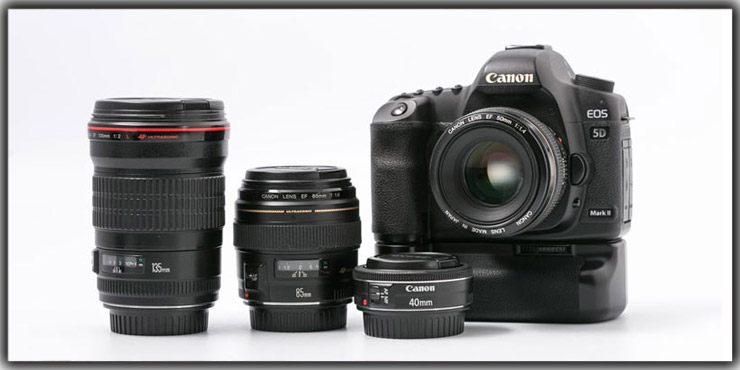
Tips 9: Shoe Photography Equipment setting
Shoe brand photography can be useful. In that case, You need to know how to fix the camera, Choose the background and product style, and change the lens, lighting of the shoes, and the landscape.
- Using a lightbox, around $100. That’s not expensive.
- The toughest form of lighting for product photography is direct lighting which casts deep shadows.
- You can use fluorescent light when you are taking a picture in a studio. Make sure that you have a workable lightbox.
- If you have to take pictures outside, find a shaded place to get the most even light, and don’t even consider taking pictures at midday.
Tips 10: Using Light for Shoe Photography
Creative ideas to Get Ideal Soes Image
Customers can not take products into their hands while shopping for products online to review every detail before deciding whether to purchase them. Alternatively, all customer information about your products comes from two major sources: product reviews and images.
Consequently, Publishing numerous, high-quality product photos is crucial to your online business’ success.
- When you take a picture, you make sure that the product will look good when you put them on “Angle.”
- If you want to take one shot, generally put the shoe “Three-quarter” angle, which looks the best. The same method will be applied to people.
- Maintain the exposure. Exposure means how “bright” the image is.
- Ensure that any piece of the shoe looks its best by creating the illusion.
- Hold it simple and elegant in your frame to get as much attention as possible on your shoes. Often props can be beneficial concerning the personal branding of your company, but photographing each item alone is usually the best and most efficient.
Please use a higher aperture on your DSLR camera like f/11 to concentrate on every aspect of your shoes. Make sure to use a tripod as well; this will reduce camera shake and ensure maximum crispness to your pictures. So don’t use blurry and delicate focus.
Hence, underwhelming cropping in consumer photography is one of the simplest errors. Your buyers will find that some of your footwear pictures are more zoomed in than others and will note that items in the same range from the camera are higher or lower than one another.
They’re going to notice changes in lighting, focus variations, etc. So DO creates a shooting and cropping model that follows specific guidelines and keeps the pictures consistent from frame to frame to avoid certain types of unwanted elements in your brand photos.
Creative shoe photography
Don’t be afraid to get creative; it is important to shoot traditional white background product shots. Use a variety of props and backgrounds to shoot the footwear at different angles. Just make sure you remain consistent with the creative vision!
Shoe photography challenges
Take a picture of shoe photography. In shoe photography, you will face many problems.
- If you need a solid white background in your ideal shoe image, you need photoshop editors to help you do that properly. Without a photo editing service, you can’t make it.
- When you take a picture, you see that you don’t get the proper color and texture of your product photos. So, in this case, you need to use photo editing services.
- Sometimes we can see that photographers can make better shadows doing Photography. Then you need to take help from photo editing services.
- You can see your image has undesirable areas that you have to remove. But You need to eliminate a photo’s undesirable outer areas and scale it to an exact length. Then This is only possible through the photoshop editing service.
- Sometimes we can see that your product has many types of tiny spots, scratches, and stains on the leaf. Then you need to take help from a photo editing service.
You can solve this type of problem in-house if you can do photo editing work yourself. But if you can’t edit, you need help from the best photo editing service that can do these types of work properly. For this, you need to find out the best or most trustworthy photo editing service.
Retouch photos to Get the Ideal Shoe Image
In most cases, a show photograph needs excessive photo editing services. This is due to the photography style. A specialized shoe photo editing is required, including background removal, shadow creation, and light retouching.
Hence, let’s dig in…
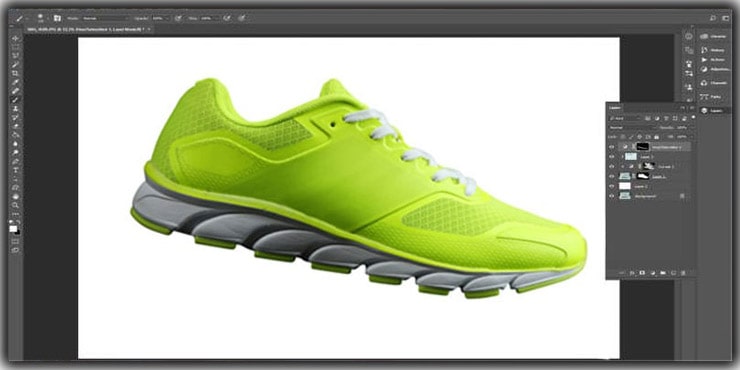
Step 1: Open The Image in Photoshop
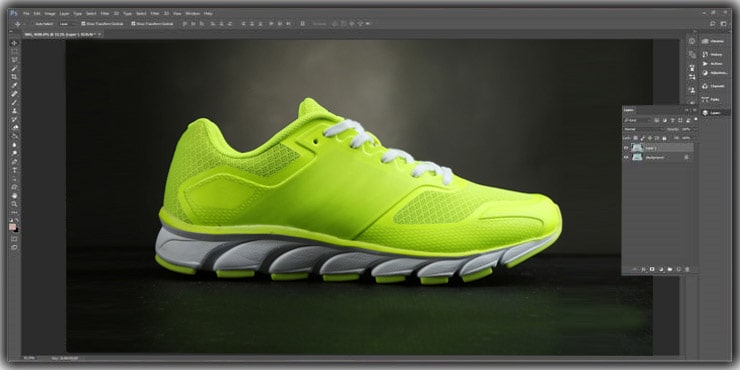
You need to take an awful shoe photo, which seems not pretty well. I mean, the photo’s color is not clear, or the shoe has many. We can resolve that easily. First access the photoshop, then open it.
Step 2: Begin with the Pen Tool
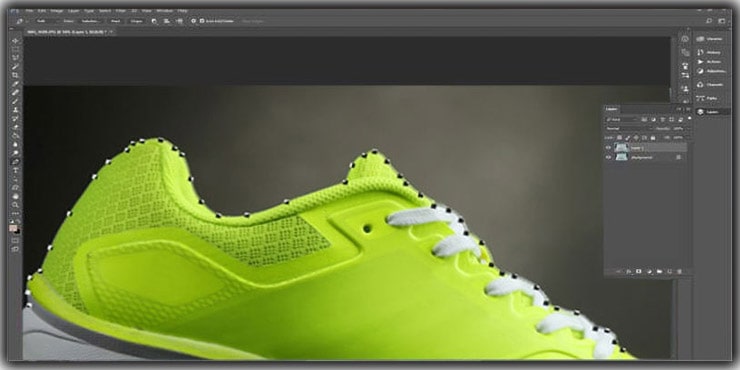
Begin with the Pen Tool, which can be found on the Tools Panel. Make a clear outline of the shoes. Create the straight lines. You can click on and draw anchor points, then you can click elsewhere, or press, hold and drag the mouse to change the curve.
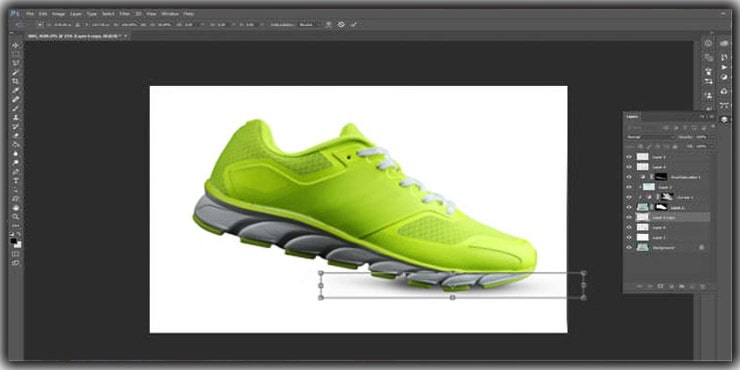
Step 3: Cut off The Shoe by Drawing Lines
You will cut off the shoe by drawing lines around every corner. It might take a while.
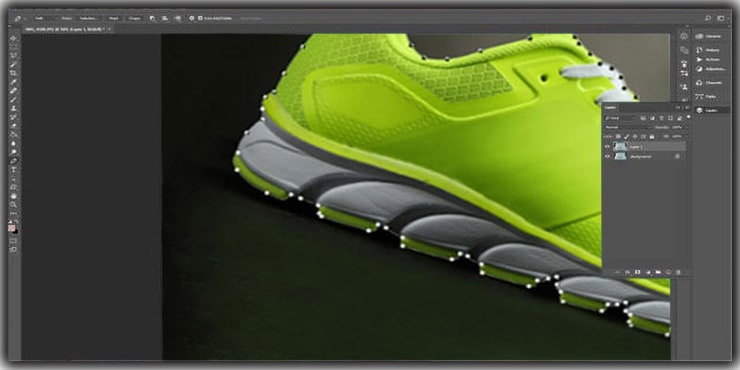
Step 4: Cut it From The Background
You can cut it from the background after you have selected your brand. Then press the right-click on the selection to select the Make selection. Next, click the options panel mask icon and select an invert in layer tool. After that, Set the new layer below the shoe with a white background.
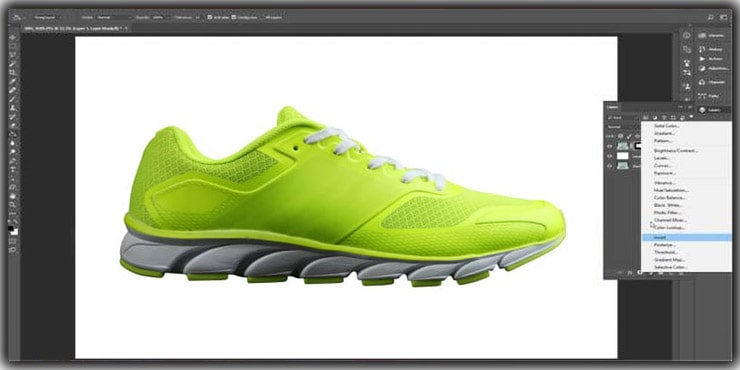
Step 5: Placed on a White Background
Our shoe is successfully cut out and placed on a white background. At this point, some photographers are finishing the shot, but we will do extra editing to make the shoe photo look real. To adjust the shoe color, create a deeper curve layer. You also can produce a new layer and use the Brush Tool with acceptable colors to clarify the product’s tone.
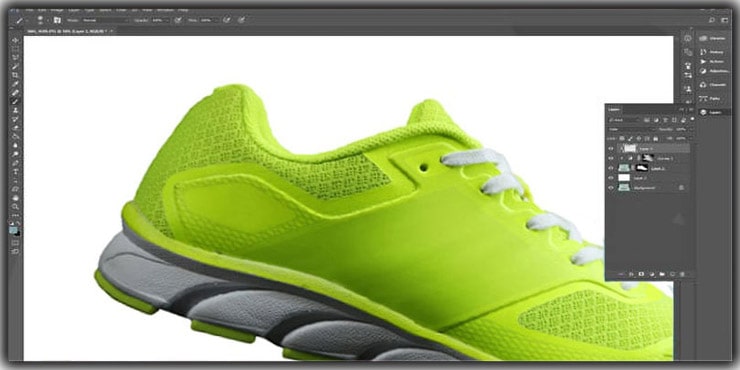
Step 6: Change the Hue / Saturation
Change the Hue / Saturation to render the white parts of the shoe whiter.
Step 7: Use the Shadow
Now the time has come to use the shadow to stop the distortion of the photograph and give it a natural look. Make a new layer with the shoe underneath the layer. And create a big stain with a brush tool of black color. Using shortcut Cmd (Ctrl)+T to transform stain.
The shoe photo is ready for your Instagram or online store site. Additionally, resizing and cropping are essential. You can read this image resizing tutorial.
Conclusion on Shoe Photography Tips and Ideas
In the world, there are millions of people who want to be a photographer. If you have the talent, you will certainly become a good photographer. However, if you’re a novice as a shoe or brand photographer, you need to learn some tricks in the Photography of a shoe or company.
These few tips can help you make shoe photography effortless and professional.
FAQs
A white background is the top choice for shoe photography. It keeps the focus entirely on the product, makes colors pop, and meets the standard requirements of most e-commerce platforms like Amazon. A sweeping paper works great since you can simply cut off the dirty section when it gets dusty.
Not necessarily, but having one helps. A model adds life and context to the image — customers want to see how shoes look on actual feet. If budget is tight, you can mix white background shots with on-foot shots for a balanced product gallery. Just shoot the legs, not the full body, and pick a model whose outfit complements the shoe’s color.
The more, the better. At minimum, capture the front, side, top, and back. A three-quarter angle is considered the most flattering single shot. Beyond that, close-up detail shots of laces, buckles, and soles matter a lot — online buyers inspect details just like they would in a physical store.
Use a higher aperture like f/11 on your DSLR to keep every part of the shoe sharp and in focus. Always shoot with a tripod to eliminate camera shake. Consistent exposure across all frames is also critical — uneven brightness between shots makes your product listings look unprofessional.
360-degree photography involves shooting around 25 frames of a shoe placed on a rotating turntable, giving viewers a fully interactive look at the product. It’s highly effective for online stores because it removes doubt in buyers’ minds. Make sure the shoe is perfectly centered on the turntable and that each frame is evenly spaced for a smooth result.
Flat lay means placing the shoes alongside complementary items and shooting straight down from above. It’s popular among Instagram sellers and lifestyle brands. Stick to 2–3 matching colors, use the rule of thirds for composition, and choose a clean background like wood, a desk, or plain white for a polished finish.
Even a well-lit shoe photo usually needs post-processing before it’s ready for commercial use. Common edits include background removal, shadow creation, color correction, dust and scratch removal, and cropping to consistent dimensions. Skipping these steps can make even good photography look amateurish on a product listing.
If you don’t have a lightbox, set up three bright lights — one on top and one on each side. Avoid direct sunlight since it creates harsh shadows and washes out texture. A lightbox (available for around $100) is a solid investment if you’re shooting regularly. When shooting outdoors, find open shade rather than shooting in direct midday sun.
You may Read:
- Real Estate Photography Tips For Beginners
- Jewelry Product Photography: A Complete Guide in 2021
- Wedding Photography Tips for Photographers 2021

Salim Ahmed is the CEO of Graphic Experts India, with over 25 years of expertise in photo editing, clipping path, image retouching, and eCommerce image editing services.